
Grow Summer Squash at Home and unlock a world of fresh, flavorful possibilities right in your backyard! Imagine stepping outside and harvesting your own vibrant zucchini, delicate yellow squash, and maybe even some quirky pattypan squash, all bursting with sunshine and homegrown goodness. Forget those bland, store-bought veggies – with a few simple tricks and a little DIY spirit, you can cultivate a thriving summer squash patch that will have your neighbors green with envy.
For centuries, squash has been a staple in gardens around the world, particularly in indigenous cultures of the Americas, where it’s considered one of the “Three Sisters” (along with corn and beans). This trio provides a complete and sustainable food source, demonstrating the enduring value of homegrown produce. But even if you don’t have acres of land, you can still participate in this rich tradition.
Why should you bother with these DIY tricks to grow summer squash at home? Well, for starters, it’s incredibly rewarding! There’s nothing quite like the satisfaction of nurturing a plant from seed to harvest. Plus, growing your own squash allows you to control what goes into your food – no harmful pesticides or mystery ingredients. And let’s be honest, who doesn’t love saving a little money while enjoying the freshest, most delicious summer squash imaginable? So, let’s dive into some easy-to-follow tips and tricks that will help you become a summer squash-growing pro, even if you’re a complete beginner!
Grow Your Own Bountiful Summer Squash: A Beginner’s Guide
Hey there, fellow garden enthusiasts! I’m so excited to share my experience and guide you through growing your own delicious summer squash. There’s nothing quite like harvesting fresh, homegrown squash right from your backyard. It’s easier than you might think, and the reward is incredibly satisfying. Let’s dive in!
Choosing Your Squash Variety
First things first, let’s talk about the different types of summer squash you can grow. This is a crucial step because different varieties have different growth habits and flavors. Here are a few popular choices:
* Zucchini: The classic summer squash! It’s prolific, versatile, and comes in green, yellow, and even striped varieties.
* Yellow Crookneck: This squash has a distinctive curved neck and a slightly sweeter flavor than zucchini.
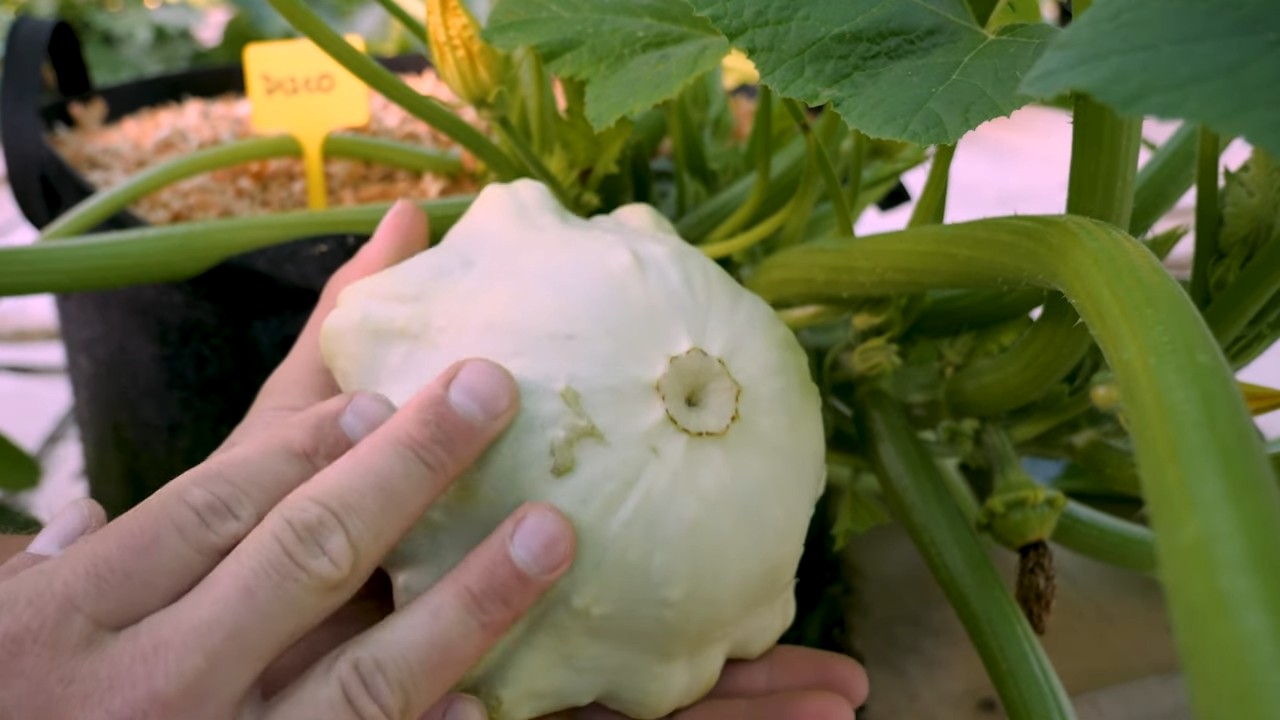
* Pattypan: These adorable, saucer-shaped squash are tender and mild. They come in various colors, including yellow, green, and white.
* Costata Romanesco: An Italian heirloom variety with a nutty flavor and ridged skin. It’s a bit more challenging to find seeds for, but well worth the effort!
I personally love growing zucchini and yellow crookneck because they’re reliable and produce a ton of squash. But feel free to experiment and find your favorite!
Preparing Your Garden Bed
Summer squash needs plenty of sunshine and well-drained soil. Here’s how to get your garden bed ready:
* Sunlight: Choose a spot that gets at least 6-8 hours of direct sunlight per day.
* Soil: Summer squash thrives in rich, fertile soil. Amend your soil with compost or well-rotted manure to improve its drainage and nutrient content.
* Soil Testing: Ideally, you should test your soil’s pH. Summer squash prefers a pH between 6.0 and 7.5. You can purchase a soil testing kit at most garden centers.
* Weed Removal: Clear the area of any weeds and grass. These can compete with your squash plants for nutrients and water.
* Raised Beds (Optional): If your soil is heavy clay or poorly drained, consider growing your squash in raised beds. This will improve drainage and make it easier to manage the soil.
Planting Your Summer Squash
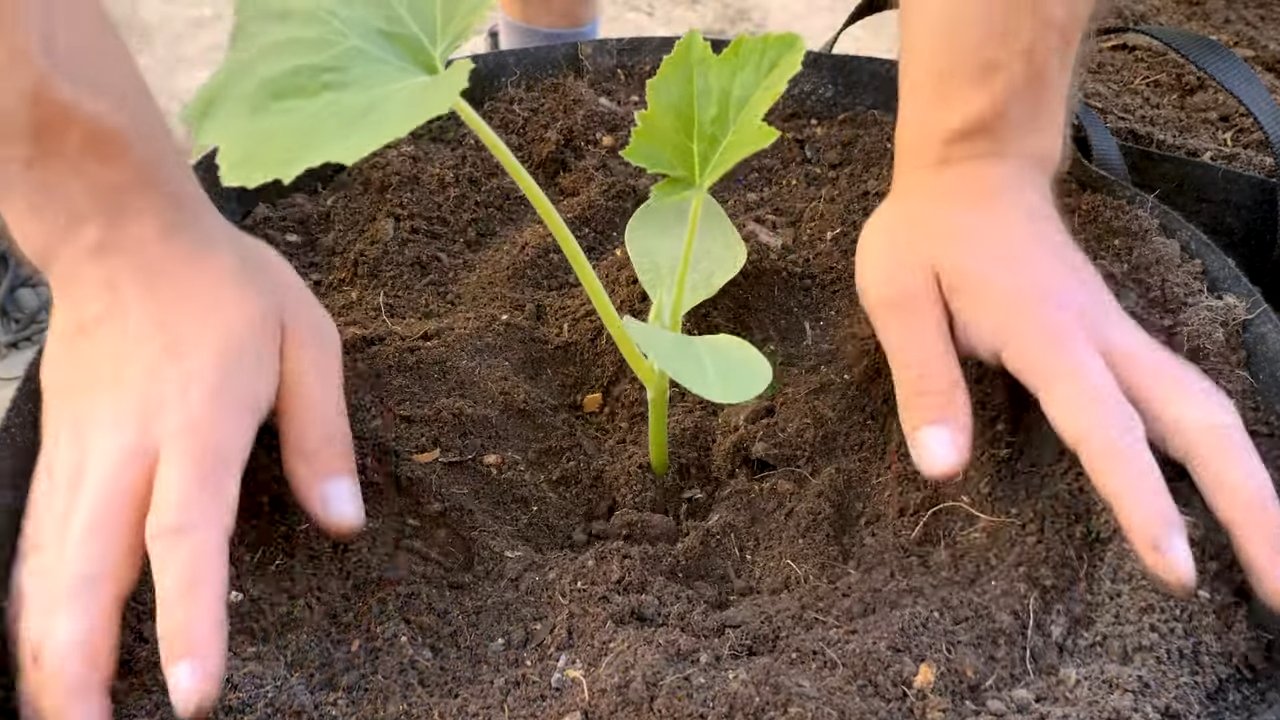
You can either start your squash seeds indoors or direct sow them in your garden. I usually prefer direct sowing because it’s less work and the plants tend to be stronger.
* Timing: Summer squash is sensitive to frost, so wait until the danger of frost has passed before planting. The soil temperature should be at least 60°F (15°C).
* Direct Sowing: Sow seeds about 1 inch deep and 2-3 feet apart. Squash plants need plenty of room to spread out.
* Starting Indoors: If you’re starting seeds indoors, sow them in peat pots or biodegradable containers about 3-4 weeks before the last expected frost. Transplant the seedlings into your garden after the danger of frost has passed.
* Watering: Water the seeds or seedlings thoroughly after planting. Keep the soil consistently moist until the plants are established.
* Thinning: If you direct sow your seeds, you may need to thin the seedlings to ensure they have enough space to grow. Choose the strongest seedling in each spot and remove the others.
Caring for Your Summer Squash Plants
Once your squash plants are established, it’s important to provide them with the care they need to thrive.
* Watering: Water your squash plants deeply and regularly, especially during hot, dry weather. Aim for about 1 inch of water per week. Water at the base of the plants to avoid wetting the foliage, which can lead to fungal diseases.
* Fertilizing: Feed your squash plants with a balanced fertilizer every 2-3 weeks. You can use a liquid fertilizer or a slow-release granular fertilizer.
* Mulching: Apply a layer of mulch around your squash plants to help retain moisture, suppress weeds, and regulate soil temperature. Straw, wood chips, or shredded leaves are all good options.
* Pest Control: Keep an eye out for common squash pests, such as squash bugs, squash vine borers, and aphids. Handpick pests off the plants or use insecticidal soap or neem oil to control infestations.
* Disease Prevention: Summer squash is susceptible to fungal diseases, such as powdery mildew and downy mildew. To prevent these diseases, provide good air circulation around the plants, avoid overhead watering, and apply a fungicide if necessary.
* Pollination: Squash plants have separate male and female flowers. Bees are essential for pollination. If you’re not seeing many bees in your garden, you may need to hand-pollinate the flowers. To do this, use a small paintbrush to transfer pollen from the male flowers to the female flowers. The female flowers have a small fruit at the base of the flower.
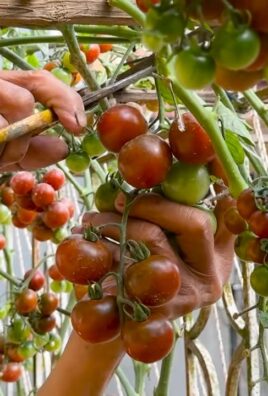
Harvesting Your Summer Squash
The best part! Summer squash is ready to harvest when it’s young and tender.
* Timing: Harvest your squash when it’s about 6-8 inches long. The skin should be smooth and easily pierced with your fingernail.
* Technique: Use a sharp knife or pruning shears to cut the squash from the plant. Leave about 2 inches of stem attached.
* Frequency: Harvest your squash regularly to encourage the plant to produce more fruit.
* Storage: Summer squash is best eaten fresh. However, you can store it in the refrigerator for up to a week.
Troubleshooting Common Problems
Even with the best care, you may encounter some problems while growing summer squash. Here are a few common issues and how to address them:
* Squash Bugs: These pests can suck the sap from your squash plants, causing them to wilt and die. Handpick the bugs off the plants or use insecticidal soap.
* Squash Vine Borers: These pests bore into the stems of your squash plants, causing them to collapse. To prevent squash vine borers, wrap the stems of your plants with aluminum foil or netting. If you find a borer, you can try to remove it by slitting the stem and pulling it out.
* Powdery Mildew: This fungal disease causes a white, powdery coating on the leaves of your squash plants. To prevent powdery mildew, provide good air circulation around the plants and avoid overhead watering. You can also apply a fungicide.
* Blossom End Rot: This condition causes the blossom end of the squash to rot. It’s usually caused by a calcium deficiency. To prevent blossom end rot, amend your soil with calcium before planting and water your plants regularly.
* Lack of Pollination: If your squash plants are producing flowers but not fruit, it may be due to a lack of pollination. Hand-pollinate the flowers or attract more bees to your garden by planting bee-friendly flowers.
Step-by-Step Instructions: From Seed to Table
Let’s break down the entire process into easy-to-follow steps:
1. Choose Your Variety: Decide which type of summer squash you want to grow. Consider your climate, space, and personal preferences.
2. Prepare Your Garden Bed: Select a sunny spot with well-drained soil. Amend the soil with compost or manure. Remove any weeds.
3. Plant Your Seeds: Direct sow seeds after the danger of frost has passed, or start seeds indoors 3-4 weeks before the last frost.
4. Water Regularly: Keep the soil consistently moist, especially during hot, dry weather.
5. Fertilize: Feed your plants with a balanced fertilizer every 2-3 weeks.
6. Mulch: Apply a layer of mulch around your plants to retain moisture and suppress weeds.
7. Monitor for Pests and Diseases: Regularly inspect your plants for pests and diseases. Take action to control any problems that arise.
8. Pollinate (If Necessary): If you’re not seeing many bees, hand-pollinate the flowers.
9. Harvest Regularly: Harvest your squash when it’s young and tender, about 6-8 inches long.
10. Enjoy Your Harvest! Cook your homegrown squash in your favorite recipes.
Extra Tips for a Successful Harvest
Here are a few extra tips to help you grow the best summer squash possible:
* Succession Planting: Plant new squash seeds every 2-3 weeks to extend your harvest season.
* Companion Planting: Plant squash with companion plants like beans, corn, and marigolds. These plants can help deter pests and improve soil health.
* Vertical Growing: If you’re short on space, consider growing your squash vertically on a trellis or fence.
* Save Seeds: Save seeds from your best squash plants to grow next year.
* Share Your Harvest: If you have more squash than you can eat, share it with your
Conclusion
So, there you have it! Growing summer squash at home isn’t just a gardening project; it’s an investment in fresh, flavorful meals and a rewarding connection with nature. We’ve walked through the essential steps, from selecting the right varieties to warding off common pests, and hopefully, demystified the process.
Why is this DIY trick a must-try? Because nothing beats the taste of a summer squash picked fresh from your own garden. The vibrant color, the crisp texture, and the subtly sweet flavor are simply unmatched by anything you can find in a grocery store. Plus, you have complete control over the growing process, ensuring your squash is free from unwanted chemicals and pesticides. You’re not just growing food; you’re cultivating a healthier lifestyle.
Beyond the basic techniques, there’s plenty of room for experimentation. Consider companion planting. Marigolds, for example, are known to deter squash bugs, while nasturtiums can attract aphids away from your precious squash plants. You could also try different trellising methods to maximize space and improve air circulation, reducing the risk of fungal diseases. For those with limited space, bush varieties of summer squash are perfect for container gardening. Explore different varieties beyond the standard zucchini and yellow squash. Try growing pattypan squash for its unique shape and delicate flavor, or delve into the world of crookneck squash for a slightly sweeter taste.
Don’t be afraid to get your hands dirty and embrace the learning process. Gardening is all about trial and error, and even experienced gardeners face challenges. The key is to observe your plants closely, adapt your techniques as needed, and celebrate your successes, no matter how small.
We wholeheartedly encourage you to try growing summer squash at home. It’s a project that offers tangible rewards, from delicious meals to a sense of accomplishment. And most importantly, we want to hear about your experience! Share your photos, tips, and challenges in the comments below. Let’s build a community of home gardeners who are passionate about growing their own food. Your insights could inspire others to take the plunge and discover the joys of homegrown summer squash. So, grab your seeds, prepare your soil, and get ready to enjoy the bounty of your own backyard! Let’s all enjoy the fruits (or rather, vegetables) of our labor and savor the deliciousness of homegrown summer squash.
Frequently Asked Questions (FAQ)
What is the best time to plant summer squash?
The ideal time to plant summer squash is after the last frost when the soil has warmed to at least 60°F (15°C). Summer squash is sensitive to cold temperatures, so planting too early can stunt its growth or even kill the seedlings. In most regions, this is typically late spring or early summer. You can start seeds indoors 2-3 weeks before the last expected frost to get a head start, but be sure to harden them off gradually before transplanting them outdoors.
How much sunlight does summer squash need?
Summer squash thrives in full sun, requiring at least 6-8 hours of direct sunlight per day. Insufficient sunlight can lead to leggy growth, reduced fruit production, and increased susceptibility to diseases. Choose a planting location that receives ample sunlight throughout the day. If you’re growing in containers, make sure to position them in a sunny spot.
What kind of soil is best for growing summer squash?
Summer squash prefers well-drained, fertile soil that is rich in organic matter. Amend your soil with compost or well-rotted manure before planting to improve its structure, drainage, and nutrient content. A slightly acidic to neutral soil pH of 6.0 to 7.0 is ideal. Avoid heavy clay soils, as they can become waterlogged and hinder root growth.
How often should I water summer squash?
Summer squash needs consistent moisture, especially during hot, dry weather. Water deeply and regularly, aiming to keep the soil consistently moist but not waterlogged. Water at the base of the plants to avoid wetting the foliage, which can increase the risk of fungal diseases. Mulching around the plants can help retain moisture and suppress weeds. A good rule of thumb is to water when the top inch of soil feels dry to the touch.
What are some common pests and diseases that affect summer squash?
Summer squash is susceptible to several pests and diseases, including squash bugs, squash vine borers, aphids, powdery mildew, and squash mosaic virus. Regularly inspect your plants for signs of infestation or disease. Use organic pest control methods, such as handpicking pests, using insecticidal soap, or introducing beneficial insects like ladybugs. To prevent diseases, ensure good air circulation, avoid overhead watering, and practice crop rotation.
How do I harvest summer squash?
Summer squash is typically ready to harvest about 50-60 days after planting. Harvest when the fruits are young and tender, typically 6-8 inches long for zucchini and yellow squash. Use a sharp knife or pruning shears to cut the squash from the vine, leaving a short stem attached. Regular harvesting encourages continued fruit production. Overripe squash can become tough and seedy.
Can I grow summer squash in containers?
Yes, you can successfully grow summer squash in containers, especially bush varieties. Choose a large container, at least 15-20 gallons in size, with good drainage holes. Use a high-quality potting mix and provide regular watering and fertilization. Container-grown squash may require more frequent watering than those grown in the ground.
How do I fertilize summer squash?
Summer squash benefits from regular fertilization. Apply a balanced fertilizer, such as 10-10-10, at planting time and then side-dress with compost or a nitrogen-rich fertilizer every few weeks during the growing season. Avoid over-fertilizing, as this can lead to excessive foliage growth and reduced fruit production.
What are some good companion plants for summer squash?
Companion planting can help improve the growth and health of your summer squash. Good companion plants include marigolds, nasturtiums, basil, oregano, and beans. Marigolds deter squash bugs, while nasturtiums attract aphids away from the squash plants. Basil and oregano can help repel other pests. Beans fix nitrogen in the soil, which benefits the squash plants.
How do I store summer squash?
Summer squash is best stored in the refrigerator. Wrap the squash in a paper towel and place it in a plastic bag or container. It will typically last for about a week in the refrigerator. You can also freeze summer squash by blanching it for a few minutes and then freezing it in airtight containers or freezer bags.
Leave a Comment