
Growing Romanesco cauliflower might seem like tackling a fractal-filled challenge straight out of a geometry textbook, but trust me, it’s a rewarding adventure for any home gardener! Forget the mundane – we’re diving into the world of this stunning, spiraling vegetable that’s as delicious as it is visually captivating.
For centuries, Romanesco cauliflower has been captivating chefs and gardeners alike. Originating in Italy, this unique vegetable boasts a mesmerizing geometric pattern, a testament to nature’s artistry. It’s more than just a pretty face, though! Romanesco offers a slightly nutty, mild flavor that’s far less bitter than its white cauliflower cousin.
Why should you bother with this slightly more challenging crop? Well, beyond the bragging rights of growing such a unique vegetable, growing Romanesco cauliflower allows you to enjoy fresh, organic produce right from your backyard. Plus, in a world saturated with the ordinary, adding a touch of the extraordinary to your garden and your plate is always a good idea. I’m here to guide you through some simple DIY tricks and hacks that will make growing this architectural marvel a breeze, even if you’re a beginner gardener. Let’s unlock the secrets to cultivating this beautiful and delicious vegetable!
Growing Romanesco Cauliflower: A DIY Guide for the Adventurous Gardener
Okay, so you want to grow Romanesco cauliflower? Awesome! It’s a bit more challenging than your average broccoli, but the payoff – that stunning, fractal head – is totally worth it. I’ve grown it a few times now, and I’m here to share my secrets to success. Get ready to impress your friends and family with this architectural marvel of the vegetable world!
Understanding Romanesco: A Little Background
Before we dive into the nitty-gritty, let’s talk about Romanesco itself. It’s technically a type of cauliflower, but its unique appearance sets it apart. Those spiraling florets aren’t just pretty; they’re a mathematical wonder, showcasing the Fibonacci sequence in action. Romanesco has a milder, nuttier flavor than regular cauliflower, making it a delicious addition to any meal.
Important Considerations:
* Timing is crucial: Romanesco needs a long, cool growing season.
* Soil preparation is key: It’s a heavy feeder, so rich soil is a must.
* Pest control is essential: Cabbage worms and aphids love Romanesco as much as we do.
Phase 1: Starting Your Romanesco Journey
This phase covers everything from seed starting to transplanting.
Choosing the Right Seeds
First things first, you need seeds! Look for reputable seed suppliers that offer Romanesco varieties. ‘Veronica’ is a popular and reliable choice.
Starting Seeds Indoors (Recommended)
Starting indoors gives you a head start, especially if you live in an area with a short growing season.
1. Gather your supplies: You’ll need seed starting trays or small pots, seed starting mix, a spray bottle, and a heat mat (optional, but helpful).
2. Sow the seeds: Fill your trays or pots with seed starting mix. Make a small indentation (about ¼ inch deep) in the center of each cell or pot. Place one or two seeds in each indentation and gently cover with soil.
3. Water gently: Use a spray bottle to moisten the soil. Avoid overwatering, which can lead to damping off (a fungal disease that kills seedlings).
4. Provide warmth and light: Place the trays or pots on a heat mat (if using) and under grow lights or in a sunny window. Romanesco seeds need warmth to germinate.
5. Maintain moisture: Keep the soil consistently moist, but not soggy. Check the soil daily and water as needed.
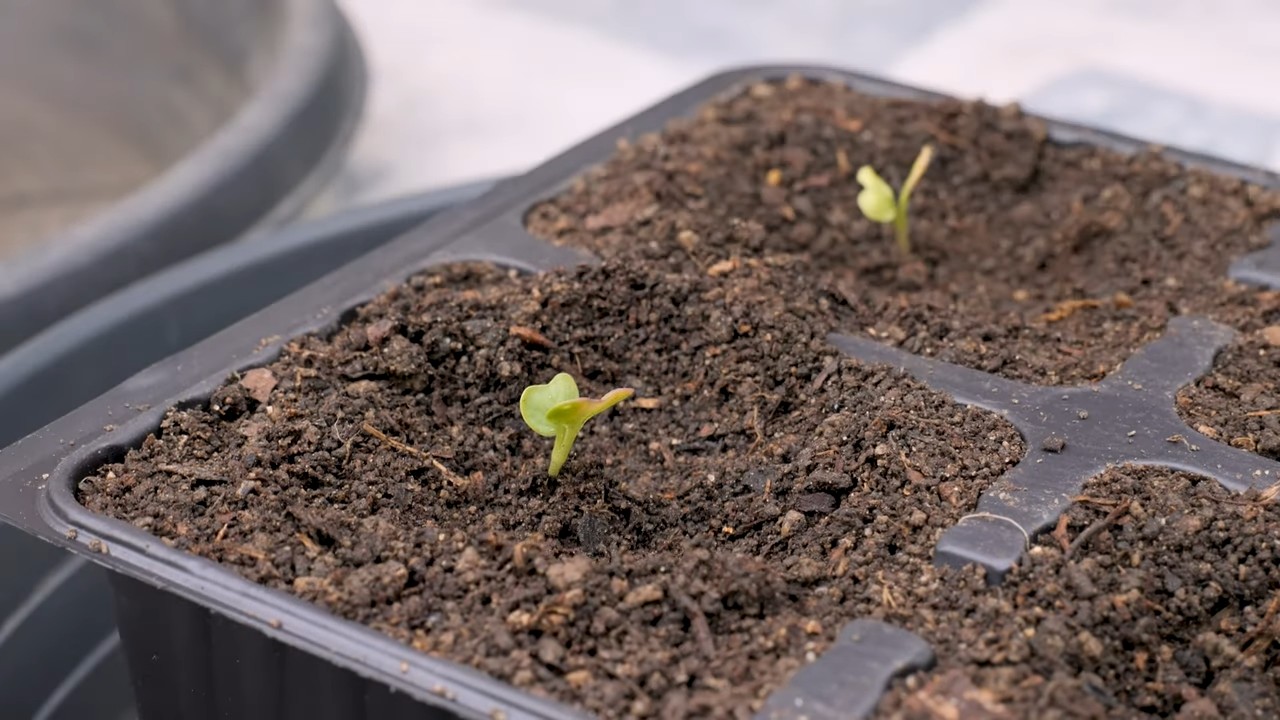
6. Thin the seedlings: Once the seedlings have their first true leaves (the second set of leaves), thin them to one seedling per cell or pot. Snip off the weaker seedling at the soil line.
7. Harden off the seedlings: About a week before transplanting, gradually acclimate the seedlings to outdoor conditions. Start by placing them outside for an hour or two each day, increasing the time each day. This helps them adjust to the sun, wind, and temperature changes.
Direct Sowing (Less Recommended, but Possible)
If you have a long growing season, you can try direct sowing, but I’ve found starting indoors to be more reliable.
1. Prepare the soil: Make sure the soil is well-drained and amended with compost or other organic matter.
2. Sow the seeds: Sow the seeds about ½ inch deep and 18-24 inches apart.
3. Water gently: Keep the soil consistently moist until the seedlings emerge.
4. Thin the seedlings: Once the seedlings have a few true leaves, thin them to one plant every 18-24 inches.
Phase 2: Transplanting and Ongoing Care
This is where you nurture your Romanesco plants to maturity.
Preparing the Garden Bed
Romanesco needs a sunny spot with well-drained, fertile soil.
1. Choose a sunny location: Romanesco needs at least 6 hours of sunlight per day.
2. Amend the soil: Incorporate plenty of compost or well-rotted manure into the soil. Romanesco is a heavy feeder and needs nutrient-rich soil. I also like to add some bone meal for phosphorus, which promotes strong root growth.
3. Check the soil pH: Romanesco prefers a soil pH between 6.0 and 7.0. You can test your soil with a soil testing kit and amend it as needed.
4. Create raised beds (optional): Raised beds can improve drainage and warm up the soil more quickly in the spring.
Transplanting the Seedlings
1. Choose the right time: Transplant the seedlings when they are about 4-6 weeks old and the danger of frost has passed.
2. Water the seedlings: Water the seedlings thoroughly before transplanting.
3. Dig holes: Dig holes that are slightly larger than the root balls of the seedlings. Space the holes 18-24 inches apart.
4. Gently remove the seedlings: Carefully remove the seedlings from their trays or pots, being careful not to damage the roots.
5. Place the seedlings in the holes: Place the seedlings in the holes and gently backfill with soil.
6. Water thoroughly: Water the seedlings thoroughly after transplanting.
7. Mulch: Apply a layer of mulch around the plants to help retain moisture, suppress weeds, and regulate soil temperature. I like to use straw or wood chips.
Ongoing Care: Watering, Fertilizing, and Pest Control
This is where the real work begins!
1. Watering: Romanesco needs consistent moisture, especially during head formation. Water deeply and regularly, especially during dry spells. Avoid overhead watering, which can promote fungal diseases. Drip irrigation is ideal.
2. Fertilizing: Feed your Romanesco plants regularly with a balanced fertilizer. I like to use a liquid fertilizer every two weeks. You can also side-dress with compost or well-rotted manure.
3. Pest Control: Cabbage worms and aphids are the most common pests of Romanesco.
* Cabbage worms: These green caterpillars can quickly devour your Romanesco plants. Handpicking them off is effective for small infestations. You can also use Bacillus thuringiensis (Bt), a biological insecticide that is safe for humans and pets.
* Aphids: These tiny insects suck the sap from plants, weakening them. You can control aphids with a strong spray of water, insecticidal soap, or neem oil.
4. Weed Control: Keep the garden bed free of weeds, which can compete with the Romanesco plants for nutrients and water. Hand-pull weeds regularly or use a hoe.
5. Sun Protection (Optional): In very hot climates, you may need to provide some shade for your Romanesco plants during the hottest part of the day. You can use shade cloth or plant them in a location that receives afternoon shade.
Phase 3: Harvesting and Enjoying Your Romanesco
The moment you’ve been waiting for!
Knowing When to Harvest
Harvest your Romanesco when the head is firm and compact, and the florets are tightly closed. The head should be about 6-8 inches in diameter. Don’t wait too long to harvest, or the florets will start to separate and the head will become loose.
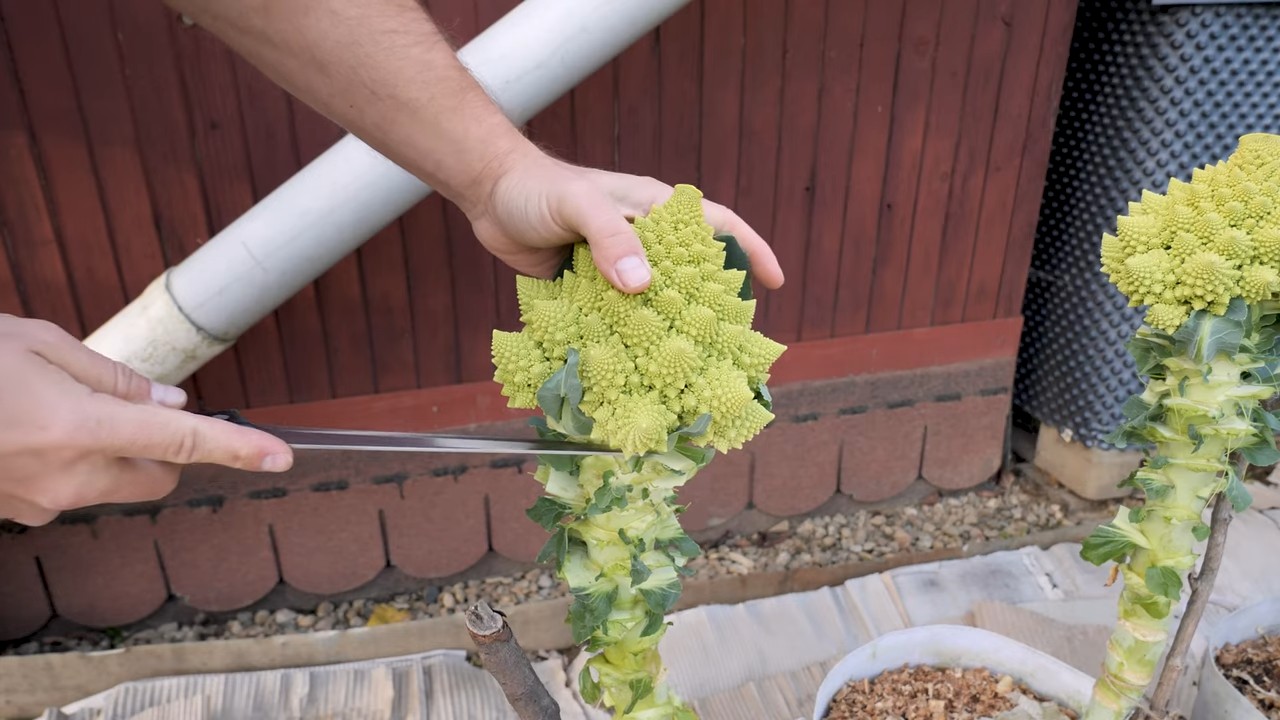
Harvesting the Romanesco
1. Cut the head: Use a sharp knife to cut the head from the plant, leaving a few inches of stem attached.
2. Remove the outer leaves: Remove the large outer leaves from the head.
3. Wash the head: Wash the head thoroughly to remove any dirt or insects.
Storing and Using Romanesco
* Storing: Store Romanesco in the refrigerator for up to a week.
* Using: Romanesco can be eaten raw, steamed, roasted, or stir-fried. It’s delicious in salads, soups, and pasta dishes.
My favorite way to prepare Romanesco is to roast it with olive oil, garlic, and parmesan cheese. It’s simple, but the flavor is amazing!
Troubleshooting Common Problems
* Buttoning: This is when the plant produces small, premature heads. It’s usually caused by stress, such as lack of water or nutrients. Make sure to water and fertilize your plants regularly.
* Bolting: This is when the plant prematurely flowers. It’s usually caused by hot weather. Choose a variety that is resistant to bolting and provide shade during hot weather.
* Clubroot: This is a soilborne disease that causes swollen, distorted roots. It can be prevented by improving soil drainage and amending the soil with lime to raise the pH.
Growing Romanesco cauliflower takes patience and attention, but the reward is well worth the effort. With a little planning and care, you can enjoy this beautiful and delicious vegetable from your own garden. Happy gardening!
Conclusion
So, there you have it! Growing Romanesco cauliflower at home might seem like a daunting task at first, but with the right knowledge and a little patience, you can cultivate this architectural marvel right in your own backyard. We’ve explored the essential steps, from selecting the perfect seeds to warding off common pests and diseases, ensuring you’re well-equipped for a successful harvest.
But why should you bother with the effort? Beyond the sheer satisfaction of nurturing a plant from seed to table, growing your own Romanesco cauliflower offers a unique opportunity to enjoy unparalleled freshness and flavor. Store-bought Romanesco, while visually appealing, often lacks the vibrant taste and crisp texture of a homegrown specimen. Plus, you have complete control over the growing process, ensuring your Romanesco is free from harmful pesticides and chemicals.
This DIY trick isn’t just about saving money or having bragging rights; it’s about connecting with nature, understanding the food we eat, and experiencing the joy of creating something beautiful and delicious. Imagine serving a vibrant, freshly harvested Romanesco cauliflower to your family and friends, knowing you nurtured it from a tiny seed. The taste, the texture, and the sense of accomplishment will be unmatched.
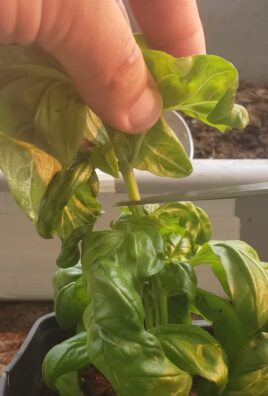
Don’t be afraid to experiment with variations! Try different soil amendments to see how they affect the size and flavor of your Romanesco. Consider companion planting with herbs like rosemary or thyme to deter pests naturally. You can even try succession planting, sowing seeds every few weeks, to extend your harvest season. For a spicier kick, try growing Romanesco near hot peppers; some gardeners swear it subtly influences the flavor.
Remember, gardening is a journey, not a destination. There will be challenges along the way, but the rewards of growing your own Romanesco cauliflower are well worth the effort. Embrace the learning process, celebrate your successes, and don’t be discouraged by setbacks. Every season brings new opportunities to refine your skills and improve your yields.
We wholeheartedly encourage you to give this DIY trick a try. Start small, be patient, and most importantly, have fun! And once you’ve harvested your first Romanesco cauliflower, we’d love to hear about your experience. Share your photos, tips, and challenges in the comments below. Let’s build a community of Romanesco growers and inspire others to embark on this rewarding journey. Your insights could be invaluable to fellow gardeners, and together, we can unlock the secrets to cultivating the perfect Romanesco cauliflower. So, grab your seeds, get your hands dirty, and prepare to be amazed by the beauty and bounty of nature!
Frequently Asked Questions (FAQ)
What is the best time of year to plant Romanesco cauliflower?
The ideal time to plant Romanesco cauliflower depends on your climate. In regions with mild winters, you can plant in the fall for a winter or early spring harvest. In colder climates, start seeds indoors 6-8 weeks before the last expected frost and transplant them outdoors after the danger of frost has passed. Romanesco thrives in cool weather, so avoid planting during the hottest months of summer. Aim for temperatures between 60-70°F (15-21°C) for optimal growth.
How much sunlight does Romanesco cauliflower need?
Romanesco cauliflower requires at least 6 hours of direct sunlight per day. Choose a planting location that receives ample sunlight throughout the day. If you live in a particularly hot climate, providing some afternoon shade can help prevent the plants from bolting (going to seed prematurely).
What type of soil is best for growing Romanesco cauliflower?
Romanesco cauliflower prefers well-drained, fertile soil that is rich in organic matter. Amend your soil with compost or well-rotted manure before planting to improve drainage and nutrient content. The ideal soil pH for Romanesco cauliflower is between 6.0 and 7.0. A soil test can help you determine your soil’s pH and nutrient levels.
How often should I water Romanesco cauliflower?
Romanesco cauliflower needs consistent moisture to thrive. Water deeply and regularly, especially during dry periods. Aim to keep the soil consistently moist but not waterlogged. Mulching around the plants can help retain moisture and suppress weeds. Check the soil moisture regularly by sticking your finger about an inch deep into the soil. If it feels dry, it’s time to water.
What are some common pests and diseases that affect Romanesco cauliflower?
Common pests that can affect Romanesco cauliflower include cabbage worms, aphids, flea beetles, and cabbage root maggots. Diseases include clubroot, black rot, and downy mildew. Implement preventative measures such as crop rotation, using row covers, and hand-picking pests. For diseases, ensure good air circulation, avoid overhead watering, and use disease-resistant varieties if available. Organic pest control options include using insecticidal soap, neem oil, and Bacillus thuringiensis (Bt).
How long does it take for Romanesco cauliflower to mature?
Romanesco cauliflower typically takes 75-90 days to mature from transplanting. The exact time will depend on the variety, growing conditions, and climate. Keep an eye on the head of the cauliflower; it’s ready to harvest when it reaches the desired size and the florets are tightly packed.
How do I know when my Romanesco cauliflower is ready to harvest?
The best time to harvest Romanesco cauliflower is when the head is firm, compact, and has reached its full size. The individual florets should be tightly packed together and the head should have a vibrant green color. Avoid harvesting when the florets start to separate or the head becomes loose, as this indicates that the cauliflower is overripe.
Can I grow Romanesco cauliflower in containers?
Yes, you can grow Romanesco cauliflower in containers, but you’ll need a large container (at least 12-18 inches in diameter) to accommodate the plant’s root system. Use a high-quality potting mix and ensure the container has good drainage. Container-grown Romanesco cauliflower may require more frequent watering and fertilization than plants grown in the ground.
How do I store Romanesco cauliflower after harvesting?
After harvesting, store Romanesco cauliflower in the refrigerator. Wrap the head in a damp paper towel and place it in a plastic bag. It will keep for up to a week. You can also blanch and freeze Romanesco cauliflower for longer storage.
What are some ways to cook Romanesco cauliflower?
Romanesco cauliflower can be cooked in a variety of ways, including steaming, roasting, sautéing, and grilling. It can also be eaten raw in salads or as a crudité. Its unique shape and mild flavor make it a versatile ingredient for many dishes. Try roasting it with olive oil, garlic, and herbs, or steaming it and serving it with a cheese sauce.
Is Romanesco cauliflower more difficult to grow than regular cauliflower?
While Romanesco cauliflower has a reputation for being slightly more challenging to grow than regular cauliflower, the basic principles of cultivation are the same. The key is to provide the right growing conditions, including cool temperatures, fertile soil, consistent moisture, and adequate sunlight. With a little extra care and attention, you can successfully grow Romanesco cauliflower at home.

Leave a Comment