
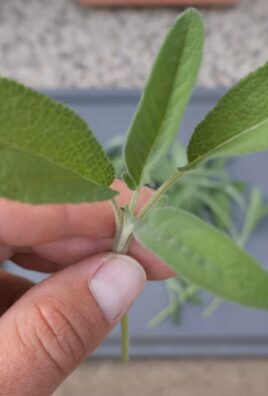
Container onion growing: it’s easier than you think! Have you ever dreamed of snipping fresh chives from your own backyard, or adding a vibrant, homegrown onion to your favorite dish? I know I have! For centuries, cultivating onions has been a cornerstone of cuisines worldwide, dating back to ancient Egypt where they were even revered as symbols of eternity. But let’s face it, not everyone has acres of land to dedicate to a sprawling vegetable garden.
That’s where the magic of container gardening comes in! This DIY article is your passport to a bountiful onion harvest, even if you only have a small balcony or patio. We’ll unlock the secrets to successful container onion growing, offering simple, step-by-step instructions and clever hacks that will transform you into a green-thumbed guru. Imagine the satisfaction of nurturing your own food, reducing your grocery bills, and enjoying the unparalleled flavor of freshly picked onions. Ready to ditch the store-bought bulbs and embark on this rewarding gardening adventure with me? Let’s get started!
Grow Onions in Containers: A Beginner’s Guide
Hey there, fellow gardening enthusiasts! Ever thought about growing your own onions but don’t have a sprawling garden? No problem! Container gardening is the perfect solution, and onions are surprisingly easy to grow in pots. I’m going to walk you through everything you need to know to have a thriving onion patch right on your patio or balcony.
Choosing the Right Onion Variety
First things first, let’s talk onions. Not all onions are created equal, especially when it comes to container gardening. You’ll want to choose varieties that are well-suited for smaller spaces and shorter growing seasons.
* Short-Day Onions: These are ideal if you live in a warmer climate (like the southern US). They need about 10-12 hours of daylight to form bulbs. Popular choices include ‘White Bermuda’, ‘Yellow Granex’, and ‘Red Creole’.
* Long-Day Onions: If you’re in a northern climate with longer summer days, these are your go-to. They need 14-16 hours of daylight. ‘Walla Walla Sweet’, ‘Yellow Spanish’, and ‘Red Burgundy’ are great options.
* Intermediate-Day Onions: These are a good middle ground, working well in areas with moderate day length. ‘Candy’ and ‘Superstar’ are reliable choices.
* Bunching Onions (Scallions): If you’re primarily interested in the green tops, bunching onions are fantastic for containers. They’re super easy to grow and you can harvest them continuously. ‘Evergreen Bunching’ and ‘White Lisbon’ are popular.
Important Tip: Check your local climate and growing zone to determine which onion type will thrive best in your area. Your local nursery can also offer great advice!
Gathering Your Supplies
Okay, now that we’ve picked our onion variety, let’s get our supplies together. Here’s what you’ll need:
* Container: Choose a container that’s at least 8-10 inches deep and wide for bunching onions, and 10-12 inches deep and wide for bulb onions. The bigger, the better, especially if you plan to grow multiple onions in one container. Make sure it has drainage holes!
* Potting Mix: Use a high-quality, well-draining potting mix. Avoid using garden soil, as it can compact in containers and hinder drainage. I personally love using a mix that includes compost, perlite, and vermiculite.
* Onion Sets or Seedlings: You can start onions from seeds, but for beginners, I highly recommend using onion sets (small, immature bulbs) or seedlings. They’re much easier to handle and get you to harvest faster.
* Fertilizer: A balanced, slow-release fertilizer is ideal for onions. You can also use a liquid fertilizer every few weeks during the growing season.
* Watering Can or Hose: For regular watering.
* Trowel: For planting.
* Optional: Mulch (like straw or wood chips) to help retain moisture and suppress weeds.
Planting Your Onions
Alright, let’s get our hands dirty! Planting onions is a breeze.
1. Prepare the Container: Fill your container with potting mix, leaving about an inch or two of space at the top.
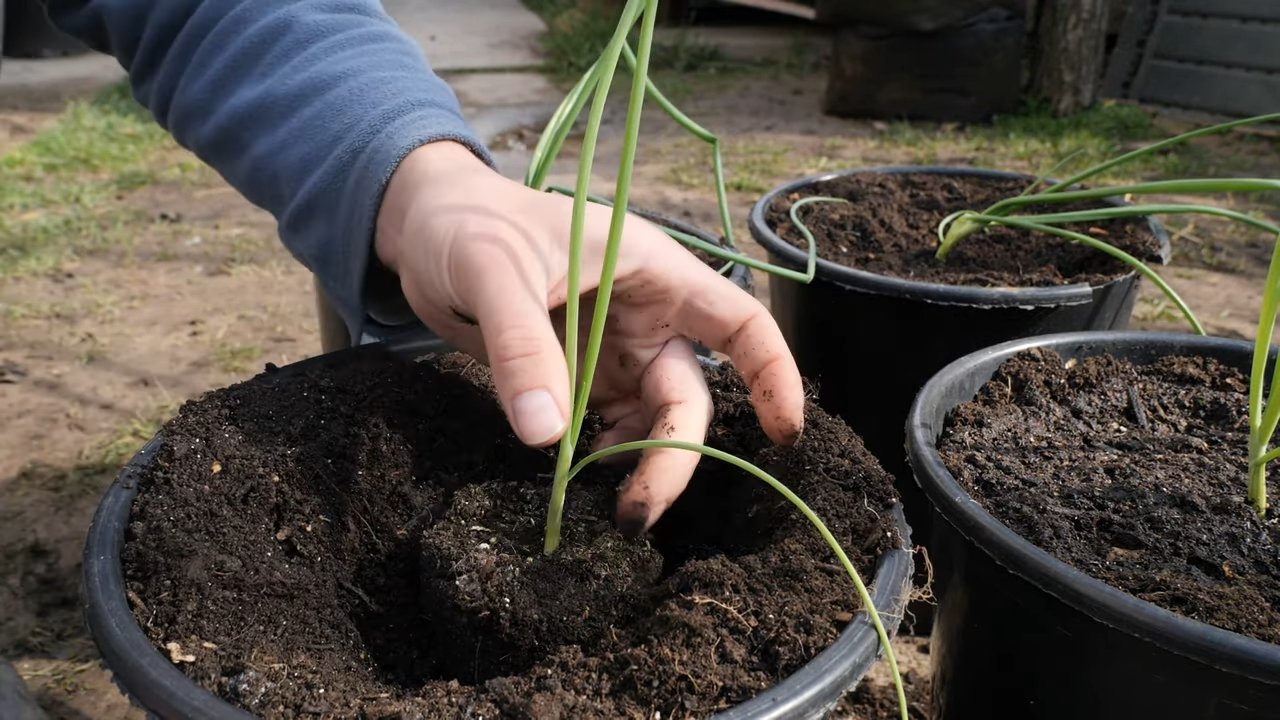
2. Planting Onion Sets: If you’re using onion sets, make small holes in the soil about 4-6 inches apart (depending on the size of your container and the variety of onion). Plant the sets with the pointed end facing up, burying them about 1 inch deep. The very tip of the set should still be visible above the soil.
3. Planting Onion Seedlings: If you’re using seedlings, gently remove them from their containers and loosen the roots a bit. Plant them at the same depth they were growing in their original containers, spacing them 4-6 inches apart.
4. Water Thoroughly: After planting, water the onions thoroughly until the water drains out of the bottom of the container. This helps settle the soil around the roots.
5. Add Mulch (Optional): If you’re using mulch, spread a thin layer around the base of the onions to help retain moisture and suppress weeds.
Caring for Your Container Onions
Now that your onions are planted, it’s time to give them some TLC.
1. Watering: Onions need consistent moisture, but they don’t like to be waterlogged. Water them when the top inch of soil feels dry to the touch. During hot, dry weather, you may need to water them more frequently.
2. Fertilizing: If you used a slow-release fertilizer at planting time, you may not need to fertilize again for a few weeks. Otherwise, start fertilizing with a liquid fertilizer every 2-3 weeks. Choose a fertilizer that’s high in nitrogen, especially during the early stages of growth. As the bulbs start to form, switch to a fertilizer that’s higher in phosphorus and potassium.
3. Sunlight: Onions need at least 6-8 hours of sunlight per day to thrive. Place your container in a sunny location where it will receive plenty of light.
4. Weeding: Keep your container free of weeds, as they can compete with the onions for nutrients and water. Gently pull out any weeds that appear.
5. Pest and Disease Control: Onions are generally pretty resistant to pests and diseases, but keep an eye out for common problems like onion maggots, thrips, and fungal diseases. If you notice any problems, treat them promptly with an appropriate insecticide or fungicide. Organic options are always a good choice!
6. Thinning (If Necessary): If you planted your onions too close together, you may need to thin them out to give them more room to grow. Gently remove some of the smaller onions, leaving the strongest ones to mature. You can use the thinned onions as scallions.
Harvesting Your Onions
The moment we’ve all been waiting for – harvest time!
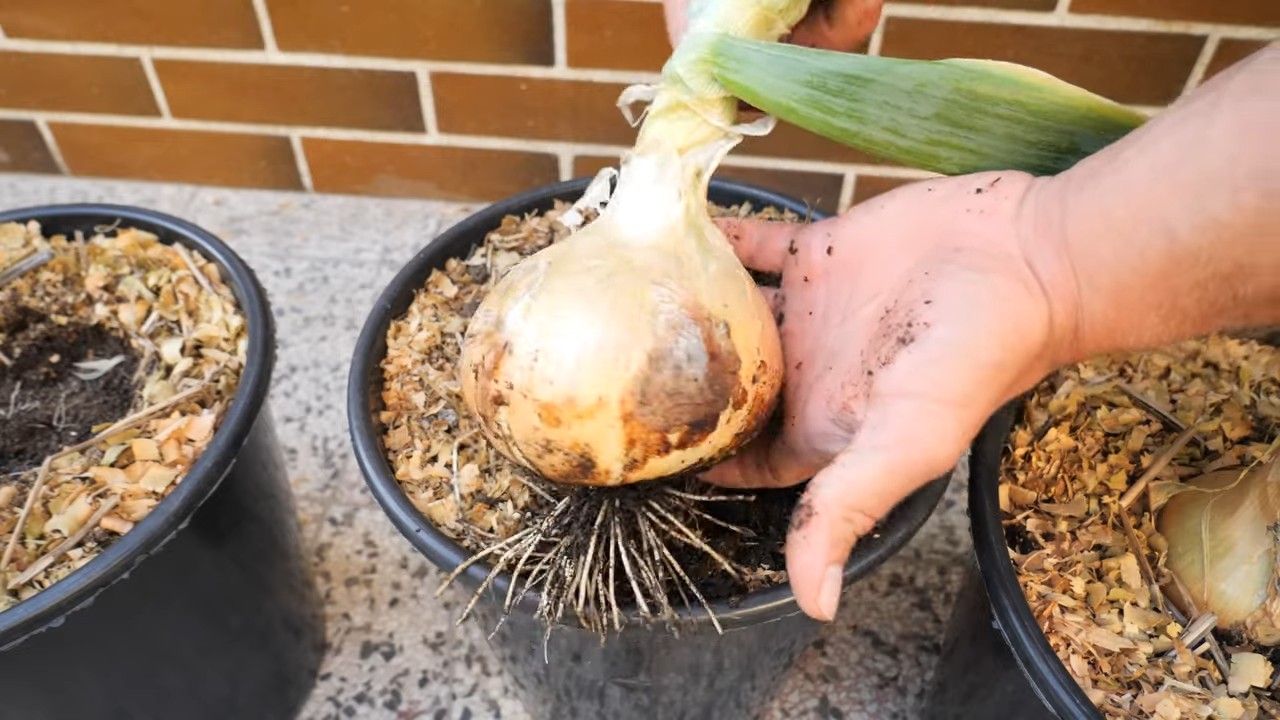
1. When to Harvest: The timing of your harvest will depend on the variety of onion you’re growing and your personal preference. Generally, bulb onions are ready to harvest when the tops start to turn yellow and fall over. Bunching onions can be harvested at any time once they reach a reasonable size.
2. Harvesting Bulb Onions: Once the tops have fallen over, stop watering the onions and let the soil dry out a bit. This will help the bulbs to cure properly. After a week or two, gently pull the onions out of the soil.
3. Harvesting Bunching Onions: Simply snip off the green tops with scissors or a knife, leaving about an inch or two of the base intact. The onions will continue to grow and produce more tops.
4. Curing Bulb Onions: After harvesting bulb onions, you’ll need to cure them to help them store longer. Spread the onions out in a single layer in a warm, dry, well-ventilated place for 1-2 weeks. The outer skins will dry out and become papery.
5. Storing Onions: Once the onions are cured, you can store them in a cool, dry, dark place. Braiding the tops together and hanging them is a traditional way to store onions, but you can also store them in mesh bags or crates.
Troubleshooting
Even with the best care, you might encounter a few challenges along the way. Here are some common problems and how to fix them:
* Yellowing Leaves: This could be a sign of overwatering, underwatering, nutrient deficiency, or disease. Check the soil moisture and adjust your watering accordingly. Fertilize with a balanced fertilizer. Inspect the plants for signs of disease and treat as needed.
* Small Bulbs: This could be caused by insufficient sunlight, poor soil, or overcrowding. Make sure your onions are getting enough sunlight and fertilize regularly. Thin out the plants if they’re too close together.
* Pests: Keep an eye out for common onion pests like onion maggots and thrips. Use appropriate insecticides or organic pest control methods to get rid of them.
* Bolting: Bolting (when the onion sends up a flower stalk) can happen if the onions experience stress, such as extreme temperature fluctuations. Once an onion bolts, the bulb will become tough and bitter. Remove the flower stalk as soon as you see it to try and salvage the bulb.
Enjoy Your Homegrown Onions!
And there you have it! Growing onions in containers is a rewarding experience that allows you to enjoy fresh, homegrown onions even if you don’t have a traditional garden. With a little bit of care and attention, you’ll be harvesting delicious onions in no time. Happy gardening!
Conclusion
So, there you have it! Growing onions in containers isn’t just a quirky gardening experiment; it’s a genuinely practical and rewarding way to enjoy fresh, flavorful onions right at your fingertips. We’ve walked through the simple steps, from selecting the right container and soil to nurturing your onion plants to a bountiful harvest. But why is this DIY trick a must-try?
First and foremost, container onion growing offers unparalleled convenience. Whether you have a sprawling backyard or a tiny balcony, you can cultivate your own onions. No more relying solely on grocery store produce – you’ll have a readily available supply of fresh onions, bursting with flavor, whenever you need them. Imagine the satisfaction of snipping off a few green onions to garnish your salad or harvesting plump bulbs for your favorite soup, all grown with your own two hands.
Beyond convenience, container gardening allows for greater control over the growing environment. You can easily move your onions to chase the sun, protect them from harsh weather, and ensure they receive the perfect amount of water and nutrients. This level of control translates to healthier, more productive plants and ultimately, a better yield.
But the benefits don’t stop there. Growing onions in containers is also a fantastic way to save money. Onions can be surprisingly expensive at the grocery store, especially if you prefer organic varieties. By growing your own, you’ll significantly reduce your grocery bill and enjoy the peace of mind that comes with knowing exactly where your food comes from.
Looking for variations? Consider experimenting with different onion varieties. Red onions, yellow onions, white onions, shallots – the possibilities are endless! You can also try companion planting. Marigolds, for example, are known to deter pests and can be planted alongside your onions to create a thriving ecosystem. Another fun variation is to succession plant, staggering your planting dates to ensure a continuous harvest throughout the growing season. Plant a new batch every few weeks, and you’ll never run out of fresh onions.
Don’t be afraid to get creative with your containers, too. While plastic pots are perfectly functional, you can also use repurposed items like old buckets, wooden crates, or even fabric grow bags. Just make sure your chosen container has adequate drainage.
We wholeheartedly encourage you to give container onion growing a try. It’s a simple, rewarding, and cost-effective way to enjoy fresh, flavorful onions. And most importantly, it’s a lot of fun! Once you experience the joy of harvesting your own homegrown onions, you’ll never look at grocery store onions the same way again.
So, grab a container, some soil, and a few onion sets or seeds, and get started today. We’re confident that you’ll be amazed by the results. And don’t forget to share your experiences with us! We’d love to hear about your successes, your challenges, and any tips or tricks you discover along the way. Share your photos and stories on social media using [Your Hashtag Here], and let’s inspire others to embrace the joys of container onion growing! Happy gardening!
Frequently Asked Questions (FAQ)
What is the best type of onion to grow in a container?
The best type of onion to grow in a container depends on your personal preference and the size of your container. However, some varieties tend to thrive in containers more than others. Bunching onions (also known as green onions or scallions) are an excellent choice because they are relatively small and quick to mature. They can be harvested continuously by snipping off the green tops as needed. Bulb onions, such as yellow, red, and white onions, can also be grown in containers, but they require more space and time to mature. Choose smaller, early-maturing varieties for best results. Some popular choices include ‘Walla Walla Sweet,’ ‘Red Burgundy,’ and ‘White Lisbon.’ Consider the size of your container when selecting your onion variety. Larger containers can accommodate larger onion varieties, while smaller containers are better suited for smaller varieties or bunching onions.
What size container do I need for growing onions?
The size of the container you need depends on the type of onion you’re growing and how many onions you want to grow in each container. For bunching onions, a container that is at least 6 inches deep and wide is sufficient. You can plant several bunching onions in a single container, spacing them about 2-3 inches apart. For bulb onions, you’ll need a larger container that is at least 8-10 inches deep and wide. Each bulb onion requires about 4-6 inches of space, so choose a container that is large enough to accommodate the number of onions you want to grow. A good rule of thumb is to allow at least one gallon of soil per onion. If you’re growing multiple onions in a single container, make sure to choose a container that is wide enough to allow for adequate spacing between the plants.
What type of soil is best for container onion growing?
Onions need well-draining, fertile soil to thrive. A good potting mix is essential for container onion growing. Avoid using garden soil, as it can be too heavy and may not drain well in a container. Instead, choose a high-quality potting mix that is specifically formulated for container gardening. You can also amend your potting mix with compost or other organic matter to improve its fertility and drainage. A mix of equal parts potting soil, compost, and perlite or vermiculite is a good starting point. The perlite or vermiculite will help to improve drainage and aeration, while the compost will provide essential nutrients for your onion plants. Make sure the soil is loose and well-aerated to allow for proper root development.
How often should I water my container onions?
Watering is crucial for successful container onion growing. Onions need consistent moisture to thrive, but they don’t like to sit in soggy soil. Water your onions deeply whenever the top inch of soil feels dry to the touch. The frequency of watering will depend on the weather, the size of your container, and the type of soil you’re using. In hot, dry weather, you may need to water your onions daily. In cooler, wetter weather, you may only need to water them every few days. Be sure to check the soil moisture regularly and adjust your watering schedule accordingly. Avoid overwatering, as this can lead to root rot. Also, avoid underwatering, as this can stress your plants and reduce their yield.
How much sunlight do container onions need?
Onions need plenty of sunlight to thrive. They require at least 6-8 hours of direct sunlight per day. Choose a location for your container onions that receives full sun. If you don’t have a spot that gets full sun, you can supplement with artificial light. Grow lights can be used to provide additional light, especially during the winter months or in areas with limited sunlight. Rotate your containers regularly to ensure that all sides of the plants receive adequate sunlight. This will help to prevent the plants from becoming leggy and will promote even growth.
How do I fertilize my container onions?
Onions are heavy feeders and require regular fertilization to thrive. Start fertilizing your onions about 2-3 weeks after planting. Use a balanced fertilizer that is specifically formulated for vegetables. Follow the instructions on the fertilizer package for application rates. You can also use organic fertilizers, such as compost tea or fish emulsion. Apply fertilizer every 2-3 weeks throughout the growing season. Avoid over-fertilizing, as this can lead to excessive foliage growth and reduced bulb size. A good rule of thumb is to use a fertilizer with a higher phosphorus content than nitrogen or potassium. Phosphorus is essential for root development and bulb formation.
When and how do I harvest my container onions?
The timing of your onion harvest will depend on the type of onion you’re growing and your personal preference. Bunching onions can be harvested continuously by snipping off the green tops as needed. Bulb onions are typically ready to harvest when the tops begin to turn yellow and fall over. This usually occurs about 90-120 days after planting. To harvest bulb onions, gently loosen the soil around the base of the plant and pull the onion out of the ground. Cure the onions by laying them out in a warm, dry place for about 1-2 weeks. This will allow the outer layers to dry and will help to prevent rot. Once the onions are cured, you can store them in a cool, dry place for several months.
What are some common pests and diseases that affect container onions?
Onions are relatively pest-resistant, but they can be susceptible to certain pests and diseases. Common pests that affect onions include onion maggots, thrips, and aphids. Onion maggots are small, white larvae that feed on the roots of onions. Thrips are tiny, slender insects that suck the sap from onion leaves. Aphids are small, soft-bodied insects that also suck the sap from onion leaves. Common diseases that affect onions include downy mildew, botrytis blight, and white rot. Downy mildew is a fungal disease that causes yellow spots on onion leaves. Botrytis blight is a fungal disease that causes gray mold on onion leaves and bulbs. White rot is a fungal disease that causes the roots of onions to rot. To prevent pests and diseases, practice good sanitation and crop rotation. Inspect your plants regularly for signs of pests or diseases and take action promptly if you notice any problems. You can use organic pesticides or fungicides to control pests and diseases.
Leave a Comment