
DIY Wheatgrass Growing at Home: Ever dreamt of having a vibrant, nutrient-packed shot of green goodness right at your fingertips? Imagine skipping those expensive juice bar trips and cultivating your own thriving patch of wheatgrass, bursting with vitamins and enzymes, all from the comfort of your own home! This isn’t just a pipe dream; it’s an achievable reality with our easy-to-follow DIY guide.
For centuries, wheatgrass has been revered for its health benefits. From ancient civilizations recognizing its revitalizing properties to modern-day health enthusiasts embracing its detoxifying power, wheatgrass has a rich history. But you don’t need to be an ancient healer or a modern guru to enjoy its benefits.
Let’s face it, in today’s fast-paced world, prioritizing our health can often take a backseat. We’re constantly bombarded with processed foods and environmental toxins. That’s where DIY wheatgrass growing at home comes in! It’s a simple, cost-effective way to boost your well-being, providing you with a readily available source of essential nutrients. Plus, it’s incredibly rewarding to nurture something from seed to harvest. So, ditch the store-bought juice and let’s embark on this green adventure together! I’m excited to show you how easy it is to grow your own wheatgrass and unlock its amazing potential.
Growing Your Own Wheatgrass: A Beginner’s Guide
Hey there, fellow health enthusiasts! Ever wanted to have a constant supply of fresh, vibrant wheatgrass right at your fingertips? Well, you’re in the right place! Growing your own wheatgrass at home is surprisingly easy, rewarding, and way more affordable than buying it pre-cut. Plus, you get the satisfaction of knowing exactly where your greens came from and how they were grown. Let’s dive into this super simple, step-by-step guide.
What You’ll Need: The Essentials
Before we get started, let’s gather our supplies. Don’t worry, you probably have a lot of this stuff lying around already!
* Wheatgrass Seeds: Look for organic, hard red winter wheat berries. These are readily available online or at your local health food store. Make sure they are specifically labeled for sprouting or growing wheatgrass.
* Growing Trays: You’ll need at least two trays – one with drainage holes and one without. The tray without holes will act as a water reservoir. Standard 10×20 inch trays work perfectly.
* Growing Medium: You have a few options here. You can use organic potting soil, coco coir, or even just a sprouting tray with no medium (hydroponically). I personally prefer coco coir because it’s lightweight, retains moisture well, and is sustainable.
* Spray Bottle: For misting the seeds and seedlings.
* Water: Filtered water is best.
* Dark Cover: A towel, lid, or another tray to block out light during the initial sprouting phase.
* Scissors or a Juicer: For harvesting and enjoying your wheatgrass!
Phase 1: Soaking and Sprouting the Seeds
This is a crucial step to kickstart the germination process. Think of it as waking up the seeds and telling them it’s time to grow!
1. Measure Your Seeds: Start with about 1-2 cups of wheatgrass seeds per 10×20 inch tray. You can adjust this based on your desired density. I usually go for about 1.5 cups for a nice, thick patch.
2. Rinse Thoroughly: Place the seeds in a large bowl and rinse them thoroughly with cool, filtered water. Remove any debris or floating seeds. These might not be viable.
3. Soak Overnight: Cover the seeds with fresh, cool water, ensuring they are completely submerged. Let them soak for 8-12 hours. This allows the seeds to absorb water and begin the sprouting process. I usually do this before I go to bed so they are ready in the morning.
4. Drain and Rinse Again: After soaking, drain the water completely and rinse the seeds again. This helps prevent mold growth.
5. Sprout in a Jar (Optional): You can sprout the seeds in a jar for the first 1-2 days. Place the rinsed seeds in a mason jar covered with cheesecloth or a sprouting lid. Rinse and drain the seeds 2-3 times a day, ensuring they stay moist but not waterlogged. This helps them sprout evenly. Alternatively, you can skip this step and go straight to the tray.
Phase 2: Planting and Initial Growth
Now it’s time to get those little sprouts into their growing home!
1. Prepare Your Tray: If you’re using soil or coco coir, moisten it thoroughly. It should be damp but not soggy. Spread the growing medium evenly in the tray with drainage holes, about 1-2 inches deep.
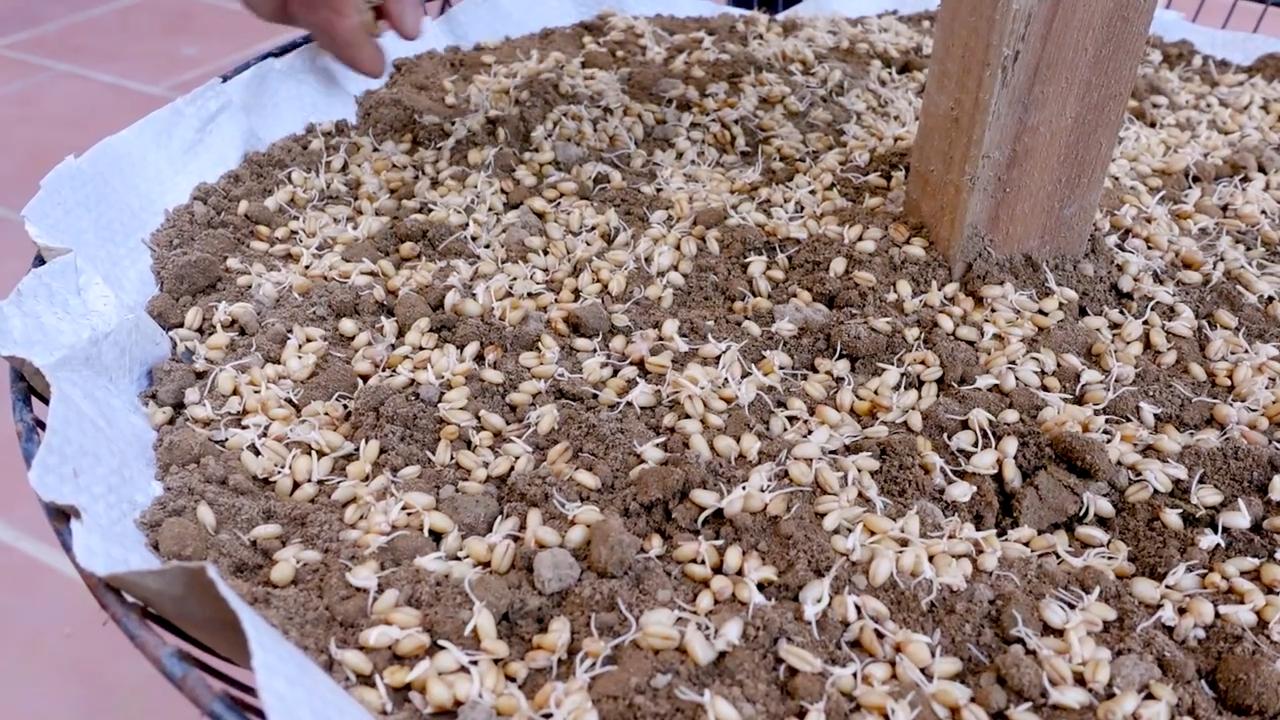
2. Spread the Sprouted Seeds: Distribute the sprouted seeds evenly over the surface of the growing medium. Try to avoid overcrowding, but don’t worry too much if they’re a little close together.
3. Gently Press Down: Lightly press the seeds into the growing medium. This helps them make good contact with the moisture.
4. Mist with Water: Use your spray bottle to gently mist the seeds with water. You want to keep them moist but not soaking wet.
5. Cover with Darkness: This is important! Cover the tray with a dark cover, such as a towel, lid, or another tray. This mimics the underground environment and encourages the seeds to sprout and develop roots.
6. Water Daily: For the next 2-3 days, continue to mist the seeds with water 2-3 times a day, keeping them consistently moist. Make sure to keep the dark cover on during this time.
Phase 3: Green Up and Grow!
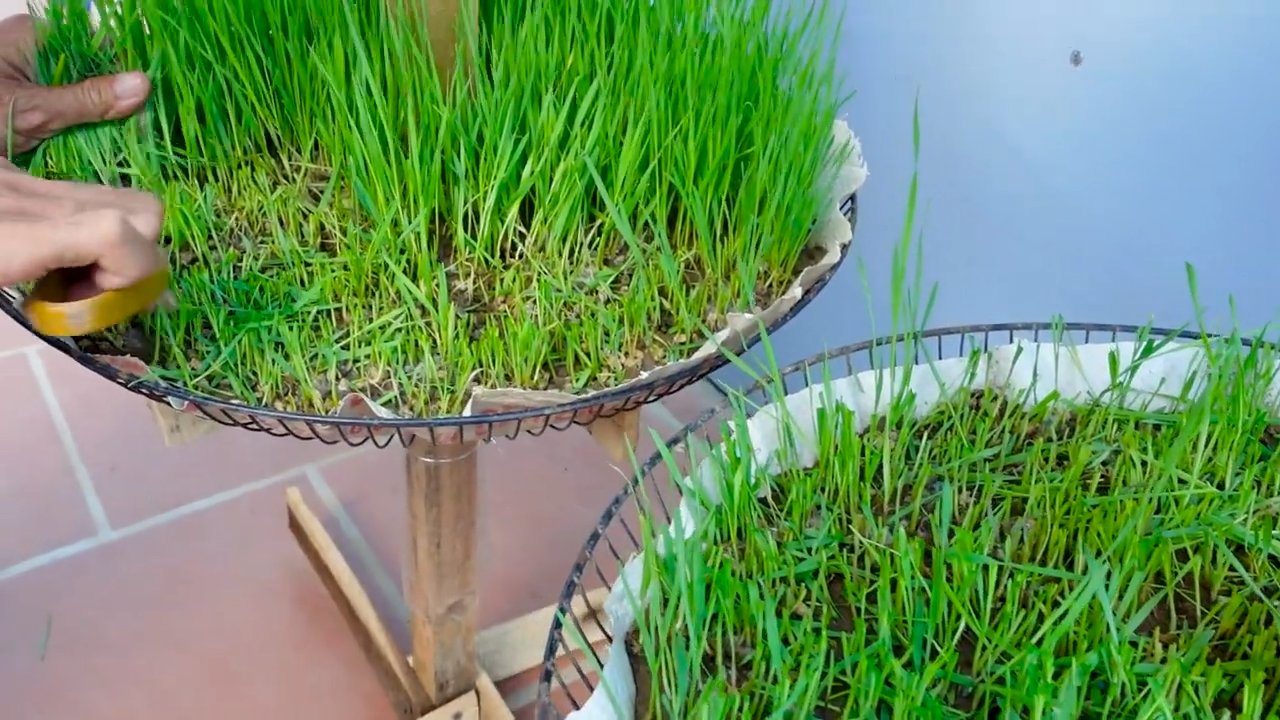
This is where the magic happens! You’ll start to see those beautiful green blades emerge.
1. Remove the Cover: After 2-3 days, once the seeds have sprouted and started to turn white, remove the dark cover.
2. Introduce Light: Place the tray in a location with indirect sunlight. Direct sunlight can scorch the delicate seedlings. A bright windowsill or under a grow light works well.
3. Watering: Now, instead of misting, you’ll start bottom watering. Place the tray with drainage holes inside the tray without holes (the water reservoir). Pour water into the bottom tray, allowing the soil or coco coir to absorb the water from below. This encourages deeper root growth. Keep the bottom tray filled with about an inch of water.
4. Rotate the Tray: Rotate the tray daily to ensure even growth. This prevents the wheatgrass from leaning towards the light source.
5. Monitor for Mold: Keep an eye out for mold. Good air circulation is key. If you see any mold, remove the affected area immediately. You can also try spraying the wheatgrass with a diluted hydrogen peroxide solution (1 part hydrogen peroxide to 10 parts water).
Phase 4: Harvesting and Enjoying Your Wheatgrass
The moment you’ve been waiting for! Time to reap the rewards of your hard work (which wasn’t really that hard, was it?).
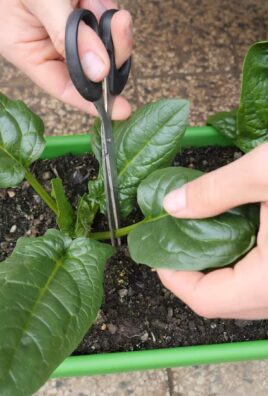
1. Harvest Time: Your wheatgrass is ready to harvest when it’s about 6-8 inches tall. This usually takes about 7-10 days after removing the dark cover.
2. Cut the Grass: Use sharp scissors to cut the wheatgrass about an inch above the soil line.
3. Rinse and Juice: Rinse the harvested wheatgrass thoroughly with water. Then, juice it using a wheatgrass juicer or a regular juicer with a wheatgrass attachment.
4. Drink Immediately: Wheatgrass juice is best consumed immediately after juicing to retain its nutrients.
5. Store Leftovers: If you have leftover wheatgrass, you can store it in a sealed container in the refrigerator for up to a week. However, it’s best to juice it fresh.
6. Second Harvest (Optional): You can often get a second harvest from the same tray. After the first harvest, continue to water the wheatgrass as usual. It will usually regrow, although the second harvest may not be as lush as the first.
Troubleshooting: Common Issues and Solutions
Even with the best intentions, things can sometimes go awry. Here are a few common issues you might encounter and how to fix them:
* Mold Growth: This is usually caused by poor air circulation or overwatering. Make sure your wheatgrass has good air circulation. You can use a small fan to improve airflow. Also, be careful not to overwater. Let the soil or coco coir dry out slightly between waterings.
* Slow Growth: This could be due to insufficient light, water, or nutrients. Make sure your wheatgrass is getting enough indirect sunlight. Also, ensure you’re watering it properly. If you’re using soil, you can add a diluted organic fertilizer to the water.
* Yellowing Leaves: This can be a sign of overwatering or underwatering. Check the moisture level of the soil or coco coir and adjust your watering accordingly.
* Uneven Growth: This is usually caused by uneven light exposure. Rotate the tray daily to ensure even growth.
Tips and Tricks for Wheatgrass Success
Here are a few extra tips to help you grow the best wheatgrass possible:
* Use Organic Seeds: This ensures that your wheatgrass is free from pesticides and other harmful chemicals.
* Maintain Good Air Circulation: This helps prevent mold growth.
* Don’t Overwater: Overwatering can lead to root rot and other problems.
* Harvest at the Right Time: Harvesting too early or too late can affect the taste and nutrient content of your wheatgrass.
* Experiment with Different Growing Mediums: Try different growing mediums to see which one works best for you.
* Clean Your Trays Regularly: This helps prevent the spread of disease.
Beyond the Juice: Other Ways to Use Wheatgrass
While wheatgrass juice is the most common way to consume it, there are other ways to incorporate this superfood into your diet:
* Smoothies: Add a small amount of wheatgrass to your
Conclusion
So, there you have it! Growing your own wheatgrass at home isn’t just a trendy health fad; it’s a genuinely rewarding and surprisingly simple way to access a powerhouse of nutrients. We’ve walked you through the entire process, from sourcing your wheat berries to harvesting your vibrant green shoots. The benefits of fresh, homegrown wheatgrass are undeniable – a concentrated dose of vitamins, minerals, and antioxidants right at your fingertips.
Why is this DIY wheatgrass growing trick a must-try? Because it puts you in control. You know exactly what’s going into your wheatgrass – no pesticides, no hidden ingredients, just pure, unadulterated goodness. Plus, it’s significantly more cost-effective than buying pre-cut wheatgrass or juice from the store. Think of all the delicious and healthy smoothies you can make!
But the advantages extend beyond just health and savings. There’s a certain satisfaction that comes from nurturing something from seed to harvest. Watching those tiny sprouts emerge and transform into a lush green carpet is a truly gratifying experience. It’s a mini-garden right in your kitchen, bringing a touch of nature indoors.
Looking for variations? Absolutely! Experiment with different sprouting trays or containers. Some people prefer using terracotta pots for better drainage, while others swear by multi-tiered sprouting systems for continuous harvests. You can also try adding a thin layer of organic compost to your growing medium for an extra boost of nutrients. Consider experimenting with different lighting conditions to see how it affects the growth rate and color of your wheatgrass. Some growers find that a little extra sunlight intensifies the green hue.
Don’t be afraid to get creative with how you incorporate your homegrown wheatgrass into your diet. While juicing is the most common method, you can also add small amounts of chopped wheatgrass to smoothies, salads, or even use it as a garnish for soups and other dishes. Remember to start with small quantities, as the taste can be quite intense.
We wholeheartedly encourage you to give this DIY wheatgrass growing project a try. It’s easier than you think, and the rewards are well worth the effort. Once you’ve experienced the joy of harvesting your own fresh wheatgrass, you’ll never go back to store-bought again.
We’d love to hear about your experiences! Share your photos, tips, and tricks in the comments below. Let us know what worked for you, what challenges you faced, and how you’re enjoying your homegrown wheatgrass. Together, we can create a community of thriving wheatgrass growers! So, grab your wheat berries, get your sprouting trays ready, and embark on this exciting journey to a healthier, greener you. Let’s get growing!
Frequently Asked Questions (FAQ)
What exactly is wheatgrass, and why is it so good for me?
Wheatgrass is essentially the young grass of the common wheat plant. It’s harvested before the wheat kernels begin to form. It’s packed with chlorophyll, vitamins (A, C, E, and K), minerals (iron, calcium, magnesium), amino acids, and enzymes. Many people consume it for its potential health benefits, including boosting the immune system, detoxifying the body, improving digestion, and increasing energy levels. While more research is always beneficial, the nutrient density of wheatgrass is undeniable.
Where can I buy wheat berries for growing?
You can find wheat berries at most health food stores, online retailers specializing in sprouting supplies, or even some bulk food stores. Make sure you’re buying *hard red winter wheat berries*, as these are specifically suited for growing wheatgrass. Avoid buying wheat berries that are treated with fungicides or other chemicals, as these are not safe for consumption. Look for organic, food-grade wheat berries for the best results.
How long does it take to grow wheatgrass from seed to harvest?
Typically, it takes about 7-10 days to grow wheatgrass from seed to harvest. The sprouting process usually takes 1-3 days, followed by about 6-7 days of growth under light. The exact timeframe can vary depending on factors such as temperature, humidity, and lighting conditions.
What kind of light do I need to grow wheatgrass?
Wheatgrass doesn’t require intense sunlight. Indirect sunlight or fluorescent grow lights are sufficient. Avoid placing your wheatgrass in direct sunlight, as this can scorch the leaves. If you’re using grow lights, position them about 6-12 inches above the wheatgrass. A simple fluorescent shop light can work wonders.
How often should I water my wheatgrass?
Keep the wheatgrass moist but not soggy. Water it once or twice a day, depending on the humidity and temperature. Use a spray bottle to mist the wheatgrass evenly. Avoid overwatering, as this can lead to mold growth. The soil should feel damp to the touch, but not waterlogged.
How do I prevent mold from growing on my wheatgrass?
Mold growth is a common concern when growing wheatgrass. To prevent it, ensure good air circulation around your wheatgrass. Avoid overcrowding the seeds in your tray. Use a well-draining growing medium. Don’t overwater. If you notice any mold, remove the affected areas immediately. Some people also use a diluted hydrogen peroxide solution to spray the wheatgrass as a preventative measure.
How do I harvest wheatgrass?
Harvest your wheatgrass when it’s about 4-7 inches tall. Use clean scissors or a knife to cut the grass just above the soil line. Harvest only what you need, as wheatgrass is best consumed fresh. You can store harvested wheatgrass in the refrigerator for a few days, but it’s best to use it as soon as possible.
How do I juice wheatgrass?
The best way to juice wheatgrass is with a dedicated wheatgrass juicer, which is designed to extract the maximum amount of juice from the tough fibers. However, you can also use a masticating juicer. Avoid using centrifugal juicers, as they tend to generate heat that can destroy some of the nutrients. If you don’t have a juicer, you can blend the wheatgrass with a little water and then strain the mixture through a cheesecloth or nut milk bag.
What does wheatgrass taste like, and how much should I consume?
Wheatgrass has a strong, grassy flavor that some people find intense. It’s best to start with small amounts, such as 1-2 ounces of juice per day, and gradually increase the amount as you become accustomed to the taste. You can mix wheatgrass juice with other fruit or vegetable juices to make it more palatable.
Can I regrow wheatgrass after harvesting?
Wheatgrass typically only produces one good harvest. While you might get a second, smaller harvest, the quality and nutrient content will be significantly lower. It’s best to start a new batch of wheatgrass after each harvest.
Is it safe for everyone to consume wheatgrass?
While wheatgrass is generally safe for most people, some individuals may experience mild side effects such as nausea, diarrhea, or headaches, especially when first starting to consume it. If you have any underlying health conditions or are taking medications, it’s always best to consult with your doctor before adding wheatgrass to your diet. People with grass allergies should exercise caution.
What are some creative ways to use wheatgrass besides juicing?
Besides juicing, you can add small amounts of chopped wheatgrass to smoothies, salads, or soups. You can also use it as a garnish for various dishes. Some people even use wheatgrass powder in baking or as a natural food coloring. Get creative and experiment with different ways to incorporate wheatgrass into your diet!
Leave a Comment