
Styrofoam Bok Choy Growing: Unlock the secrets to a thriving garden with this unexpected DIY trick! Have you ever imagined transforming discarded styrofoam into a miniature bok choy farm? It sounds crazy, right? But trust me, this method is not only incredibly effective but also a fantastic way to recycle and reduce waste.
Bok choy, a staple in Asian cuisine, has a rich history dating back to 5th-century China. For centuries, it has been cultivated for its delicious flavor and nutritional benefits. Now, you can bring this ancient vegetable into your own home, regardless of your gardening experience or space limitations.
Many people struggle with traditional gardening methods, facing challenges like limited space, poor soil quality, or simply a lack of time. That’s where this styrofoam bok choy growing hack comes in! It’s a simple, cost-effective, and space-saving solution that allows you to enjoy fresh, homegrown bok choy with minimal effort. I’m excited to share this easy-to-follow guide that will empower you to create your own little bok choy oasis, turning what was once trash into a treasure trove of delicious greens. Let’s get started!
DIY Styrofoam Bok Choy Growing: A Fun and Sustainable Project!
Hey there, fellow gardening enthusiasts! Ever thought about growing bok choy in styrofoam? Sounds a little crazy, right? But trust me, it’s a surprisingly effective and eco-friendly way to cultivate this delicious and nutritious leafy green. I’ve been experimenting with this method for a while now, and I’m excited to share my experience and guide you through the process. Not only is it a great way to recycle styrofoam, but it also allows you to control the growing environment and potentially extend your bok choy season. So, let’s dive in!
What You’ll Need
Before we get started, let’s gather all the necessary materials. This will make the whole process smoother and more enjoyable.
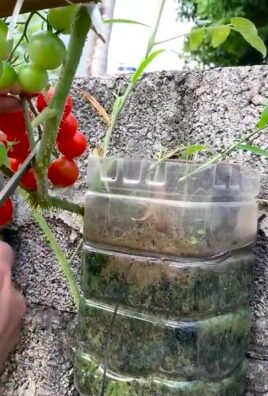
* Styrofoam Container: This is the star of the show! Look for a clean, sturdy styrofoam container. The size will depend on how many bok choy plants you want to grow. I usually use the kind that electronics come packaged in, or even large takeout containers. Just make sure it’s food-safe if you’re using a recycled container.
* Bok Choy Seeds: Choose your favorite bok choy variety! There are many options, from baby bok choy to larger, more mature varieties. You can find seeds at your local garden center or online.
* Seed Starting Mix: This is a lightweight, well-draining soil mix specifically designed for starting seeds. It’s crucial for healthy germination.
* Potting Mix: Once your seedlings are ready to transplant, you’ll need a good quality potting mix. Look for one that’s rich in nutrients and provides good drainage.
* Water: Essential for all stages of growth! Use filtered or dechlorinated water if possible.
* Nutrient Solution (Optional): While not strictly necessary, adding a diluted nutrient solution can boost growth and yield. I like to use a balanced liquid fertilizer specifically formulated for leafy greens.
* Drill or Sharp Tool: You’ll need this to create drainage holes in your styrofoam container.
* Spray Bottle: For misting the seeds and seedlings.
* Grow Lights (Optional): If you’re growing indoors or in a low-light environment, grow lights can provide the necessary light for healthy growth.
* Measuring Cup and Spoon: For measuring water and nutrient solution.
* Gloves (Optional): To keep your hands clean.
Preparing the Styrofoam Container
This is a crucial step to ensure proper drainage and prevent waterlogging, which can lead to root rot.
1. Clean the Container: Thoroughly clean the styrofoam container with soap and water to remove any dirt or debris. Rinse it well and let it dry completely.
2. Drill Drainage Holes: Using a drill or sharp tool, create drainage holes in the bottom of the container. I usually make about 4-6 holes, depending on the size of the container. Make sure the holes are large enough to allow water to drain freely, but not so large that the soil will fall out.
3. Consider a Liner (Optional): While not always necessary, you can line the inside of the container with plastic sheeting to help retain moisture and prevent the styrofoam from degrading over time. If you choose to do this, make sure to cut holes in the liner to match the drainage holes in the container.
Sowing the Seeds
Now comes the fun part – planting the seeds!
1. Fill with Seed Starting Mix: Fill the styrofoam container with seed starting mix, leaving about an inch of space at the top. Gently pat down the soil to create a firm, even surface.
2. Sow the Seeds: Sprinkle the bok choy seeds evenly over the surface of the soil. Follow the instructions on the seed packet for spacing recommendations. I usually sow the seeds fairly densely, knowing that I’ll thin them out later.
3. Cover with a Thin Layer of Soil: Lightly cover the seeds with a thin layer of seed starting mix.
4. Mist with Water: Gently mist the soil with water using a spray bottle. The goal is to moisten the soil without disturbing the seeds.
5. Cover (Optional): To create a humid environment that promotes germination, you can cover the container with a clear plastic lid or plastic wrap. Make sure to leave some ventilation to prevent mold growth.
6. Place in a Warm Location: Place the container in a warm, bright location. The ideal temperature for bok choy germination is between 65-75°F (18-24°C).
Caring for the Seedlings
Once the seeds germinate, it’s important to provide the seedlings with the right conditions for healthy growth.
1. Remove Cover: Once the seedlings emerge (usually within 5-7 days), remove the cover to allow for better air circulation.
2. Provide Adequate Light: Bok choy seedlings need plenty of light to thrive. If you’re growing indoors, provide them with grow lights for at least 12-14 hours per day. If you’re growing outdoors, place them in a location that receives at least 6 hours of sunlight per day.
3. Water Regularly: Keep the soil consistently moist, but not waterlogged. Water when the top inch of soil feels dry to the touch. Use a gentle watering can or spray bottle to avoid disturbing the seedlings.
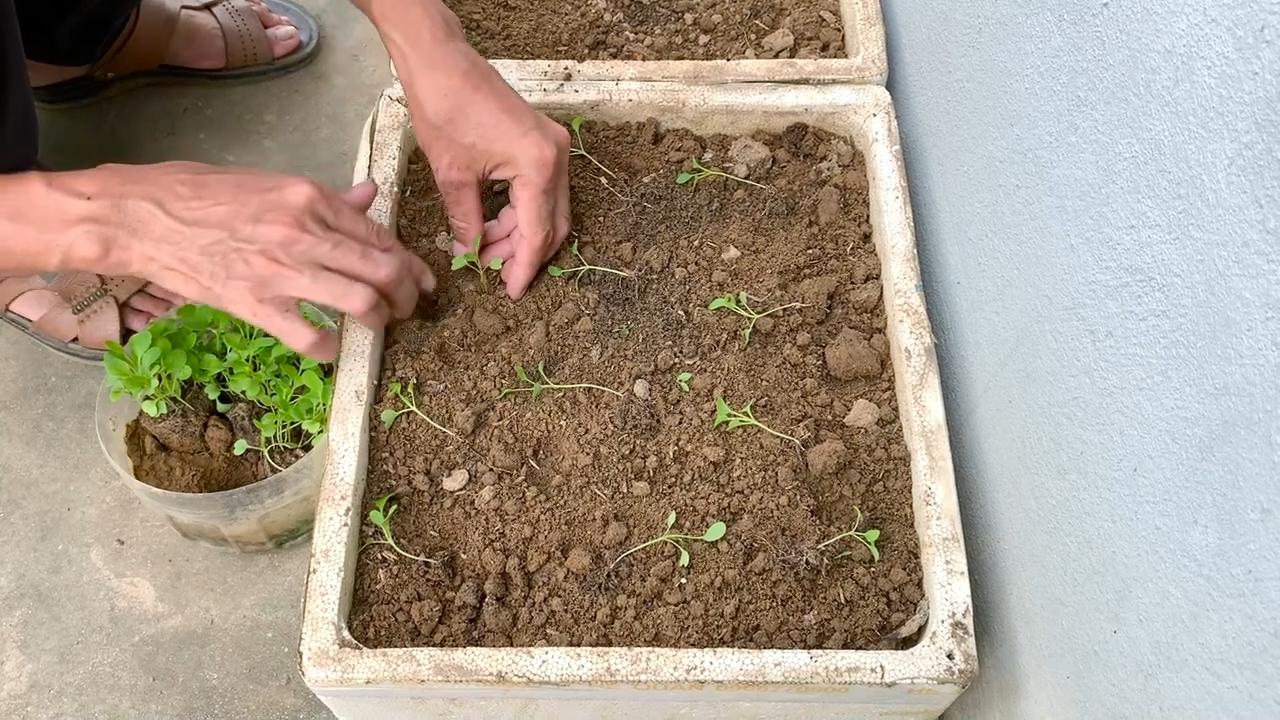
4. Thin the Seedlings: Once the seedlings have developed a few true leaves (the second set of leaves), thin them out to provide adequate spacing for each plant. Gently remove the weaker seedlings, leaving the strongest ones to grow. The ideal spacing will depend on the variety of bok choy you’re growing, but generally, you’ll want to leave about 4-6 inches between plants.
5. Fertilize (Optional): If you’re using a nutrient solution, start fertilizing the seedlings about 2 weeks after they emerge. Dilute the nutrient solution according to the instructions on the package and apply it when you water.
Transplanting to Potting Mix
Once the seedlings have grown large enough, it’s time to transplant them into a larger container filled with potting mix.
1. Prepare the Potting Mix: Fill the styrofoam container with potting mix, leaving about an inch of space at the top.
2. Gently Remove the Seedlings: Carefully remove the seedlings from the seed starting mix, being careful not to damage the roots. You can use a small trowel or your fingers to gently loosen the soil around the seedlings.
3. Plant the Seedlings: Dig small holes in the potting mix and plant the seedlings, making sure the top of the root ball is level with the surface of the soil.
4. Water Thoroughly: Water the seedlings thoroughly after transplanting to help them settle in.
5. Provide Support (Optional): If you’re growing a larger variety of bok choy, you may need to provide support to prevent the plants from falling over. You can use stakes or a trellis to support the plants.
Ongoing Care
Once the bok choy plants are established, it’s important to continue providing them with the right conditions for healthy growth.
1. Water Regularly: Bok choy needs consistent moisture to thrive. Water when the top inch of soil feels dry to the touch. Avoid overwatering, as this can lead to root rot.
2. Fertilize Regularly: Continue fertilizing the plants with a diluted nutrient solution every 2-3 weeks.
3. Provide Adequate Light: Bok choy needs plenty of light to grow well. If you’re growing indoors, provide them with grow lights for at least 12-14 hours per day. If you’re growing outdoors, place them in a location that receives at least 6 hours of sunlight per day.
4. Protect from Pests: Bok choy can be susceptible to pests such as aphids, slugs, and cabbage worms. Inspect your plants regularly for signs of pests and take appropriate action to control them. You can use organic pest control methods such as insecticidal soap or neem oil.
5. Monitor for Diseases: Bok choy can also be susceptible to diseases such as downy mildew and clubroot. Monitor your plants regularly for signs of disease and take appropriate action to control them. Ensure good air circulation to prevent fungal diseases.
Harvesting Your Bok Choy
The best part of growing your own bok choy is harvesting and enjoying the fresh, delicious greens!
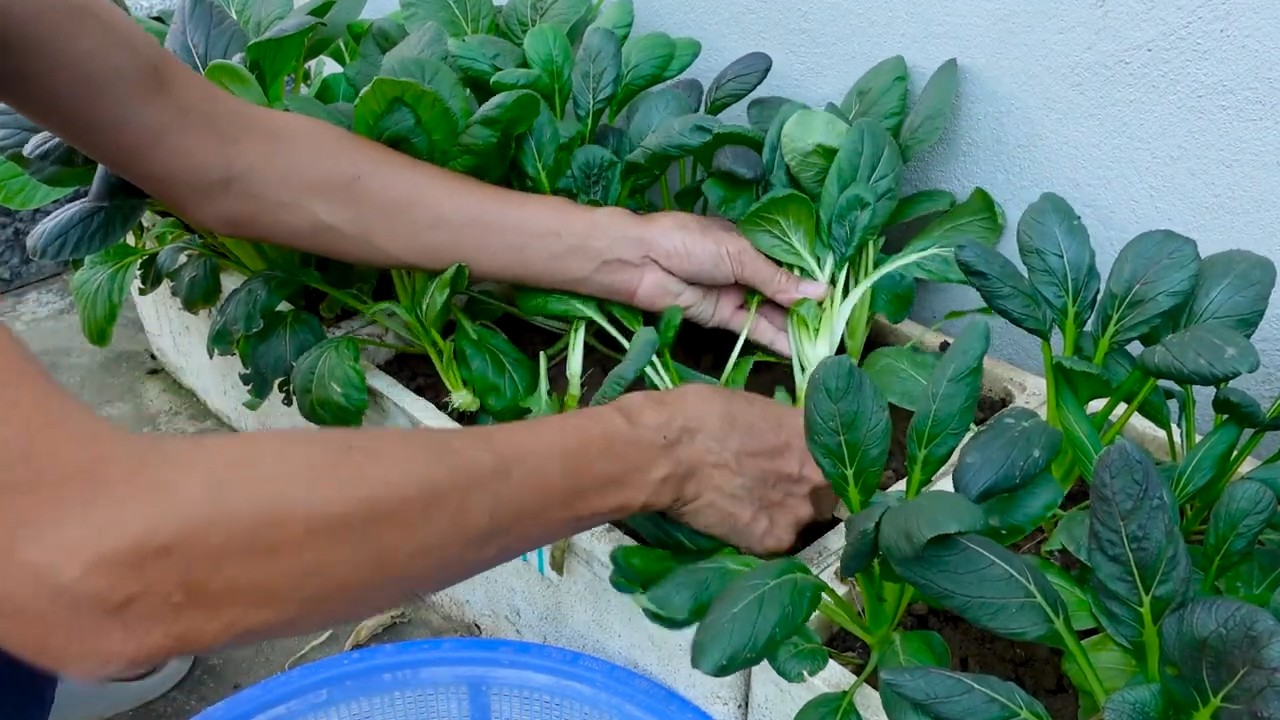
1. Harvest When Ready: Bok choy is typically ready to harvest about 45-60 days after planting, depending on the variety. You can harvest the entire plant at once, or you can harvest individual leaves as needed.
2. Cut at the Base: To harvest the entire plant, cut it at the base with a sharp knife.
3. Harvest Individual Leaves: To harvest individual leaves, simply snap them off at the base of the plant.
4. Wash and Enjoy: Wash the harvested bok
Conclusion
So, there you have it! Transforming discarded styrofoam into a thriving bok choy haven isn’t just a quirky experiment; it’s a testament to resourcefulness and a step towards a more sustainable lifestyle. This DIY styrofoam bok choy growing method offers a unique blend of benefits that traditional gardening often lacks. Think about it: you’re diverting waste from landfills, creating a lightweight and easily movable growing medium, and potentially enjoying a bountiful harvest of fresh, crisp bok choy right from your own home.
The beauty of this project lies in its adaptability. Feel free to experiment with different sizes of styrofoam containers to accommodate varying amounts of bok choy. Consider adding a layer of landscape fabric between the styrofoam and the soil to further prevent any potential leaching, although the risk is minimal with proper sealing and the inert nature of most styrofoam used for packaging. You could also explore different nutrient solutions to optimize growth, keeping a close eye on your bok choy’s development and adjusting accordingly.
Don’t be afraid to get creative with your styrofoam bok choy growing setup. You can paint the styrofoam containers to add a splash of color to your garden or even decorate them with mosaic tiles for a truly unique and eye-catching display. Imagine a vertical garden constructed entirely from repurposed styrofoam, overflowing with lush green bok choy!
This isn’t just about growing bok choy; it’s about embracing a mindset of innovation and environmental consciousness. It’s about proving that even the most seemingly useless materials can be transformed into something beautiful and productive. The satisfaction of harvesting your own homegrown bok choy, knowing that you played a part in reducing waste, is truly unparalleled.
We wholeheartedly encourage you to give this DIY styrofoam bok choy growing method a try. It’s a fun, rewarding, and environmentally friendly project that’s perfect for gardeners of all skill levels. Whether you’re a seasoned pro or a complete beginner, you’ll find this technique surprisingly simple and effective.
And most importantly, we want to hear about your experiences! Share your photos, tips, and challenges in the comments below. Let’s create a community of styrofoam bok choy growers, sharing our knowledge and inspiring others to embrace sustainable gardening practices. Together, we can transform waste into wonder and cultivate a greener future, one styrofoam container and one bok choy plant at a time. Let us know what kind of fertilizer you used, what kind of styrofoam you used, and any other tips and tricks you discovered along the way. Your insights could be invaluable to other aspiring styrofoam bok choy farmers! So, get your hands dirty, get creative, and get growing!
Frequently Asked Questions (FAQ)
1. Is it safe to grow bok choy in styrofoam? Won’t chemicals leach into the soil and affect the plants?
This is a very common and valid concern. The safety of growing food in styrofoam depends on a few factors. First, it’s crucial to use styrofoam that is food-grade or has been used to package food items. This type of styrofoam is generally considered inert and less likely to leach harmful chemicals. Second, consider sealing the inside of the styrofoam container with a food-safe sealant or lining it with landscape fabric. This provides an extra barrier between the styrofoam and the soil, further minimizing any potential leaching. While styrofoam is technically recyclable, it is not always recycled. This is a great way to reuse it.
However, it’s important to acknowledge that there’s always a slight risk of some chemicals leaching into the soil over time. To mitigate this risk, avoid using styrofoam that has been exposed to harsh chemicals or solvents. Regularly monitor your plants for any signs of distress or unusual growth patterns. If you’re still concerned, you can opt for other container gardening methods using materials like terracotta pots or recycled plastic containers. Ultimately, the decision of whether or not to use styrofoam for growing bok choy is a personal one, based on your comfort level and risk tolerance.
2. What kind of soil should I use for growing bok choy in styrofoam containers?
Bok choy thrives in well-draining, nutrient-rich soil. A good starting point is a high-quality potting mix specifically formulated for vegetables. You can also amend the potting mix with compost, aged manure, or other organic matter to boost its fertility and improve drainage. Avoid using garden soil directly in your styrofoam containers, as it can be too heavy and compact, hindering root growth and potentially leading to waterlogging. The ideal soil pH for bok choy is between 6.0 and 7.5. You can test your soil pH using a home testing kit and adjust it accordingly with lime (to raise pH) or sulfur (to lower pH).
3. How often should I water my bok choy plants in styrofoam containers?
Watering frequency depends on several factors, including the size of your styrofoam container, the type of soil you’re using, the weather conditions, and the stage of growth of your bok choy plants. Generally, you should water your bok choy whenever the top inch of soil feels dry to the touch. Avoid overwatering, as this can lead to root rot. Styrofoam containers, being non-porous, tend to retain moisture longer than terracotta pots. Therefore, it’s crucial to ensure proper drainage by creating drainage holes in the bottom of your containers. During hot, dry weather, you may need to water your bok choy plants more frequently. Conversely, during cool, rainy weather, you may need to water them less often.
4. What kind of fertilizer should I use for my styrofoam bok choy garden?
Bok choy is a heavy feeder, meaning it requires a good supply of nutrients to grow and thrive. You can use either a liquid fertilizer or a slow-release granular fertilizer. For liquid fertilizers, choose one that is specifically formulated for vegetables and follow the instructions on the label. Apply the fertilizer every 2-3 weeks during the growing season. For slow-release granular fertilizers, incorporate them into the soil at planting time. These fertilizers release nutrients gradually over a period of several months. Look for fertilizers that are rich in nitrogen, phosphorus, and potassium (NPK). You can also supplement with organic fertilizers like compost tea or fish emulsion.
5. How much sunlight does bok choy need when grown in styrofoam?
Bok choy prefers full sun to partial shade. Ideally, it should receive at least 6 hours of direct sunlight per day. However, in hot climates, it can benefit from some afternoon shade to prevent the leaves from scorching. If you’re growing your bok choy indoors, you’ll need to provide supplemental lighting using grow lights. Place the grow lights about 6-12 inches above the plants and keep them on for 12-16 hours per day. Monitor your plants closely and adjust the lighting as needed.
6. What are some common pests and diseases that affect bok choy, and how can I prevent them when growing in styrofoam?
Common pests that affect bok choy include aphids, cabbage worms, flea beetles, and slugs. To prevent pest infestations, inspect your plants regularly and remove any pests you find by hand. You can also use organic pest control methods like insecticidal soap, neem oil, or diatomaceous earth. Diseases that can affect bok choy include downy mildew, clubroot, and black rot. To prevent diseases, ensure good air circulation around your plants, avoid overwatering, and practice crop rotation. If you notice any signs of disease, remove the affected leaves or plants immediately.
7. Can I grow other vegetables in styrofoam containers besides bok choy?
Absolutely! Styrofoam containers can be used to grow a wide variety of vegetables, herbs, and flowers. Some other vegetables that thrive in styrofoam containers include lettuce, spinach, kale, radishes, carrots, and peppers. The key is to choose plants that are well-suited to container gardening and provide them with the appropriate growing conditions.
8. How do I dispose of the styrofoam containers after I’m done using them?
While the goal is to reuse and repurpose, eventually the styrofoam may degrade. Check with your local recycling center to see if they accept styrofoam for recycling. Unfortunately, many recycling centers do not accept styrofoam due to its low density and the cost of processing it. If recycling is not an option, you can dispose of the styrofoam in your regular trash. However, consider other creative ways to reuse the styrofoam before discarding it. You could use it as packing material, insulation, or even as a base for craft projects.
Leave a Comment