
Water Spinach Fast Growth Tips are what every home gardener dreams of! Imagine harvesting crisp, delicious water spinach from your own backyard just weeks after planting. Sounds too good to be true? It’s not! For generations, water spinach, also known as Ong Choy, has been a staple in Asian cuisine, prized for its rapid growth and nutritional value. From stir-fries to soups, this leafy green adds a delightful crunch and earthy flavor to any dish.
But let’s be honest, sometimes our gardening efforts don’t quite yield the results we hope for. We’ve all been there, staring at a seemingly lifeless patch of soil, wondering where we went wrong. That’s where these DIY tricks and hacks come in! I’m going to share my secrets to achieving unbelievably fast water spinach growth, even if you’re a complete beginner.
Why do you need these water spinach fast growth tips? Because fresh, homegrown produce is simply better! Not only does it taste amazing, but you also know exactly what went into growing it – no harmful pesticides or questionable chemicals. Plus, growing your own food is incredibly rewarding and a fantastic way to connect with nature. So, grab your gardening gloves, and let’s get started on your journey to a bountiful water spinach harvest!

Grow Water Spinach Like a Pro: My Foolproof DIY Guide
Hey there, fellow gardening enthusiasts! I’m so excited to share my secrets for growing water spinach (also known as kangkong or ong choy) like a total boss. This leafy green is a staple in Asian cuisine, and it’s surprisingly easy to cultivate at home, even if you’re a beginner. I’ve experimented with different methods, and I’ve finally nailed down a system that guarantees a bountiful harvest. Get ready to impress your friends and family with your homegrown water spinach!
What You’ll Need
Before we dive in, let’s gather our supplies. Here’s a list of everything you’ll need to make this DIY water spinach growing project a success:
* Water Spinach Seeds or Cuttings: You can find seeds online or at your local Asian grocery store. Cuttings are another great option if you know someone who already grows water spinach.
* A Large Container or Tub: I recommend a container that’s at least 12 inches deep and wide. The bigger, the better!
* Potting Soil: A good quality potting mix will provide the necessary nutrients for your water spinach.
* Compost or Aged Manure: This will enrich the soil and give your plants an extra boost.
* Water: Lots and lots of water! Water spinach loves to be submerged.
* Fertilizer (Optional): A balanced liquid fertilizer can help promote growth, but it’s not essential.
* Sunlight: Water spinach needs at least 6 hours of sunlight per day.
* Gardening Gloves: To keep your hands clean.
* Watering Can or Hose: For easy watering.
* Scissors or Pruning Shears: For harvesting.
Getting Started: Planting Your Water Spinach
Okay, let’s get our hands dirty! This is where the magic begins. We’ll start by preparing our container and planting the seeds or cuttings.
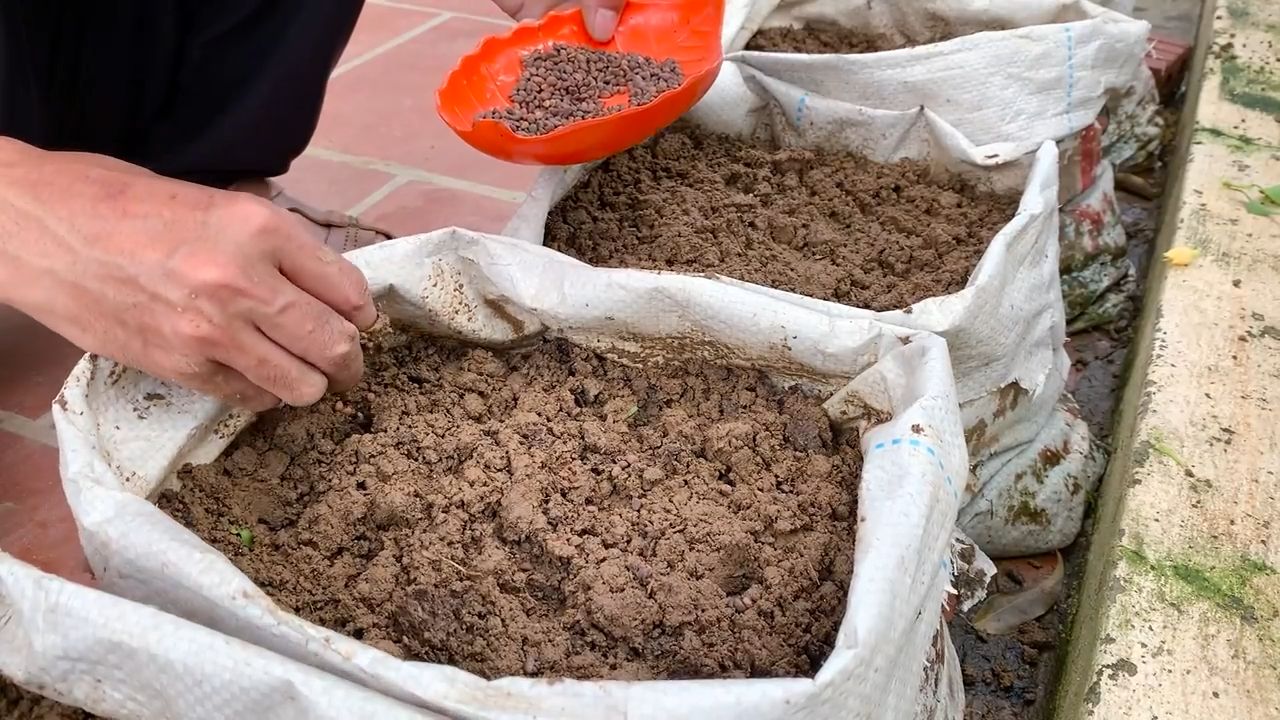
1. Prepare Your Container: First, make sure your container has drainage holes. Water spinach loves water, but it doesn’t want to sit in stagnant water. Fill the container with a mixture of potting soil and compost or aged manure. I usually go for a 2:1 ratio of potting soil to compost. This gives the plants a rich and well-draining base to grow from.
2. Sowing Seeds (If Using Seeds): If you’re starting from seeds, sow them about half an inch deep and an inch apart. Gently cover them with soil and water thoroughly. Keep the soil consistently moist until the seeds germinate, which usually takes about 7-14 days. I like to pre-soak my seeds in water for 24 hours before planting. This helps to soften the seed coat and speeds up germination.
3. Planting Cuttings (If Using Cuttings): If you’re using cuttings, choose healthy stems that are about 6-8 inches long. Remove the lower leaves, leaving only a few at the top. Plant the cuttings directly into the soil, burying about 2-3 inches of the stem. Water thoroughly. Cuttings usually root within a week or two. To encourage rooting, you can dip the cut end of the stem in rooting hormone before planting.
4. Watering is Key: After planting, water the soil thoroughly. Water spinach thrives in moist conditions, so make sure the soil is always damp. I like to check the soil moisture every day and water as needed.
Creating the Ideal Environment: Water and Sunlight
Water spinach is a semi-aquatic plant, so it needs plenty of water and sunlight to flourish. Here’s how to create the perfect environment for your plants:
1. Submerge the Base: Once your plants are established (a few inches tall), you can start submerging the base of the container in water. I usually place my container inside a larger tub or basin and fill it with water until it reaches about halfway up the sides of the container. This creates a shallow pond effect that water spinach loves.
2. Sunlight is Essential: Water spinach needs at least 6 hours of direct sunlight per day. Place your container in a sunny spot in your garden or on your balcony. If you don’t have enough sunlight, you can supplement with grow lights.
3. Maintain Water Levels: Regularly check the water level in your tub or basin and replenish as needed. The water will evaporate over time, especially in hot weather. I usually top up the water every day or two.
4. Water Quality: I use tap water for my water spinach, but if your tap water is heavily chlorinated, you may want to let it sit out for 24 hours before using it. This will allow the chlorine to evaporate.
Feeding Your Plants: Fertilizer Tips
While water spinach can grow without fertilizer, giving it a little boost can significantly increase your yield. Here’s what I recommend:
1. Choose a Balanced Fertilizer: I use a balanced liquid fertilizer with an NPK ratio of 10-10-10. This means it contains equal parts nitrogen, phosphorus, and potassium, which are essential for plant growth.
2. Dilute the Fertilizer: Always dilute the fertilizer according to the instructions on the label. Over-fertilizing can burn your plants.
3. Fertilize Regularly: I fertilize my water spinach every 2-3 weeks. I simply add the diluted fertilizer to the water in the tub or basin.
4. Organic Options: If you prefer organic gardening, you can use compost tea or fish emulsion as a fertilizer. These are both great sources of nutrients for your plants.
Harvesting Your Bounty: When and How
The best part of growing water spinach is, of course, harvesting and enjoying your fresh greens! Here’s how to harvest your water spinach for maximum yield:
1. When to Harvest: You can start harvesting your water spinach about 4-6 weeks after planting. The stems should be about 8-12 inches long.
2. How to Harvest: Use scissors or pruning shears to cut the stems about 4-6 inches above the soil line. This will encourage the plant to produce new shoots.
3. Harvest Regularly: The more you harvest, the more your water spinach will grow. I usually harvest my plants every week or two.
4. Post-Harvest Care: After harvesting, fertilize your plants to help them recover and continue growing.
Troubleshooting: Common Problems and Solutions
Even with the best care, you may encounter some problems while growing water spinach. Here are some common issues and how to solve them:
1. Yellowing Leaves: Yellowing leaves can be a sign of nutrient deficiency. Try fertilizing your plants with a balanced fertilizer. It could also be a sign of overwatering, so make sure your container has good drainage.
2. Slow Growth: Slow growth can be caused by a lack of sunlight or nutrients. Make sure your plants are getting enough sunlight and fertilize them regularly.
3. Pests: Water spinach is generally pest-resistant, but aphids and spider mites can sometimes be a problem. You can control these pests by spraying your plants with insecticidal soap or neem oil.
4. Algae Growth: Algae can sometimes grow in the water in your tub or basin. This is usually not a problem, but if it becomes excessive, you can clean the tub and refill it with fresh water.
Extra Tips for Supercharged Growth
Okay, I’m going to let you in on a few extra secrets that I’ve learned over the years to really boost your water spinach growth:
* Air Circulation: Good air circulation is important for preventing fungal diseases. Make sure your plants are not too crowded and that there is good airflow around them.
* Succession Planting: To ensure a continuous harvest, plant new seeds or cuttings every few weeks. This is called succession planting.
* Water Temperature: Water spinach prefers warm water. If you live in a cold climate, you can use a water heater to keep the water temperature around 70-80°F.
* Pruning: Regular pruning encourages bushier growth and prevents the plants from becoming leggy.
* Observe Your Plants: Pay attention to your plants and learn to recognize the signs of stress or disease. The sooner you catch a problem, the easier it will be to solve.
Enjoying Your Harvest: Delicious Recipes
Now that you’ve harvested your water spinach, it’s time to enjoy the fruits (or rather, leaves) of your labor! Here are a few of my favorite ways to cook with water spinach:
* Stir-Fry: Water spinach is delicious stir-fried with garlic, ginger, and soy sauce.
* Soup: Add water spinach to your favorite soup for a nutritious and flavorful boost.
* Salad: Young, tender water spinach leaves can be eaten raw in salads.
* Steamed: Steamed water spinach is a simple and healthy side dish.
Conclusion
So, there you have it! Transforming your water spinach cultivation with this simple, yet incredibly effective DIY trick is not just a possibility, it’s practically a guarantee. We’ve walked you through the process, highlighting the benefits of faster growth, healthier plants, and a more abundant harvest. But why is this method a must-try?
Firstly, it’s about efficiency. Time is precious, and no one wants to wait an eternity for their vegetables to mature. This DIY trick significantly accelerates the growth rate of your water spinach, allowing you to enjoy fresh, homegrown produce much sooner than you would with conventional methods. Imagine harvesting crisp, vibrant water spinach just weeks after planting, ready to be stir-fried, steamed, or added to your favorite soups.
Secondly, it’s about control. You’re in charge of the entire process, from selecting the best water spinach seeds or cuttings to providing the optimal growing environment. This level of control allows you to tailor the conditions to your specific needs and preferences, ensuring that your plants receive the exact nutrients and care they require. You’re not relying on commercial fertilizers or potentially harmful chemicals; instead, you’re using a natural, sustainable approach that’s good for your plants and good for the environment.
Thirdly, it’s about the sheer satisfaction of seeing your efforts pay off. There’s nothing quite like the feeling of nurturing a plant from seed to harvest, knowing that you played a vital role in its growth and development. This DIY trick amplifies that sense of accomplishment, as you witness the remarkable transformation of your water spinach plants in a relatively short period of time.
Now, let’s talk about variations. While the core method remains the same, you can certainly experiment with different aspects to suit your specific circumstances. For example, you could try using different types of organic fertilizers, such as compost tea or worm castings, to further enrich the growing medium. You could also explore different lighting options, such as supplemental grow lights, to boost growth during periods of low sunlight. Consider the pH of your water source, and adjust accordingly to ensure optimal nutrient absorption. Some gardeners have even reported success by adding a small amount of Epsom salts to the water, providing magnesium which is crucial for chlorophyll production. Remember to research any additions thoroughly before applying them to your water spinach.
We wholeheartedly encourage you to give this DIY trick a try. It’s easy, affordable, and incredibly rewarding. But don’t just take our word for it – experience the difference for yourself. Plant your water spinach, implement this method, and watch as your plants thrive and flourish.
And most importantly, we want to hear about your experiences! Share your results, your tips, and your challenges with us. Let us know what worked for you, what didn’t, and what variations you tried. Your feedback will not only help us improve this guide but will also inspire other gardeners to embark on their own water spinach growing adventures. Use the comments section below to connect with fellow enthusiasts and share your success stories. Together, we can unlock the full potential of this amazing vegetable and enjoy a bountiful harvest of fresh, delicious water spinach. Remember, mastering these **water spinach fast growth tips** is within your reach!
FAQ
What exactly makes this DIY trick so effective for water spinach growth?
The effectiveness stems from a combination of factors. Primarily, it focuses on optimizing the growing environment by providing consistent moisture, adequate nutrients, and sufficient light. Water spinach thrives in moist conditions, and this method ensures that the roots are constantly hydrated. The addition of organic fertilizers provides the essential nutrients that the plants need to grow rapidly. Furthermore, by controlling the growing environment, you can minimize the risk of pests and diseases, which can significantly hinder growth. The DIY aspect allows for customization, tailoring the method to your specific climate and resources.
How often should I apply the organic fertilizer to my water spinach?
The frequency of fertilizer application depends on the type of fertilizer you’re using and the overall health of your plants. As a general guideline, you can apply a diluted liquid fertilizer, such as compost tea or fish emulsion, every 1-2 weeks. However, it’s crucial to monitor your plants closely and adjust the frequency accordingly. If you notice signs of nutrient deficiency, such as yellowing leaves, you may need to increase the frequency of application. Conversely, if you see signs of over-fertilization, such as burnt leaf tips, you should reduce the frequency. Always follow the instructions on the fertilizer packaging and err on the side of caution. It’s better to under-fertilize than to over-fertilize.
Can I use this DIY trick for growing water spinach indoors?
Yes, absolutely! This DIY trick is perfectly suitable for growing water spinach indoors, especially if you live in a climate with cold winters or limited sunlight. However, you’ll need to provide adequate lighting to ensure that your plants receive enough energy for photosynthesis. You can use fluorescent grow lights or LED grow lights, which are energy-efficient and provide a broad spectrum of light. Position the lights close to the plants, but not so close that they burn the leaves. You’ll also need to ensure that the growing environment is well-ventilated to prevent the buildup of humidity and the risk of fungal diseases.
What are some common problems that I might encounter when using this DIY trick, and how can I solve them?
Some common problems include nutrient deficiencies, pest infestations, and fungal diseases. Nutrient deficiencies can be addressed by adjusting the fertilizer application. Pest infestations can be controlled by using organic pesticides, such as neem oil or insecticidal soap. Fungal diseases can be prevented by ensuring good ventilation and avoiding overwatering. It’s also important to inspect your plants regularly for any signs of problems and address them promptly. Early detection and intervention are key to preventing serious issues.
What type of container is best for growing water spinach using this method?
The ideal container should be large enough to accommodate the root system of the water spinach plants and have adequate drainage holes. A container that is at least 12 inches deep and 12 inches wide is generally recommended. You can use plastic pots, ceramic pots, or even repurposed containers, such as buckets or tubs. Just make sure that the container is clean and free of any harmful chemicals. The material of the container isn’t as important as the size and drainage.
How do I know when my water spinach is ready to harvest?
Water spinach is typically ready to harvest about 4-6 weeks after planting. You can harvest the stems and leaves when they are about 6-8 inches long. Simply cut the stems a few inches above the soil line, and the plants will continue to produce new growth. You can harvest multiple times throughout the growing season. The younger leaves are generally more tender and flavorful.
Is this method suitable for hydroponic water spinach cultivation?
While this guide focuses on soil-based cultivation, the principles can be adapted for hydroponics. The key is to provide a nutrient-rich water solution and ensure adequate aeration for the roots. Research hydroponic nutrient solutions specifically formulated for leafy greens and follow the manufacturer’s instructions. You’ll also need a hydroponic system that provides support for the plants and allows for easy harvesting.
What are the best companion plants for water spinach?
Companion planting can enhance the growth and health of your water spinach. Good companions include basil, garlic, and onions, which can help deter pests. Marigolds are also beneficial, as they attract beneficial insects that prey on pests. Avoid planting water spinach near fennel, as it can inhibit its growth.
How can I save seeds from my water spinach for future planting?
Saving seeds from water spinach can be a bit challenging, as it requires allowing the plants to flower and produce seeds. However, it is possible. Allow some of your plants to mature fully and produce flowers. Once the flowers fade, seed pods will develop. Allow the seed pods to dry completely on the plant before harvesting them. Once dry, carefully remove the seeds from the pods and store them in a cool, dry place. Keep in mind that seeds saved from hybrid varieties may not produce plants that are true to type.
What if I don’t have access to organic fertilizers? Can I use chemical fertilizers instead?
While organic fertilizers are generally preferred for their environmental benefits and slow-release properties, you can use chemical fertilizers as an alternative. However, it’s crucial to use them sparingly and follow the instructions on the packaging carefully. Over-fertilization with chemical fertilizers can lead to nutrient imbalances and potentially harm your plants. Choose a fertilizer that is specifically formulated for leafy greens and apply it at the recommended rate. It’s also important to flush the soil periodically with water to prevent the buildup of salts from the fertilizer.


Leave a Comment