
Growing bigger melons might seem like a challenge reserved for seasoned farmers, but I’m here to tell you it’s totally achievable right in your own backyard! Imagine sinking your teeth into a juicy, homegrown watermelon that’s bursting with flavor – a melon so big, it’s the envy of the neighborhood. Sounds good, right?
For centuries, melons have been cultivated across the globe, from the ancient Egyptians who buried them with their pharaohs to the vibrant markets of Asia where they symbolize prosperity and good fortune. This rich history shows just how much we humans value these sweet, refreshing fruits. But let’s be honest, store-bought melons often lack that intense, sun-ripened taste that makes a melon truly special. That’s where these DIY tricks come in!
Let’s face it, who wouldn’t want to impress their friends and family with a giant, delicious melon grown with their own two hands? These simple yet effective hacks will help you optimize your melon patch, ensuring you get the biggest, sweetest harvest possible. Whether you’re a beginner gardener or have a bit of experience under your belt, these tips for growing bigger melons will transform your gardening game. Get ready to roll up your sleeves, because we’re about to unlock the secrets to melon-growing success!
DIY: How to Grow Melons That Are Seriously HUGE!
Okay, melon lovers, let’s talk about growing some seriously impressive melons. I’m not talking about those little grocery store guys. I’m talking about melons so big, you’ll need help carrying them! This guide will walk you through everything you need to know, from prepping your soil to the final harvest. Get ready for some melon magic!
Choosing the Right Melon Variety
First things first, you need to pick the right melon for the job. Not all melons are created equal when it comes to size. Here are a few varieties known for their potential to grow large:
* Watermelon: ‘Carolina Cross’ (can reach over 200 lbs!), ‘Charleston Gray’, ‘Black Diamond’
* Cantaloupe: ‘Honey Rock’, ‘Athena’
* Honeydew: ‘Honey Dew Green Flesh’
I personally love ‘Carolina Cross’ watermelons. They’re a bit of a challenge, but the payoff is incredible!
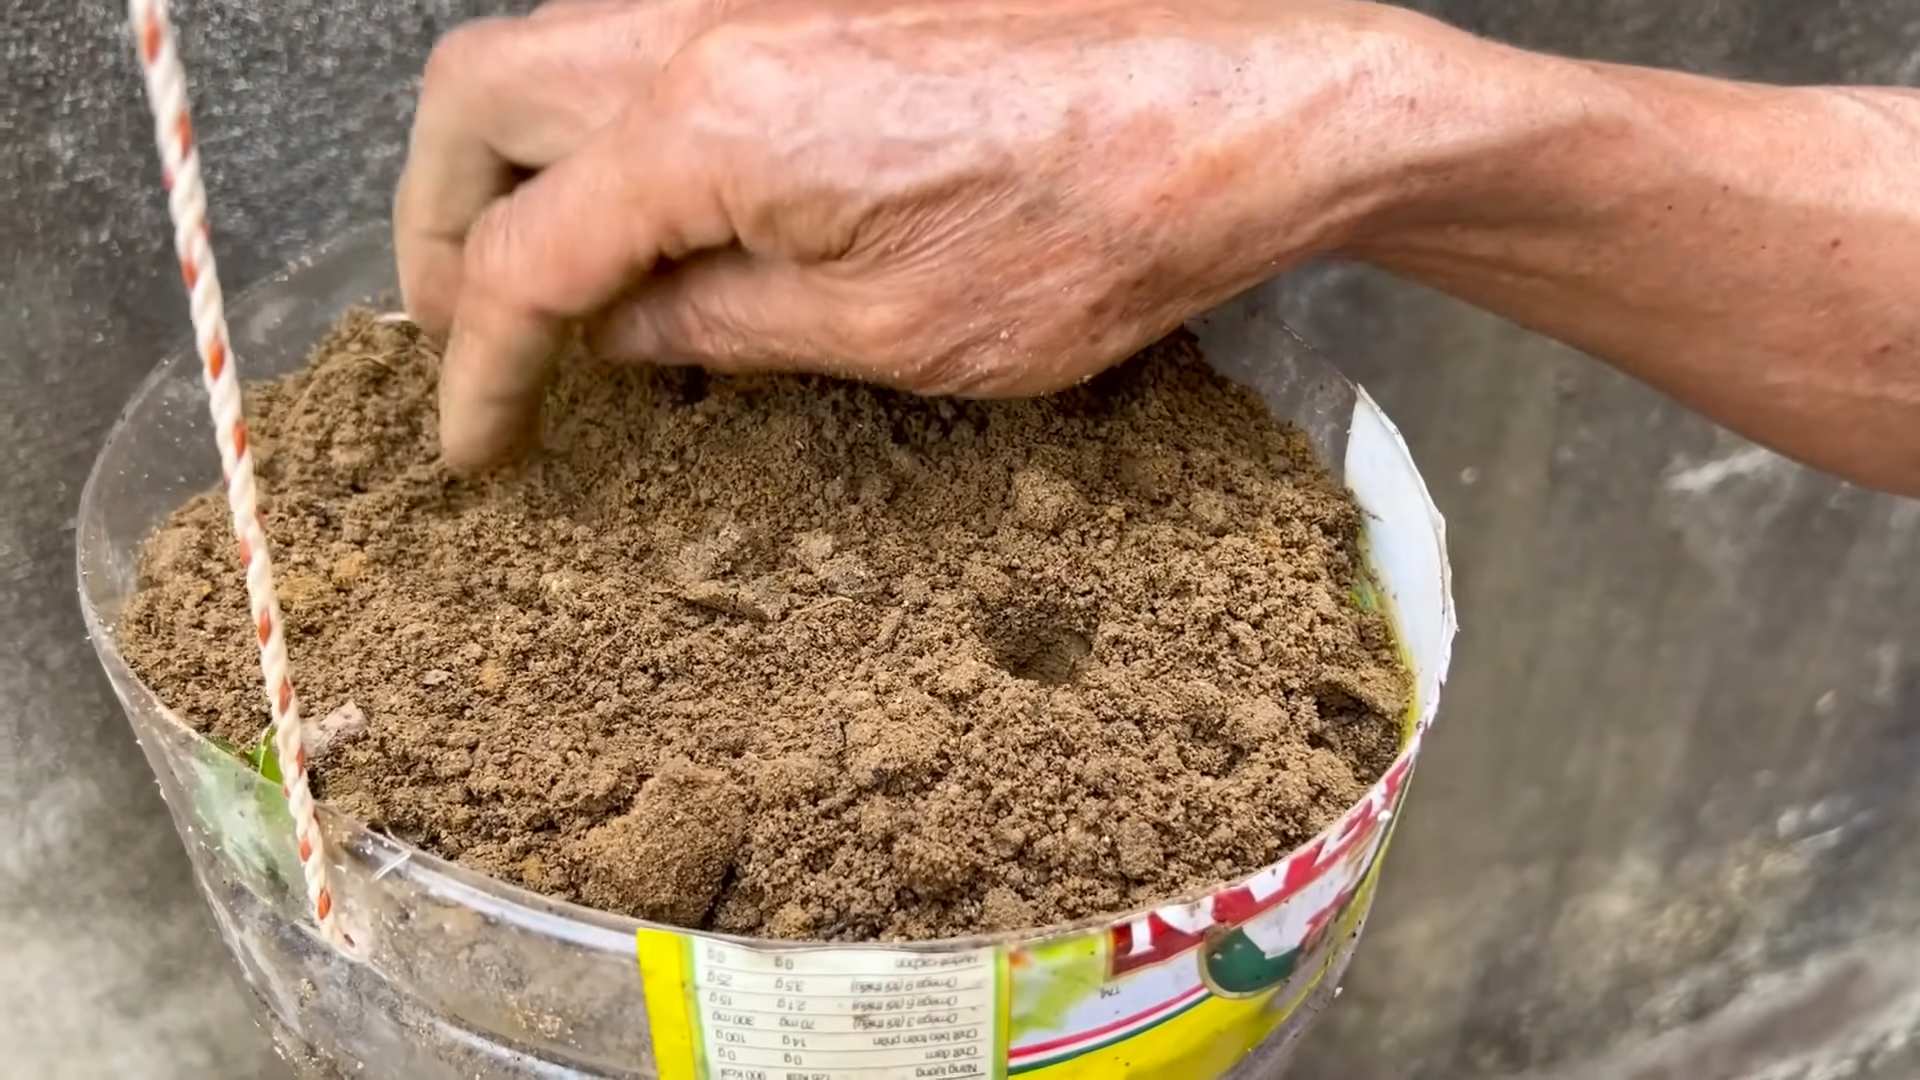
Preparing Your Melon Patch: The Foundation for Success
Melons are heavy feeders, meaning they need a lot of nutrients to grow big and strong. Proper soil preparation is absolutely crucial.
* Sunlight: Melons need at least 6-8 hours of direct sunlight per day. Choose a sunny spot in your garden.
* Soil: Melons prefer well-drained, sandy loam soil with a pH between 6.0 and 6.8.
* Nutrients: Amend your soil with plenty of organic matter, such as compost, aged manure, or leaf mold. This will improve drainage, water retention, and nutrient availability.
Step-by-Step Soil Preparation:
1. Clear the Area: Remove any weeds, rocks, or debris from your chosen melon patch.
2. Test Your Soil: A soil test will tell you the pH and nutrient levels of your soil. You can purchase a soil test kit at most garden centers or send a sample to your local agricultural extension office.
3. Amend the Soil: Based on your soil test results, amend your soil accordingly. If your soil is too acidic (pH below 6.0), add lime. If it’s too alkaline (pH above 6.8), add sulfur.
4. Add Organic Matter: Spread a 3-4 inch layer of compost, aged manure, or leaf mold over the entire area.
5. Till or Dig: Use a tiller or garden fork to incorporate the organic matter into the top 12 inches of soil.
6. Create Mounds or Rows: Melons grow best on raised mounds or rows. This improves drainage and warms the soil faster. Create mounds that are about 12 inches high and 3-4 feet wide, spaced 4-6 feet apart. If you prefer rows, create rows that are 12 inches high and 4-6 feet apart.
Planting Your Melon Seeds or Transplants
You can start melon seeds indoors 4-6 weeks before the last expected frost, or you can direct sow them in the garden after the soil has warmed up to at least 70°F (21°C). I usually start mine indoors to get a head start.
* Starting Seeds Indoors: Use peat pots or biodegradable pots to avoid disturbing the roots when transplanting. Sow 2-3 seeds per pot, about 1 inch deep. Keep the soil moist and warm (75-85°F or 24-29°C). Once the seedlings emerge, thin to one plant per pot.
* Direct Sowing: Sow seeds 1 inch deep, spacing them 2-3 feet apart within the row or mound. Thin to one plant per hill once the seedlings have a few true leaves.
* Transplanting: Harden off your seedlings by gradually exposing them to outdoor conditions for a week before transplanting. Transplant them into the garden after the last expected frost, spacing them 4-6 feet apart.
Step-by-Step Planting:
1. Prepare the Planting Hole: Dig a hole that is slightly larger than the root ball of your transplant or the depth you need for direct sowing.
2. Add Fertilizer: Mix a handful of slow-release fertilizer into the bottom of the hole. This will provide the seedlings with a boost of nutrients. I like to use a fertilizer specifically formulated for vegetables.
3. Plant the Seedling or Seed: Gently remove the seedling from its pot and place it in the hole. If direct sowing, place the seed in the hole.
4. Backfill the Hole: Fill the hole with soil, gently firming it around the plant.
5. Water Thoroughly: Water the plant thoroughly to settle the soil and provide moisture.
6. Mulch: Apply a layer of mulch around the plant to help retain moisture, suppress weeds, and regulate soil temperature. I use straw or shredded leaves.
Watering and Fertilizing: Keeping Your Melons Hydrated and Well-Fed
Melons need consistent watering, especially during fruit development. They also benefit from regular fertilization.
* Watering: Water deeply and regularly, especially during hot, dry weather. Aim for at least 1 inch of water per week. Use a soaker hose or drip irrigation to avoid wetting the foliage, which can lead to fungal diseases.
* Fertilizing: Fertilize your melons every 2-3 weeks with a balanced fertilizer. You can also use a liquid fertilizer, such as fish emulsion or seaweed extract. Avoid over-fertilizing with nitrogen, as this can promote leafy growth at the expense of fruit production.
Step-by-Step Watering and Fertilizing:
1. Water Deeply: Water the soil around the base of the plant until it is thoroughly saturated. Avoid wetting the foliage.
2. Check Soil Moisture: Use your finger to check the soil moisture level. If the top inch of soil is dry, it’s time to water.
3. Fertilize Regularly: Apply fertilizer according to the package directions. Be sure to water the fertilizer into the soil.
4. Monitor Plant Growth: Observe your plants for signs of nutrient deficiencies, such as yellowing leaves or stunted growth. Adjust your fertilization schedule accordingly.
Pruning and Training: Directing Energy for Maximum Melon Size
Pruning and training can help direct the plant’s energy towards fruit production, resulting in larger melons.
* Pruning: Remove any suckers (shoots that grow from the base of the plant) to encourage the main vine to grow stronger. You can also prune some of the lateral vines to reduce overcrowding and improve air circulation.
* Training: Train the vines to grow in a specific direction, such as along a trellis or fence. This will help keep the melons off the ground and prevent them from rotting.
Step-by-Step Pruning and Training:
1. Identify Suckers: Look for shoots growing from the base of the plant.
2. Remove Suckers: Use pruning shears to remove the suckers close to the main stem.
3. Prune Lateral Vines: If the plant is becoming too crowded, prune some of the lateral vines. Focus on removing vines that are crossing each other or blocking sunlight.
4. Train the Vines: Use twine or plant ties to attach the vines to a trellis or fence. Gently guide the vines in the desired direction.
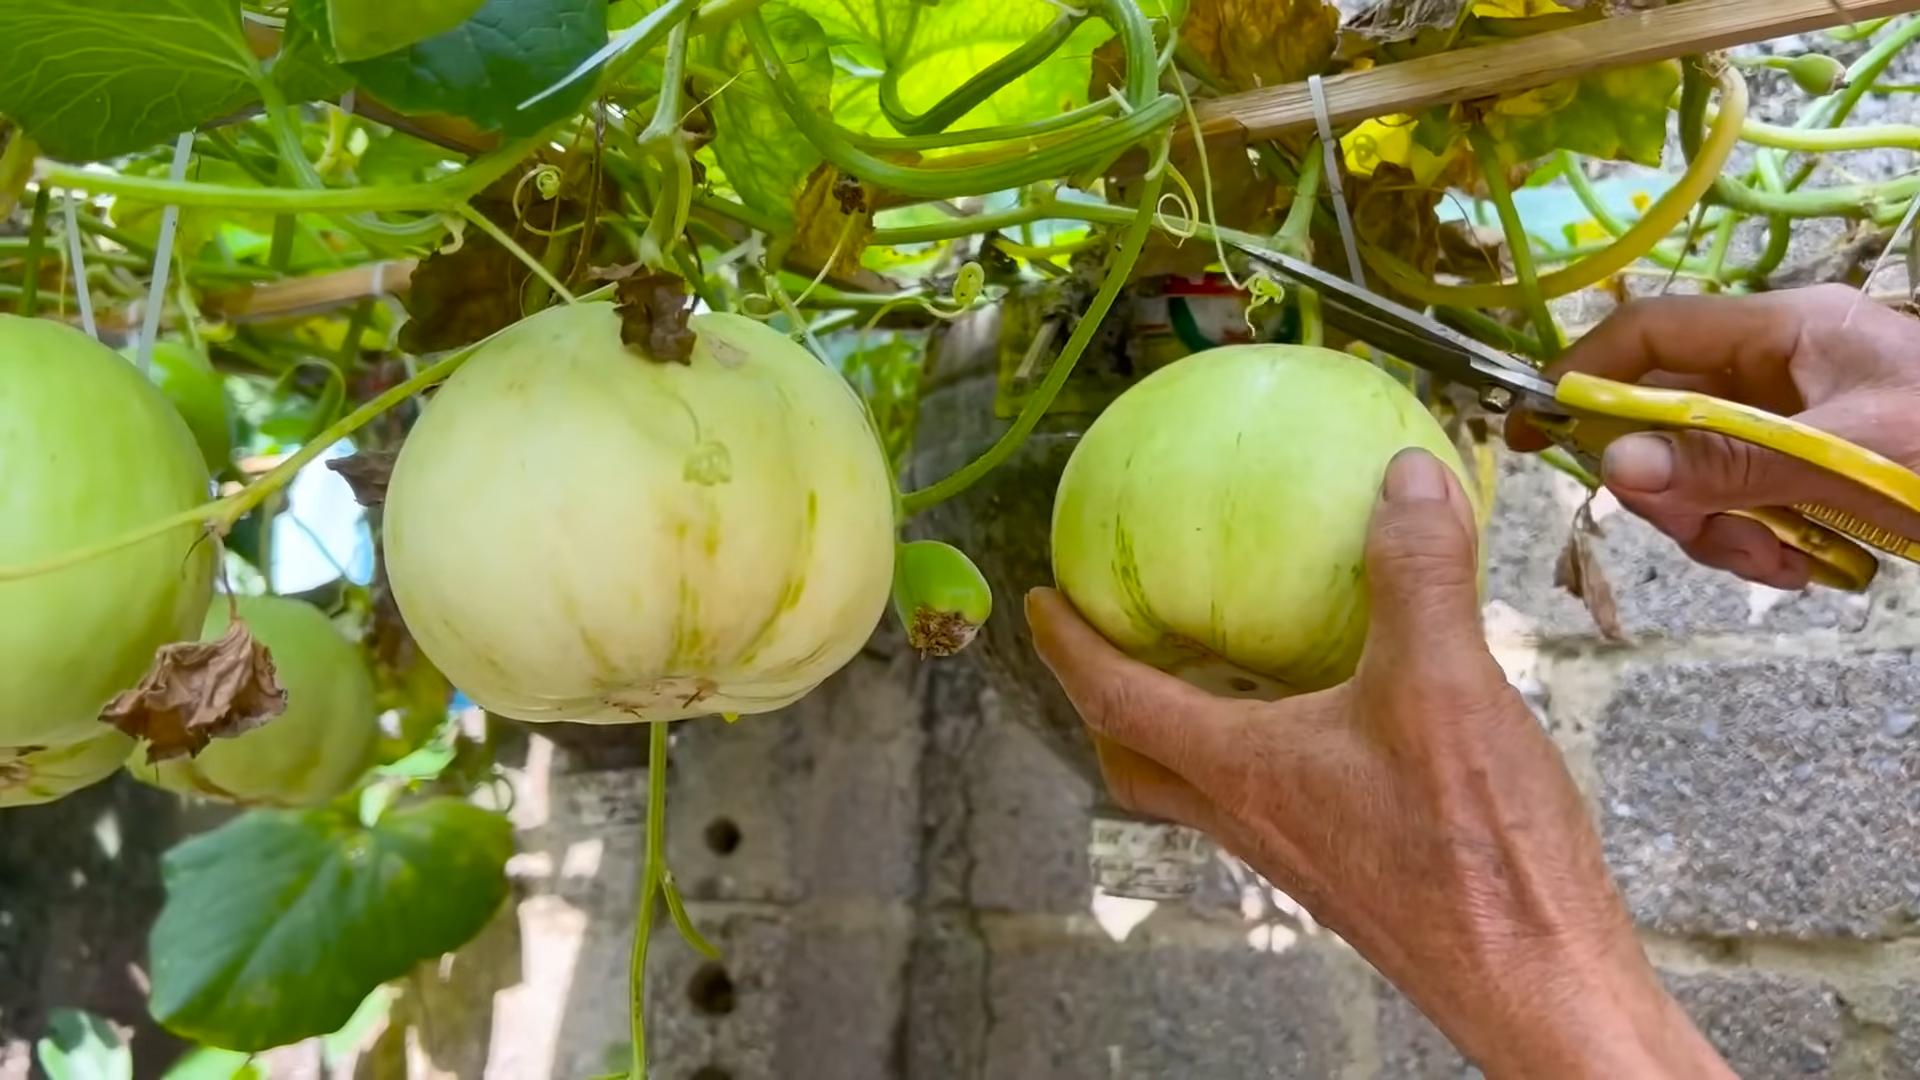
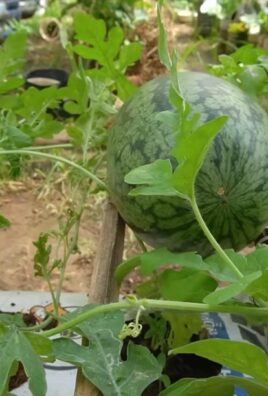
Fruit Thinning: Focusing the Plant’s Energy
This is a crucial step for growing truly giant melons. You need to limit the number of melons on each vine so the plant can focus its energy on growing just a few to an enormous size.
* Thinning: Once the melons have reached the size of a softball, select the most promising one on each vine and remove the rest. This will allow the plant to focus all of its energy on growing that one melon.
Step-by-Step Fruit Thinning:
1. Inspect the Melons: Examine each melon on the vine and choose the one that is the most uniform in shape, free of blemishes, and well-positioned on the vine.
2. Remove the Other Melons: Use pruning shears to carefully remove the other melons from the vine. Cut the stem close to the melon, being careful not to damage the remaining melon or the vine.
Protecting Your Melons: Keeping Pests and Diseases at Bay
Melons are susceptible to a variety of pests and diseases. Here are some common problems and how to deal with them:
* Squash Bugs: Handpick squash bugs and their eggs from the plants. You can also use insecticidal soap.
* Cucumber Beetles: Cover young plants with row covers to prevent cucumber beetles from feeding on them. You can also use insecticidal soap or neem oil.
* Powdery Mildew: Improve air circulation around the plants and avoid wetting the foliage. You can also use a fungicide.
* Anthracnose: Rotate your crops and avoid overhead watering. You
Conclusion
So, there you have it! This simple yet effective DIY trick for growing bigger melons is a game-changer for any home gardener. We’ve walked you through the process, highlighting the science behind why it works and providing practical tips to ensure your success. But why is this method a must-try?
Firstly, it’s about maximizing your yield. Who wouldn’t want larger, juicier, and more flavorful melons from the same amount of space and effort? This technique allows your melon plants to focus their energy on fewer fruits, resulting in significantly increased size and sweetness. Imagine biting into a watermelon that’s bursting with flavor, knowing you cultivated it to its full potential.
Secondly, this DIY approach is incredibly cost-effective. You don’t need to invest in expensive fertilizers or specialized equipment. All you need are a few basic gardening tools and a little bit of your time. It’s a sustainable and environmentally friendly way to enhance your melon harvest.
Thirdly, it’s about the satisfaction of nurturing your plants and witnessing the tangible results of your efforts. There’s a unique sense of accomplishment that comes from growing your own food, and this trick amplifies that feeling. Seeing those melons swell to impressive sizes is incredibly rewarding.
But don’t just take our word for it! We encourage you to experiment with different variations of this technique. For example, you could try using different types of supports for your melons, such as slings made from old t-shirts or pantyhose. This can help to distribute the weight of the growing fruit and prevent it from breaking off the vine.
Another variation is to experiment with different types of mulch around your melon plants. Mulch helps to retain moisture in the soil, suppress weeds, and regulate soil temperature. Organic mulches like straw or wood chips can also add nutrients to the soil as they decompose.
Consider the specific variety of melon you are growing. Some varieties naturally produce larger fruits than others. Researching the characteristics of your chosen melon variety will help you tailor your growing techniques for optimal results. For instance, some smaller melon varieties might not benefit as much from this thinning technique, while larger varieties will see a dramatic difference.
Remember to monitor your plants closely for signs of pests or diseases. Early detection and treatment are crucial for preventing problems that could affect the size and quality of your melons. Regular inspection of the leaves, stems, and fruits will help you identify any issues before they become severe.
We are confident that this DIY trick will transform your melon-growing experience. It’s a simple, effective, and rewarding way to achieve bigger, better melons. So, grab your gardening gloves, head out to your garden, and give it a try!
And most importantly, we want to hear about your results! Share your experiences, photos, and tips in the comments section below. Let’s create a community of melon-growing enthusiasts and learn from each other. Your insights could help other gardeners achieve their own melon-growing success. Let’s all work together to grow bigger melons!
Frequently Asked Questions (FAQ)
1. How many melons should I leave on each vine for optimal size?
The ideal number of melons to leave on each vine depends on the variety of melon you’re growing and the overall health of the plant. Generally, for larger melon varieties like watermelons and cantaloupes, it’s best to leave only one or two melons per vine. This allows the plant to focus its energy on developing those fruits to their full potential. For smaller melon varieties like honeydew or personal-sized watermelons, you might be able to leave three or four melons per vine. However, always prioritize quality over quantity. If you notice that the melons are not growing as quickly as they should, or if the plant seems stressed, it’s best to thin them out further.
2. When is the best time to thin out the melons?
The best time to thin out the melons is when they are about the size of a tennis ball or slightly larger. At this stage, you can easily identify the healthiest and most promising fruits. Choose the melons that are well-shaped, free from blemishes, and located in a position that receives adequate sunlight. Remove any melons that are damaged, misshapen, or growing in a crowded area. Use sharp, clean pruning shears to avoid damaging the vine.
3. Will removing some of the melons affect the overall health of the plant?
No, removing some of the melons will not negatively affect the overall health of the plant. In fact, it will actually benefit the plant by reducing the amount of energy it needs to expend. By focusing its resources on fewer fruits, the plant will be able to produce larger, healthier, and more flavorful melons. Thinning out the melons can also improve air circulation around the plant, which can help to prevent fungal diseases.
4. What should I do with the melons that I remove?
The melons that you remove can be composted or used as animal feed, depending on their condition. If they are still relatively small and unripe, they can be added to your compost pile. If they are larger and more developed, they can be fed to livestock like chickens or pigs. Alternatively, you could try pickling or fermenting the unripe melons for a unique culinary experience.
5. How can I support the growing melons to prevent them from breaking off the vine?
As the melons grow larger, they can become quite heavy and may need additional support to prevent them from breaking off the vine. You can use slings made from old t-shirts, pantyhose, or netting to support the melons. Simply tie the sling around the melon and attach it to a sturdy support structure like a trellis or stake. Make sure the sling is snug but not too tight, and that it distributes the weight of the melon evenly.
6. What are some common pests and diseases that can affect melon plants, and how can I prevent them?
Some common pests that can affect melon plants include aphids, squash bugs, and vine borers. To prevent these pests, you can use insecticidal soap, neem oil, or row covers. Regularly inspect your plants for signs of infestation and take action promptly. Common diseases that can affect melon plants include powdery mildew, downy mildew, and fusarium wilt. To prevent these diseases, ensure good air circulation around your plants, avoid overhead watering, and use disease-resistant varieties. You can also apply fungicides as a preventative measure.
7. How often should I water my melon plants?
Melon plants need consistent moisture, especially during fruit development. Water deeply and regularly, aiming for about 1-2 inches of water per week. Avoid overhead watering, as this can promote fungal diseases. Use a soaker hose or drip irrigation to deliver water directly to the roots. Monitor the soil moisture regularly and adjust your watering schedule as needed, depending on the weather conditions.
8. What type of fertilizer should I use for my melon plants?
Melon plants benefit from a balanced fertilizer that is rich in nitrogen, phosphorus, and potassium. You can use a commercial fertilizer specifically formulated for melons, or you can use organic fertilizers like compost, manure, or bone meal. Apply the fertilizer according to the package instructions, and avoid over-fertilizing, as this can lead to excessive vegetative growth and reduced fruit production.
9. How do I know when my melons are ripe and ready to harvest?
The signs of ripeness vary depending on the type of melon you’re growing. For watermelons, look for a dull rind, a yellow or cream-colored spot on the bottom where the melon rested on the ground, and a hollow sound when you thump it. For cantaloupes, look for a tan or yellowish rind, a sweet aroma, and a stem that slips easily from the vine. For honeydew melons, look for a creamy white rind and a slightly soft texture.
10. Can I use this DIY trick for growing other types of fruits and vegetables?
While this DIY trick is specifically designed for growing bigger melons, the principle of thinning out fruits and vegetables can be applied to other crops as well. For example, you can thin out apples, peaches, and pears to encourage larger and more flavorful fruits. You can also thin out tomatoes, peppers, and eggplants to improve air circulation and prevent diseases. However, it’s important to research the specific needs of each crop before applying this technique.

Leave a Comment