
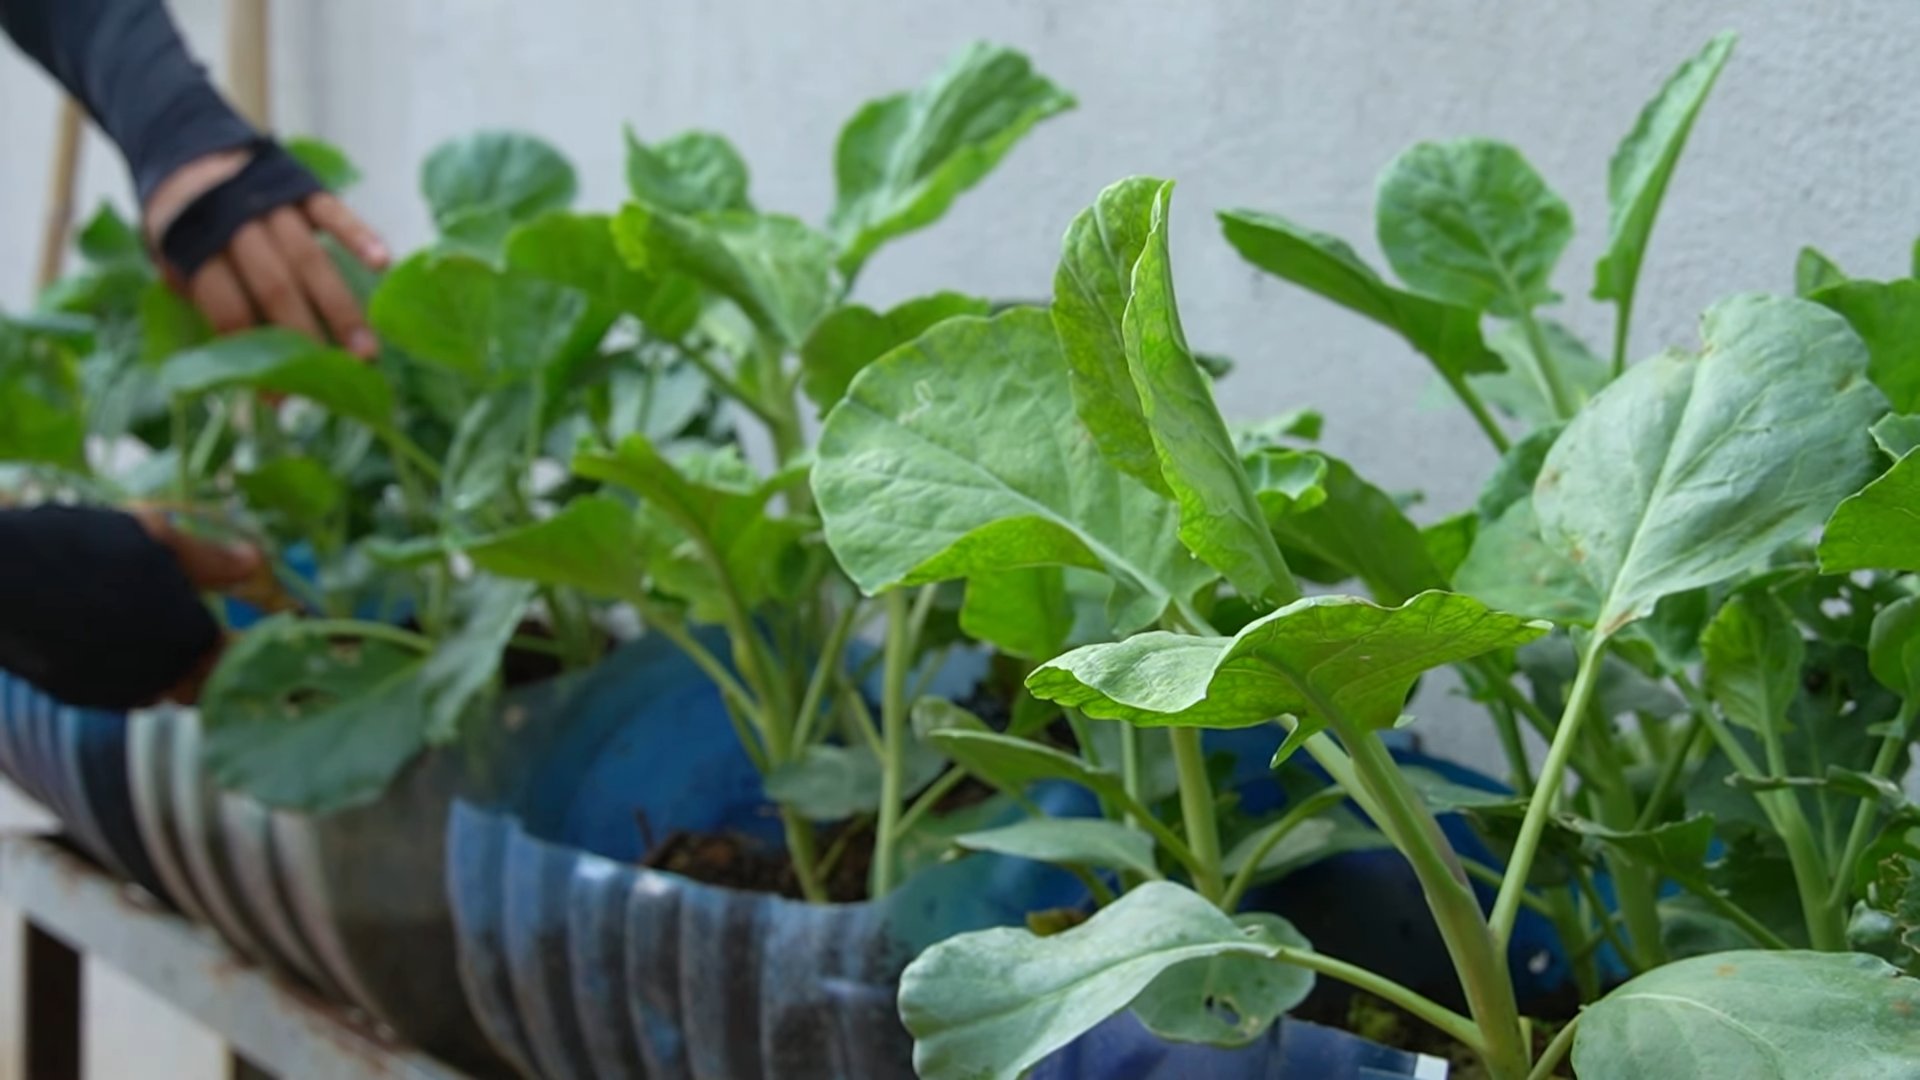
Collard Green Growing Tips: Ever dream of stepping into your backyard and harvesting vibrant, leafy greens for a delicious, home-cooked meal? I know I have! There’s something incredibly satisfying about nurturing your own food, and collard greens are a fantastic place to start. These nutritional powerhouses are surprisingly easy to grow, even if you’re a beginner gardener like I once was.
Collard greens have a rich history, deeply rooted in Southern American cuisine and culture. Brought over by enslaved Africans, they became a staple, symbolizing resilience and resourcefulness. Today, they continue to be a beloved ingredient, packed with vitamins and flavor. But let’s be honest, sometimes growing them can feel a little tricky. Pests, soil conditions, and timing can all throw a wrench in your plans.
That’s where these DIY tricks and hacks come in! I’m going to share my tried-and-true secrets for successful collard green growing tips, ensuring you have a bountiful harvest. Forget expensive store-bought greens – with a little know-how, you can enjoy fresh, organic collards straight from your garden. Whether you’re looking to save money, eat healthier, or simply connect with nature, these tips will empower you to grow the best collards you’ve ever tasted. So, grab your gardening gloves, and let’s get started!
Growing Collard Greens Like a Pro: My Foolproof Guide
Okay, so you want to grow collard greens? Awesome! You’ve come to the right place. I’ve been growing these leafy greens for years, and let me tell you, there’s nothing quite like harvesting your own fresh collards. They’re packed with nutrients, delicious, and surprisingly easy to grow once you get the hang of it. This guide will walk you through everything you need to know, from choosing the right variety to dealing with pests. Let’s get started!
Choosing the Right Collard Green Variety
First things first, you need to decide which type of collard green you want to grow. There are tons of varieties out there, each with its own unique flavor and characteristics. Here are a few of my favorites:
* Georgia Southern: This is a classic variety, known for its large, slightly crumpled leaves and mild flavor. It’s a reliable choice and a good all-around option for beginners.
* Vates: Vates is a compact variety that’s perfect for smaller gardens. It has a slightly stronger flavor than Georgia Southern and is very cold-hardy.
* Champion: If you’re looking for a fast-growing variety, Champion is a great choice. It matures quickly and produces tender, flavorful leaves.
* Top Bunch: This variety is known for its upright growth habit, making it easy to harvest. It has a mild, sweet flavor and is resistant to bolting (going to seed).
* Blue Max: For a unique look, try Blue Max. It has beautiful blue-green leaves and a slightly peppery flavor.
Consider your climate, garden size, and taste preferences when choosing a variety. Don’t be afraid to experiment and try a few different types to see which ones you like best!
Preparing Your Garden Bed
Collard greens need a sunny spot with well-drained soil. Here’s how to prepare your garden bed for success:
* Sunlight: Collard greens need at least 6 hours of sunlight per day. Choose a location in your garden that gets plenty of sun.
* Soil: Collard greens prefer soil that is rich in organic matter and well-drained. If your soil is heavy clay or sandy, amend it with compost or other organic matter to improve drainage and fertility.
* pH: The ideal soil pH for collard greens is between 6.0 and 7.5. You can test your soil pH with a soil testing kit and amend it with lime to raise the pH or sulfur to lower it.
* Fertilizer: Collard greens are heavy feeders, so it’s important to fertilize them regularly. Before planting, incorporate a balanced fertilizer into the soil, such as 10-10-10.
Planting Your Collard Greens
You can start collard greens from seed or transplant seedlings. I usually prefer to start from seed, but both methods work well.
Starting from Seed
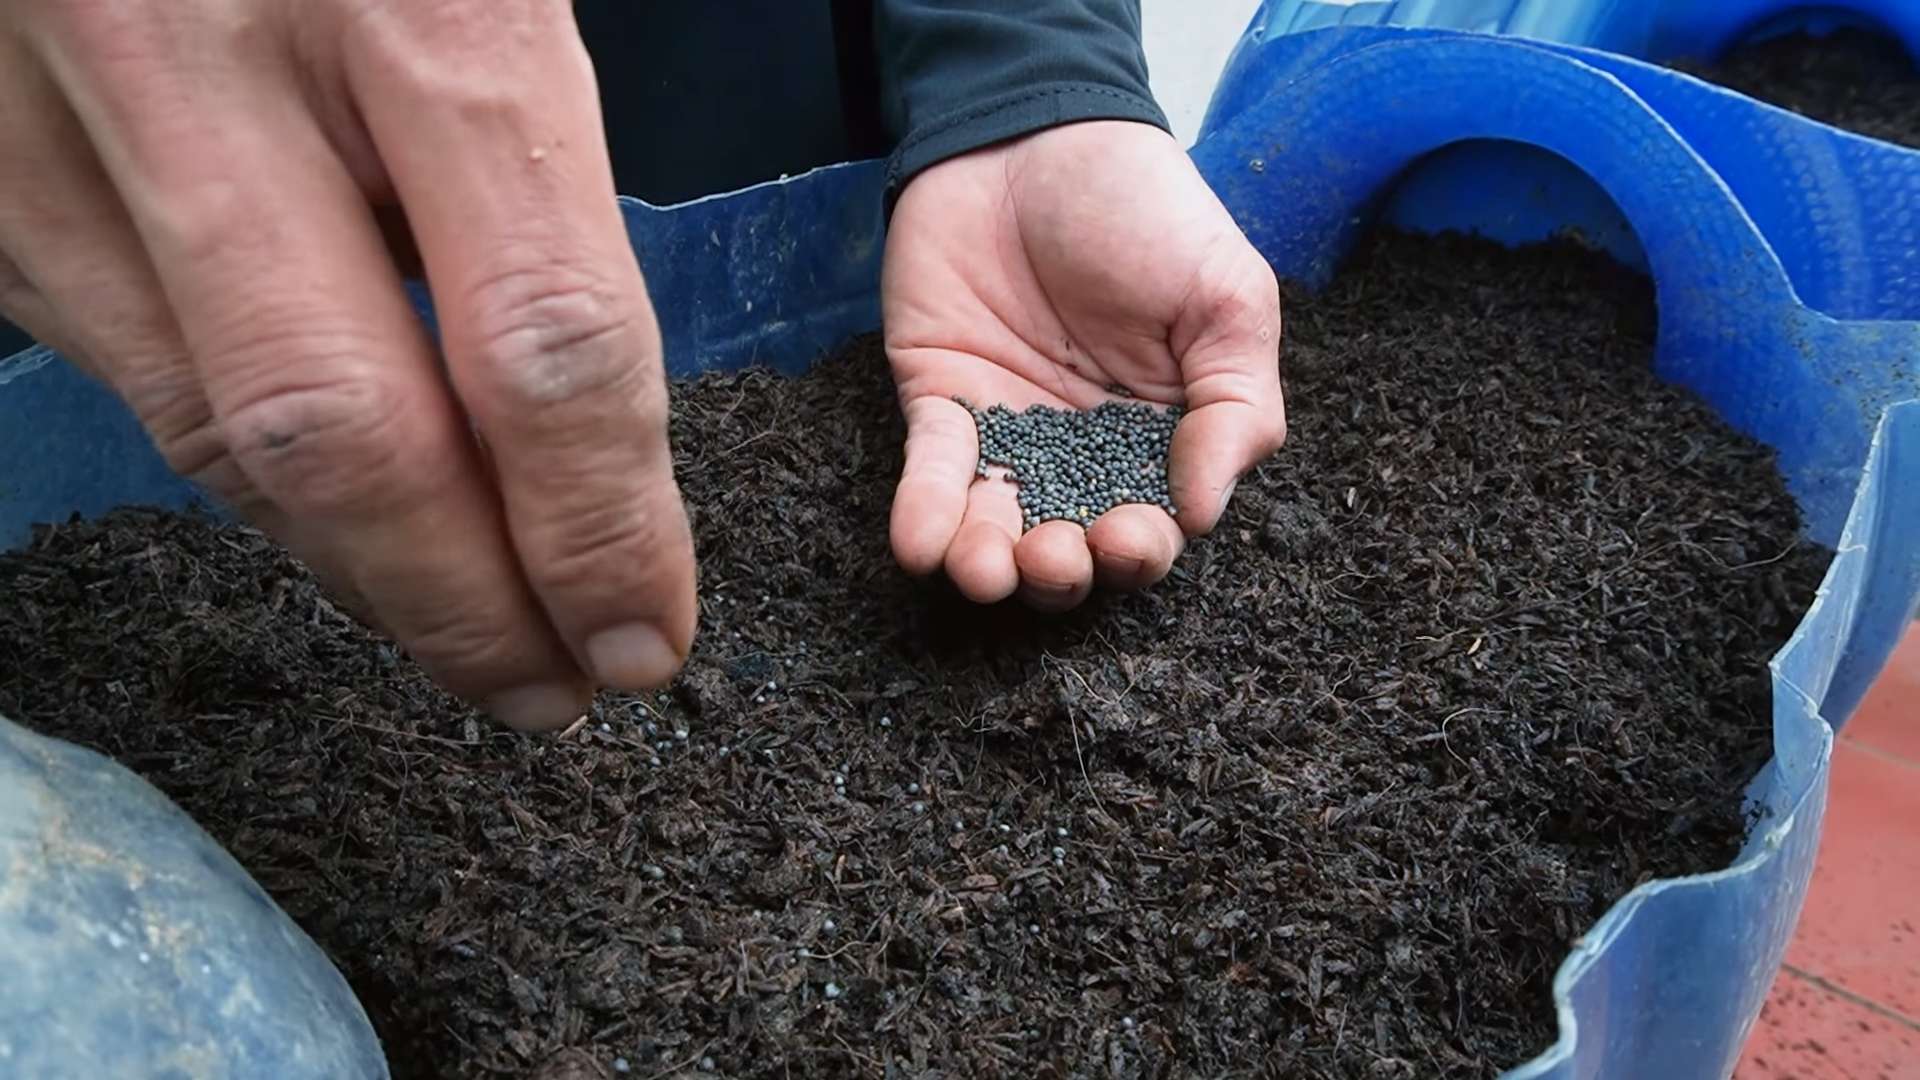
1. Timing: You can start collard green seeds indoors 6-8 weeks before the last frost or direct sow them in the garden 2-4 weeks before the last frost. For a fall harvest, sow seeds in mid-summer.
2. Sowing Indoors: If you’re starting seeds indoors, sow them in seed trays or pots filled with seed-starting mix. Plant the seeds about 1/4 inch deep and keep the soil moist.
3. Sowing Outdoors: If you’re direct sowing seeds in the garden, plant them about 1/2 inch deep and space them 2-3 inches apart. Once the seedlings emerge, thin them to 12-18 inches apart.
4. Watering: Water the seeds or seedlings regularly to keep the soil moist but not soggy.
Transplanting Seedlings
1. Hardening Off: If you’re transplanting seedlings that you started indoors, you’ll need to harden them off before planting them in the garden. This means gradually exposing them to outdoor conditions over a period of 1-2 weeks.
2. Planting: Dig holes that are slightly larger than the root balls of the seedlings. Gently remove the seedlings from their pots and place them in the holes.
3. Spacing: Space the seedlings 12-18 inches apart in rows that are 2-3 feet apart.
4. Watering: Water the seedlings thoroughly after planting.
Caring for Your Collard Greens
Once your collard greens are planted, it’s important to provide them with the care they need to thrive.
* Watering: Collard greens need consistent moisture, especially during hot, dry weather. Water them deeply once or twice a week, or more often if the soil dries out quickly.
* Fertilizing: Fertilize your collard greens every 4-6 weeks with a balanced fertilizer. You can also side-dress them with compost or manure.
* Weeding: Keep your garden bed free of weeds, which can compete with your collard greens for nutrients and water.
* Mulching: Mulch around your collard greens with straw, hay, or wood chips to help retain moisture, suppress weeds, and regulate soil temperature.
Dealing with Pests and Diseases
Collard greens are susceptible to a few common pests and diseases. Here’s how to deal with them:
* Cabbage Worms: These green caterpillars can quickly devour your collard green leaves. Handpick them off the plants or spray them with Bacillus thuringiensis (Bt), a natural insecticide.
* Aphids: These tiny insects suck the sap from collard green leaves, causing them to curl and yellow. Spray them with insecticidal soap or neem oil.
* Flea Beetles: These small, jumping beetles can create small holes in collard green leaves. Cover your plants with row covers or spray them with pyrethrin.
* Downy Mildew: This fungal disease causes yellow spots on the upper surfaces of collard green leaves and a white, downy growth on the undersides. Improve air circulation around your plants and spray them with a fungicide.
* Black Rot: This bacterial disease causes yellow, V-shaped lesions on the edges of collard green leaves. Remove infected leaves and avoid overhead watering.
Regularly inspect your plants for pests and diseases and take action promptly to prevent them from spreading.
Harvesting Your Collard Greens
You can start harvesting collard greens when the leaves are about 10-12 inches long.
1. Harvesting Individual Leaves: The easiest way to harvest collard greens is to pick individual leaves from the bottom of the plant. This allows the plant to continue producing new leaves.
2. Harvesting the Whole Plant: If you want to harvest the entire plant, cut it off at the base.
3. Timing: Harvest collard greens in the morning, when the leaves are crisp and cool.
4. Storage: Store collard greens in the refrigerator for up to a week.
Tips for a Bountiful Harvest
Here are a few extra tips to help you get the most out of your coll
Okay, so you want to grow collard greens? Awesome! You’ve come to the right place. I’ve been growing these leafy greens for years, and let me tell you, there’s nothing quite like harvesting your own fresh collards. They’re packed with nutrients, delicious, and surprisingly easy to grow once you get the hang of it. This guide will walk you through everything you need to know, from choosing the right variety to dealing with pests. Let’s get started!
Choosing the Right Collard Green Variety
First things first, you need to decide which type of collard green you want to grow. There are tons of varieties out there, each with its own unique flavor and characteristics. Here are a few of my favorites:
* Georgia Southern: This is a classic variety, known for its large, slightly crumpled leaves and mild flavor. It’s a reliable choice and a good all-around option for beginners.
* Vates: Vates is a compact variety that’s perfect for smaller gardens. It has a slightly stronger flavor than Georgia Southern and is very cold-hardy.
* Champion: If you’re looking for a fast-growing variety, Champion is a great choice. It matures quickly and produces tender, flavorful leaves.
* Top Bunch: This variety is known for its upright growth habit, making it easy to harvest. It has a mild, sweet flavor and is resistant to bolting (going to seed).
* Blue Max: For a unique look, try Blue Max. It has beautiful blue-green leaves and a slightly peppery flavor.
Consider your climate, garden size, and taste preferences when choosing a variety. Don’t be afraid to experiment and try a few different types to see which ones you like best!
Preparing Your Garden Bed
Collard greens need a sunny spot with well-drained soil. Here’s how to prepare your garden bed for success:
* Sunlight: Collard greens need at least 6 hours of sunlight per day. Choose a location in your garden that gets plenty of sun.
* Soil: Collard greens prefer soil that is rich in organic matter and well-drained. If your soil is heavy clay or sandy, amend it with compost or other organic matter to improve drainage and fertility.
* pH: The ideal soil pH for collard greens is between 6.0 and 7.5. You can test your soil pH with a soil testing kit and amend it with lime to raise the pH or sulfur to lower it.
* Fertilizer: Collard greens are heavy feeders, so it’s important to fertilize them regularly. Before planting, incorporate a balanced fertilizer into the soil, such as 10-10-10.
Planting Your Collard Greens
You can start collard greens from seed or transplant seedlings. I usually prefer to start from seed, but both methods work well.
Starting from Seed
1. Timing: You can start collard green seeds indoors 6-8 weeks before the last frost or direct sow them in the garden 2-4 weeks before the last frost. For a fall harvest, sow seeds in mid-summer.
2. Sowing Indoors: If you’re starting seeds indoors, sow them in seed trays or pots filled with seed-starting mix. Plant the seeds about 1/4 inch deep and keep the soil moist.
3. Sowing Outdoors: If you’re direct sowing seeds in the garden, plant them about 1/2 inch deep and space them 2-3 inches apart. Once the seedlings emerge, thin them to 12-18 inches apart.
4. Watering: Water the seeds or seedlings regularly to keep the soil moist but not soggy.
Transplanting Seedlings
1. Hardening Off: If you’re transplanting seedlings that you started indoors, you’ll need to harden them off before planting them in the garden. This means gradually exposing them to outdoor conditions over a period of 1-2 weeks.
2. Planting: Dig holes that are slightly larger than the root balls of the seedlings. Gently remove the seedlings from their pots and place them in the holes.
3. Spacing: Space the seedlings 12-18 inches apart in rows that are 2-3 feet apart.
4. Watering: Water the seedlings thoroughly after planting.
Caring for Your Collard Greens
Once your collard greens are planted, it’s important to provide them with the care they need to thrive.
* Watering: Collard greens need consistent moisture, especially during hot, dry weather. Water them deeply once or twice a week, or more often if the soil dries out quickly.
* Fertilizing: Fertilize your collard greens every 4-6 weeks with a balanced fertilizer. You can also side-dress them with compost or manure.
* Weeding: Keep your garden bed free of weeds, which can compete with your collard greens for nutrients and water.
* Mulching: Mulch around your collard greens with straw, hay, or wood chips to help retain moisture, suppress weeds, and regulate soil temperature.
Dealing with Pests and Diseases
Collard greens are susceptible to a few common pests and diseases. Here’s how to deal with them:
* Cabbage Worms: These green caterpillars can quickly devour your collard green leaves. Handpick them off the plants or spray them with Bacillus thuringiensis (Bt), a natural insecticide.
* Aphids: These tiny insects suck the sap from collard green leaves, causing them to curl and yellow. Spray them with insecticidal soap or neem oil.
* Flea Beetles: These small, jumping beetles can create small holes in collard green leaves. Cover your plants with row covers or spray them with pyrethrin.
* Downy Mildew: This fungal disease causes yellow spots on the upper surfaces of collard green leaves and a white, downy growth on the undersides. Improve air circulation around your plants and spray them with a fungicide.
* Black Rot: This bacterial disease causes yellow, V-shaped lesions on the edges of collard green leaves. Remove infected leaves and avoid overhead watering.
Regularly inspect your plants for pests and diseases and take action promptly to prevent them from spreading.
Harvesting Your Collard Greens
You can start harvesting collard greens when the leaves are about 10-12 inches long.
1. Harvesting Individual Leaves: The easiest way to harvest collard greens is to pick individual leaves from the bottom of the plant. This allows the plant to continue producing new leaves.
2. Harvesting the Whole Plant: If you want to harvest the entire plant, cut it off at the base.
3. Timing: Harvest collard greens in the morning, when the leaves are crisp and cool.
4. Storage: Store collard greens in the refrigerator for up to a week.
Tips for a Bountiful Harvest
Here are a few extra tips to help you get the most out of your collard green crop:
* Succession Planting: Plant collard greens every few weeks to ensure a continuous harvest throughout the growing season.
* Crop Rotation: Rotate your collard greens with other crops each year to prevent soilborne diseases.
* Companion Planting: Plant collard greens with companion plants like dill, chamomile, and rosemary to deter pests.
* Cold Protection: Collard greens are cold-hardy and can tolerate light frosts. However, if you’re expecting a hard freeze, cover your plants with row covers or blankets.
* Bolting Prevention: Hot weather can cause collard greens to bolt (go to seed), which makes the leaves bitter. To prevent bolting, provide your plants with shade during the hottest part of the day.
Enjoying Your Homegrown Collard Greens
Now that you’ve harvested your collard greens, it’s time to enjoy them! There are countless ways to prepare collard greens, from steaming and sautéing to braising and adding them to soups and stews.
My favorite way to cook collard greens is to braise them with smoked ham hocks. Here’s my recipe:
1. Ingredients: 1 pound collard greens, washed and chopped; 1 smoked ham hock; 1 onion, chopped; 2 cloves garlic, minced; 1/2 cup chicken broth; 1/4 cup apple cider vinegar; 1 tablespoon brown sugar; Salt and pepper to taste.
2. Instructions: In a large pot or Dutch oven, combine the collard greens, ham hock, onion, garlic, chicken broth, apple cider vinegar, and brown sugar. Season with salt and pepper.
3. Bring to a boil, then reduce heat and simmer for 1-2 hours, or until the collard greens are tender.
4. Remove the ham hock
Conclusion
So, there you have it! Mastering the art of growing your own collard greens is not only achievable but incredibly rewarding. We’ve explored some simple yet effective DIY tricks that can transform your gardening experience and yield a bountiful harvest of these nutritious leafy greens. From understanding the importance of soil preparation and sunlight to implementing natural pest control methods and optimizing your watering schedule, these tips are designed to empower you, regardless of your gardening experience level.
Why is this a must-try? Because fresh, homegrown collard greens offer a flavor profile that simply can’t be matched by store-bought varieties. The subtle sweetness and earthy notes are intensified when you harvest them straight from your garden, knowing you nurtured them from seed to table. Plus, you have complete control over the growing process, ensuring your collard greens are free from harmful pesticides and chemicals. You’re not just growing vegetables; you’re cultivating a healthier lifestyle.
But the journey doesn’t end here! Feel free to experiment with different varieties of collard greens. Try growing Georgia Southern for its mild flavor and large leaves, or opt for Champion for its heat tolerance and disease resistance. Consider companion planting to further enhance your garden’s ecosystem. Marigolds can deter nematodes, while dill attracts beneficial insects that prey on aphids. You can also explore different methods of preserving your harvest. Blanching and freezing collard greens allows you to enjoy them throughout the year, while pickling offers a tangy and flavorful twist.
Don’t be afraid to get your hands dirty and embrace the learning process. Gardening is a journey of discovery, and every season brings new challenges and opportunities. The satisfaction of harvesting your own collard greens, knowing you nurtured them from seed to table, is an unparalleled experience.
We wholeheartedly encourage you to try these DIY collard green growing tips and witness the transformation in your garden. Remember, even small steps can lead to significant results. Start with a small patch, experiment with different techniques, and adapt them to your specific climate and soil conditions.
And most importantly, we want to hear about your experiences! Share your successes, your challenges, and your unique approaches to growing collard greens in the comments below. Your insights can inspire and empower other gardeners to embark on their own journey of cultivating these delicious and nutritious leafy greens. Let’s create a community of passionate gardeners who are dedicated to growing their own food and sharing their knowledge with others. So, grab your gardening gloves, get your hands dirty, and let’s grow some amazing collard greens together! Your journey to delicious, homegrown collard greens starts now!
Frequently Asked Questions (FAQ)
What is the best time of year to plant collard greens?
The ideal time to plant collard greens depends on your climate. In warmer regions with mild winters, you can plant them in the fall for a winter harvest. In colder regions, plant them in the spring after the last frost for a summer or fall harvest. Collard greens can tolerate light frosts, which can actually improve their flavor. For a continuous harvest, consider succession planting, sowing new seeds every few weeks. This ensures a steady supply of fresh collard greens throughout the growing season.
What kind of soil is best for growing collard greens?
Collard greens thrive in well-drained soil that is rich in organic matter. The ideal soil pH is between 6.0 and 7.5. Before planting, amend your soil with compost, aged manure, or other organic materials to improve its fertility and drainage. If your soil is heavy clay, consider adding sand or perlite to improve drainage. A soil test can help you determine the specific nutrient deficiencies in your soil and guide your amendment choices.
How much sunlight do collard greens need?
Collard greens require at least 6 hours of direct sunlight per day. While they can tolerate some shade, especially in hotter climates, insufficient sunlight can result in leggy growth and reduced yields. Choose a planting location that receives ample sunlight throughout the day. If you are growing collard greens indoors, use grow lights to supplement natural sunlight.
How often should I water my collard greens?
Collard greens need consistent moisture to thrive. Water deeply and regularly, especially during dry periods. Aim to keep the soil consistently moist but not waterlogged. Overwatering can lead to root rot, while underwatering can stress the plants and reduce their growth. Mulching around the plants can help retain moisture in the soil and reduce the need for frequent watering. Check the soil moisture regularly by sticking your finger into the soil. If the top inch feels dry, it’s time to water.
What are some common pests and diseases that affect collard greens?
Collard greens are susceptible to a variety of pests and diseases, including aphids, cabbage worms, flea beetles, and clubroot. Regularly inspect your plants for signs of infestation or disease. Use organic pest control methods, such as insecticidal soap, neem oil, or Bacillus thuringiensis (Bt), to control pests. Practice crop rotation to prevent the buildup of soilborne diseases. Ensure good air circulation around the plants to reduce the risk of fungal diseases. Remove any infected leaves or plants promptly to prevent the spread of disease.
How do I harvest collard greens?
You can begin harvesting collard greens when the leaves are about 8-10 inches long. Harvest the outer leaves first, leaving the inner leaves to continue growing. This allows you to enjoy a continuous harvest over several weeks. Use a sharp knife or scissors to cut the leaves close to the stem. Wash the leaves thoroughly before cooking or storing them.
Can I grow collard greens in containers?
Yes, collard greens can be successfully grown in containers. Choose a large container that is at least 12 inches deep and wide. Use a well-draining potting mix that is rich in organic matter. Ensure the container has drainage holes to prevent waterlogging. Place the container in a location that receives at least 6 hours of direct sunlight per day. Water regularly and fertilize every few weeks with a balanced fertilizer.
How do I store collard greens after harvesting?
To store collard greens, wash them thoroughly and remove any damaged or yellowing leaves. Wrap the leaves in a damp paper towel and place them in a plastic bag or container. Store them in the refrigerator for up to a week. For longer storage, you can blanch and freeze collard greens. To blanch, submerge the leaves in boiling water for 2-3 minutes, then transfer them to an ice bath to stop the cooking process. Drain the leaves thoroughly and pack them into freezer bags or containers. Frozen collard greens can be stored for up to 12 months.
What are some ways to cook collard greens?
Collard greens can be cooked in a variety of ways. They can be boiled, steamed, sautéed, or braised. Traditionally, collard greens are cooked with smoked meats, such as ham hocks or bacon, for added flavor. They can also be seasoned with vinegar, hot sauce, or other spices. Collard greens are a versatile ingredient that can be used in soups, stews, salads, and side dishes. Experiment with different recipes and find your favorite way to enjoy these nutritious leafy greens.
Are there any health benefits to eating collard greens?
Yes, collard greens are packed with nutrients and offer numerous health benefits. They are an excellent source of vitamins A, C, and K, as well as folate, calcium, and fiber. Collard greens are also rich in antioxidants, which can help protect against cell damage and reduce the risk of chronic diseases. Eating collard greens can help improve bone health, boost the immune system, and promote healthy digestion. Incorporating collard greens into your diet is a delicious and nutritious way to support your overall health and well-being.

Leave a Comment