
Bigger Pumpkin Yields are the dream of every home gardener who envisions carving the perfect jack-o’-lantern or baking a delicious pumpkin pie. But let’s be honest, nurturing those orange giants can feel like a daunting task. Have you ever wondered how some gardeners manage to grow pumpkins that look like they belong in a fairytale, while yours end up… well, a little less impressive?
For centuries, pumpkins have held a special place in our hearts and cultures. From ancient indigenous traditions where they were a vital food source, to the modern-day pumpkin spice craze, these gourds are deeply woven into our history. But beyond the cultural significance, growing your own pumpkins offers a unique connection to nature and a sense of accomplishment that’s hard to beat.
That’s where these DIY tricks and hacks come in! I’m here to share some simple, yet effective, strategies to help you achieve those bigger pumpkin yields you’ve always wanted. Forget complicated gardening techniques and expensive equipment. These are practical tips that anyone can implement, regardless of their gardening experience.
Why do you need these tricks? Because let’s face it, gardening can be unpredictable. Pests, diseases, and even the weather can throw a wrench in your plans. But with a little know-how and these easy-to-follow DIY solutions, you can overcome those challenges and cultivate a pumpkin patch that will be the envy of the neighborhood. Get ready to roll up your sleeves and discover the secrets to growing truly impressive pumpkins!
How to Grow Giant Pumpkins: My Secret DIY Fertilizer Recipe and Growing Techniques
Okay, pumpkin enthusiasts! So, you want to grow a pumpkin so big it needs its own zip code? I’m here to share my tried-and-true methods for cultivating colossal gourds. It’s not just about luck; it’s about science, dedication, and a little bit of DIY magic. Let’s dive in!
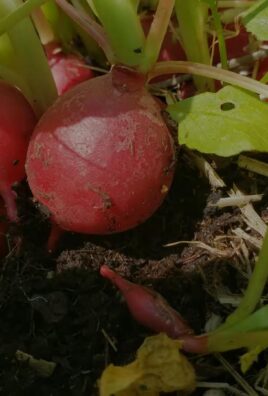
Choosing the Right Seeds and Preparing the Soil
Before we even think about fertilizer, we need to lay the groundwork for success. This means selecting the right seeds and prepping the soil like it’s a five-star hotel for pumpkins.
* Seed Selection is Key: Don’t just grab any pumpkin seeds! Look for Atlantic Giant pumpkin seeds from a reputable source. These are specifically bred for size. I always recommend buying seeds from growers who have a proven track record of producing massive pumpkins. Check online forums and pumpkin growing clubs for recommendations.
* Start Seeds Indoors: About 3-4 weeks before the last expected frost, start your seeds indoors. This gives them a head start and protects them from early-season pests and weather.
* Soil Testing: Get your soil tested! Seriously, this is crucial. You need to know the pH and nutrient levels. Your local agricultural extension office can help with this. Pumpkins thrive in slightly acidic soil (pH 6.0-6.8).
* Amend, Amend, Amend!: Based on your soil test results, amend your soil accordingly. I like to add plenty of compost, well-rotted manure, and peat moss to improve drainage and fertility. Think of it as building a nutrient-rich foundation for your future giant.
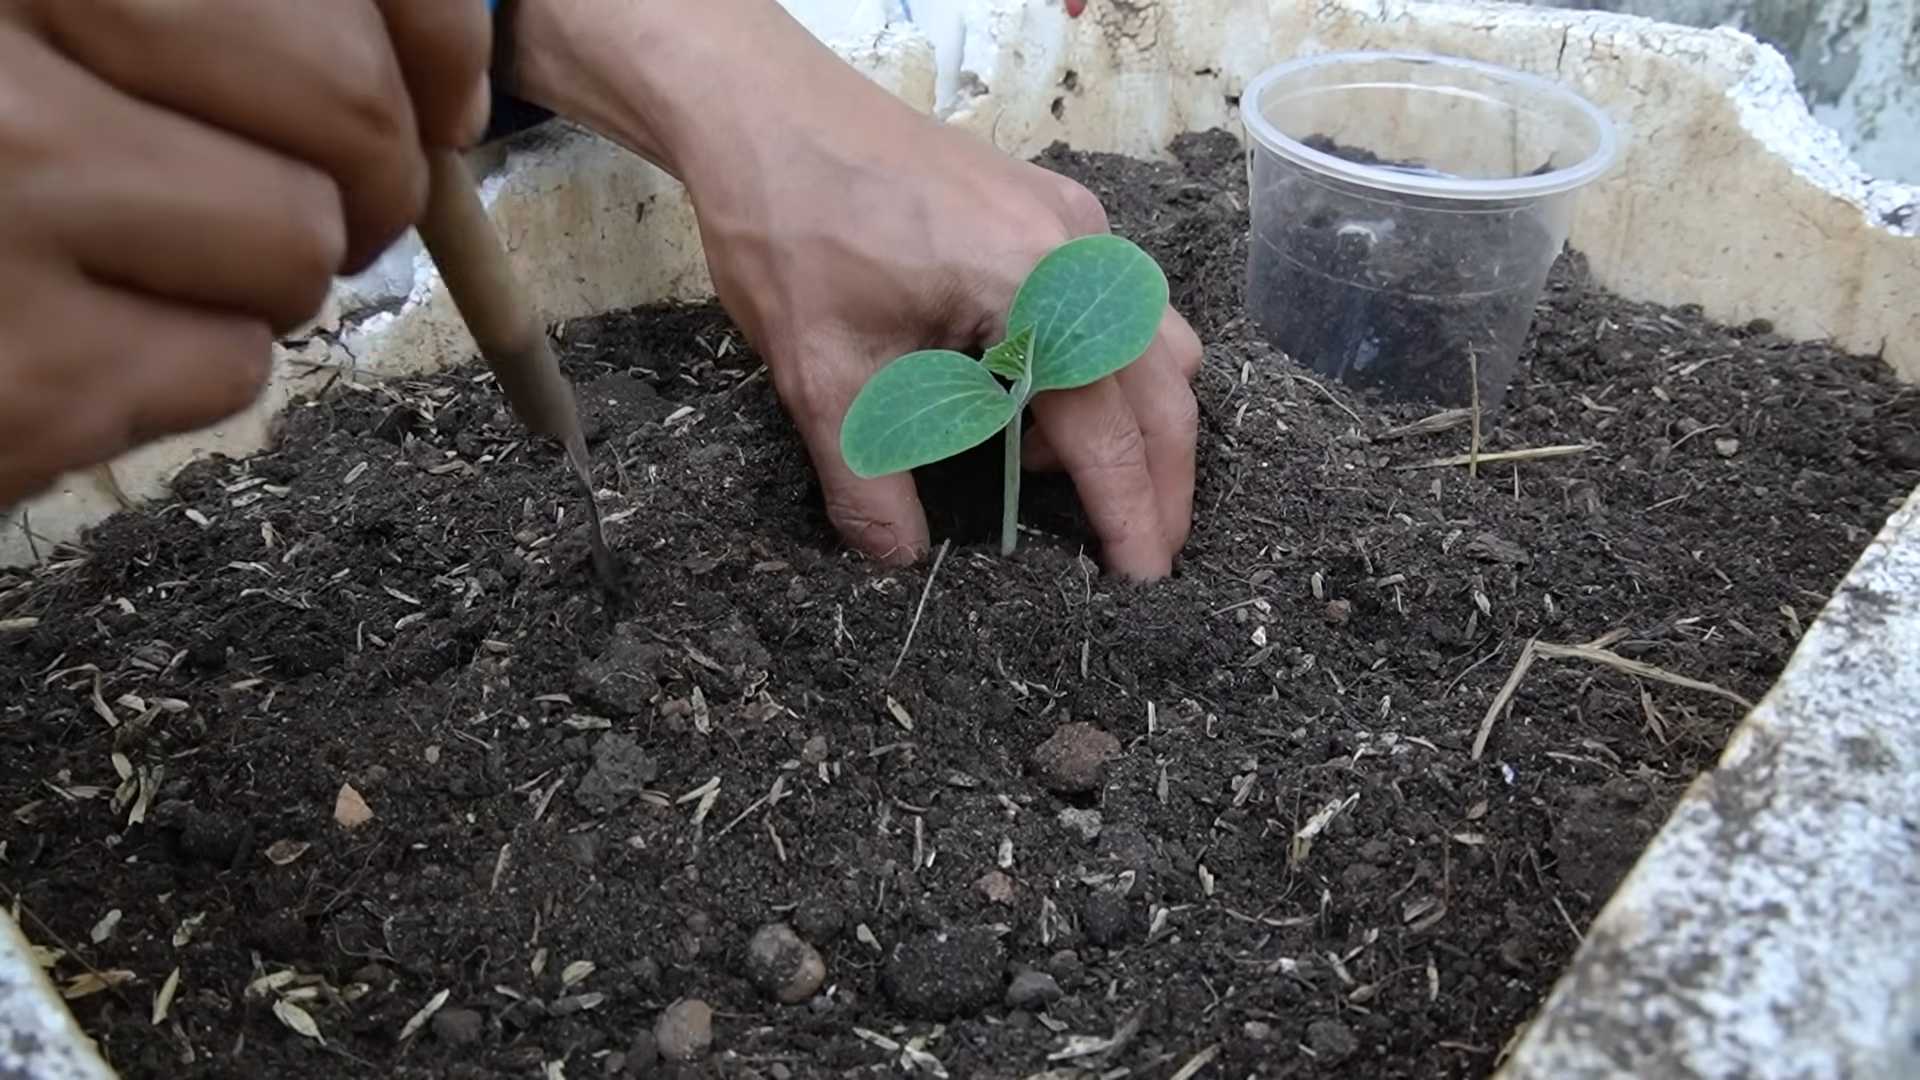
Step-by-Step: Starting Your Pumpkin Seeds Indoors
1. Soak the Seeds: Gently nick the seed with a nail file (be careful not to damage the inner seed) and soak the seeds in warm water for 2-4 hours. This helps soften the seed coat and encourages germination.
2. Prepare Seedling Pots: Fill 4-inch peat pots with a seed-starting mix. I prefer peat pots because they can be directly planted into the ground, minimizing root disturbance.
3. Plant the Seeds: Plant one seed per pot, about 1 inch deep.
4. Water Gently: Water the pots gently to moisten the soil. Avoid overwatering, which can lead to rot.
5. Provide Warmth: Place the pots on a heat mat or in a warm location. Pumpkin seeds germinate best at temperatures between 80-90°F (27-32°C).
6. Provide Light: Once the seedlings emerge (usually within 5-10 days), provide them with plenty of light. A sunny windowsill or grow lights will work.
7. Harden Off: Before transplanting the seedlings outdoors, gradually acclimate them to outdoor conditions. This process, called hardening off, involves exposing the seedlings to increasing amounts of sunlight and wind over a period of 7-10 days.
Transplanting and Vine Training
Now that your seedlings are thriving, it’s time to get them into the ground and start training those vines!
* Choose the Right Location: Pumpkins need full sun (at least 6-8 hours per day) and plenty of space. Each plant will need at least 400 square feet.
* Prepare the Planting Hole: Dig a hole that is twice as wide and as deep as the peat pot. Amend the soil in the hole with more compost and fertilizer.
* Transplant Carefully: Gently remove the seedling from the peat pot and plant it in the hole. Backfill with soil and water thoroughly.
* Vine Training: As the vines grow, train them to grow in a specific direction. I like to train them in a herringbone pattern. This helps to maximize sunlight exposure and prevent overcrowding. Remove any secondary vines that grow off the main vines. You want to focus the plant’s energy on one or two pumpkins.
* Bury Vines: Bury sections of the vines at regular intervals. This encourages the development of additional roots, which will help the plant absorb more nutrients and water.
My Secret DIY Fertilizer Recipe
Alright, here’s the good stuff! This is my secret weapon for growing giant pumpkins. It’s a combination of organic and inorganic fertilizers that provides a balanced supply of nutrients throughout the growing season.
* The Base: I start with a base of compost tea. Compost tea is a liquid fertilizer made by steeping compost in water. It’s rich in beneficial microbes and nutrients.
* Epsom Salts: Magnesium is essential for chlorophyll production and overall plant health. I add Epsom salts to the compost tea at a rate of 1 tablespoon per gallon.
* Fish Emulsion: Fish emulsion is a great source of nitrogen, which is important for vegetative growth. I add fish emulsion to the compost tea at a rate of 2 tablespoons per gallon.
* Seaweed Extract: Seaweed extract is rich in micronutrients and growth hormones. I add seaweed extract to the compost tea at a rate of 1 tablespoon per gallon.
* Bone Meal: Bone meal is a good source of phosphorus, which is important for root development and flowering. I add bone meal to the soil around the plants at a rate of 1/2 cup per plant.
* Wood Ash: Wood ash is a good source of potassium, which is important for fruit development. I add wood ash to the soil around the plants at a rate of 1/2 cup per plant. Be careful not to overdo it with wood ash, as it can raise the pH of the soil.
Step-by-Step: Making and Applying My DIY Fertilizer
1. Brew the Compost Tea: Fill a 5-gallon bucket with water and add a few handfuls of compost. Let it steep for 24-48 hours, stirring occasionally.
2. Strain the Compost Tea: Strain the compost tea through a cheesecloth or fine-mesh sieve to remove any solids.
3. Add the Amendments: Add the Epsom salts, fish emulsion, and seaweed extract to the compost tea. Stir well to combine.
4. Apply the Fertilizer: Water the plants with the fertilizer solution every 7-10 days. Be sure to water the soil thoroughly.
5. Apply Bone Meal and Wood Ash: Apply bone meal and wood ash to the soil around the plants every 2-3 weeks. Gently work it into the soil.
Pollination and Fruit Selection
Once your pumpkin plants start flowering, it’s time to think about pollination and fruit selection.
* Hand Pollination: To ensure successful pollination, I recommend hand-pollinating the female flowers. Female flowers have a small pumpkin-like structure at the base of the flower. Male flowers do not.
* Pollination Timing: Pollinate the female flowers early in the morning, when the flowers are fully open.
* Pollination Technique: Gently remove a male flower and remove the petals to expose the pollen-covered stamen. Gently rub the stamen against the stigma of the female flower.
* Fruit Selection: Once the pumpkins start to develop, select the most promising fruit and remove the others. You want to focus the plant’s energy on one or two pumpkins. Choose a pumpkin that is round, symmetrical, and free of blemishes.
Watering and Pest Control
Consistent watering and diligent pest control are essential for growing giant pumpkins.
* Watering: Pumpkins need a lot of water, especially during hot weather. Water deeply and regularly, aiming for at least 1 inch of water per week. Use a soaker hose or drip irrigation to water the plants at the base, avoiding wetting the foliage.
* Pest Control: Common pumpkin pests include squash bugs, squash vine borers, and aphids. Inspect your plants regularly for signs of pests and take action immediately. I prefer to use organic pest control methods, such as insecticidal soap, neem oil, and hand-picking pests.
* Disease Prevention: Powdery mildew is a common pumpkin disease. To prevent powdery mildew, provide good air circulation and avoid wetting the foliage. You can also spray the plants with a fungicide if necessary.
Protecting Your Giant Pumpkin
As your pumpkin grows, it will become increasingly vulnerable to damage from sun, wind, and pests.
* Sun Protection: Protect your pumpkin from sunburn by shading it with a tarp or blanket during the hottest part of the day.
* Wind Protection: Protect your pumpkin from wind damage by building a windbreak around it.
* Pest Protection: Continue to monitor your pumpkin for pests and take action as needed. You can also use netting to protect the pumpkin from pests.
* Support: As your pumpkin gets larger, it may need additional support. You can use a sling or cradle to support the pumpkin and prevent it from breaking off the vine.
Harvesting Your Giant Pumpkin
The moment you’ve been waiting for! Harvesting your giant pumpkin is a momentous occasion.
*
Conclusion
So, there you have it! This simple, yet effective DIY trick for achieving bigger pumpkin yields is more than just a gardening hack; it’s a pathway to a more bountiful and rewarding harvest. We’ve explored the science behind it, the straightforward steps involved, and the potential benefits that await you.
Why is this a must-try? Because it’s accessible, affordable, and demonstrably effective. You don’t need to be a seasoned gardener with years of experience or specialized equipment. This method utilizes readily available materials and leverages the natural growth processes of your pumpkin plants to maximize their potential. Imagine the satisfaction of showcasing pumpkins that are not only healthy and vibrant but also significantly larger than you ever thought possible. Think of the bragging rights at the local fall festival!
But beyond the sheer size, this DIY approach also contributes to the overall health and vigor of your pumpkin plants. By providing targeted nourishment and support, you’re creating an environment where they can thrive, leading to stronger stems, more robust foliage, and ultimately, more impressive fruit.
Now, let’s talk about variations. While the core technique remains the same, you can certainly adapt it to suit your specific needs and preferences. For example, instead of using a standard liquid fertilizer, you could experiment with compost tea, a nutrient-rich brew made from steeping compost in water. This is a fantastic organic option that provides a slow-release source of essential elements.
Another variation involves the type of support you provide to the developing pumpkins. While we’ve suggested using slings or netting, you could also consider building small platforms or cradles out of wood or other sturdy materials. This can be particularly helpful for larger pumpkins that require extra support.
Furthermore, consider the timing of your interventions. While the general guidelines we’ve provided are a good starting point, you may need to adjust them based on your local climate and growing conditions. Pay close attention to your plants and be responsive to their needs. If you notice signs of nutrient deficiencies, such as yellowing leaves, you may need to increase the frequency of your fertilizing applications.
Ultimately, the key to success with this DIY trick is experimentation and observation. Don’t be afraid to try different approaches and see what works best for you. Keep detailed records of your efforts, noting the types of fertilizers you use, the timing of your applications, and the overall growth of your pumpkins. This will allow you to fine-tune your technique over time and achieve even better results in the future.
We are incredibly excited for you to try this DIY trick and witness the remarkable difference it can make in your pumpkin patch. We are confident that you will be amazed by the size and quality of your harvest.
So, grab your supplies, head out to your garden, and get ready to grow some truly impressive pumpkins! And most importantly, don’t forget to share your experiences with us. We would love to hear about your successes, your challenges, and any variations you’ve tried. Post pictures of your giant pumpkins on social media using [Your Hashtag Here] and tag us [Your Social Media Handle Here]. Let’s create a community of pumpkin-growing enthusiasts and share our knowledge and passion with the world! Happy growing!
Frequently Asked Questions (FAQ)
What exactly does this DIY trick do to increase pumpkin size?
This DIY trick focuses on two key aspects of pumpkin growth: targeted nutrient delivery and structural support. By directly feeding the developing pumpkin with a diluted fertilizer solution, you’re ensuring that it receives a concentrated dose of essential nutrients precisely when it needs them most. This bypasses the plant’s natural distribution system, which can sometimes be inefficient, especially when the plant is supporting multiple fruits. The structural support, provided by slings or netting, prevents the pumpkin from detaching from the vine due to its increasing weight. This allows the pumpkin to continue growing to its full potential without the risk of premature separation. Essentially, you are optimizing the pumpkin’s access to resources and preventing physical limitations to its growth.
How often should I fertilize the pumpkins directly?
The frequency of fertilization depends on several factors, including the type of fertilizer you’re using, the size of the pumpkin, and the overall health of the plant. As a general guideline, we recommend fertilizing every 7-10 days, starting when the pumpkin is about the size of a softball. However, it’s crucial to monitor your plants closely and adjust the frequency as needed. If you notice signs of nutrient deficiencies, such as yellowing leaves or stunted growth, you may need to fertilize more frequently. Conversely, if you see signs of over-fertilization, such as burnt leaf tips, you should reduce the frequency or dilute the fertilizer further. Remember, observation is key!
What kind of fertilizer is best for this DIY trick?
A balanced liquid fertilizer with an NPK ratio (Nitrogen, Phosphorus, Potassium) of around 10-10-10 or 20-20-20 is generally a good choice. However, you can also use a fertilizer specifically formulated for pumpkins or other fruiting vegetables. Look for a fertilizer that contains micronutrients, such as iron, zinc, and manganese, as these are also essential for healthy growth. Organic options, such as compost tea or fish emulsion, can also be used, but they may require more frequent applications due to their lower nutrient concentrations. Always dilute the fertilizer according to the manufacturer’s instructions to avoid burning the pumpkin.
What if I don’t have netting or slings? What else can I use for support?
If you don’t have netting or slings readily available, there are several alternative options you can use to support your growing pumpkins. Old pantyhose or t-shirts can be repurposed into makeshift slings. You can also create small platforms or cradles out of wood, cardboard, or even sturdy plastic containers. The key is to provide a stable and comfortable support that will prevent the pumpkin from detaching from the vine. Make sure the support is strong enough to handle the weight of the pumpkin as it grows.
Can I use this trick on all types of pumpkins?
Yes, this DIY trick can be used on most types of pumpkins, including giant pumpkins, carving pumpkins, and pie pumpkins. However, the results may vary depending on the specific variety and its genetic potential. Giant pumpkin varieties, such as Atlantic Giant, are naturally predisposed to grow larger than other types, so you’re likely to see more dramatic results with them. However, even smaller pumpkin varieties can benefit from this technique, resulting in larger and healthier fruits.
Is this trick safe for the environment?
When used responsibly, this DIY trick is generally safe for the environment. However, it’s important to use fertilizers judiciously and avoid over-fertilization, which can lead to nutrient runoff and water pollution. Opting for organic fertilizers, such as compost tea, is a more environmentally friendly option. Additionally, be mindful of the materials you use for support. Choose biodegradable or reusable materials whenever possible to minimize waste.
My pumpkin is already quite large. Is it too late to start this trick?
It’s never too late to start providing support to your pumpkin. Even if it’s already quite large, adding a sling or platform can help prevent it from detaching from the vine due to its weight. However, the earlier you start fertilizing directly, the more significant the impact on its overall size. If your pumpkin is already nearing its mature size, the benefits of fertilization may be less pronounced, but it can still help improve its overall health and vigor.
Will this trick guarantee me a giant pumpkin?
While this DIY trick can significantly increase the size of your pumpkins, it’s not a guarantee of a giant pumpkin. Several other factors also play a role, including genetics, soil quality, sunlight, and overall plant health. This trick is best viewed as a way to optimize the growing conditions and maximize the pumpkin’s potential, but it’s not a substitute for good gardening practices.
What are the signs of over-fertilization?
Signs of over-fertilization in pumpkins include burnt leaf tips, yellowing between the veins of the leaves, and stunted growth. In severe cases, over-fertilization can even kill the plant. If you notice any of these symptoms, reduce the frequency of your fertilizing applications or dilute the fertilizer further.
How do I know when my pumpkin is ripe and ready to harvest?
A ripe pumpkin will have a deep, solid color and a hard rind that is resistant to scratching. The stem will also be dry and hardened. When you tap on the pumpkin, it should sound hollow. Avoid harvesting pumpkins that have soft spots or blemishes, as these are more susceptible to rot.
Leave a Comment