
Sparkling faucets are the unsung heroes of a clean and inviting home. Let’s be honest, though, keeping them gleaming can feel like a never-ending battle against water spots and grime. But what if I told you the secret to effortlessly brilliant faucets was already sitting in your bathroom cabinet?
For generations, resourceful homemakers have passed down clever cleaning hacks, often relying on simple, readily available ingredients. While the exact origins of using toothpaste for cleaning are a bit hazy, the principle is rooted in the understanding of mild abrasives and their ability to lift away stubborn dirt. Think of it as a time-tested tradition, now revitalized for the modern home!
Why is this sparkling faucets toothpaste hack so essential? Because nobody wants to spend hours scrubbing! We all crave quick, effective solutions that free up our time for the things we truly enjoy. Plus, harsh chemical cleaners can be expensive and potentially harmful to both our health and the environment. This DIY trick offers a budget-friendly, eco-conscious alternative that delivers stunning results. Get ready to ditch the elbow grease and embrace the power of toothpaste for faucets that shine like new!

DIY Sparkling Faucets with a Toothpaste Hack
Hey everyone! Are your faucets looking a little dull and grimy? Mine definitely were! I was about to reach for some harsh chemicals when I remembered a little trick I learned from my grandma: toothpaste! Yes, you read that right. Toothpaste isn’t just for your teeth; it’s a surprisingly effective and gentle cleaning agent for chrome and other metal surfaces. This hack is super easy, budget-friendly, and leaves your faucets sparkling like new. Let’s get started!
What You’ll Need
Before we dive in, let’s gather our supplies. The best part is, you probably already have most of these things lying around the house!
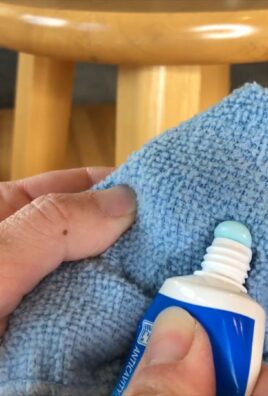
* Toothpaste: Plain white toothpaste works best. Avoid gel toothpastes or those with abrasive whitening agents, as they can potentially scratch delicate surfaces. I usually use a basic fluoride toothpaste.
* Soft Cloth or Sponge: Microfiber cloths are my go-to for cleaning because they’re gentle and absorbent. A soft sponge will also work well.
* Old Toothbrush (Optional): This is perfect for getting into those hard-to-reach areas around the base of the faucet and handles.
* Water: For rinsing, of course!
* Dry Cloth: For buffing and drying the faucet after cleaning.
* Vinegar (Optional, for stubborn stains): If you have hard water stains or stubborn grime, a little vinegar can help.
Step-by-Step Instructions: The Toothpaste Cleaning Process
Okay, let’s get those faucets sparkling! Here’s how I do it:
1. Prepare the Faucet: Before you start slathering on the toothpaste, give your faucet a quick rinse with water. This will remove any loose dirt or debris and help the toothpaste adhere better.
2. Apply the Toothpaste: Squeeze a small amount of toothpaste (about the size of a pea) onto your damp cloth or sponge. You don’t need a lot; a little goes a long way!
3. Clean the Faucet: Gently rub the toothpaste onto the faucet surface in a circular motion. Make sure to cover all areas, including the spout, handles, and base. If you’re using an old toothbrush, use it to scrub around the edges and in any crevices where grime tends to accumulate.
4. Let it Sit (Optional): For extra cleaning power, especially if you have stubborn stains, let the toothpaste sit on the faucet for a few minutes (around 5-10 minutes should do the trick). This allows the toothpaste to break down the dirt and grime.
5. Rinse Thoroughly: Rinse the faucet thoroughly with water to remove all traces of toothpaste. Make sure you get into all the nooks and crannies. I usually run the water for a minute or two to ensure everything is completely clean.
6. Dry and Buff: Use a clean, dry cloth to dry the faucet completely. As you dry it, buff the surface to bring out the shine. This step is crucial for achieving that sparkling finish!
Dealing with Stubborn Stains: Vinegar Power!
Sometimes, toothpaste alone isn’t enough to tackle those really tough stains, especially hard water deposits. That’s where vinegar comes in! Here’s how I use it:
1. Vinegar Soak: Soak a cloth or paper towel in white vinegar.
2. Apply to Stains: Place the vinegar-soaked cloth or paper towel directly onto the stubborn stain.
3. Let it Sit: Let the vinegar sit on the stain for about 15-20 minutes. This will help to dissolve the mineral deposits.
4. Scrub Gently: After soaking, use a soft cloth or sponge to gently scrub the stain. You can also use an old toothbrush for those hard-to-reach areas.
5. Rinse and Dry: Rinse the faucet thoroughly with water to remove all traces of vinegar. Then, dry and buff the faucet with a clean, dry cloth.
Tips and Tricks for Sparkling Faucets
Here are a few extra tips and tricks I’ve learned along the way to keep your faucets looking their best:
* Regular Cleaning: The key to maintaining sparkling faucets is regular cleaning. I try to wipe down my faucets with a damp cloth every few days to prevent grime from building up.
* Avoid Abrasive Cleaners: Harsh chemicals and abrasive cleaners can damage the finish of your faucets. Stick to gentle cleaning agents like toothpaste and vinegar.
* Test in an Inconspicuous Area: Before applying toothpaste or vinegar to the entire faucet, test it in a small, inconspicuous area to make sure it doesn’t damage the finish.
* Use Distilled Water: If you have hard water, consider using distilled water for rinsing your faucets. This will help prevent water spots.
* Lemon Juice Alternative: If you don’t have vinegar on hand, lemon juice can also be used to remove hard water stains. It works in a similar way to vinegar.
* Baking Soda Paste: For extra stubborn stains, you can make a paste of baking soda and water. Apply the paste to the stain, let it sit for a few minutes, and then scrub gently.
* Don’t Forget the Aerator: The aerator (the little screen at the end of the faucet) can also accumulate mineral deposits and debris. Unscrew the aerator and soak it in vinegar to clean it.
* Protect Your Faucets: Consider applying a sealant or wax to your faucets to protect them from water spots and stains. This will also make them easier to clean in the future.
* Dry After Each Use: Wiping down your faucets with a dry cloth after each use can help prevent water spots and keep them looking shiny.
* Be Gentle: Avoid using excessive force when scrubbing your faucets. Gentle pressure is usually all you need to remove dirt and grime.
Why This Hack Works
You might be wondering, “Why does toothpaste work so well on faucets?” Well, toothpaste contains mild abrasives that help to remove dirt, grime, and stains without scratching the surface. It also contains detergents that help to break down grease and oil. Plus, the fluoride in toothpaste can help to protect the metal from corrosion.
Vinegar, on the other hand, is a natural acid that dissolves mineral deposits like calcium and lime. This makes it an effective cleaner for hard water stains.
Safety First!
While this hack is generally safe, it’s always a good idea to take a few precautions:
* Wear Gloves: If you have sensitive skin, wear gloves to protect your hands from the toothpaste and vinegar.
* Avoid Contact with Eyes: Avoid getting toothpaste or vinegar in your eyes. If contact occurs, rinse thoroughly with water.
* Ventilation: When using vinegar, make sure the area is well-ventilated.
* Keep Out of Reach of Children: Keep toothpaste and vinegar out of reach of children.
Enjoy Your Sparkling Faucets!
And there you have it! With just a few simple ingredients and a little elbow grease, you can transform your dull, grimy faucets into sparkling beauties. I hope you found this DIY hack helpful. Happy cleaning!

Conclusion
So, there you have it! Achieving sparkling faucets doesn’t require harsh chemicals or expensive cleaning products. This simple toothpaste hack is a game-changer for anyone looking to maintain a gleaming bathroom or kitchen without breaking the bank or exposing themselves to potentially harmful substances. The beauty of this method lies in its simplicity and accessibility – you likely already have everything you need right under your sink!
But the benefits extend beyond just cost-effectiveness. Think about the environmental impact. By reducing your reliance on commercial cleaners, you’re contributing to a more sustainable lifestyle. Plus, the gentle abrasives in toothpaste are less likely to damage the finish of your faucets compared to some aggressive cleaning agents.
Don’t be afraid to experiment! While regular toothpaste works wonders, consider using whitening toothpaste for an extra boost of shine. For particularly stubborn stains or hard water buildup, let the toothpaste sit on the faucet for a longer period – perhaps 15-20 minutes – before scrubbing. You can also use an old toothbrush to get into those hard-to-reach crevices around the base of the faucet and the handles. Another variation is to mix a small amount of baking soda with the toothpaste for added cleaning power. Just be sure to test this mixture on an inconspicuous area first to ensure it doesn’t scratch the finish.
This isn’t just about cleaning; it’s about reclaiming your time and simplifying your routine. Imagine the satisfaction of knowing you can achieve professional-level results with a product you already trust. It’s a small change that can make a big difference in the overall appearance of your home.
We wholeheartedly encourage you to give this toothpaste hack a try. It’s quick, easy, and incredibly effective. Once you experience the difference, you’ll wonder why you haven’t been doing this all along!
And most importantly, we want to hear about your experience! Did this trick work for you? Did you try any variations? Share your tips, tricks, and before-and-after photos in the comments below. Let’s build a community of sparkling faucet enthusiasts and help each other achieve a cleaner, brighter home, one faucet at a time. Your feedback is invaluable and will help others discover the magic of this simple yet powerful cleaning solution. Let us know if you have any questions, and happy cleaning!
Frequently Asked Questions (FAQs)
1. What kind of toothpaste works best for cleaning faucets?
Generally, any standard toothpaste will work effectively for cleaning faucets. However, whitening toothpaste can provide an extra boost of shine due to the added polishing agents. Gel toothpastes may not be as effective as paste-based toothpastes because they often lack the same level of abrasiveness needed to remove grime and water spots. Avoid using heavily abrasive toothpastes designed for deep cleaning, as they could potentially scratch delicate faucet finishes. Experiment to see what works best for your specific faucets and the type of buildup you’re dealing with.
2. Will toothpaste scratch my faucet’s finish?
While toothpaste is generally gentle, it’s always a good idea to test it on an inconspicuous area of your faucet first, especially if you have a delicate or antique finish. Most modern faucet finishes are quite durable and can withstand the mild abrasives in toothpaste. However, if you’re concerned, use a soft cloth or sponge instead of a scrub brush, and avoid applying excessive pressure. If you have a particularly sensitive finish, consider diluting the toothpaste with a little water before applying it.
3. How often should I clean my faucets with toothpaste?
The frequency of cleaning depends on how often you use your faucets and the hardness of your water. If you live in an area with hard water, you may need to clean your faucets more frequently to prevent mineral buildup. A good rule of thumb is to clean your faucets with toothpaste once a week to maintain their shine and prevent the accumulation of grime. For faucets that are used less frequently, you can clean them every two weeks or as needed.
4. Can I use this toothpaste hack on other bathroom or kitchen fixtures?
Yes, absolutely! This toothpaste hack is not limited to faucets. You can use it to clean other bathroom and kitchen fixtures, such as showerheads, sink basins, and even stainless steel appliances. The gentle abrasives in toothpaste can help remove soap scum, water spots, and other types of buildup from these surfaces. Just be sure to test it on an inconspicuous area first, especially if you’re cleaning a delicate or antique fixture.
5. What if I have stubborn stains or hard water buildup that toothpaste alone can’t remove?
For particularly stubborn stains or hard water buildup, you can try a few different approaches. First, let the toothpaste sit on the affected area for a longer period – perhaps 15-20 minutes – before scrubbing. You can also try mixing a small amount of baking soda with the toothpaste for added cleaning power. Another option is to pre-treat the area with a solution of equal parts white vinegar and water. Let the vinegar solution sit for a few minutes before applying the toothpaste. Remember to rinse thoroughly after cleaning.
6. Is this toothpaste cleaning method safe for all types of faucets?
This method is generally safe for most common faucet types, including chrome, stainless steel, and brushed nickel. However, it’s always best to exercise caution and test the toothpaste on an inconspicuous area first, especially if you have a faucet with a specialty finish, such as oil-rubbed bronze or antique brass. These finishes can be more delicate and may be susceptible to scratching. If you’re unsure, consult the manufacturer’s instructions for cleaning your specific faucet.
7. What are some other natural alternatives to cleaning faucets?
If you prefer to avoid using toothpaste altogether, there are several other natural alternatives you can try. White vinegar is a great all-purpose cleaner that can effectively remove hard water stains and soap scum. Lemon juice is another natural option that can help brighten and disinfect your faucets. You can also try using a paste made from baking soda and water. These natural alternatives are gentle, effective, and environmentally friendly.
8. How can I prevent water spots and buildup on my faucets in the future?
Prevention is key to keeping your faucets sparkling clean. After each use, wipe down your faucets with a dry cloth to remove any water droplets. This will help prevent water spots and mineral buildup. You can also apply a thin layer of car wax or furniture polish to your faucets to create a protective barrier that repels water and dirt. Consider installing a water softener if you live in an area with hard water.
9. Can I use a magic eraser instead of toothpaste?
Magic erasers can be effective for cleaning faucets, but they are more abrasive than toothpaste. While they can remove stubborn stains, they can also potentially scratch the finish of your faucets if used too aggressively. If you choose to use a magic eraser, be sure to wet it thoroughly and use gentle pressure. Test it on an inconspicuous area first to ensure it doesn’t damage the finish. Toothpaste is generally a gentler and safer option for regular cleaning.
10. What if my faucets are severely corroded? Will toothpaste still work?
If your faucets are severely corroded, toothpaste may not be sufficient to remove the corrosion. In this case, you may need to use a specialized rust remover or corrosion cleaner. Follow the manufacturer’s instructions carefully and wear gloves and eye protection. For heavily corroded faucets, it may be necessary to replace them altogether. Regular cleaning with toothpaste can help prevent corrosion from developing in the first place.

Leave a Comment