
Bag Tying Time Saver: Are you tired of wrestling with flimsy plastic bags in your garden, struggling to tie them securely around your precious plants? I know I was! There’s nothing more frustrating than spending precious gardening time battling unruly bags when you could be nurturing your green babies. For generations, gardeners have relied on various methods to protect their plants, from makeshift cloches to elaborate netting systems. But let’s be honest, sometimes the simplest solutions are the best.
This DIY trick isn’t just about convenience; it’s about reclaiming your time and energy. Think of all those minutes wasted fumbling with knots that come undone, or worse, bags that tear open, leaving your plants exposed. With this Bag Tying Time Saver hack, you’ll be able to quickly and efficiently secure bags around your plants, protecting them from pests, frost, or even excessive sunlight. I’m going to show you a simple, yet effective method that will revolutionize the way you use bags in your garden. Get ready to say goodbye to frustrating bag battles and hello to a more enjoyable and productive gardening experience!
Bag Tying Time Saver: The Ultimate DIY Hack
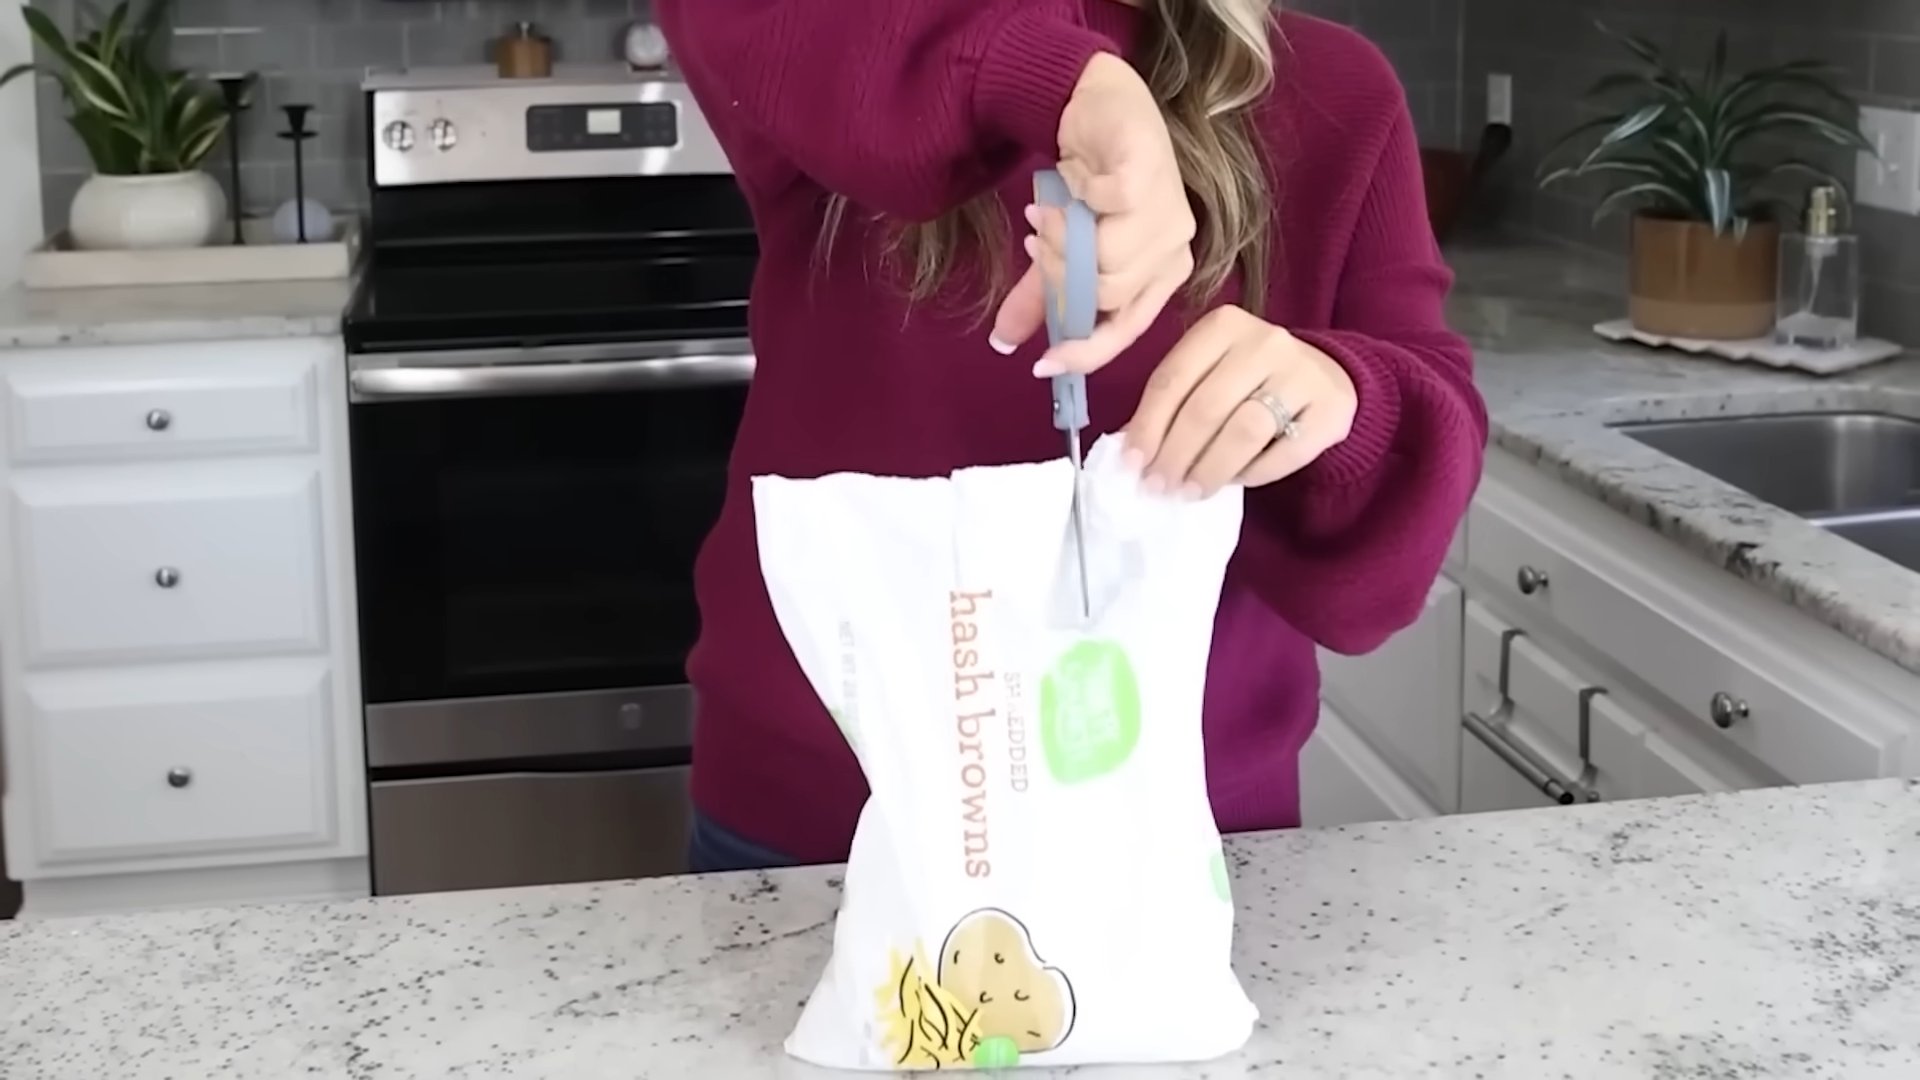
Okay, let’s be honest, who *doesn’t* struggle with those pesky produce bags at the grocery store? Fumbling with the thin plastic, trying to create a knot that actually holds, it’s a universal frustration. Well, fret no more! I’ve got a super simple, incredibly effective DIY hack that will transform your bag-tying experience. This little gadget is easy to make, uses readily available materials, and will save you precious seconds (and sanity!) every time you shop.
What You’ll Need
Before we dive in, let’s gather our supplies. The beauty of this project is that you probably already have most of these lying around the house.
* **A sturdy plastic bottle cap:** Think soda bottle, water bottle, juice bottle – anything that’s relatively rigid and has a decent lip. The size isn’t super critical, but something around 1-1.5 inches in diameter works best.
* **A utility knife or sharp craft knife:** Safety first! Be extremely careful when using a knife. A sharp blade is actually safer than a dull one, as it requires less force.
* **Sandpaper (optional):** If you want to smooth out any rough edges after cutting, sandpaper is your friend. A medium grit (around 120-150) should do the trick.
* **A marker or pen:** For marking our cutting lines.
* **A drill (optional):** If you find the knife method too difficult, a drill with a small drill bit can be used to start the initial cut.
* **Safety glasses:** Always protect your eyes when working with tools!
The Core Concept: How It Works
The idea behind this hack is to create a small, slotted device that acts as a lever and anchor for the bag. You simply thread the bag through the slot, wrap it around the cap, and tuck the end back through the slot. The tension created by the wrap and the slot keeps the bag securely closed. It’s surprisingly effective!
Step-by-Step Instructions: Crafting Your Bag-Tying Tool
Alright, let’s get down to business! Follow these steps carefully, and you’ll have your own bag-tying time saver in no time.
1. **Prepare the Bottle Cap:** Start by thoroughly cleaning the bottle cap. Remove any labels or residue. Make sure it’s completely dry before proceeding.
2. **Mark the Cutting Lines:** This is where precision is key. We need to create a slot that’s wide enough to easily thread the bag through but narrow enough to provide sufficient grip.
* Using your marker, draw a line across the *top* of the bottle cap, roughly halfway between the center and the edge. This line should be about 1/4 to 1/3 of the diameter of the cap. Don’t make it too long!
* Now, draw a second line parallel to the first, about 1/8 inch away. This will define the width of our slot.
* You should now have two parallel lines on the top of the cap, indicating where you’ll be cutting.
3. **Cut the Slot:** This is the trickiest part, so take your time and be extra cautious.
* **Using the Knife:** Carefully score along one of the marked lines with your utility knife. Apply gentle pressure and repeat the scoring motion several times until you’ve created a shallow groove.
* Gradually deepen the groove, working your way along the line. Be patient and avoid applying too much force at once. You want to cut through the plastic cleanly, not crack or shatter it.
* Repeat the process for the second marked line.
* Once you’ve cut along both lines, carefully remove the plastic between them. You might need to use the tip of the knife to pry it out.
* **Using a Drill (Alternative):** If you’re finding the knife method difficult, you can use a drill to start the cut. Drill a small hole at each end of the marked lines.
* Then, use the knife to connect the holes and create the slot. This method can be easier for some people, but still requires caution.
4. **Smooth the Edges (Optional):** After cutting the slot, the edges might be a bit rough. This is where the sandpaper comes in handy.
* Fold a small piece of sandpaper and gently sand along the edges of the slot to smooth them out. This will prevent the bag from tearing or snagging when you use the tool.
* Be careful not to over-sand, as you don’t want to widen the slot too much.
5. **Test and Refine:** Now it’s time to test your creation! Grab a plastic bag and try tying it using your new tool.
* Thread the open end of the bag through the slot.
* Wrap the bag around the bottle cap.
* Tuck the end of the bag back through the slot.
* Pull the bag tight to secure the knot.
* If the bag slips or the knot doesn’t hold, you might need to refine the slot. You can try slightly widening it or smoothing the edges further.
Using Your Bag-Tying Time Saver: A Quick Guide
Now that you’ve crafted your amazing bag-tying tool, let’s go over how to use it effectively. It’s super simple, but a little practice makes perfect.
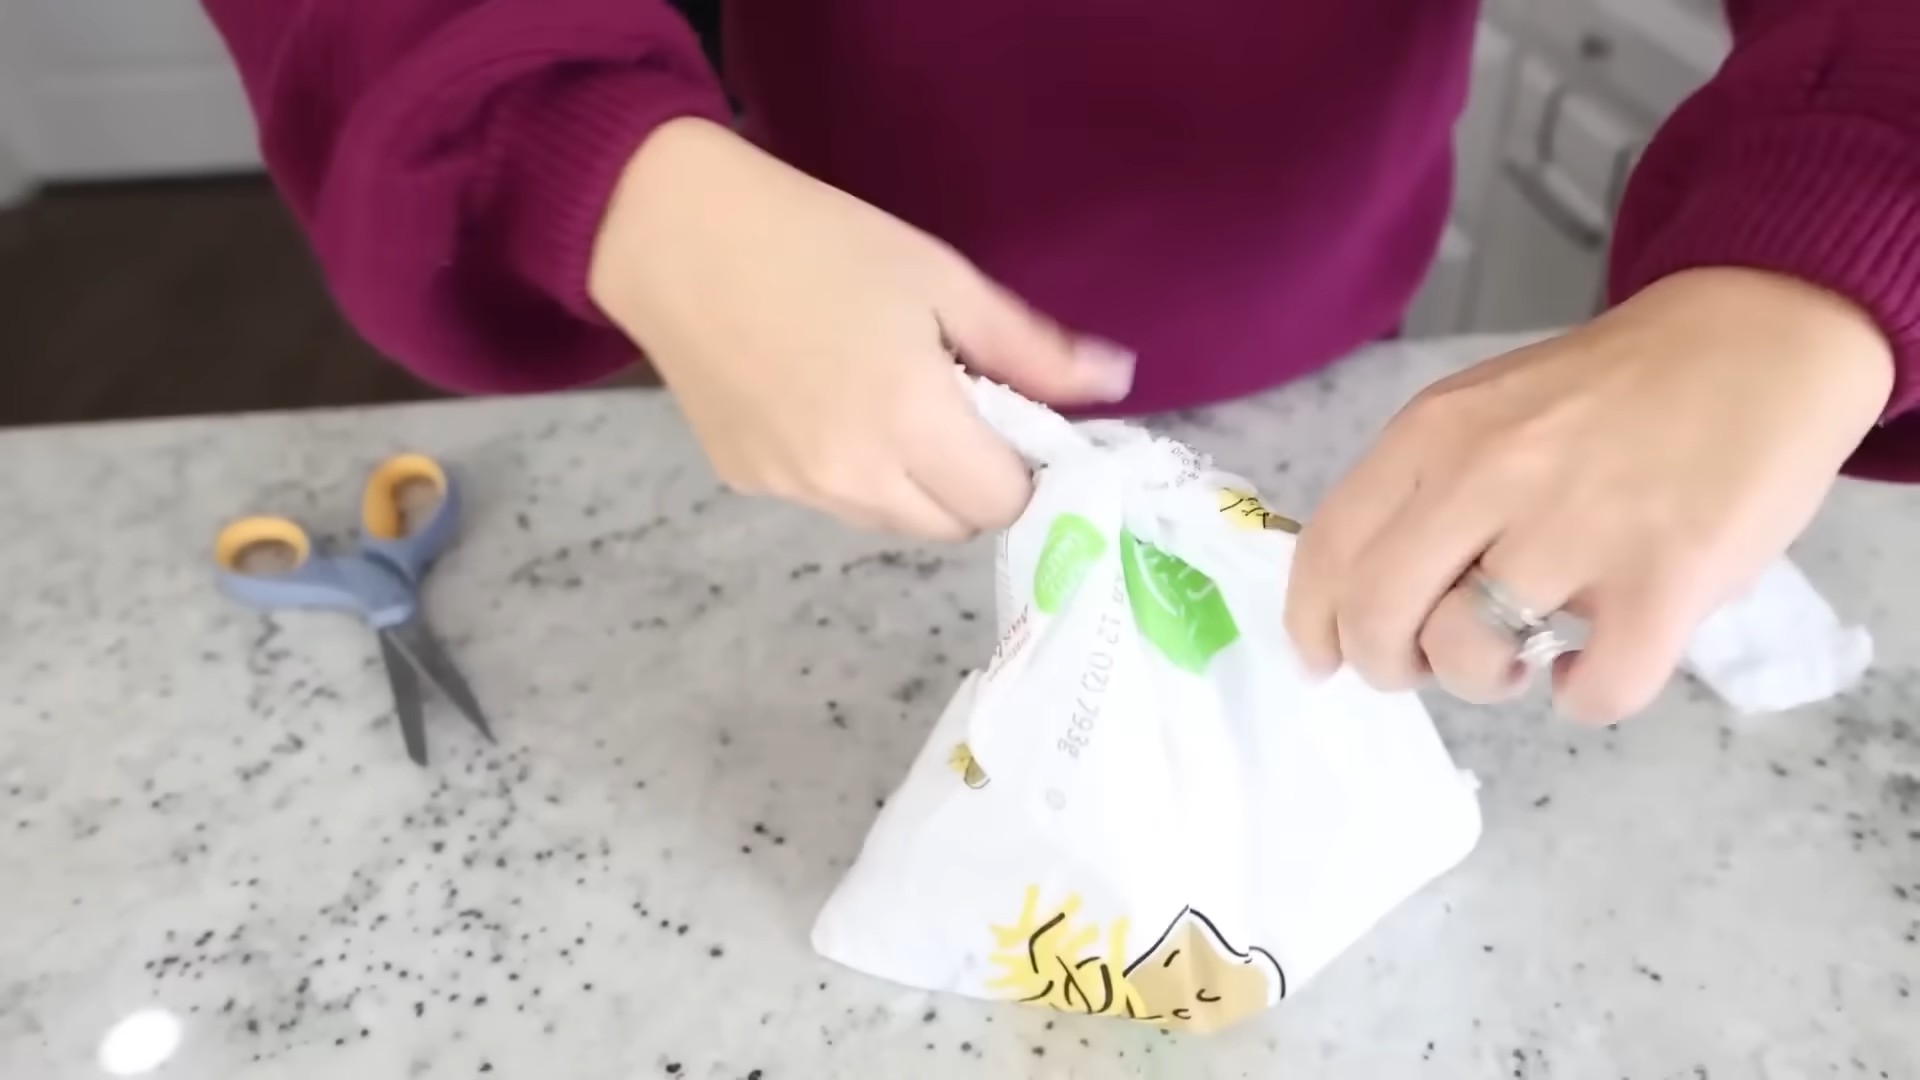
1. **Gather the Bag:** Hold the open end of the bag together, ready to be tied.
2. **Thread Through the Slot:** Insert the gathered end of the bag through the slot in your bottle cap tool. Pull enough of the bag through so you have a good length to work with.
3. **Wrap Around the Cap:** Wrap the bag around the outside of the bottle cap, pulling it snugly. The number of wraps depends on the bag’s thickness and how secure you want the tie to be. Usually, one or two wraps are sufficient.
4. **Tuck Back Through the Slot:** This is the key to the whole operation. Take the end of the bag you’ve wrapped around the cap and tuck it back through the slot, on the same side you initially threaded it through.
5. **Tighten and Secure:** Pull the end of the bag firmly to tighten the knot. The tension created by the wrap and the slot will hold the bag securely closed.
6. **Trim Excess (Optional):** If you have a lot of excess bag material hanging out, you can trim it with scissors. However, leaving a little extra can be helpful for re-opening the bag later.
Troubleshooting Tips
Even with the best instructions, sometimes things don’t go exactly as planned. Here are a few common issues and how to fix them:
* **Bag Slips Out:** If the bag keeps slipping out of the slot, the slot might be too wide. Unfortunately, there’s not much you can do to narrow it once it’s cut. You might need to start with a new bottle cap and be more careful when cutting the slot. Alternatively, try wrapping the bag around the cap more times to increase the friction.
* **Bag Tears:** If the bag is tearing when you try to tighten the knot, the edges of the slot might be too sharp. Use sandpaper to smooth them out further. Also, be careful not to pull too hard on the bag.
* **Difficulty Threading:** If you’re having trouble threading the bag through the slot, make sure the slot is wide enough and that the edges are smooth. You can also try slightly wetting the bag to make it more pliable.
* **Knot Doesn’t Hold:** Ensure you are wrapping the bag tightly around the cap before tucking it back through the slot. The tension is what keeps the knot secure.
Beyond Produce Bags: Other Uses
While this hack is primarily designed for produce bags, its usefulness extends beyond the grocery store. Here are a few other ways you can use your bag-tying tool:
* **Sandwich Bags:** Keep your sandwiches fresh and secure in your lunch bag.
* **Snack Bags:** Perfect for sealing up chips, pretzels, or other snacks.
* **Freezer Bags:** Help prevent freezer burn by creating a tight seal on freezer bags.
* **Garbage Bags:** While not ideal for heavy-duty garbage bags, it can be useful for smaller trash bags in bathrooms or offices.
* **Travel:** Use it to secure small bags of toiletries or other items in your suitcase.
Final Thoughts and Customization
This DIY bag-tying time saver is a simple yet incredibly practical hack that can make your life a little bit easier. It’s a great way to reduce frustration and save time, especially when you’re juggling multiple bags at the grocery store.
Feel free to customize your tool to your liking. You can paint the bottle cap, add a keychain loop, or even glue on some decorative elements. The possibilities are endless!
And remember, safety first! Always be careful when using knives or other sharp tools.
Happy crafting, and happy bag-tying! I hope this little gadget brings you as
Conclusion
So, there you have it! This simple yet ingenious bag tying time saver is more than just a clever trick; it’s a game-changer for anyone who regularly deals with plastic bags, whether in the kitchen, garden, or garage. Think about all those half-eaten bags of chips, the overflowing trash bags, or the neatly organized craft supplies – all now secured with a quick, efficient, and surprisingly satisfying knot.
Why is this a must-try? Because it addresses a common frustration: the fumbling, the struggling, and the often-uneven results of traditional bag tying methods. This method is faster, more secure, and, let’s be honest, a little bit addictive once you get the hang of it. It’s a small change that can make a surprisingly big difference in your daily routine.
But don’t just take our word for it! We encourage you to experiment and adapt this technique to your specific needs. For example, if you’re dealing with particularly thick or slippery bags, you might want to try creating a slightly larger loop before pulling the end through. Or, if you’re using this method for food storage, consider adding a label with the date to the tied bag for easy identification. You can even color-code your bags using different colored twist ties or markers on the bag itself.
The beauty of this bag tying time saver lies in its simplicity and adaptability. It’s a skill that anyone can learn and master, and it’s guaranteed to save you time and frustration in the long run. So, ditch the complicated knots and embrace this easy and effective solution.
We’re confident that once you try this method, you’ll wonder how you ever lived without it. It’s a small investment of time that yields significant returns in terms of convenience and efficiency. And who doesn’t want a little more of that in their lives?
Now, it’s your turn! Give this bag tying time saver a try and let us know what you think. Share your experiences, your variations, and your success stories in the comments below. We’re eager to hear how this simple trick has helped you streamline your daily tasks and conquer the dreaded bag-tying struggle. Happy tying!
Frequently Asked Questions (FAQs)
Q: What types of bags does this bag tying time saver work best on?
A: This technique works well on a wide variety of plastic bags, including grocery bags, trash bags, sandwich bags, and even some thicker storage bags. The key is to ensure the bag material is flexible enough to form a loop and pull through itself without tearing. Thinner bags, like produce bags, might require a gentler touch to avoid ripping. Experiment with different bag types to find what works best for you.
Q: Is this method more secure than a regular knot?
A: In many cases, yes! The loop-and-pull method creates a tighter and more secure knot than a simple overhand knot, especially when dealing with slippery plastic. The tension created by pulling the end through the loop helps to lock the knot in place, preventing it from easily loosening or unraveling. However, the security also depends on the bag material and the amount of tension applied when tying.
Q: Can I use this method for bags that need to be easily reopened?
A: Absolutely! While the knot is secure, it’s also relatively easy to untie. Simply locate the end of the bag that was pulled through the loop and gently pull it in the opposite direction. The knot should loosen quickly, allowing you to access the contents of the bag. This makes it ideal for bags that you need to open and close frequently, such as snack bags or bags containing craft supplies.
Q: What if the bag is too full to tie easily?
A: If the bag is overflowing, try compressing the contents slightly before attempting to tie it. You can also try twisting the top of the bag tightly to reduce the volume and create a more manageable “neck” to tie. For very full bags, you might need to use a larger bag or divide the contents into multiple bags.
Q: Does this method work on biodegradable or compostable bags?
A: This depends on the specific material of the biodegradable or compostable bag. Some of these bags are more delicate than traditional plastic bags and may tear more easily. It’s best to test the technique on a small, inconspicuous area of the bag first to ensure it can withstand the tension of the knot. If the bag seems too fragile, consider using a different tying method or opting for reusable containers instead.
Q: Can I use this method with twist ties or rubber bands?
A: While the primary focus is on tying the bag itself, you can certainly incorporate twist ties or rubber bands for added security or to create a more decorative closure. For example, you could tie the bag using the loop-and-pull method and then add a twist tie around the knot for extra reinforcement. Or, you could use a colorful rubber band to create a more visually appealing closure, especially for gift bags or party favors.
Q: Is there a video tutorial available for this bag tying time saver?
A: While we don’t have a video tutorial embedded here, a quick search on YouTube or other video platforms for “easy bag tying method” or “plastic bag knot trick” will likely yield numerous helpful videos demonstrating the technique. Visual learners often find video tutorials to be particularly helpful in mastering new skills.
Q: What are some other uses for this bag tying technique besides kitchen and household applications?
A: This technique can be surprisingly versatile! Consider using it for securing bags of gardening supplies, organizing cables and wires, bundling newspapers or magazines, or even creating makeshift handles for lightweight items. The possibilities are endless!
Q: I’m having trouble getting the knot tight enough. Any tips?
A: Make sure you’re pulling the end of the bag completely through the loop before tightening. Also, try holding the base of the loop firmly while pulling the end through to prevent the loop from unraveling. You can also experiment with creating a slightly smaller loop to begin with, which will result in a tighter knot when pulled.
Q: What if the bag tears while I’m trying to tie it?
A: If the bag tears, it’s likely due to either the bag material being too thin or too much force being applied. Try using a gentler touch and avoid pulling too hard on the bag. If the bag is consistently tearing, consider using a different type of bag or a different tying method altogether. You can also reinforce the area around the knot with tape before tying to prevent tearing.


Leave a Comment