
Bell Pepper Container Gardening: Dreaming of fresh, vibrant bell peppers right outside your door? You’re not alone! For centuries, humans have cultivated gardens, from the hanging gardens of Babylon to the humble window boxes of today. There’s something deeply satisfying about nurturing plants and harvesting your own food. But let’s face it, not everyone has acres of land for a sprawling garden. That’s where container gardening comes in, and specifically, bell pepper container gardening!
I’m here to tell you that growing your own bell peppers, even if you only have a small balcony or patio, is totally achievable. Imagine the joy of plucking a sun-ripened bell pepper, still warm from the sun, and using it in your dinner that very night. This isn’t just about convenience; it’s about connecting with nature, reducing your carbon footprint, and enjoying the unparalleled flavor of homegrown produce. Plus, who doesn’t love a good DIY project?
This article is packed with easy-to-follow tricks and hacks that will transform you into a bell pepper container gardening pro, even if you’ve never grown anything before. We’ll cover everything from choosing the right container and soil to watering techniques and pest control. Get ready to unleash your inner gardener and enjoy a bountiful harvest of delicious bell peppers!
DIY Bell Pepper Container Gardening: A Beginner’s Guide
Hey there, fellow gardening enthusiasts! I’m so excited to share my experience with growing bell peppers in containers. It’s surprisingly easy, even if you don’t have a huge backyard. I’ve had great success with this method, and I’m confident you can too. Let’s dive in!
Choosing the Right Bell Pepper Variety
First things first, you need to pick the right bell pepper variety. Not all bell peppers are created equal, especially when it comes to container gardening. Some varieties are naturally more compact and better suited for pots than others.
* **Consider Size:** Look for varieties labeled as “compact,” “dwarf,” or “bush.” These tend to stay smaller and produce well in limited space.
* **Popular Choices:** Some of my personal favorites include:
* **’Patio Bell Pepper’:** As the name suggests, this one is perfect for patios and balconies. It produces smaller, but plentiful, peppers.
* **’Mini Bell’:** These are adorable and produce lots of bite-sized peppers. Great for snacking!
* **’Lunchbox Peppers’:** Similar to mini bells, but often come in a mix of colors.
* **’Better Belle’:** A reliable standard bell pepper that can be grown in a larger container.
* **Read the Seed Packet:** Always check the seed packet or plant label for information on plant size and suitability for containers.
Gathering Your Supplies
Okay, now that you’ve chosen your bell pepper variety, let’s gather the necessary supplies. This is where the fun begins!
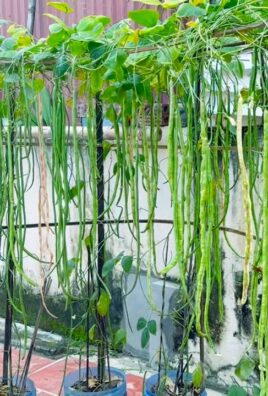
* **Containers:**
* **Size Matters:** Choose a container that is at least 12 inches in diameter and 12 inches deep. Bigger is generally better, as it provides more room for the roots to grow. I usually go for 5-gallon buckets or larger pots.
* **Drainage is Key:** Make sure your container has drainage holes! Bell peppers don’t like soggy roots. If your container doesn’t have enough drainage, you can drill some extra holes.
* **Material Options:** Plastic, terracotta, or even fabric pots will work. I personally like plastic because they’re lightweight and retain moisture well.
* **Potting Mix:**
* **Avoid Garden Soil:** Don’t use garden soil in your containers! It’s too heavy and doesn’t drain well.
* **Use Potting Mix:** Use a high-quality potting mix specifically designed for containers. These mixes are lighter, fluffier, and provide better drainage.
* **Amendments (Optional):** You can amend your potting mix with compost or other organic matter to improve fertility and drainage.
* **Bell Pepper Seeds or Seedlings:**
* **Seeds:** Starting from seed is a rewarding experience, but it requires more time and effort.
* **Seedlings:** Buying seedlings from a local nursery is a quicker and easier option. Just make sure the seedlings look healthy and vigorous.
* **Fertilizer:**
* **Balanced Fertilizer:** Use a balanced fertilizer with an NPK ratio of 10-10-10 or something similar.
* **Slow-Release Fertilizer:** A slow-release fertilizer is a great option for providing a steady supply of nutrients over time.
* **Liquid Fertilizer:** You can also use a liquid fertilizer every few weeks to supplement the slow-release fertilizer.
* **Watering Can or Hose:**
* **Gentle Watering:** You’ll need a way to water your plants gently without disturbing the soil.
* **Optional Supplies:**
* **Plant Markers:** To keep track of your different varieties.
* **Gloves:** To protect your hands.
* **Trowel:** For transplanting seedlings.
* **Stakes or Cages:** For supporting taller varieties.
Planting Your Bell Peppers
Alright, let’s get our hands dirty! This is where we actually plant our bell peppers in the containers.
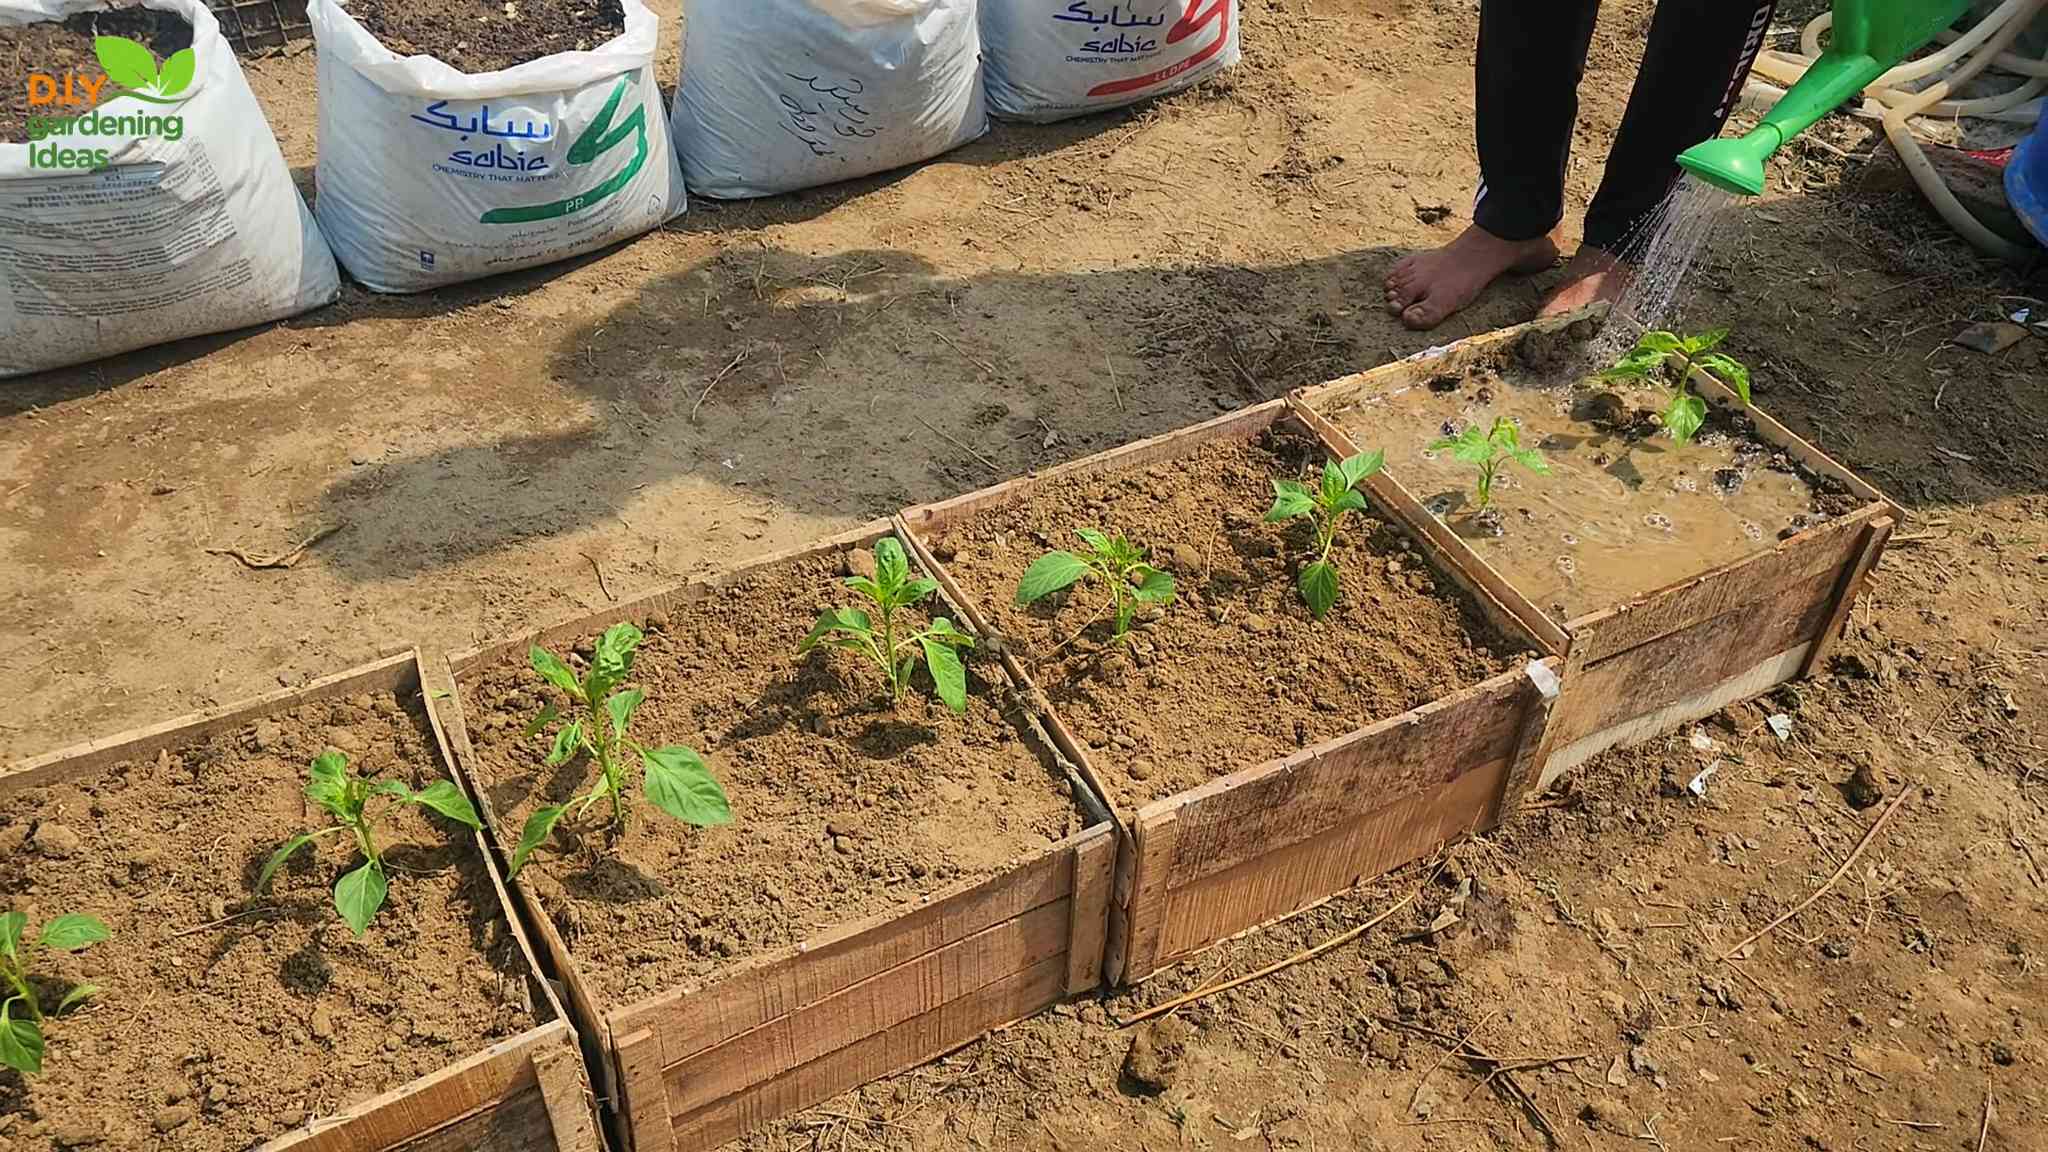
1. **Prepare the Container:** Fill your container with potting mix, leaving a few inches of space at the top.
2. **Planting Seeds (If Starting from Seed):**
* **Sow Seeds:** Sow the seeds about 1/4 inch deep and space them about 1 inch apart.
* **Water Gently:** Water the soil gently to moisten it.
* **Keep Warm:** Keep the soil warm and moist until the seeds germinate.
* **Thin Seedlings:** Once the seedlings emerge, thin them to one plant per container.
3. **Transplanting Seedlings (If Using Seedlings):**
* **Dig a Hole:** Dig a hole in the potting mix that is slightly larger than the root ball of the seedling.
* **Remove Seedling:** Gently remove the seedling from its container.
* **Loosen Roots:** Gently loosen the roots of the seedling.
* **Place Seedling:** Place the seedling in the hole and backfill with potting mix.
* Make sure the top of the root ball is level with the soil surface.
* **Water Thoroughly:** Water the seedling thoroughly after planting.
4. **Spacing:** If you’re planting multiple bell pepper plants in a large container, space them at least 12 inches apart.
5. **Support (If Needed):** If you’re growing a taller variety, insert a stake or cage into the container to provide support.
Caring for Your Bell Pepper Plants
Now that your bell peppers are planted, it’s time to take care of them. This involves watering, fertilizing, and providing the right amount of sunlight.
1. **Watering:**
* **Water Regularly:** Bell peppers need consistent moisture, especially during hot weather.
* **Check the Soil:** Check the soil moisture regularly by sticking your finger into the soil. If the top inch of soil is dry, it’s time to water.
* **Water Deeply:** Water deeply until the water drains out of the drainage holes.
* **Avoid Overwatering:** Avoid overwatering, as this can lead to root rot.
* Water in the morning to allow the foliage to dry before nightfall.
2. **Fertilizing:**
* **Follow Instructions:** Follow the instructions on your fertilizer label.
* **Slow-Release Fertilizer:** If you’re using a slow-release fertilizer, apply it at planting time and then again every few months.
* **Liquid Fertilizer:** If you’re using a liquid fertilizer, apply it every few weeks.
* **Don’t Over-Fertilize:** Avoid over-fertilizing, as this can burn the roots.
3. **Sunlight:**
* **Full Sun:** Bell peppers need at least 6-8 hours of sunlight per day.
* **Protect from Intense Heat:** In very hot climates, provide some afternoon shade to protect the plants from scorching.
* **Rotate Containers:** Rotate your containers regularly to ensure that all sides of the plant receive sunlight.
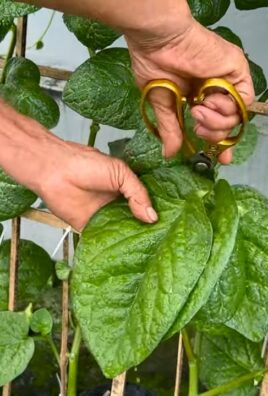
4. **Pruning:**
* **Remove Suckers:** Remove any suckers (small shoots that grow from the base of the plant) to encourage more fruit production.
* **Pinch Back Tips:** You can also pinch back the tips of the branches to encourage bushier growth.
5. **Pest and Disease Control:**
* **Inspect Regularly:** Inspect your plants regularly for pests and diseases.
* **Common Pests:** Common pests include aphids, whiteflies, and spider mites.
* **Organic Solutions:** Use organic pest control methods, such as insecticidal soap or neem oil, to control pests.
* **Good Air Circulation:** Ensure good air circulation around your plants to prevent fungal diseases.
* **Remove Diseased Leaves:** Remove any diseased leaves promptly to prevent the spread of disease.
Harvesting Your Bell Peppers
The moment we’ve all been waiting for – harvesting! This is the most rewarding part of the process.
1. **Timing:**
* **Color:** Bell peppers are typically harvested when they are fully colored (green, red, yellow, orange, etc.).
* **Firmness:** The peppers should be firm to the touch.
* **Size:** The size of the pepper will depend on the variety.
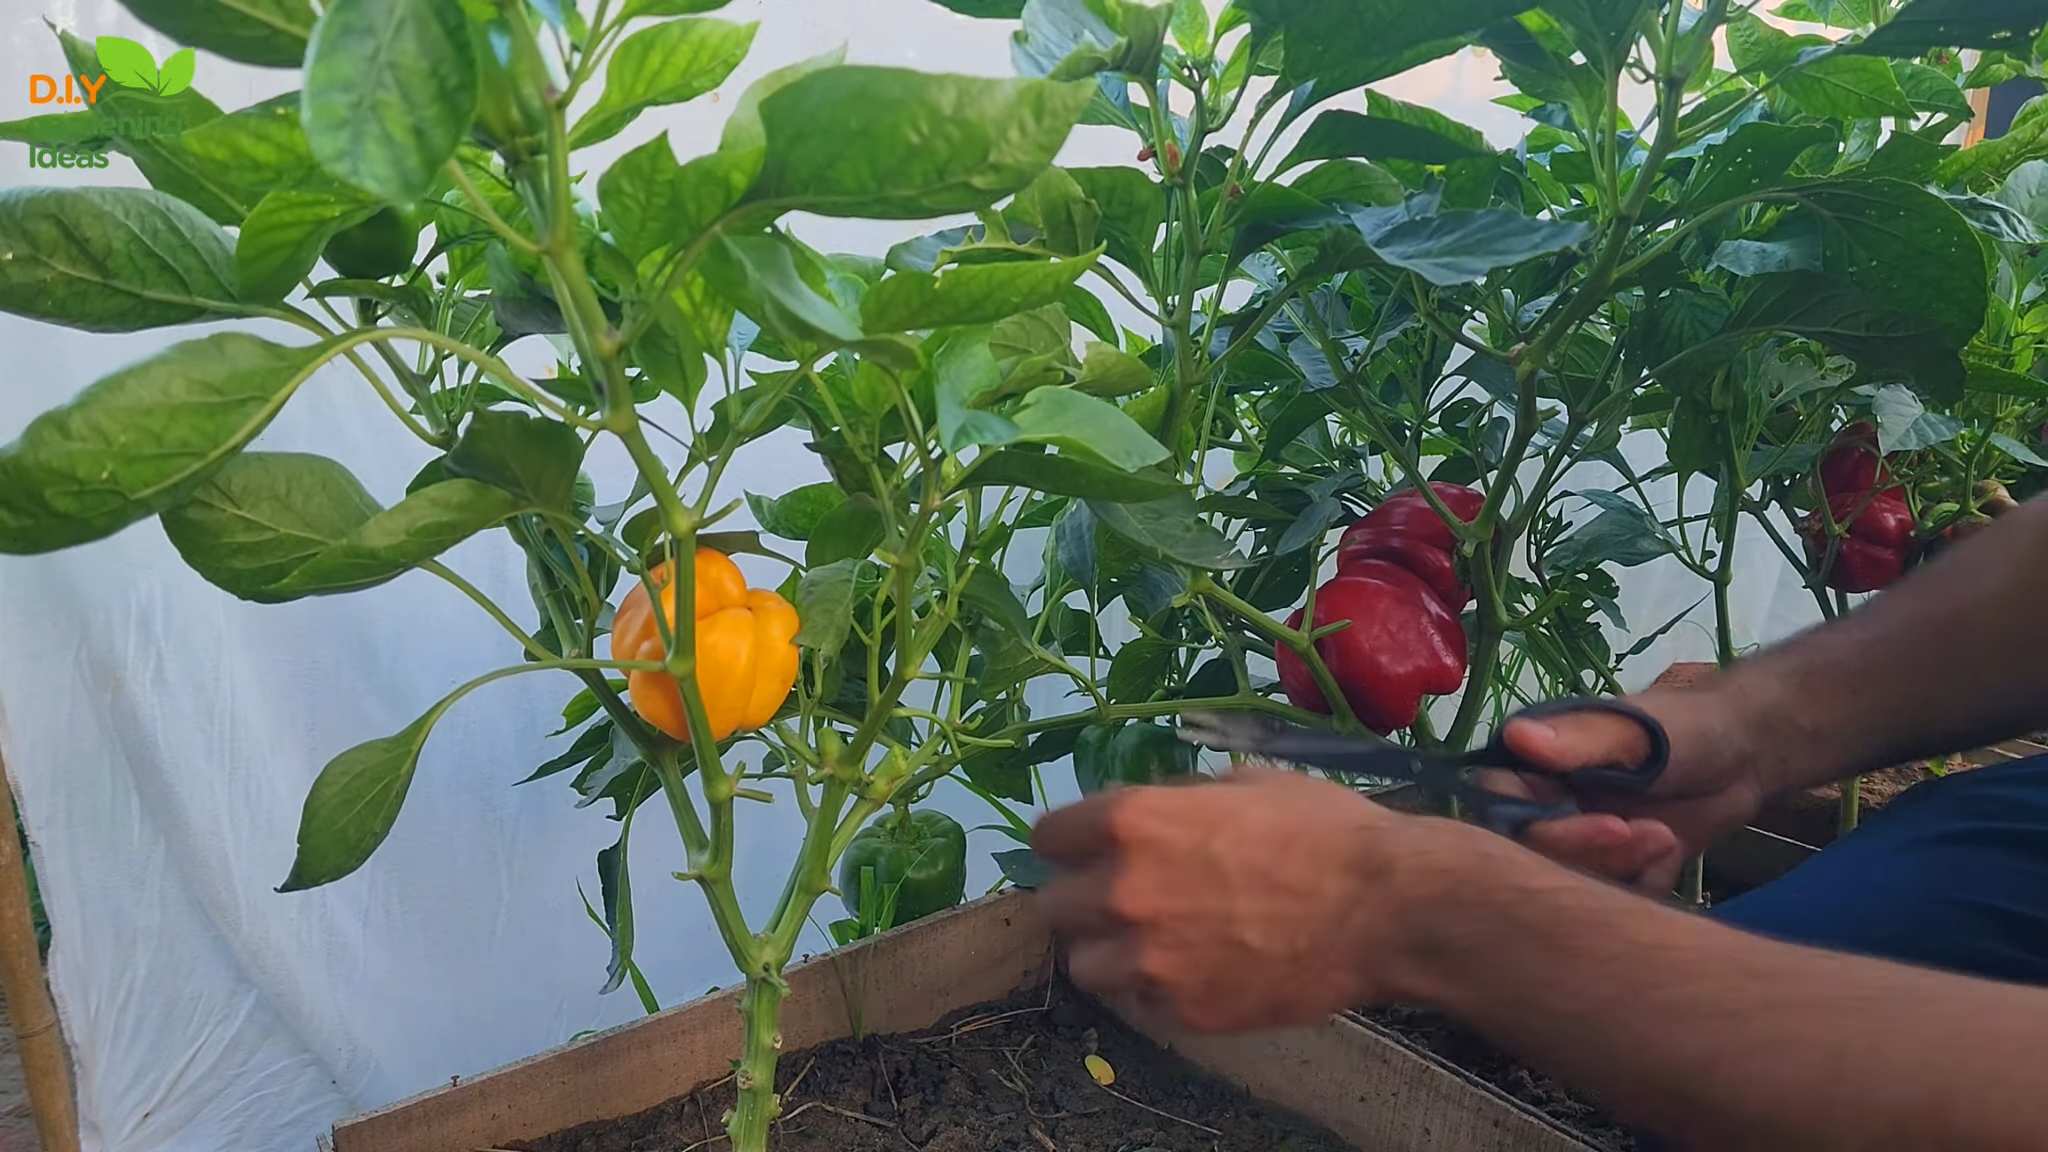
2. **Harvesting Technique:**
* **Use Pruning Shears:** Use pruning shears or a sharp knife to cut the pepper from the plant.
* **Leave a Small Stem:** Leave a small stem attached to the pepper.
* Avoid Pulling:** Avoid pulling the pepper from the plant, as this can damage the plant.
3. **Storage:**
* **Refrigerate:** Store your harvested bell peppers in the refrigerator.
* **Use Within a Week:** Use them within a week for the best flavor and texture.
Troubleshooting
Even with the best care, you might
Conclusion
So, there you have it! Transforming your patio, balcony, or even a sunny windowsill into a thriving bell pepper garden is not only achievable but incredibly rewarding. This DIY container gardening trick, focusing on proper drainage, nutrient-rich soil, and consistent watering, unlocks the potential for a bountiful harvest of crisp, colorful bell peppers right at your fingertips.
Why is this a must-try? Because it democratizes gardening. You don’t need acres of land or years of experience to enjoy the satisfaction of growing your own food. This method is accessible to everyone, regardless of their living situation or gardening expertise. Imagine the joy of plucking a perfectly ripe bell pepper, still warm from the sun, and using it in your favorite recipe. The flavor is simply unmatched by anything you can buy in the store. Plus, you know exactly where your food came from and what went into growing it – a peace of mind that’s priceless in today’s world.
But the benefits extend beyond just fresh produce. Container gardening is therapeutic. It’s a chance to connect with nature, to nurture something, and to witness the miracle of growth firsthand. It’s a stress reliever, a mood booster, and a source of immense personal satisfaction. And let’s not forget the aesthetic appeal! A vibrant collection of bell pepper plants adds a splash of color and life to any space.
Ready to take your bell pepper container gardening to the next level? Consider experimenting with different varieties. From the classic green bell pepper to the sweeter red, yellow, and orange varieties, there’s a whole world of flavors and colors to explore. You can also try companion planting. Basil, for example, is known to repel pests and improve the flavor of bell peppers. Marigolds are another great option for attracting beneficial insects.
Don’t be afraid to get creative with your containers. While standard pots work perfectly well, you can also repurpose old buckets, tubs, or even grow bags. Just make sure they have adequate drainage holes. And remember, the size of the container will affect the size of your plant and the number of peppers it produces. A larger container generally means a larger plant and a more abundant harvest.
This DIY bell pepper container gardening method is more than just a gardening technique; it’s an invitation to connect with nature, to cultivate your own food, and to experience the joy of growing.
We encourage you to give this a try. Start small, learn as you go, and don’t be discouraged by setbacks. Gardening is a journey, not a destination. And we’re here to help you every step of the way.
Once you’ve harvested your first bell peppers, we’d love to hear about your experience! Share your photos, tips, and stories in the comments below. Let’s build a community of container gardeners and inspire others to embrace the joy of growing their own food. What variety did you grow? What challenges did you face? What successes did you celebrate? Your insights can help others learn and grow. So, get your hands dirty, plant those seeds, and let’s grow some bell peppers together!
Frequently Asked Questions (FAQ)
What is the best size container for growing bell peppers?
The ideal container size for bell peppers is at least 5 gallons, but 7-10 gallons is even better. This provides enough space for the roots to develop properly and supports a healthy, productive plant. Smaller containers can work, but you’ll need to water and fertilize more frequently, and the plant may not reach its full potential. Remember, the larger the container, the more stable the growing environment will be.
What type of soil should I use for bell pepper container gardening?
Use a high-quality potting mix specifically formulated for containers. Avoid using garden soil, as it can become compacted in containers and doesn’t drain well. A good potting mix will be lightweight, well-draining, and contain essential nutrients. You can also amend your potting mix with compost or other organic matter to improve its fertility and water retention. Look for mixes that contain ingredients like peat moss, perlite, and vermiculite.
How often should I water my bell pepper plants in containers?
Water your bell pepper plants regularly, especially during hot, dry weather. The frequency of watering will depend on the size of the container, the type of potting mix, and the weather conditions. Check the soil moisture by sticking your finger about an inch into the soil. If it feels dry, it’s time to water. Water deeply until water drains out of the bottom of the container. Avoid overwatering, as this can lead to root rot. Generally, you’ll need to water more frequently in the summer than in the spring or fall.
How much sunlight do bell pepper plants need?
Bell pepper plants need at least 6-8 hours of direct sunlight per day to thrive. Choose a location that receives plenty of sunlight throughout the day. If you’re growing your plants indoors, you may need to supplement with grow lights. Insufficient sunlight can result in leggy plants with fewer peppers.
What kind of fertilizer should I use for bell pepper plants?
Use a balanced fertilizer with a slightly higher phosphorus content to promote flowering and fruit production. A fertilizer with an NPK ratio of 5-10-5 or 10-20-10 is a good choice. Fertilize your plants every 2-3 weeks during the growing season. You can use a liquid fertilizer or a slow-release granular fertilizer. Follow the instructions on the fertilizer package carefully.
How do I prevent pests and diseases on my bell pepper plants?
Inspect your plants regularly for signs of pests or diseases. Common pests include aphids, spider mites, and whiteflies. You can control these pests with insecticidal soap or neem oil. Diseases can be prevented by providing good air circulation, avoiding overwatering, and using disease-resistant varieties. If you notice any signs of disease, remove the affected leaves or plants immediately.
When should I harvest my bell peppers?
Bell peppers are typically ready to harvest 60-90 days after transplanting, depending on the variety. The peppers should be firm, glossy, and fully colored. You can harvest them at any stage of ripeness, but they will be sweetest and most flavorful when fully ripe. Use a sharp knife or scissors to cut the peppers from the plant, leaving a small stem attached.
Can I grow bell peppers indoors?
Yes, you can grow bell peppers indoors, but you’ll need to provide them with adequate light and warmth. Place your plants in a sunny window or use grow lights to supplement the natural light. You’ll also need to pollinate the flowers by hand, as there won’t be any bees or other pollinators indoors.
What are some common problems when growing bell peppers in containers?
Some common problems include blossom end rot (caused by calcium deficiency), aphids, and fungal diseases. Blossom end rot can be prevented by adding calcium to the soil or using a calcium-rich fertilizer. Aphids can be controlled with insecticidal soap or neem oil. Fungal diseases can be prevented by providing good air circulation and avoiding overwatering.
Can I save seeds from my bell peppers to plant next year?
Yes, you can save seeds from your bell peppers, but keep in mind that the resulting plants may not be true to type, especially if you grew hybrid varieties. To save seeds, allow the peppers to fully ripen on the plant. Then, cut them open and remove the seeds. Spread the seeds out on a paper towel to dry completely. Store the dried seeds in an airtight container in a cool, dark place.
Leave a Comment