
Grow Spinach Indoors? Absolutely! Imagine fresh, vibrant spinach gracing your salads, smoothies, and sautés, all year round, regardless of the weather outside. Forget those sad, wilted bags from the grocery store – we’re talking about homegrown goodness, bursting with flavor and nutrients, right at your fingertips.
For centuries, cultivating spinach has been a practice deeply intertwined with human history. Originating in ancient Persia, this leafy green made its way across continents, becoming a staple in cuisines worldwide. From Popeye’s legendary strength to its role in countless culinary creations, spinach holds a special place in our hearts and diets.
But let’s face it, not everyone has a sprawling garden or the perfect outdoor climate to successfully grow spinach. That’s where the magic of indoor gardening comes in! This DIY guide is your passport to a thriving indoor spinach patch. I’m going to show you simple, effective tricks and hacks to grow spinach indoors, even if you’re a complete beginner. We’ll cover everything from choosing the right containers and soil to providing optimal lighting and watering techniques.
Why do you need this? Because fresh, healthy food shouldn’t be a luxury. It should be accessible to everyone. Plus, there’s something incredibly rewarding about nurturing a plant from seed to harvest. So, let’s ditch the store-bought spinach and embark on this exciting indoor gardening adventure together!
Growing Spinach Indoors: Your Comprehensive DIY Guide
Hello, fellow gardeners! Do you want to harvest fresh spinach, even in winter? Then you’ve come to the right place! I’ll show you how you can easily grow spinach indoors. It’s easier than you think and will bring delicious, healthy greens to your table all year round.
What You’ll Need: The Materials List
Before we get started, here’s a list of everything you’ll need for your indoor spinach project:
- Spinach seeds: Choose a variety that is suitable for growing in containers. “Baby’s Leaf” or “Winter Giant” are good options.
- Planters: Pots or containers with good drainage. They should be at least 15 cm (6 inches) deep.
- High-quality potting soil: A loose, well-draining soil is ideal.
- Grow light (optional, but recommended): Especially in the darker months, a grow light provides sufficient light.
- Spray bottle: For moistening the soil.
- Watering can: For watering the plants.
- Fertilizer (optional): An organic liquid fertilizer for leafy greens.
- A warm, bright location: A windowsill or another spot with plenty of light.
The Preparation: Everything to Get Started
Before we start planting, we need to prepare everything. This is important so that the spinach feels comfortable and grows well.
- Prepare the planters: Make sure your pots or containers have clean drainage holes. This prevents waterlogging, which spinach does not like at all. Then fill the containers with potting soil. Leave about 2-3 cm (1 inch) of space at the top.
- Moisten the soil: Lightly moisten the soil with a spray bottle before planting. It should be damp, but not wet.
- Choose the location: Spinach needs a lot of light, especially in winter. A south-facing windowsill is ideal. If that’s not possible, a grow light is a good investment.
Sowing: Sowing Spinach Made Easy
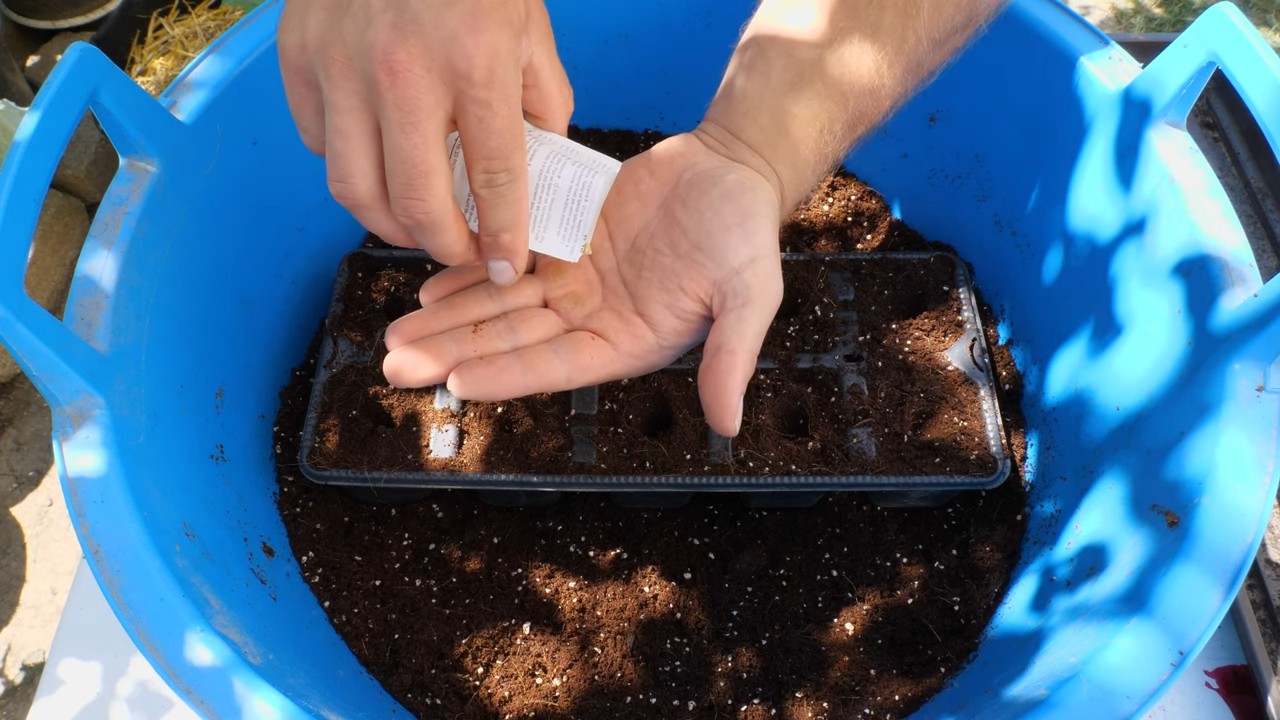
Now comes the exciting part: sowing the spinach seeds!
- Sow the seeds: Sprinkle the spinach seeds evenly over the soil. Press them down lightly, but don’t cover them too deeply. About 0.5 cm (0.2 inches) of soil on top is perfectly sufficient.
- Moisten: Gently spray the soil again with the spray bottle.
- Cover (optional): You can cover the pots with plastic wrap or a plastic bag to increase humidity. This promotes germination. But don’t forget to ventilate regularly to prevent mold.
- Wait: Place the pots in a warm spot and wait patiently. Germination usually takes 5-10 days.
Care: Keeping Your Spinach Happy
As soon as the first small spinach seedlings sprout, the real care begins. Here are a few tips to help your spinach thrive:
- Watering: Water the spinach regularly, but avoid waterlogging. The soil should always be slightly moist. It’s best to test with your finger to see if the soil is dry before you water.
- Lighting: Spinach needs a lot of light. If you don’t have a grow light, place the pots in the brightest possible location. Rotate the pots regularly so that all sides of the plants get even light.
- Temperature: Spinach likes it cool. A temperature between 15 and 20 degrees Celsius (59-68°F) is ideal. Avoid exposing the plants to direct heat.
- Fertilizing (optional): If you wish, you can fertilize the spinach every two weeks with an organic liquid fertilizer for leafy greens. Be sure to follow the instructions on the package carefully.
- Thinning: If the plants are too close together, you should thin them out. This means removing some of the smaller plants so that the remaining ones have enough space to grow.
The Harvest: Finally, Fresh Spinach!
After about 4-6 weeks, you can harvest your first homegrown spinach!
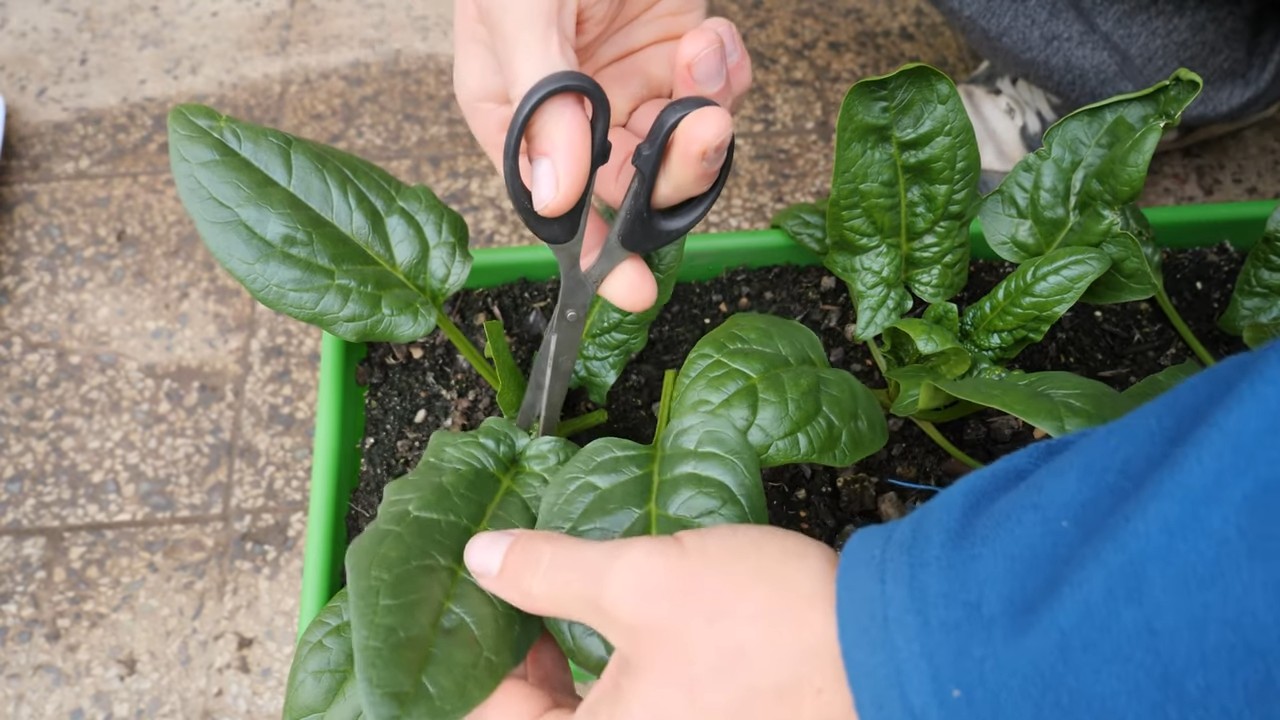
- The Harvest: Cut off the outer leaves as soon as they are large enough. Let the inner leaves grow so the plant can continue to produce. You can harvest the spinach multiple times.
- Storage: Fresh spinach does not last long. It is best to process it immediately. If you need to store it, wrap it in a damp cloth and place it in the refrigerator.
Common Problems and Solutions
Even with indoor spinach cultivation, problems can occur. Here are a few common problems and how you can solve them:
- Yellow leaves: This can be a sign of too little light, too much water, or a nutrient deficiency. Check the lighting, your watering habits, and fertilize if necessary.
- Mold: Mold indicates excessive humidity. Ventilate regularly and avoid wetting the leaves.
- Pests: Aphids or other pests may appear. Rinse the plants with water or use a biological pesticide.
Additional Tips for Success
Here are a few more tips to help make your indoor spinach cultivation a success:
Experiment: Try different varieties, locations, and fertilizers to find out what works best for you.
Choose the right variety: Not all spinach varieties are suitable for growing in containers. Research the characteristics of the variety before buying.
Use high-quality soil: Good potting soil is the foundation for healthy growth.
Pay attention to drainage: Waterlogging is the enemy of spinach. Make sure your pots have good drainage holes.
Be patient: Spinach takes time to grow. Be patient and don’t be discouraged if it doesn’t work out right away.
Conclusion
So, there you have it! Growing spinach indoors is not only achievable but also incredibly rewarding. Imagine fresh, vibrant, and nutrient-packed spinach leaves readily available at your fingertips, regardless of the season. This DIY trick transforms your kitchen into a miniature garden, offering a sustainable and cost-effective way to enjoy this leafy green.
Why is this a must-try? Because it empowers you to control the quality and freshness of your food. Store-bought spinach, while convenient, often lacks the vibrancy and flavor of homegrown varieties. Plus, you eliminate the need for long trips to the grocery store, reducing your carbon footprint and saving you money in the long run. You also know exactly what went into growing your spinach – no pesticides, no hidden chemicals, just pure, healthy goodness.
But the benefits extend beyond mere convenience and cost savings. Gardening, even on a small scale, is a therapeutic activity. Nurturing your spinach plants, watching them grow, and harvesting your own food can be incredibly satisfying and stress-relieving. It’s a connection to nature that can be easily incorporated into your daily routine.
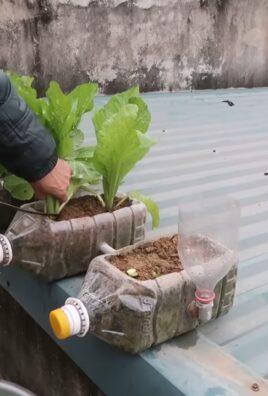
Don’t be afraid to experiment with different varieties of spinach. Some, like ‘Baby’s Leaf Hybrid,’ are specifically bred for indoor growing and offer a sweeter, more tender flavor. Others, like ‘Bloomsdale Long Standing,’ are known for their resilience and ability to withstand slightly less-than-ideal conditions. You can also try growing spinach in different containers, from traditional pots to repurposed containers like plastic tubs or even old buckets. Just make sure they have adequate drainage.
Consider adding companion plants to your indoor spinach garden. Herbs like basil and chamomile can help deter pests and improve the overall health of your spinach plants. Marigolds are also a great option, as they release compounds into the soil that can repel nematodes and other harmful insects.
For those looking to maximize their yield, consider investing in a grow light. While spinach can tolerate partial shade, it thrives under bright, indirect light. A grow light will ensure that your plants receive the optimal amount of light, resulting in faster growth and larger, more flavorful leaves.
Finally, remember that growing spinach indoors is a learning process. Don’t be discouraged if your first attempt isn’t perfect. Pay attention to your plants, observe their needs, and adjust your approach accordingly. With a little patience and experimentation, you’ll be harvesting fresh, delicious spinach in no time.
We wholeheartedly encourage you to try this DIY trick and experience the joy of growing your own spinach. Share your experiences with us! Let us know what varieties you tried, what challenges you faced, and what successes you celebrated. Your insights can help other aspiring indoor gardeners embark on their own spinach-growing journey. Post pictures of your indoor spinach garden on social media using #IndoorSpinachGarden and inspire others to embrace the joys of homegrown goodness. Let’s cultivate a community of indoor gardeners and share the bounty of our harvests! Growing spinach indoors is easier than you think, and the rewards are well worth the effort.
Frequently Asked Questions (FAQ)
What are the best spinach varieties to grow indoors?
Several spinach varieties thrive indoors. ‘Baby’s Leaf Hybrid’ is a popular choice due to its compact size, rapid growth, and tender leaves. ‘Bloomsdale Long Standing’ is another excellent option, known for its heat tolerance and resistance to bolting (going to seed). ‘Winter Bloomsdale’ is a cold-hardy variety that can tolerate cooler indoor temperatures. ‘Space’ spinach is also a good choice, offering disease resistance and a mild flavor. Ultimately, the best variety depends on your personal preferences and growing conditions. Experiment with a few different varieties to see which ones perform best in your indoor environment. Consider factors like available light, temperature, and humidity when making your selection.
How much light does indoor spinach need?
Spinach requires at least 6 hours of bright, indirect light per day. If you don’t have a sunny window, consider using a grow light. LED grow lights are energy-efficient and provide the full spectrum of light that spinach needs to thrive. Position the grow light a few inches above the plants and adjust the height as they grow. Insufficient light can lead to leggy growth and pale leaves. If your spinach plants are not getting enough light, they may also be more susceptible to pests and diseases. Observe your plants closely and adjust the lighting as needed.
What type of soil is best for growing spinach indoors?
Spinach prefers well-draining soil that is rich in organic matter. A good potting mix for spinach should be lightweight and retain moisture without becoming waterlogged. You can create your own potting mix by combining equal parts of compost, peat moss (or coconut coir), and perlite or vermiculite. Avoid using garden soil, as it can be too heavy and may contain pests or diseases. Before planting, amend the soil with a slow-release fertilizer to provide essential nutrients.
How often should I water my indoor spinach plants?
Water your spinach plants regularly, keeping the soil consistently moist but not soggy. Water when the top inch of soil feels dry to the touch. Avoid overwatering, as this can lead to root rot. Use a watering can or a hose with a gentle spray nozzle to avoid damaging the delicate leaves. Water in the morning to allow the foliage to dry before nightfall, which can help prevent fungal diseases. The frequency of watering will depend on factors like temperature, humidity, and the size of your container.
How do I fertilize my indoor spinach plants?
Spinach is a heavy feeder and benefits from regular fertilization. Use a balanced liquid fertilizer diluted to half strength every two to three weeks. Alternatively, you can use a slow-release fertilizer at planting time. Avoid over-fertilizing, as this can lead to excessive leaf growth and a bitter taste. Look for fertilizers that are specifically formulated for leafy greens.
How do I harvest my indoor spinach?
You can begin harvesting spinach leaves when they are about 4-6 inches long. Harvest the outer leaves first, leaving the inner leaves to continue growing. This cut-and-come-again method allows you to harvest spinach continuously for several weeks. Use scissors or a sharp knife to cut the leaves at the base of the stem. Avoid pulling the leaves, as this can damage the plant.
What are common pests and diseases that affect indoor spinach?
Common pests that can affect indoor spinach include aphids, spider mites, and whiteflies. Inspect your plants regularly for signs of infestation and take action promptly. You can control pests by spraying the plants with insecticidal soap or neem oil. Fungal diseases, such as powdery mildew and downy mildew, can also affect spinach. To prevent fungal diseases, ensure good air circulation and avoid overwatering. If you notice signs of disease, remove the affected leaves and treat the plants with a fungicide.
How long does it take to grow spinach indoors?
Spinach typically takes about 4-6 weeks to mature from seed to harvest. The exact time will depend on the variety, growing conditions, and your desired leaf size.
Can I grow spinach indoors year-round?
Yes, you can grow spinach indoors year-round, provided you have adequate light and temperature control. Spinach prefers cooler temperatures, so avoid placing your plants near heat sources.
What are some tips for preventing spinach from bolting indoors?
Bolting (going to seed) is a common problem with spinach, especially in warm weather. To prevent bolting, keep the temperature cool (ideally between 60-70°F), provide adequate light, and water regularly. Choose bolt-resistant varieties, such as ‘Bloomsdale Long Standing.’


Leave a Comment