
Grow Bags Potatoes: Imagine harvesting a bounty of delicious, homegrown potatoes right from your patio or balcony! Sounds amazing, right? Well, it’s easier than you think, and this DIY guide will show you exactly how to do it using grow bags. For centuries, potatoes have been a staple food source, playing a vital role in cultures worldwide. From the Inca civilization in the Andes to the humble Irish potato famine, this versatile tuber has a rich and complex history.
But you don’t need a sprawling farm to enjoy the taste of freshly dug potatoes. That’s where the magic of grow bags comes in! I’m here to tell you that if you’re short on space, dealing with poor soil, or simply want a convenient and manageable way to grow your own food, then grow bags potatoes are the perfect solution. This DIY project is not only incredibly rewarding, but it also offers a fantastic way to connect with nature, reduce your carbon footprint, and enjoy the unparalleled flavor of homegrown produce.
I’ll walk you through every step, from choosing the right grow bag and potato variety to planting, watering, and harvesting your spuds. Get ready to ditch the store-bought potatoes and experience the joy of growing your own delicious crop – it’s easier than you think!
Growing Potatoes in Grow Bags: A Beginner’s Guide
Hey there, fellow gardening enthusiasts! I’m so excited to share my experience with growing potatoes in grow bags. It’s a fantastic way to enjoy fresh, homegrown potatoes, even if you don’t have a traditional garden. Plus, the harvest is like a treasure hunt – so much fun! Let’s dive in!
What You’ll Need
Before we get started, let’s gather our supplies. Here’s a list of everything you’ll need:
* Grow Bags: I recommend using bags that are at least 10 gallons in size, but 15-20 gallons is even better. The larger the bag, the more potatoes you can grow. Make sure they have drainage holes!
* Seed Potatoes: These are potatoes specifically grown for planting. You can find them at your local garden center or online. Choose varieties that are suitable for your climate.
* Potting Mix: A good quality potting mix is essential. Avoid using garden soil, as it can compact and hinder drainage. I like to use a mix that’s light and airy.
* Compost: Compost adds nutrients and improves soil structure. I use a mix of homemade and store-bought compost.
* Fertilizer: A balanced fertilizer (like 10-10-10) or a fertilizer specifically formulated for potatoes will help your plants thrive.
* Watering Can or Hose: For, well, watering!
* Trowel or Small Shovel: For planting and adding soil.
* Optional:
* Mycorrhizae: These beneficial fungi help plants absorb nutrients.
* Potato Fertilizer Spikes: These provide a slow-release source of nutrients.
* Gardening Gloves: To keep your hands clean.
Preparing Your Seed Potatoes
This step is crucial for getting a good start. You can plant whole seed potatoes if they are small, but larger ones should be cut into pieces.
1. Chitting (Optional but Recommended): Chitting is the process of encouraging your seed potatoes to sprout before planting. This gives them a head start. To chit your potatoes, place them in a cool, bright location (but not direct sunlight) for a few weeks. You’ll see small sprouts, called “eyes,” emerging from the potatoes.
2. Cutting the Potatoes (If Necessary): If your seed potatoes are large, cut them into pieces, ensuring that each piece has at least 2-3 “eyes.”
3. Curing the Cut Pieces: After cutting, let the pieces sit for a day or two to allow the cut surfaces to callous over. This helps prevent rot. I usually leave them on a tray in a cool, dry place.
Planting Your Potatoes
Now for the fun part! Let’s get those potatoes in the ground (or, in this case, the grow bag).
1. Fill the Grow Bag: Start by filling the grow bag with about 4-6 inches of potting mix. Mix in some compost and a slow-release fertilizer at this stage.
2. Plant the Seed Potatoes: Place the seed potato pieces (or whole small potatoes) on top of the soil, with the “eyes” facing upwards. Space them about 8-12 inches apart. If you’re only planting one potato per bag, place it in the center.
3. Cover with Soil: Cover the potatoes with another 4-6 inches of potting mix.
4. Water Thoroughly: Water the soil well, making sure it’s evenly moist but not waterlogged.
“Hilling” Your Potatoes
This is a key technique for maximizing your potato harvest. As the potato plants grow, you’ll need to add more soil to encourage the formation of more potatoes along the stems.
1. Wait for Growth: Once the potato plants have grown about 6-8 inches tall, it’s time to “hill” them.
2. Add More Soil: Add a mixture of potting mix and compost around the base of the plants, burying the lower part of the stems. Leave the top few inches of the plant exposed.
3. Repeat the Process: Continue to “hill” the potatoes every few weeks as they grow, until the grow bag is almost full. This encourages the plants to produce more potatoes along the buried stems. I usually do this 3-4 times during the growing season.
Caring for Your Potato Plants
Proper care is essential for a bountiful harvest.
1. Watering: Potatoes need consistent moisture, especially during tuber formation. Water deeply whenever the top inch of soil feels dry. Avoid overwatering, as this can lead to rot. I usually water every 2-3 days, depending on the weather.
2. Fertilizing: Potatoes are heavy feeders, so regular fertilization is important. Use a balanced fertilizer or a potato-specific fertilizer according to the package directions. You can also use fertilizer spikes for a slow-release source of nutrients. I like to side-dress my plants with compost every few weeks as well.
3. Sunlight: Potatoes need at least 6-8 hours of sunlight per day. Place your grow bags in a sunny location.
4. Pest and Disease Control: Keep an eye out for pests like aphids, potato beetles, and flea beetles. You can use insecticidal soap or other organic pest control methods to manage them. Also, watch for diseases like early blight and late blight. Proper watering and good air circulation can help prevent these diseases. If you notice any signs of disease, remove the affected leaves immediately.
5. Support (Optional): If your potato plants get very tall and leggy, you may need to provide some support to prevent them from falling over. You can use stakes or a tomato cage.
Harvesting Your Potatoes
The most exciting part! Knowing when to harvest is key.
1. Timing: You can harvest “new potatoes” (small, tender potatoes) about 2-3 weeks after the plants flower. For larger, mature potatoes, wait until the foliage starts to die back and turn yellow or brown. This usually happens about 80-100 days after planting.
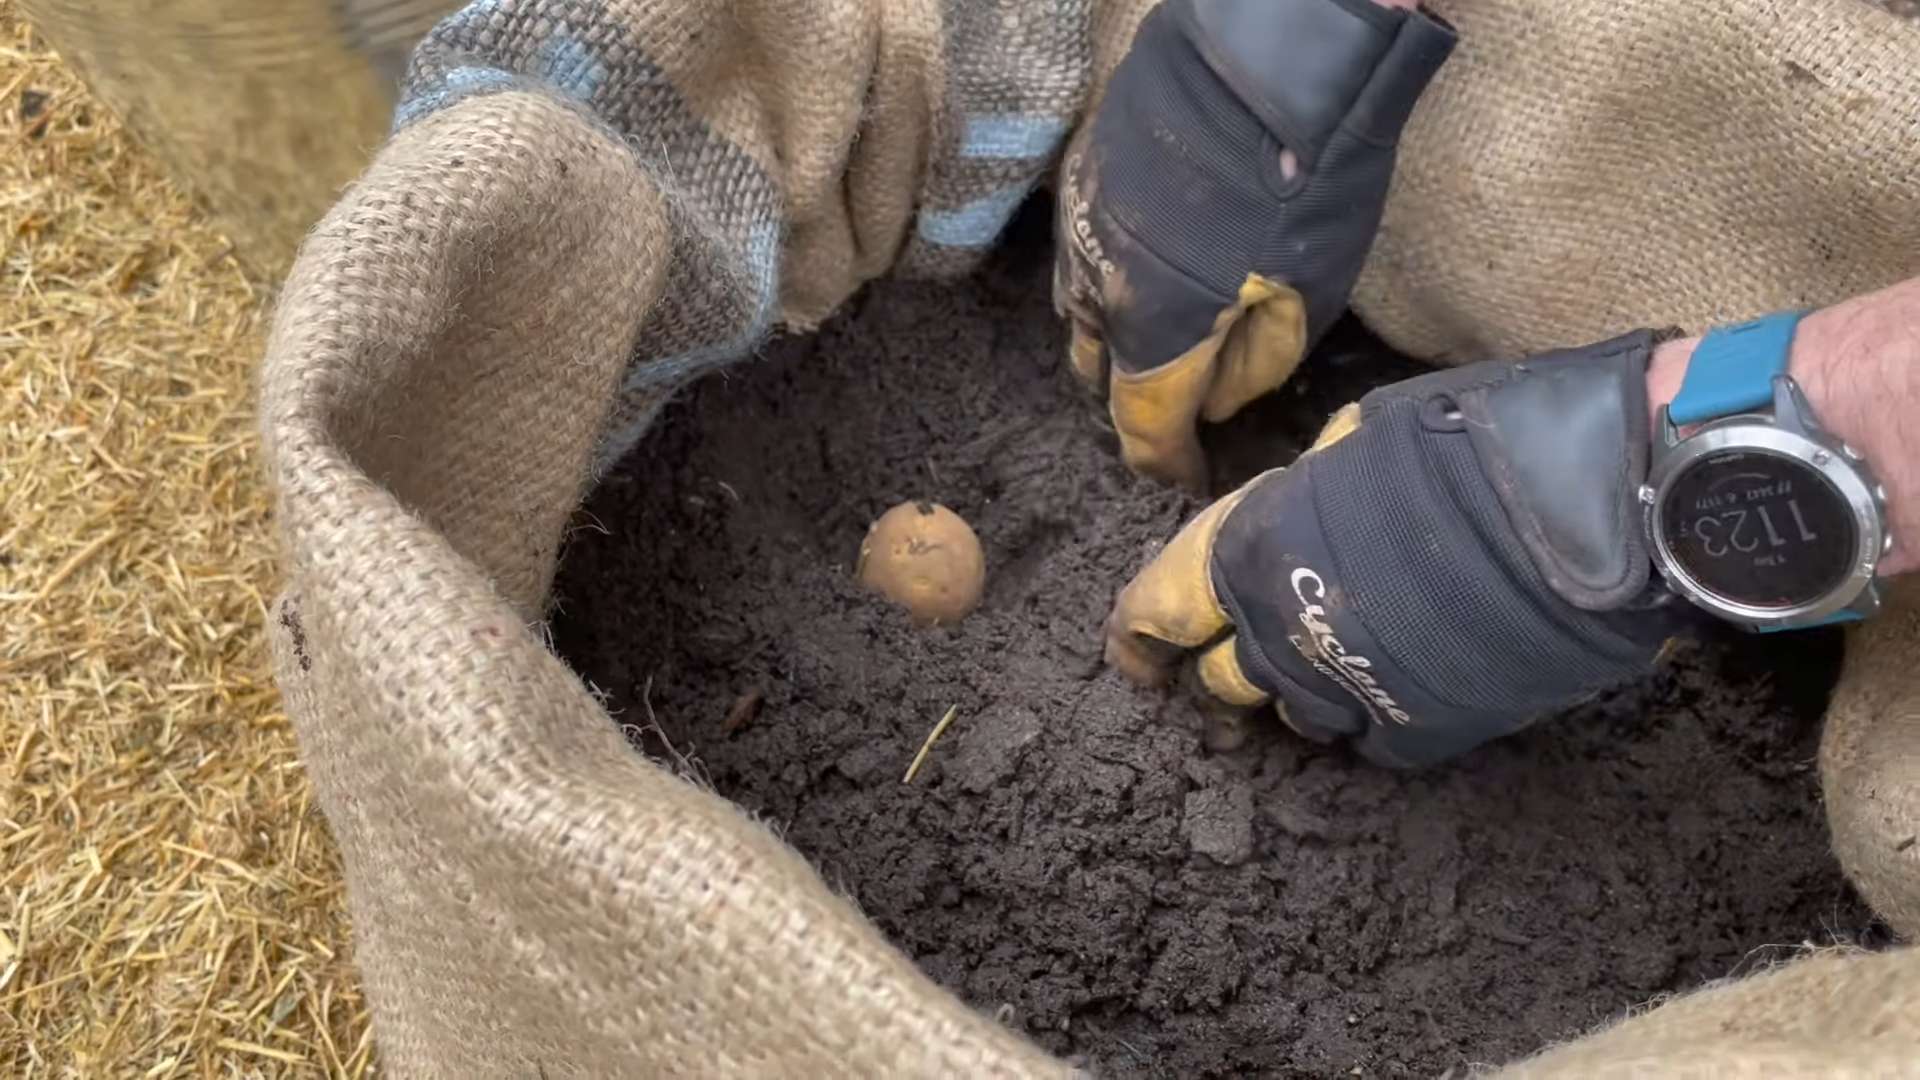
2. Harvesting New Potatoes: To harvest new potatoes, carefully reach into the grow bag and feel around for small potatoes. Gently pull them out, being careful not to damage the plant.
3. Harvesting Mature Potatoes: Once the foliage has died back, stop watering the plants for a week or two. This will help the potato skins to toughen up, making them easier to store.
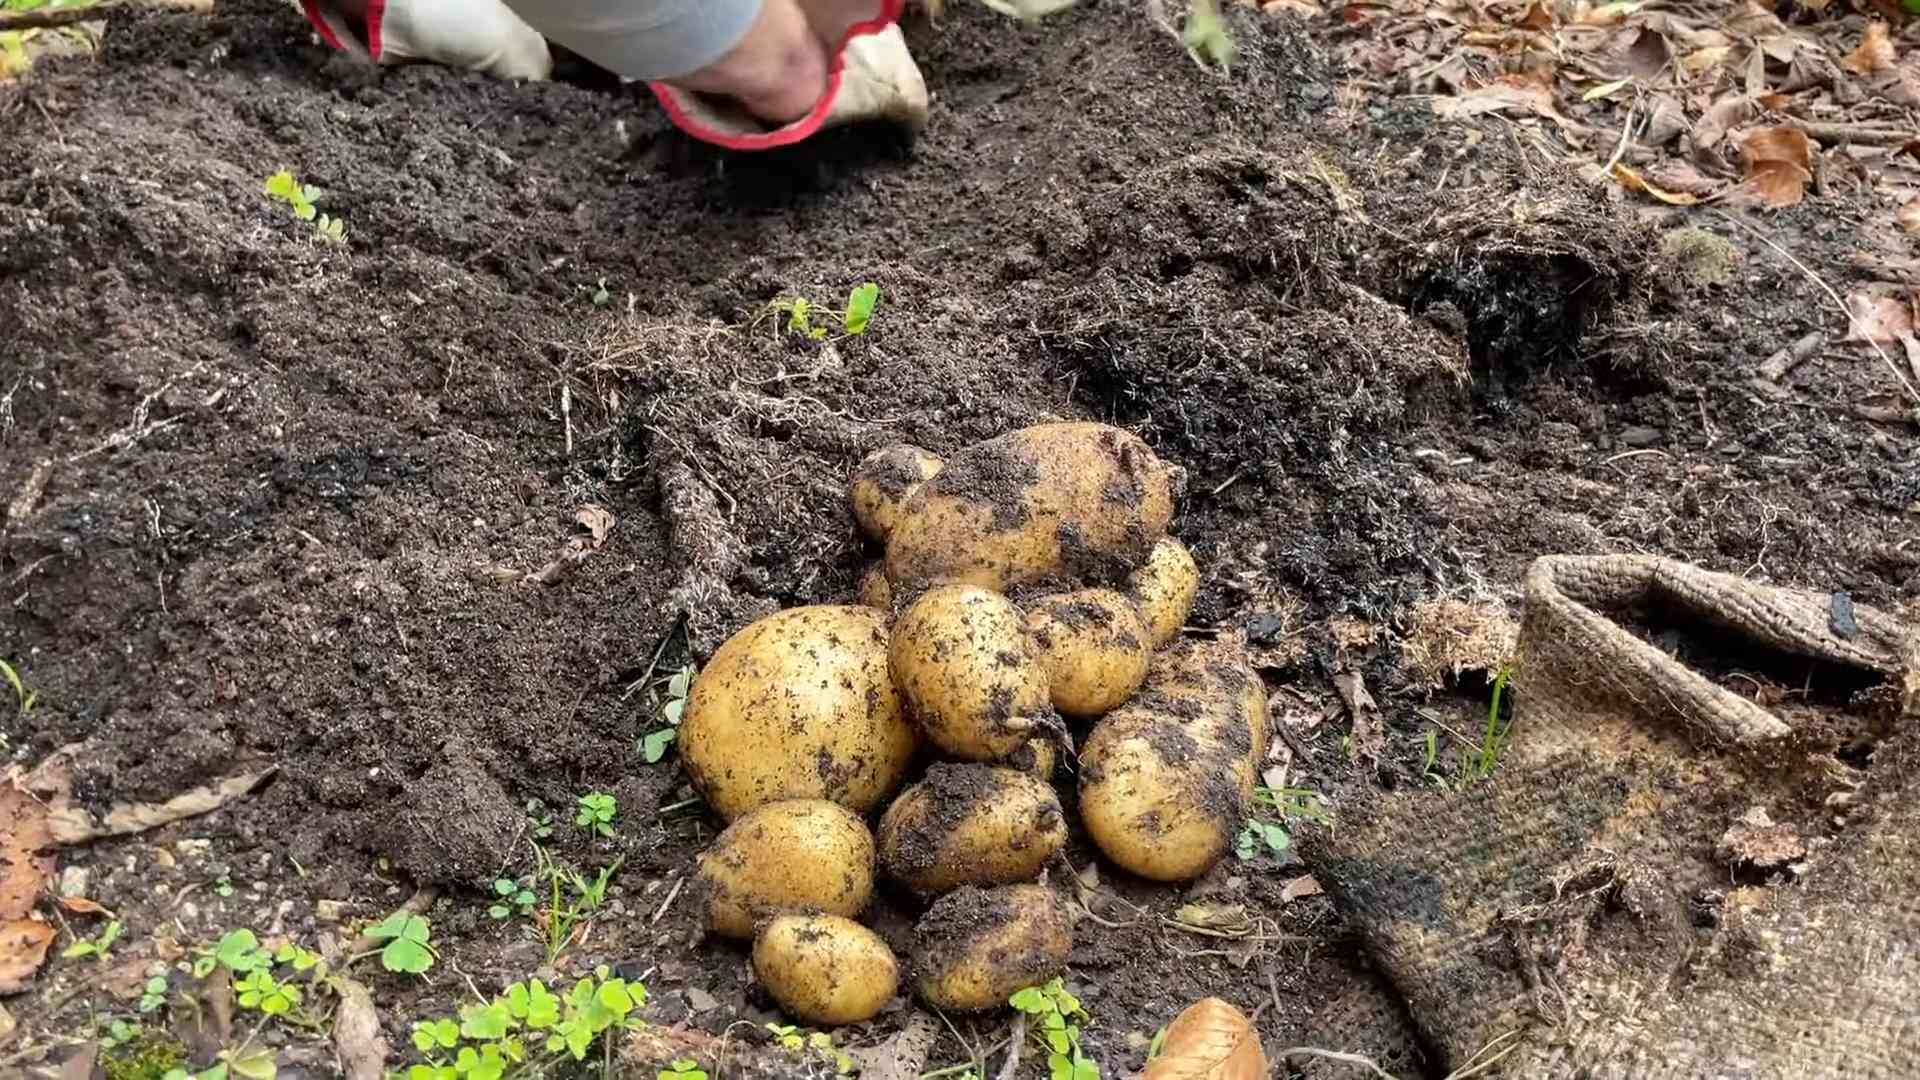
4. Dumping the Bag: To harvest the mature potatoes, simply dump the grow bag onto a tarp or into a wheelbarrow. Sift through the soil and collect your potatoes! It’s like a treasure hunt!
5. Curing the Potatoes: After harvesting, cure the potatoes by spreading them out in a cool, dark, and well-ventilated place for about a week. This helps to heal any cuts or bruises and extends their storage life.
Storing Your Potatoes
Proper storage is essential for keeping your potatoes fresh for as long as possible.
1. Choose the Right Potatoes: Select potatoes that are free from cuts, bruises, and blemishes for storage.
2. Store in a Cool, Dark, and Dry Place: The ideal storage temperature for potatoes is between 40-50°F (4-10°C). Store them in a dark place to prevent them from turning green. A root cellar, basement, or unheated garage are good options.
3. Avoid Storing with Apples or Onions: Apples and onions release ethylene gas, which can cause potatoes to sprout prematurely.
4. Check Regularly: Check your potatoes regularly for signs of spoilage. Remove any potatoes that are soft, shriveled, or have sprouts.
Troubleshooting
Even with the best care, you might encounter some problems. Here are a few common issues and how to address them:
* Potato Scab: This is a common soilborne disease that causes rough, scabby patches on the potato skins. To prevent potato scab, maintain a slightly acidic soil pH (around 6.0). Avoid overwatering and ensure good drainage.
* Early Blight: This fungal disease causes brown spots on the leaves. To prevent early blight, provide good air circulation and avoid overhead watering. Remove any affected leaves immediately.
* Late Blight: This is a more serious fungal disease that can quickly destroy your potato plants. It’s more common in cool, wet weather. To prevent late blight, choose disease-resistant varieties and apply a fungicide if necessary.
* Pests: As mentioned earlier, keep an eye out for pests like aphids, potato beetles, and flea beetles. Use insecticidal soap or other organic pest control methods to manage them.
* Poor Growth: If your potato plants are not growing well, it could be due to a lack of nutrients, poor drainage, or insufficient sunlight. Make sure you
Conclusion
So, there you have it! Growing potatoes in grow bags is not just a gardening trend; it’s a game-changer for anyone, regardless of space or experience. We’ve walked you through the simple steps, highlighted the benefits, and hopefully, inspired you to ditch the traditional garden bed (at least for your potatoes!).
Why is this DIY trick a must-try? Because it offers unparalleled control over your growing environment. You dictate the soil composition, the watering schedule, and even the amount of sunlight your precious potato plants receive. This level of control translates to healthier plants, bigger yields, and ultimately, tastier potatoes. Plus, the portability of grow bags means you can chase the sun or shelter your plants from unexpected frost with ease.
But the beauty of this method lies in its adaptability. Feel free to experiment with different potato varieties. Russets, Yukon Golds, fingerlings – they all thrive in grow bags. Consider adding companion plants like marigolds or basil to deter pests and enhance the flavor of your potatoes. You can also adjust the size of your grow bags depending on the space you have available and the number of potatoes you want to grow. Smaller bags are perfect for patios and balconies, while larger bags can accommodate more plants and produce a bigger harvest.
Don’t be afraid to get creative with your soil mix. While the recommended blend of compost, potting soil, and perlite works wonders, you can tailor it to your specific needs and preferences. Adding bone meal can provide extra phosphorus for root development, while incorporating worm castings can boost the overall nutrient content of the soil.
And remember, growing potatoes in grow bags is a learning experience. Don’t be discouraged if your first attempt isn’t perfect. Every season brings new challenges and opportunities to refine your technique. The key is to observe your plants, pay attention to their needs, and adjust your approach accordingly.
We are confident that once you experience the joy of harvesting your own homegrown potatoes from grow bags, you’ll be hooked. The satisfaction of digging into the soil and unearthing those golden nuggets is truly unparalleled. It’s a rewarding experience that connects you to the earth and provides you with fresh, delicious food.
So, what are you waiting for? Grab some grow bags, gather your supplies, and get ready to embark on a potato-growing adventure. We encourage you to try this DIY trick and share your experiences with us. Let us know what varieties you’re growing, what challenges you’ve faced, and what successes you’ve celebrated. Share your photos and tips on social media using #GrowBagPotatoes. We can’t wait to see your amazing harvests! Happy growing!
Frequently Asked Questions (FAQ)
What size grow bag is best for potatoes?
The ideal size grow bag for potatoes is typically between 10 and 20 gallons. A 10-gallon bag is suitable for smaller varieties or if you’re limited on space. A 20-gallon bag provides ample room for larger varieties and allows for a more substantial harvest. The key is to provide enough space for the potato plants to develop a healthy root system and produce plenty of tubers. If you’re unsure, it’s always better to err on the side of a larger bag.
How often should I water my potatoes in grow bags?
Watering frequency depends on several factors, including the weather, the size of the grow bag, and the type of soil you’re using. Generally, you should water your potatoes whenever the top inch of soil feels dry to the touch. During hot, dry weather, you may need to water daily. In cooler, wetter weather, you may only need to water every few days. The best way to determine if your potatoes need water is to check the soil moisture regularly. Avoid overwatering, as this can lead to root rot. Grow bags typically drain well, but ensure your bag has drainage holes.
What kind of soil should I use for growing potatoes in grow bags?
A well-draining, nutrient-rich soil mix is essential for growing healthy potatoes in grow bags. A good starting point is a blend of equal parts compost, potting soil, and perlite. Compost provides essential nutrients, potting soil provides a good base for root growth, and perlite improves drainage and aeration. You can also add other amendments like bone meal for phosphorus or worm castings for added nutrients. Avoid using garden soil, as it can be too heavy and compact, hindering root development.
How many seed potatoes can I plant in one grow bag?
The number of seed potatoes you can plant in one grow bag depends on the size of the bag and the variety of potatoes you’re growing. In a 10-gallon bag, you can typically plant one to two seed potatoes. In a 20-gallon bag, you can plant two to three seed potatoes. Space the seed potatoes evenly within the bag to allow for adequate growth. Overcrowding can lead to smaller potatoes and reduced yields.
When is the best time to plant potatoes in grow bags?
The best time to plant potatoes in grow bags is typically in early spring, after the last frost. Potatoes prefer cool weather, so planting them early in the season allows them to establish a strong root system before the summer heat arrives. You can also plant potatoes in late summer for a fall harvest, but be sure to choose a variety that matures quickly. Check your local planting calendar for specific dates based on your climate.
How do I “hill” potatoes in grow bags?
Hilling potatoes is an important step in growing potatoes in grow bags. As the potato plants grow, gradually add more soil to the grow bag, covering the stems up to the bottom leaves. This encourages the plants to produce more tubers along the buried stems. Repeat this process every few weeks until the grow bag is nearly full. Hilling also helps to protect the developing tubers from sunlight, which can cause them to turn green and produce solanine, a toxic compound.
How do I know when my potatoes are ready to harvest from grow bags?
Potatoes are typically ready to harvest when the plants begin to flower or when the foliage starts to die back. You can also gently feel around in the soil to check the size of the tubers. If they are large enough for your liking, you can start harvesting. To harvest, simply tip the grow bag over and carefully remove the potatoes from the soil. Be gentle to avoid damaging the tubers.
Can I reuse the soil from my grow bags after harvesting potatoes?
Yes, you can reuse the soil from your grow bags after harvesting potatoes, but it’s important to amend it with fresh compost and other nutrients. Potatoes are heavy feeders, so they deplete the soil of essential nutrients. Adding compost will replenish these nutrients and improve the soil structure. You may also want to add other amendments like bone meal or worm castings. Avoid planting potatoes in the same soil year after year, as this can increase the risk of disease. Rotate your crops to maintain soil health.
What are some common pests and diseases that affect potatoes in grow bags?
Some common pests that affect potatoes include aphids, potato beetles, and flea beetles. Diseases that can affect potatoes include early blight, late blight, and potato scab. To prevent pests and diseases, choose disease-resistant varieties, practice good sanitation, and monitor your plants regularly. You can also use organic pest control methods like insecticidal soap or neem oil. If you notice any signs of disease, remove the affected plants immediately to prevent the spread of the disease.
Can I grow potatoes in grow bags indoors?
Yes, you can grow potatoes in grow bags indoors, but you’ll need to provide them with adequate light. Potatoes need at least six hours of direct sunlight per day, so you may need to supplement with grow lights. Choose a sunny location near a window or use grow lights to provide the necessary light. Also, ensure that the grow bags have good drainage to prevent overwatering. Indoor growing can be a great option for those who live in areas with short growing seasons or limited outdoor space.

Leave a Comment