
Grow Sage Indoors? Absolutely! Imagine stepping into your kitchen and snipping fresh, fragrant sage leaves to elevate your culinary creations. No more last-minute grocery store runs or settling for dried herbs that lack that vibrant, earthy punch. This isn’t just a dream; it’s an achievable reality with a few simple DIY tricks.
Sage, with its velvety leaves and distinctive aroma, has a rich history steeped in tradition. For centuries, cultures around the world have revered sage not only for its culinary uses but also for its medicinal properties. From ancient Romans using it as a preservative to Native Americans incorporating it into spiritual ceremonies, sage has always held a special place in human history. Now, you can bring this piece of history into your own home.
But why should you bother learning how to grow sage indoors? Well, for starters, it’s incredibly rewarding! There’s something deeply satisfying about nurturing a plant from a tiny seed or cutting to a thriving herb. Beyond the personal satisfaction, growing your own sage offers a constant supply of fresh herbs, saves you money, and reduces your reliance on commercially grown produce. Plus, it’s a fantastic way to add a touch of greenery and natural fragrance to your living space. I’m here to guide you through some easy and effective DIY methods that will have you harvesting your own sage in no time!
Growing Sage Indoors: A Comprehensive DIY Guide
Hey there, fellow plant enthusiasts! I’m so excited to share my tried-and-true method for growing sage indoors. Fresh sage is a game-changer in the kitchen, and having it readily available is a total win. Plus, the aroma is just divine! Let’s dive into how you can cultivate your own thriving sage plant right inside your home.
Choosing the Right Sage Variety
First things first, not all sage varieties are created equal when it comes to indoor growing. Some get quite large and might outgrow your space quickly. Here are a few of my favorite, more compact sage varieties that thrive indoors:
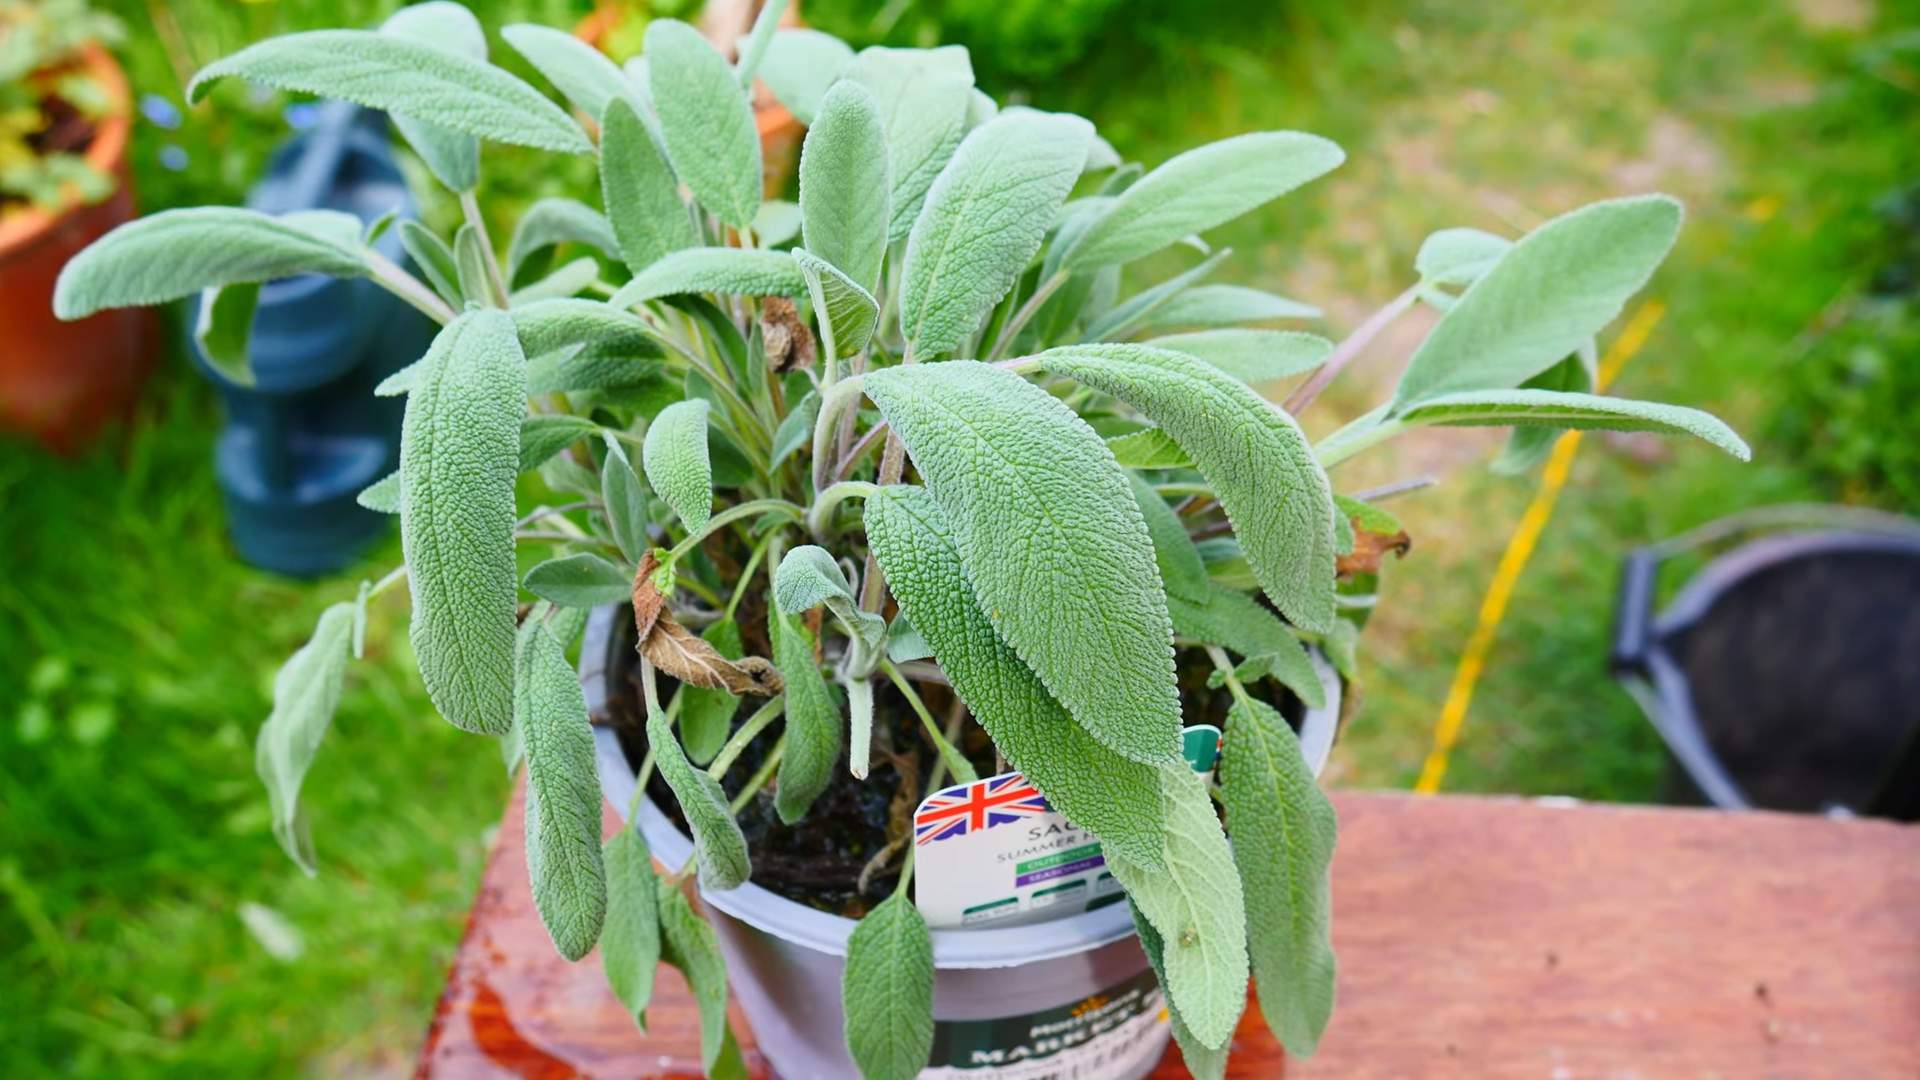
* **Common Sage (Salvia officinalis):** This is the classic culinary sage, known for its robust flavor and grayish-green leaves. It’s relatively easy to grow and stays a manageable size.
* **Dwarf Sage (Salvia officinalis ‘Nana’):** As the name suggests, this is a smaller version of common sage, making it perfect for smaller pots and limited spaces.
* **Golden Sage (Salvia officinalis ‘Aurea’):** This variety boasts beautiful golden-variegated leaves, adding a touch of visual interest to your indoor garden. It has a slightly milder flavor than common sage.
* **Purple Sage (Salvia officinalis ‘Purpurascens’):** With its striking purple foliage, this sage is as ornamental as it is useful in the kitchen. The flavor is similar to common sage.
Gathering Your Supplies
Before we get our hands dirty, let’s make sure we have everything we need. Here’s a checklist of essential supplies:
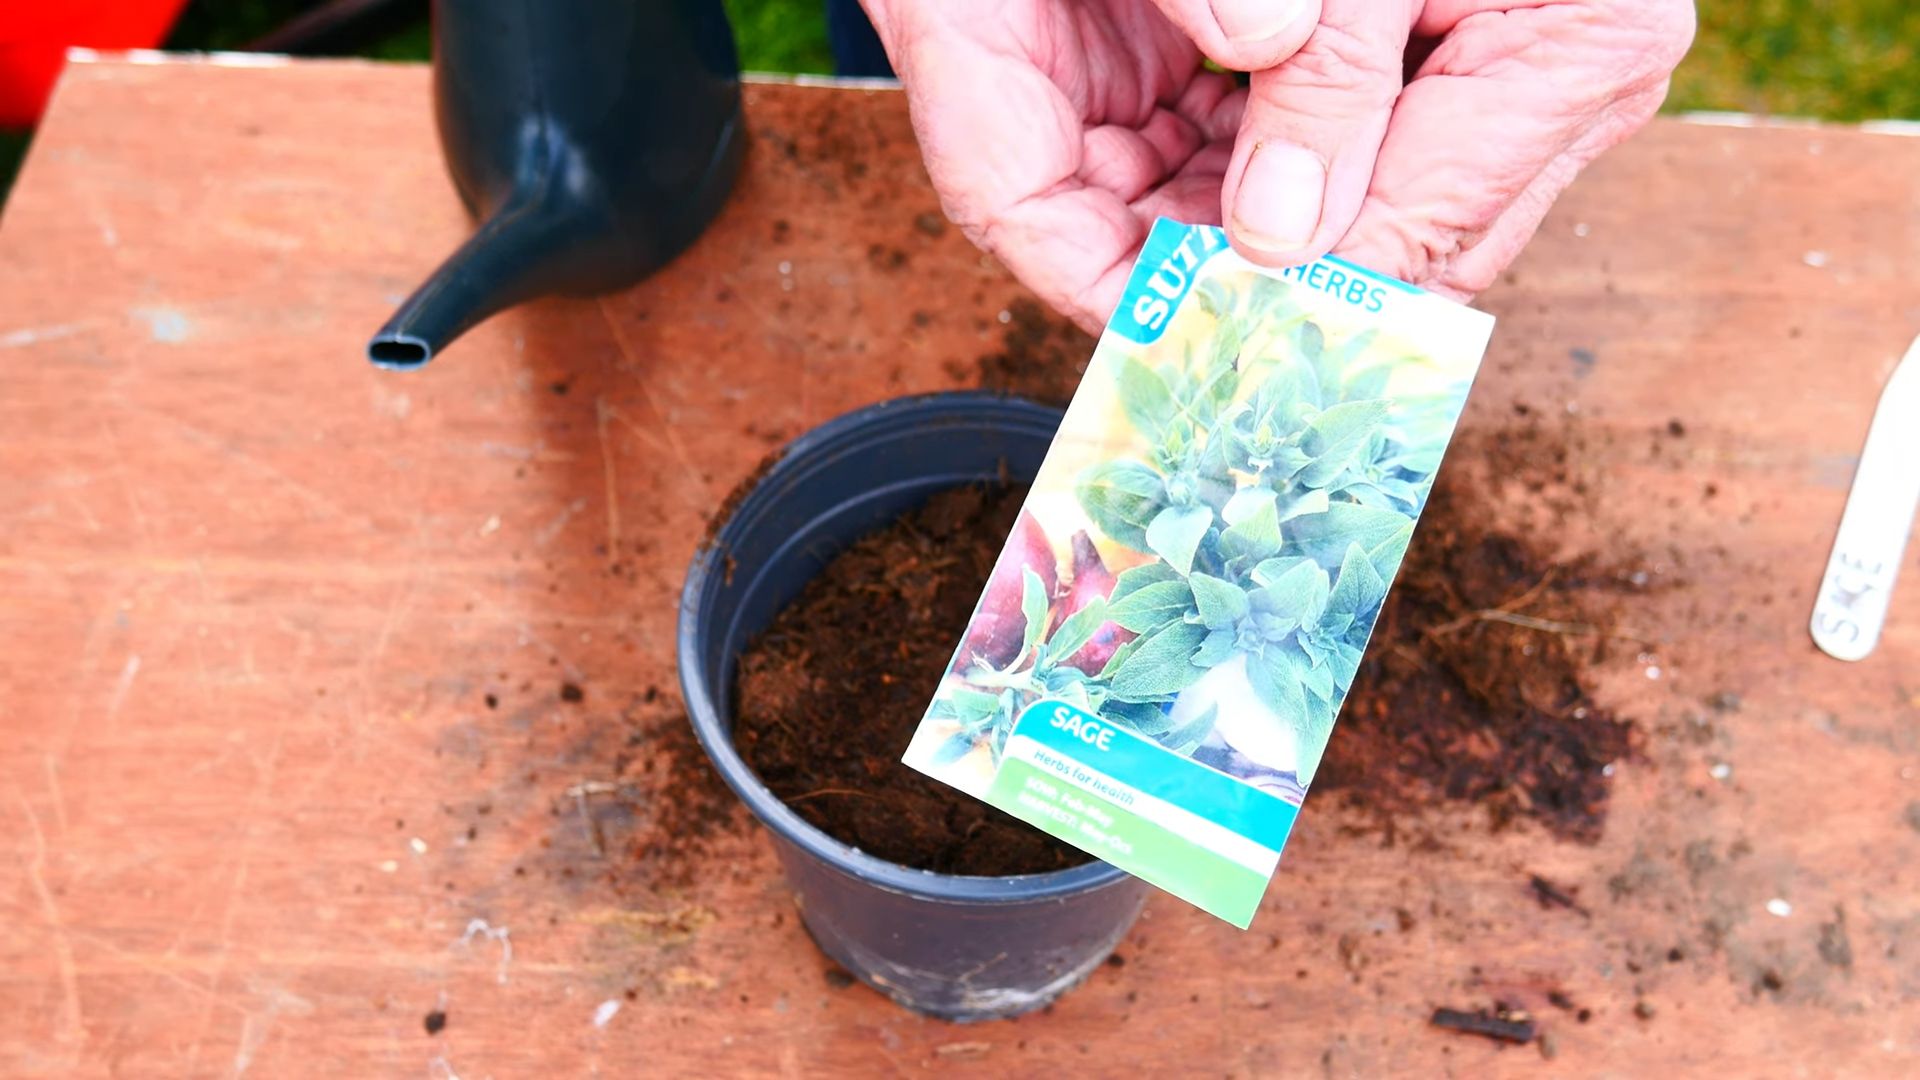
* **Sage Seeds or a Sage Plant:** You can start from seeds or purchase a small sage plant from a local nursery. Starting from seeds takes longer, but it’s a rewarding experience.
* **Potting Mix:** Use a well-draining potting mix specifically formulated for herbs or vegetables. Avoid using garden soil, as it can become compacted and doesn’t drain well in pots.
* **Pot with Drainage Holes:** Choose a pot that’s at least 6 inches in diameter and has drainage holes at the bottom. Good drainage is crucial for preventing root rot.
* **Saucer:** Place a saucer under the pot to catch any excess water that drains out.
* **Grow Lights (Optional but Recommended):** If you don’t have a sunny windowsill, grow lights will provide the necessary light for your sage to thrive.
* **Watering Can or Spray Bottle:** For gentle watering.
* **Small Shovel or Trowel:** For planting and transplanting.
* **Pruning Shears or Scissors:** For trimming and harvesting.
Starting from Seeds (If You Choose This Route)
If you’re feeling adventurous and want to start your sage from seeds, here’s how I do it:
1. **Sow the Seeds:** Fill a small seed tray or individual pots with seed-starting mix. Moisten the mix thoroughly. Sprinkle the sage seeds evenly over the surface of the soil. Gently press the seeds into the soil, but don’t bury them too deeply. Sage seeds need light to germinate.
2. **Provide Light and Warmth:** Cover the seed tray or pots with a clear plastic lid or plastic wrap to create a humid environment. Place the tray in a warm location, ideally between 70-75°F (21-24°C). If you don’t have a warm spot, you can use a heat mat designed for seed germination.
3. **Keep the Soil Moist:** Check the soil moisture daily and mist with water as needed to keep it consistently moist but not soggy.
4. **Wait for Germination:** Sage seeds typically germinate in 10-21 days. Once the seedlings emerge, remove the plastic cover and place the tray under grow lights or in a sunny windowsill.
5. **Thin the Seedlings:** Once the seedlings have developed a few sets of true leaves (the leaves that look like miniature sage leaves), thin them out, leaving only the strongest seedling in each pot.
6. **Transplant to Larger Pots:** When the seedlings are about 2-3 inches tall, transplant them into larger pots (at least 6 inches in diameter) filled with well-draining potting mix.
Planting a Sage Plant
If you’re starting with a sage plant from a nursery, the process is much simpler:
1. **Prepare the Pot:** Fill the pot with well-draining potting mix, leaving about an inch of space at the top.
2. **Remove the Plant from its Container:** Gently remove the sage plant from its nursery container. If the roots are tightly bound, gently loosen them with your fingers.
3. **Plant the Sage:** Place the sage plant in the center of the pot, making sure the top of the root ball is level with the soil surface.
4. **Fill in with Soil:** Fill in the remaining space around the plant with potting mix, gently pressing down to secure the plant.
5. **Water Thoroughly:** Water the plant thoroughly until water drains out of the drainage holes.
Caring for Your Indoor Sage Plant
Now that your sage is planted, let’s talk about how to keep it happy and healthy.
Light
Sage needs at least 6-8 hours of sunlight per day. A south-facing windowsill is ideal. If you don’t have enough natural light, use grow lights to supplement. I’ve found that using a full-spectrum LED grow light for 12-14 hours a day works wonders.
Watering
Water your sage plant when the top inch of soil feels dry to the touch. Avoid overwatering, as this can lead to root rot. When you water, water thoroughly until water drains out of the drainage holes. Make sure to empty the saucer underneath the pot to prevent the plant from sitting in water. I usually water my sage about once a week, but this can vary depending on the temperature and humidity in your home.
Temperature and Humidity
Sage prefers temperatures between 60-70°F (15-21°C). Avoid placing your plant near drafts or heat sources. Sage is relatively tolerant of low humidity, but it will appreciate a little extra humidity, especially during the winter months when indoor air tends to be dry. You can increase humidity by placing a tray of water near the plant or using a humidifier.
Fertilizing
Feed your sage plant every 2-4 weeks during the growing season (spring and summer) with a balanced liquid fertilizer diluted to half strength. Avoid over-fertilizing, as this can lead to leggy growth and a less flavorful herb. I like to use an organic fertilizer specifically formulated for herbs.
Pruning
Pruning is essential for keeping your sage plant compact and bushy. Regularly pinch back the tips of the stems to encourage branching. You can also remove any dead or yellowing leaves. Don’t be afraid to prune your sage plant – it will actually encourage it to grow more!
Harvesting
You can start harvesting sage leaves once the plant is established and has grown to a reasonable size. To harvest, simply snip off the leaves with pruning shears or scissors. Harvest leaves from the top of the plant, as this will encourage new growth. You can use fresh sage leaves immediately or dry them for later use.
Troubleshooting Common Problems
Even with the best care, you might encounter some problems with your indoor sage plant. Here are a few common issues and how to address them:
* **Yellowing Leaves:** This can be caused by overwatering, underwatering, nutrient deficiencies, or pests. Check the soil moisture and adjust your watering accordingly. If the soil is dry, water thoroughly. If the soil is soggy, allow it to dry out before watering again. If the yellowing is accompanied by stunted growth, consider fertilizing your plant. Inspect the leaves for pests.
* **Leggy Growth:** This is usually caused by insufficient light. Move your plant to a sunnier location or supplement with grow lights. Prune back the leggy stems to encourage bushier growth.
* **Root Rot:** This is caused by overwatering and poor drainage. Make sure your pot has drainage holes and that you’re not overwatering your plant. If you suspect root rot, remove the plant from the pot and inspect the roots. If the roots are brown and mushy, trim them off and repot the plant in fresh potting mix.
* **Pests:** Sage can be susceptible to pests such as aphids, spider mites, and whiteflies. Inspect your plant regularly for pests. If you find any, you can try washing them off with a strong stream of water or using an insecticidal soap.
Drying Sage Leaves
If you have a bountiful harvest of sage leaves, you can dry them for later use. Here’s how I dry my sage leaves:
1. **Harvest the Leaves:** Harvest the sage leaves in the morning, after the dew has dried.
2. **Wash and Dry:** Wash the leaves gently and pat them dry with a paper towel.
3. **Bundle the Leaves:** Tie the leaves together in small bundles with twine.
4. **Hang to Dry:** Hang the bundles upside down in a cool, dry, and well-ventilated place.
Conclusion
So, there you have it! Growing sage indoors is not only achievable, but it’s also a rewarding experience that brings a touch of the garden into your home, regardless of the season. We’ve walked through the essential steps, from selecting the right variety and providing optimal lighting to ensuring proper watering and addressing potential challenges. But why is this DIY trick a must-try?
Firstly, consider the convenience. Imagine having fresh, fragrant sage readily available whenever you need it for your culinary creations. No more last-minute trips to the grocery store or settling for dried herbs that lack the vibrant flavor of fresh sage. This is especially beneficial if you live in an area with harsh winters or limited access to fresh herbs year-round.
Secondly, growing your own sage is incredibly cost-effective. A single sage plant can provide you with a continuous supply of leaves for months, if not years, far outweighing the cost of purchasing fresh sage repeatedly. Plus, you have the satisfaction of knowing exactly where your herbs come from and how they were grown, ensuring they are free from harmful pesticides and chemicals.
Thirdly, and perhaps most importantly, growing sage indoors is a fantastic way to connect with nature and add a touch of greenery to your living space. The simple act of tending to a plant can be incredibly therapeutic, providing a sense of calm and accomplishment. Watching your sage plant thrive under your care is a truly rewarding experience.
Now, let’s talk about variations and suggestions. While we’ve focused on the basic method, there are plenty of ways to customize your indoor sage growing experience. For example, you could experiment with different varieties of sage, such as purple sage or golden sage, to add visual interest to your indoor herb garden. You could also try propagating new sage plants from cuttings, expanding your collection and sharing them with friends and family.
Another suggestion is to consider companion planting. Certain herbs and vegetables thrive when grown together, and sage is no exception. Try planting your sage alongside rosemary, thyme, or even tomatoes to create a mutually beneficial ecosystem.
Don’t be afraid to experiment with different potting mixes and fertilizers to find what works best for your sage plant. Some growers prefer organic options, while others opt for synthetic fertilizers. The key is to monitor your plant’s growth and adjust your approach accordingly.
Ultimately, the best way to learn is by doing. So, we encourage you to take the plunge and try growing sage indoors. It’s a relatively simple and inexpensive project that can bring a wealth of benefits to your life.
And now, we want to hear from you! Have you tried growing sage indoors before? What challenges did you face, and what tips would you share with other readers? We encourage you to share your experiences in the comments section below. Your insights could be invaluable to others who are just starting out. Let’s create a community of indoor herb growers and learn from each other’s successes and failures. We are confident that with a little patience and care, you’ll be enjoying the fresh, aromatic flavor of homegrown sage in no time. Embrace the journey of indoor gardening and discover the joy of nurturing your own little piece of nature within the comfort of your home. Remember, the key to successful indoor gardening, especially when you **grow sage indoors**, is consistent care and attention.
FAQ
What is the best variety of sage to grow indoors?
The best varieties of sage to grow indoors are typically smaller, more compact cultivars. Common sage (Salvia officinalis) is a popular choice and generally does well indoors. Dwarf sage varieties are also excellent options as they don’t require as much space. Consider ‘Berggarten’ sage, which is known for its attractive foliage and relatively compact size. Ultimately, the best variety depends on your personal preference and the amount of space you have available. Research different sage varieties to find one that suits your needs and aesthetic preferences.
How much sunlight does indoor sage need?
Sage requires a significant amount of sunlight to thrive indoors. Aim for at least 6-8 hours of direct sunlight per day. A south-facing window is ideal, but if you don’t have one, you can supplement with grow lights. If your sage plant isn’t getting enough sunlight, it may become leggy and produce fewer leaves. Observe your plant closely and adjust its position or lighting as needed. Rotate the plant regularly to ensure all sides receive adequate sunlight.
What type of soil is best for growing sage indoors?
Sage prefers well-draining soil that is slightly alkaline. A good potting mix for sage should consist of a combination of potting soil, perlite, and vermiculite. This will help to ensure proper drainage and aeration. Avoid using heavy, clay-based soils, as they can retain too much moisture and lead to root rot. You can also add a small amount of lime to the soil to increase its alkalinity.
How often should I water my indoor sage plant?
Water your sage plant when the top inch of soil feels dry to the touch. Avoid overwatering, as this can lead to root rot. Sage prefers to be kept slightly on the dry side. When you do water, water thoroughly until water drains out of the bottom of the pot. Be sure to empty any excess water from the saucer to prevent the plant from sitting in water. The frequency of watering will depend on factors such as the size of the pot, the type of soil, and the humidity levels in your home.
How do I fertilize my indoor sage plant?
Sage is not a heavy feeder, so you don’t need to fertilize it frequently. Fertilize your sage plant every 2-3 months during the growing season (spring and summer) with a balanced liquid fertilizer diluted to half strength. Avoid fertilizing during the dormant season (fall and winter). Over-fertilizing can lead to leggy growth and a decrease in flavor. Organic fertilizers, such as compost tea or fish emulsion, are also good options.
How do I prune my indoor sage plant?
Pruning is essential for maintaining the health and shape of your indoor sage plant. Prune regularly to encourage bushier growth and prevent the plant from becoming leggy. You can prune your sage plant at any time of year, but the best time to prune is in the spring after the plant has finished flowering. Remove any dead or damaged leaves and stems. You can also pinch back the tips of the stems to encourage branching.
What are some common problems when growing sage indoors?
Some common problems when growing sage indoors include overwatering, underwatering, pests, and diseases. Overwatering can lead to root rot, while underwatering can cause the leaves to wilt and dry out. Pests such as aphids, spider mites, and whiteflies can infest sage plants. Diseases such as powdery mildew can also affect sage. Monitor your plant regularly for signs of problems and take action promptly to address them.
How do I harvest sage leaves from my indoor plant?
You can harvest sage leaves from your indoor plant at any time after the plant has established itself. Simply snip off the leaves with scissors or pruning shears. Avoid removing more than one-third of the plant’s foliage at any one time. The best time to harvest sage leaves is in the morning after the dew has dried. Fresh sage leaves can be used immediately in cooking or dried for later use.
Can I propagate sage from cuttings indoors?
Yes, you can easily propagate sage from cuttings indoors. Take a 4-6 inch cutting from a healthy sage plant, removing the lower leaves. Dip the cut end in rooting hormone and plant it in a pot filled with well-draining potting mix. Keep the soil moist and place the pot in a warm, bright location. Roots should develop within a few weeks. Once the cuttings have rooted, you can transplant them into larger pots.
How do I dry sage leaves from my indoor plant?
There are several ways to dry sage leaves from your indoor plant. One method is to hang the stems upside down in a cool, dry, and well-ventilated area. Another method is to spread the leaves out on a baking sheet and dry them in a low oven (170°F) for several hours. You can also use a dehydrator to dry sage leaves. Once the leaves are completely dry, store them in an airtight container in a cool, dark place.

Leave a Comment