
Quick home cleaning shortcuts – who doesn’t crave them? Let’s be honest, spending hours scrubbing and tidying isn’t exactly anyone’s idea of a good time. We all dream of a sparkling clean home, but the reality of fitting cleaning into our already packed schedules can feel overwhelming. That’s where these brilliant DIY cleaning hacks come in!
For centuries, people have sought ways to make household chores easier. From ancient Roman bathhouses meticulously maintained by slaves to the ingenious inventions of the Victorian era, the desire for efficient cleaning has always been present. Today, we’re carrying on that tradition, armed with modern knowledge and a DIY spirit.
But why are these quick home cleaning shortcuts so essential in today’s world? Well, time is precious! We’re juggling work, family, hobbies, and everything in between. Spending less time cleaning means more time for the things we truly enjoy. Plus, let’s face it, a clean and organized home contributes to a sense of calm and well-being. It’s hard to relax and recharge in a cluttered, dirty space. I’m here to share some of my favorite time-saving tricks that will transform your cleaning routine from a dreaded chore into a manageable task. Get ready to reclaim your weekends and enjoy a cleaner, happier home!
Quick Home Cleaning Shortcuts: My Secret Weapons for a Sparkling Home
Okay, let’s be honest, cleaning isn’t exactly anyone’s favorite pastime. But a clean home is a happy home, right? So, I’ve compiled my absolute favorite quick cleaning shortcuts that help me keep my place looking presentable without spending my entire weekend scrubbing. These are the tricks I use to maintain a relatively clean space even when life gets crazy busy.
The Power of Prevention: Setting the Stage for Easy Cleaning
Before we dive into the actual cleaning hacks, let’s talk about prevention. A little bit of effort upfront can save you a ton of time and energy later.
* Wipe as you go: This is my golden rule. Spill something? Wipe it up immediately. See a smudge on the mirror? Grab a cloth and get rid of it. Addressing messes as they happen prevents them from becoming bigger, harder-to-clean problems.
* Shoe-free zone: Seriously, this makes a HUGE difference. Designate an area near your entrance for shoes. This keeps dirt and grime from being tracked throughout your house. I have a cute little shoe rack and a welcome mat that helps catch debris.
* Do a quick tidy every evening: Before settling in for the night, take 5-10 minutes to put things back where they belong. Fluff the pillows, fold the blankets, clear the coffee table. It’s amazing how much cleaner your home will look with just a little bit of straightening up.
* Use doormats: Place doormats both inside and outside your exterior doors. These mats trap dirt and debris before they can be tracked into your home. Shake them out regularly to keep them effective.
* Declutter regularly: The less stuff you have, the less you have to clean around. Regularly decluttering your home will make cleaning much easier and faster. Donate or discard items you no longer need or use.
Speed Cleaning the Kitchen: My Go-To Hacks
The kitchen is often the dirtiest room in the house, but these shortcuts will help you keep it sparkling.
1. Microwave Magic
This is one of my favorite tricks!
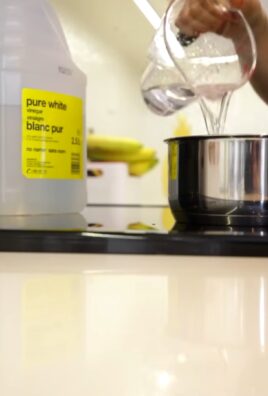
1. Fill a microwave-safe bowl with 1 cup of water and a few tablespoons of vinegar or lemon juice.
2. Microwave on high for 5 minutes. The steam will loosen any stuck-on food.
3. Carefully remove the bowl (it will be hot!) and wipe down the inside of the microwave with a sponge or paper towel. The grime should come off easily.
2. Dishwasher Deep Clean
Keep your dishwasher running efficiently with this simple hack.
1. Once a month, place a cup of white vinegar in a dishwasher-safe bowl on the top rack of your empty dishwasher.
2. Run the dishwasher on a hot cycle. The vinegar will help to remove grease, grime, and odors.
3. Alternatively, you can sprinkle a cup of baking soda on the bottom of the dishwasher and run a short, hot cycle.
3. Sink Sparkle
A clean sink makes the whole kitchen feel cleaner.
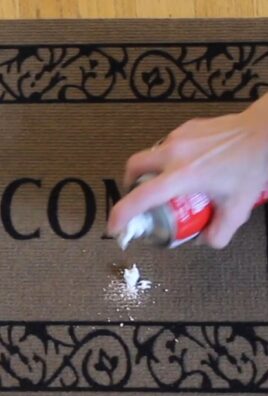
1. Sprinkle baking soda all over the sink.
2. Pour a little vinegar over the baking soda. It will fizz!
3. Scrub the sink with a sponge or brush.
4. Rinse thoroughly with water.
4. Stovetop Savior
Burnt-on food on the stovetop is a pain, but this makes it easier.
1. Sprinkle baking soda over the cooled stovetop.
2. Spray with white vinegar.
3. Let it sit for 15-20 minutes.
4. Scrub with a sponge or non-scratch scouring pad.
5. Wipe clean with a damp cloth.
5. Quick Counter Wipe Down
Keep a spray bottle filled with a mixture of water and a few drops of dish soap or all-purpose cleaner handy.
1. Spray the counters.
2. Wipe clean with a microfiber cloth.
3. Do this after every meal prep to prevent build-up.
Bathroom Blitz: Fast and Effective Cleaning
The bathroom can quickly become a breeding ground for germs and grime, but these shortcuts will help you keep it clean and fresh.
1. Shower Spray and Go
This is a game-changer for preventing soap scum build-up.
1. After each shower, spray the walls and door with a shower cleaner. You can buy a commercial shower cleaner or make your own by mixing equal parts white vinegar and water in a spray bottle.
2. No need to rinse! The cleaner will help to prevent soap scum from forming.
2. Toilet Bowl Tidy
Keep your toilet bowl clean with minimal effort.
1. Pour 1/2 cup of baking soda into the toilet bowl.
2. Follow with 1 cup of white vinegar.
3. Let it fizz for 30 minutes.
4. Scrub with a toilet brush and flush.
3. Mirror Magic
Streak-free mirrors are easy to achieve with this simple trick.
1. Mix equal parts white vinegar and water in a spray bottle.
2. Spray the mirror.
3. Wipe clean with a microfiber cloth or newspaper.
4. Fast Floor Freshening
Keep your bathroom floor clean with a quick sweep or mop.
1. Keep a broom or mop in the bathroom for quick cleanups.
2. Sweep or mop the floor regularly to remove dust, hair, and debris.
3. For a deeper clean, use a bathroom cleaner or a mixture of water and vinegar.
5. Declutter the Counters
Clear the bathroom counters of unnecessary items.
1. Store toiletries in drawers or cabinets to keep the counters clutter-free.
2. Use organizers to keep items tidy and accessible.
3. Wipe down the counters regularly to remove spills and splatters.
Living Room Refresh: Quick Tips for a Tidy Space
The living room is where we relax and entertain, so it’s important to keep it clean and inviting.
1. Pillow Plump and Blanket Fold
This simple step can make a big difference in the overall appearance of your living room.
1. Fluff the pillows and fold the blankets on the sofa and chairs.
2. This will instantly make the room look tidier and more inviting.
2. Surface Sweep
Clear the coffee table and other surfaces of clutter.
1. Gather any items that don’t belong in the living room and put them away.
2. Wipe down the surfaces with a damp cloth to remove dust and spills.
3. Vacuuming Velocity
A quick vacuum can instantly freshen up the living room.
1. Use a vacuum cleaner with a brush attachment to vacuum the carpets and rugs.
2. Pay attention to high-traffic areas and corners.
3. Use the hose attachment to vacuum upholstery and hard-to-reach areas.
4. Dusting Dash
Dusting can make a big difference in the air quality and appearance of your living room.
1. Use a microfiber cloth or duster to dust furniture, shelves, and other surfaces.
2. Pay attention to areas that tend to accumulate dust, such as window sills and baseboards.
5. Window Wonder
Clean windows can brighten up the entire living room.
1. Use a window cleaner or a mixture of water and vinegar to clean the windows.
2. Wipe the windows with a microfiber cloth or paper towel.
3. For streak-free results, clean the windows on a cloudy day.
Bedroom Bliss: Keeping Your Sanctuary Clean
Your bedroom should be a relaxing and peaceful space, and keeping it clean is essential for creating that atmosphere.
1. Make the Bed
This is the simplest and most effective way to make your bedroom look tidier.
1. Make your bed every morning.
2. It takes just a few minutes, but it makes a huge difference in the overall appearance of the room.
2. Clothes Control
Keep your clothes organized and off the floor.
1. Hang up or fold your clothes immediately after wearing them.
2. Put dirty clothes in the hamper.
3. Regularly declutter your closet and drawers to get rid of clothes you no longer need or wear.
3. Surface Sanity
Clear the nightstands and dressers of clutter.
1. Gather any items that don’t belong in the bedroom and put them away.
2. Wipe down the surfaces with a damp cloth to remove dust and spills.
4. Floor Focus
Keep your bedroom floor clean and free of clutter.
1. Vacuum or sweep the floor regularly to remove dust, hair, and debris.
2. Pick up any items that are on the floor and put them away.
5. Air Affair
Freshen the air in your bedroom.
1. Open the windows to air out the room.
2. Use an air freshener or diffuser to add a pleasant scent.
3. Wash your bedding regularly
Conclusion
So, there you have it! These quick home cleaning shortcuts aren’t just about saving time; they’re about reclaiming your weekends and enjoying a cleaner, more comfortable living space without sacrificing your sanity. We’ve explored simple yet effective ways to tackle common cleaning challenges, from banishing microwave messes to revitalizing your showerhead.
The beauty of these DIY tricks lies in their adaptability. Feel free to experiment with different essential oils in your microwave cleaning solution to find a scent that invigorates you. If you’re sensitive to vinegar, try using lemon juice as a substitute in your showerhead cleaning routine. The key is to find what works best for you and your home.
Why is this a must-try? Because these shortcuts are not only incredibly effective but also incredibly budget-friendly. You’re likely to have most of the ingredients already in your pantry or cleaning cabinet. Plus, you’re reducing your reliance on harsh chemicals, making your home a healthier environment for you and your family.
Imagine spending less time scrubbing and more time doing the things you love. Picture a sparkling clean kitchen after just a few minutes of effort. Envision a showerhead that delivers a powerful, refreshing spray, thanks to a simple overnight soak. These are the realities that await you when you embrace these quick home cleaning shortcuts.
We wholeheartedly encourage you to try these DIY cleaning methods. Don’t be afraid to tweak them to suit your specific needs and preferences. And most importantly, share your experiences with us! Let us know which shortcuts worked best for you, any variations you discovered, and any other cleaning tips you’d like to share. Your feedback is invaluable and helps us create even more helpful content for our community.
Ready to transform your cleaning routine? Give these quick home cleaning shortcuts a try and experience the difference for yourself. You’ll be amazed at how much time and effort you can save while achieving a sparkling clean home.
Frequently Asked Questions
Q: Are these cleaning shortcuts safe for all surfaces?
A: While most of these shortcuts are generally safe, it’s always a good idea to test them on an inconspicuous area first, especially on delicate surfaces like natural stone or wood. For instance, while vinegar is a fantastic cleaner, it can etch certain types of stone. Similarly, be cautious when using abrasive cleaners on easily scratched surfaces. Always read the manufacturer’s instructions for your surfaces and appliances before using any cleaning product, DIY or otherwise. If you are unsure, consult a professional cleaner.
Q: Can I use these shortcuts if I have allergies or sensitivities?
A: Absolutely! Many of these shortcuts utilize natural ingredients like vinegar, baking soda, and lemon juice, which are generally less irritating than harsh chemicals. However, if you have known allergies or sensitivities, it’s crucial to be mindful of the ingredients. For example, if you’re allergic to citrus, avoid using lemon juice. Always wear gloves when cleaning to protect your skin, and ensure proper ventilation to avoid inhaling strong fumes. If you experience any adverse reactions, discontinue use immediately and consult a medical professional. You can also substitute ingredients with hypoallergenic alternatives. For example, use a fragrance-free dish soap instead of one with added perfumes.
Q: How often should I use these cleaning shortcuts?
A: The frequency of use depends on your lifestyle and cleaning habits. For high-traffic areas like the kitchen and bathroom, you might want to incorporate these shortcuts into your weekly cleaning routine. For less frequently used areas, a monthly cleaning might suffice. The microwave cleaning shortcut can be used as needed, whenever you notice splatters and spills. The showerhead cleaning shortcut is best done every few months to prevent mineral buildup. Ultimately, the best approach is to assess your needs and adjust your cleaning schedule accordingly.
Q: What if I don’t have all the ingredients listed?
A: The beauty of these DIY shortcuts is their flexibility. Many ingredients can be substituted with similar alternatives. For example, if you don’t have white vinegar, you can use apple cider vinegar. If you don’t have baking soda, you can try using washing soda. If you don’t have lemon juice, you can use lime juice. The key is to understand the purpose of each ingredient and find a suitable replacement. However, be mindful of potential differences in effectiveness and safety. Always research the properties of the substitute ingredient before using it.
Q: Will these shortcuts eliminate the need for traditional cleaning products?
A: While these shortcuts can significantly reduce your reliance on traditional cleaning products, they may not completely eliminate the need for them. For heavily soiled or stained areas, you might still need to use specialized cleaning products. However, these shortcuts can serve as a great foundation for your cleaning routine, reducing the amount of harsh chemicals you use and saving you money in the long run. Think of them as a complement to your existing cleaning arsenal, rather than a complete replacement.
Q: How do I store the cleaning solutions I make using these shortcuts?
A: Store your homemade cleaning solutions in clean, labeled spray bottles or containers. It’s essential to label them clearly to avoid confusion and accidental misuse. Keep them out of reach of children and pets. Store them in a cool, dark place to prevent degradation of the ingredients. Some solutions, like those containing essential oils, may have a shorter shelf life. It’s best to make small batches and use them within a few weeks for optimal effectiveness. Discard any solutions that show signs of spoilage, such as discoloration or a foul odor.
Q: Can I use these shortcuts to clean my entire house?
A: Yes, you can adapt these shortcuts to clean various areas of your home. The microwave cleaning shortcut can be used to clean other appliances, such as ovens and refrigerators. The showerhead cleaning shortcut can be used to clean faucets and other fixtures. The key is to adapt the techniques and ingredients to suit the specific cleaning task. With a little creativity and experimentation, you can create a comprehensive cleaning routine using these simple yet effective shortcuts. Remember to always test on an inconspicuous area first.
Q: Are these shortcuts environmentally friendly?
A: Yes, these shortcuts are generally more environmentally friendly than using traditional cleaning products. They utilize natural ingredients that are biodegradable and less harmful to the environment. By reducing your reliance on harsh chemicals, you’re minimizing your contribution to pollution and protecting the planet. Furthermore, you’re reducing your consumption of plastic packaging, which contributes to waste. By embracing these DIY cleaning methods, you’re making a conscious choice to live a more sustainable lifestyle.

Leave a Comment