
Grow Asparagus Indoors? Absolutely! Imagine harvesting fresh, tender asparagus spears right from your kitchen, even in the dead of winter. Sounds like a dream, right? Well, it doesn’t have to be! This comprehensive guide will unlock the secrets to successfully cultivating this delectable vegetable within the cozy confines of your home.
Asparagus, a culinary delicacy enjoyed for centuries, boasts a rich history dating back to ancient Greece and Rome, where it was prized for its medicinal properties and unique flavor. Today, it remains a beloved ingredient in cuisines worldwide. But what if you don’t have a sprawling garden or live in a climate conducive to outdoor asparagus cultivation? That’s where our DIY tricks come in!
Many people shy away from growing asparagus, believing it requires vast amounts of space and years of patience. While it’s true that outdoor asparagus beds take time to establish, growing asparagus indoors offers a faster, more controlled environment. Plus, who wouldn’t want a continuous supply of this nutritious and delicious vegetable? I’m here to tell you that with a few simple hacks and readily available materials, you can enjoy homegrown asparagus year-round. Let’s dive in and transform your indoor space into a thriving asparagus haven!
Growing Asparagus Indoors: A Comprehensive DIY Guide
Okay, so you want to grow asparagus indoors? Awesome! It’s totally doable, though it requires a bit of patience and the right setup. Asparagus isn’t exactly your typical houseplant, but with this guide, I’ll walk you through everything you need to know to enjoy fresh, homegrown asparagus spears even without a garden.
Choosing the Right Asparagus Variety
Before we dive into the nitty-gritty, let’s talk about asparagus varieties. Not all asparagus is created equal, especially when it comes to indoor growing. You’ll want to choose a variety that’s known for its vigor and adaptability.
* ‘Jersey Knight’: This is a popular choice and a reliable producer. It’s known for its disease resistance and high yields.
* ‘Purple Passion’: If you’re looking for something a little different, ‘Purple Passion’ is a great option. It has a sweeter flavor than green varieties and adds a pop of color to your indoor garden.
* ‘Millennium’: This is another excellent choice for its hardiness and productivity. It’s a hybrid variety that’s well-suited for various growing conditions.
I recommend starting with ‘Jersey Knight’ if you’re a beginner. It’s generally considered the easiest to grow.
Getting Started: What You’ll Need
Here’s a list of everything you’ll need to get your indoor asparagus garden up and running:
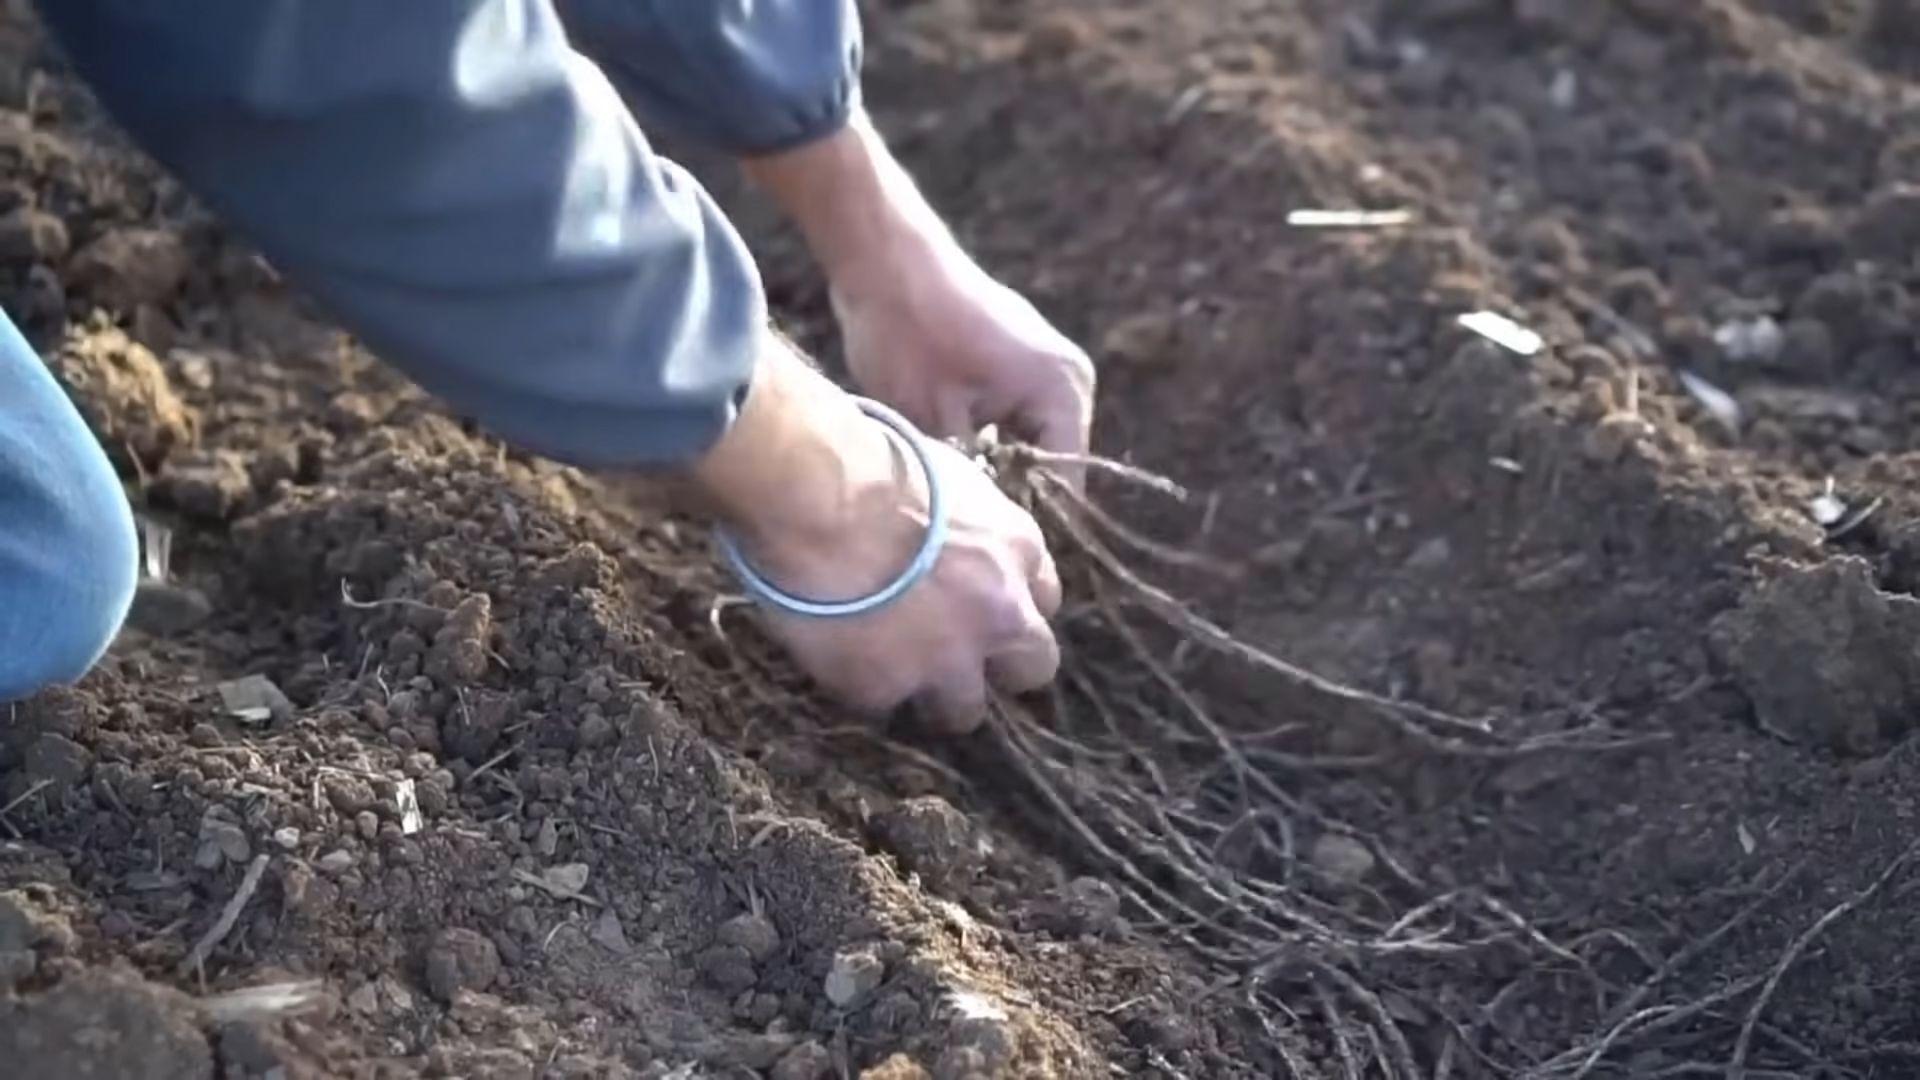
* Asparagus Crowns: These are the dormant roots of the asparagus plant. You can purchase them online or from a local nursery. One-year-old crowns are generally recommended.
* Large Containers: Asparagus needs plenty of room for its roots to spread. Choose containers that are at least 12 inches deep and 12 inches wide. The bigger, the better!
* Well-Draining Potting Mix: A mix of compost, peat moss, and perlite or vermiculite works well. Avoid using garden soil, as it can become compacted and doesn’t drain well.
* Grow Lights: Asparagus needs a lot of light, so you’ll need to supplement natural light with grow lights. Full-spectrum LED grow lights are a great option.
* Fertilizer: A balanced, slow-release fertilizer is essential for providing your asparagus plants with the nutrients they need.
* Watering Can or Hose: For watering your plants.
* Pruning Shears or Scissors: For trimming ferns.
* Optional: A humidity tray to increase humidity around the plants.
Step-by-Step Instructions: Planting Your Asparagus Crowns
Now for the fun part! Here’s how to plant your asparagus crowns:
1. Soak the Crowns: Before planting, soak the asparagus crowns in water for about an hour. This will help rehydrate them and encourage them to sprout.
2. Prepare the Containers: Fill the containers with the potting mix, leaving about 2-3 inches of space at the top.
3. Create a Mound: In the center of each container, create a small mound of potting mix.
4. Position the Crowns: Place the asparagus crown on top of the mound, spreading the roots out around it.
5. Cover the Roots: Gently cover the roots with potting mix, leaving the crown (the top part where the shoots will emerge) exposed.
6. Water Thoroughly: Water the containers thoroughly until the water drains out of the bottom.
7. Place Under Grow Lights: Position the containers under your grow lights.
Caring for Your Indoor Asparagus Plants
Once your asparagus crowns are planted, it’s important to provide them with the right care to ensure they thrive.
1. Light: Asparagus needs at least 14-16 hours of light per day. Position your grow lights about 6-12 inches above the plants.
2. Watering: Keep the soil consistently moist, but not waterlogged. Water when the top inch of soil feels dry to the touch.
3. Fertilizing: Fertilize your asparagus plants every 2-3 weeks with a balanced, slow-release fertilizer. Follow the instructions on the fertilizer package.
4. Temperature: Asparagus prefers temperatures between 65-75°F (18-24°C).
5. Humidity: Asparagus prefers moderate humidity. If the air in your home is dry, you can increase humidity by placing a humidity tray near the plants or using a humidifier.
6. Pruning: As the asparagus plants grow, they will produce ferns. These ferns are important for photosynthesis and should not be removed until they turn yellow or brown in the fall. You can trim any dead or damaged ferns as needed.
Harvesting Your Asparagus Spears
This is where the patience comes in. You shouldn’t harvest any spears during the first year after planting. This allows the plants to establish a strong root system.
1. Second Year: In the second year, you can harvest a few spears, but only for a short period (about 2-3 weeks).
2. Third Year and Beyond: In the third year and beyond, you can harvest spears for a longer period (about 6-8 weeks).
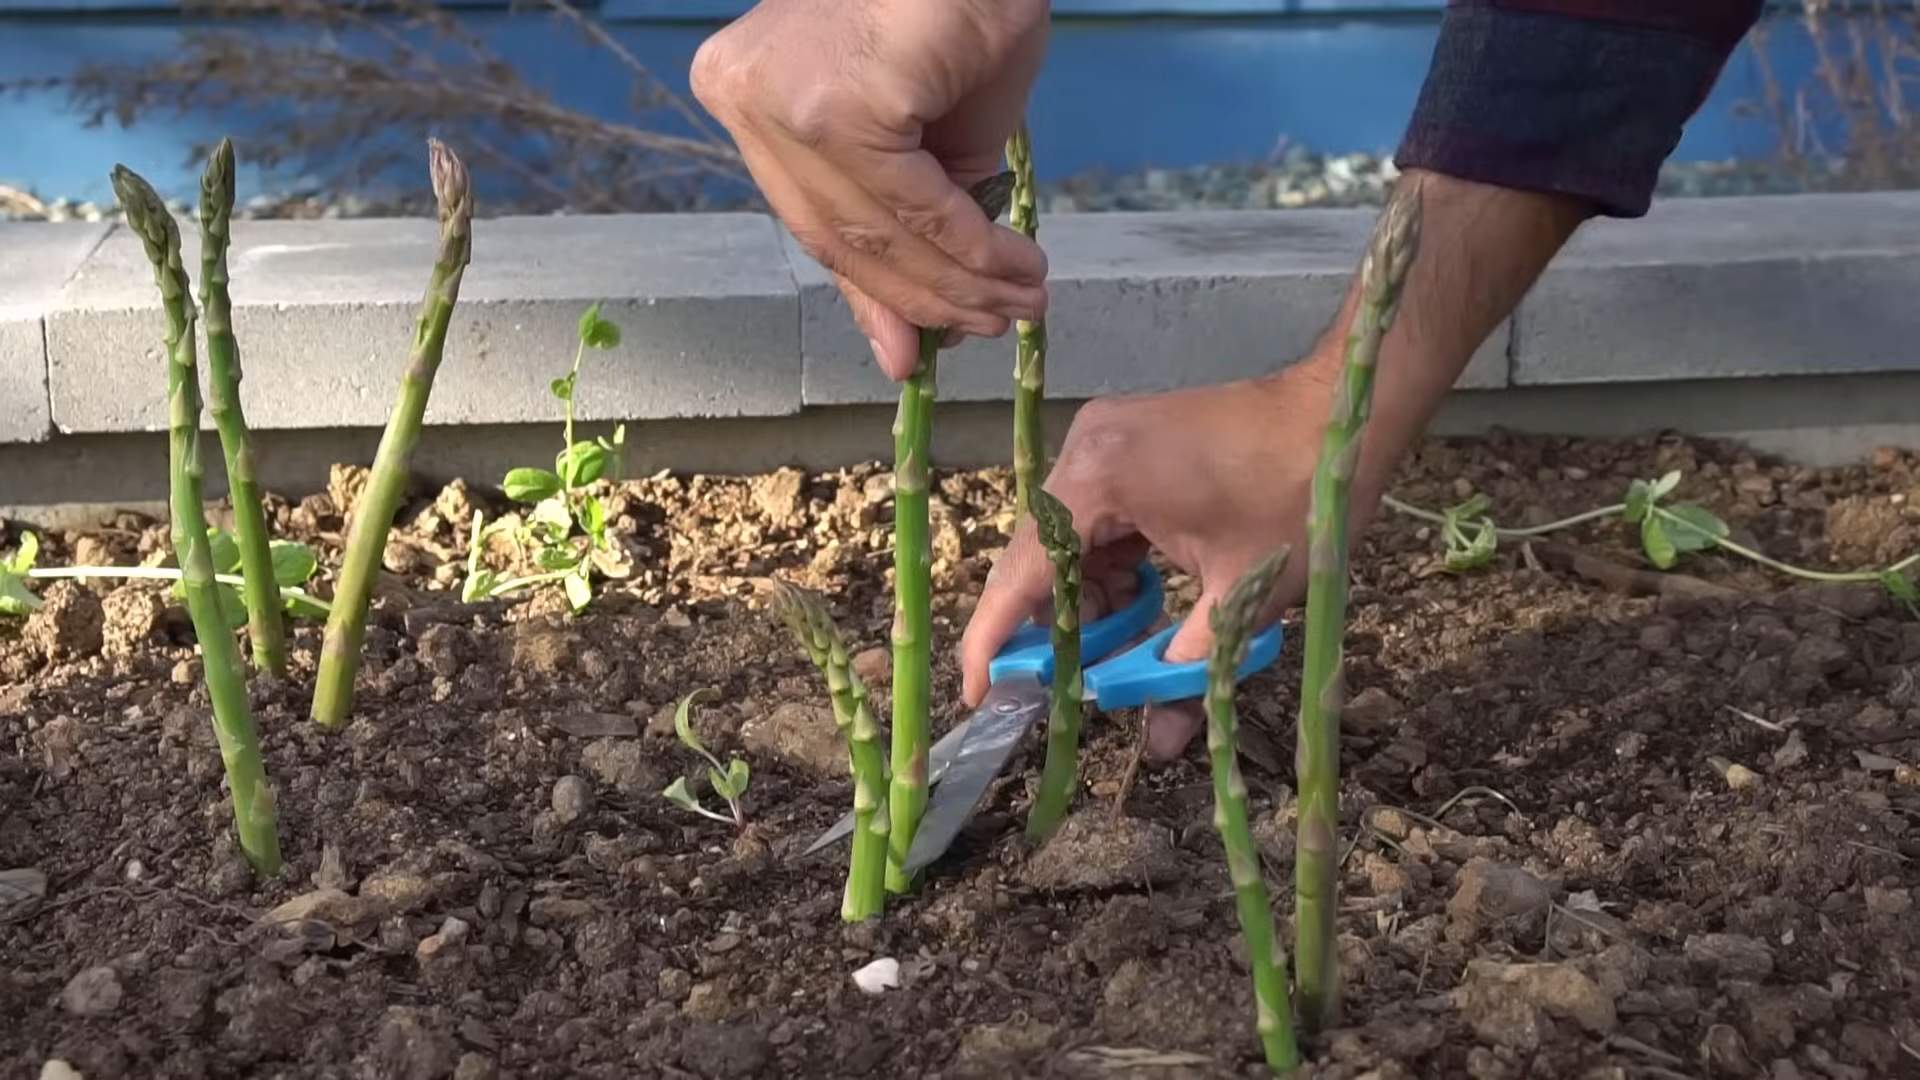
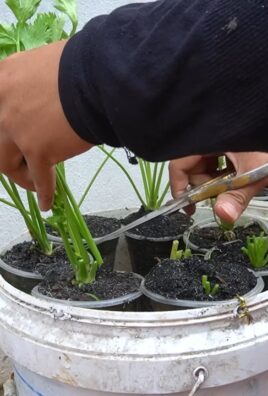
3. Harvesting Technique: To harvest asparagus spears, use a sharp knife to cut them off at ground level. Harvest spears when they are about 6-8 inches tall and before the tips start to open up.
Troubleshooting Common Problems
Even with the best care, you may encounter some problems when growing asparagus indoors. Here are some common issues and how to address them:
* Yellowing Ferns: This could be a sign of overwatering, underwatering, or nutrient deficiency. Check the soil moisture and adjust your watering accordingly. Fertilize the plants if necessary.
* Pests: Asparagus beetles and aphids can sometimes be a problem. Inspect your plants regularly and treat any infestations with insecticidal soap or neem oil.
* Lack of Spears: This could be due to insufficient light, poor soil, or a lack of nutrients. Make sure your plants are getting enough light and fertilize them regularly.
* Thin Spears: This is often a sign that the plants are not getting enough nutrients or water. Increase your watering and fertilizing frequency.
Overwintering Your Asparagus Plants
Asparagus plants need a period of dormancy in the winter to rest and prepare for the next growing season.
1. Stop Fertilizing: In the fall, stop fertilizing your asparagus plants.
2. Reduce Watering: Reduce watering as the ferns start to turn yellow or brown.
3. Cut Back Ferns: Once the ferns have completely died back, cut them off at ground level.
4. Cool Storage: Move the containers to a cool, dark place (around 40-50°F or 4-10°C) for about 2-3 months. You can store them in a garage, basement, or shed.
5. Resume Care: In the spring, bring the containers back indoors and resume watering and fertilizing.
Tips for Success
Here are a few extra tips to help you succeed with your indoor asparagus garden:
* Use High-Quality Potting Mix: Don’t skimp on the potting mix. A good quality mix will provide your plants with the nutrients and drainage they need.
* Provide Adequate Drainage: Make sure your containers have drainage holes to prevent waterlogging.
* Rotate Your Plants: Rotate your plants regularly to ensure they receive even light exposure.
* Be Patient: Asparagus takes time to mature, so don’t get discouraged if you don’t see results right away.
* Monitor for Pests and Diseases: Inspect your plants regularly for pests and diseases and take action promptly if you notice any problems.
* Consider Companion Planting: While not strictly necessary indoors, you could try companion planting with herbs like basil or parsley in separate pots nearby. These can sometimes help deter pests.
Section: Understanding Asparagus Growth Cycle
Asparagus is a perennial plant, meaning it lives for more than two years. Understanding its growth cycle is crucial for successful indoor cultivation.
1. Spring: This is when the spears emerge from the ground. These spears are the edible part of the plant.
2. Summer: The spears develop into ferns, which are the leafy part of the plant. The ferns are responsible for photosynthesis and storing energy for the plant.
3. Fall: The ferns turn yellow or brown and die back. This is when the plant enters dormancy.
4. Winter: The plant remains dormant until the following spring.
By understanding this cycle, you can provide your asparagus plants with the right care at the right time. For example, you’ll know when to harvest spears, when to fertilize, and when to
Conclusion
So, there you have it! Growing asparagus indoors might seem like a challenge reserved for seasoned gardeners, but with a little patience and the right approach, you can absolutely cultivate your own delicious spears right in your home. This DIY trick for growing asparagus indoors isn’t just about saving money; it’s about connecting with your food, enjoying the satisfaction of nurturing something from seed to harvest, and having access to fresh, flavorful asparagus whenever the craving strikes.
Why is this a must-try? Because store-bought asparagus simply can’t compare to the vibrant taste and texture of freshly picked spears. Plus, you control the growing environment, ensuring your asparagus is free from harmful pesticides and herbicides. Imagine the pride you’ll feel serving a dish featuring asparagus you grew yourself!
Beyond the basic method outlined, there’s room for experimentation. Consider trying different asparagus varieties, such as ‘Jersey Knight’ for its high yield or ‘Purple Passion’ for its unique color and slightly sweeter flavor. You can also explore different growing mediums, like a soilless mix of coco coir and perlite, to improve drainage and aeration. Another variation is to use grow lights with different spectrums to see how it affects the growth rate and overall health of your asparagus plants. Some gardeners even experiment with hydroponic systems for an even more controlled and efficient growing environment.
Don’t be intimidated by the initial setup or the time it takes for asparagus to mature. The reward of fresh, homegrown asparagus is well worth the effort. Remember to be patient, provide consistent care, and adjust your approach as needed based on your plants’ needs.
We wholeheartedly encourage you to give this DIY trick a try. Start small, perhaps with just a few crowns, and gradually expand your indoor asparagus garden as you gain experience. The process is incredibly rewarding, and the taste of homegrown asparagus is simply unmatched.
And most importantly, we want to hear about your experiences! Share your tips, successes, and challenges in the comments below. Let’s build a community of indoor asparagus growers and learn from each other. Did you find a particular variety that thrives indoors? Did you discover a unique way to optimize your growing setup? Your insights could be invaluable to other aspiring indoor gardeners. So, grab your seeds or crowns, prepare your containers, and embark on this exciting journey of growing asparagus indoors. Happy gardening!
Frequently Asked Questions (FAQ)
1. How long does it take to grow asparagus indoors from seed?
Growing asparagus from seed indoors is a long-term commitment. It typically takes around three years from seed to harvestable spears. The first year is focused on developing a strong root system (the crown). The second year allows the crown to mature further. By the third year, you should be able to harvest a small number of spears. While it requires patience, starting from seed is a cost-effective way to establish a large asparagus patch.
2. Can I grow asparagus indoors year-round?
Yes, you can grow asparagus indoors year-round, but it requires mimicking the plant’s natural dormancy cycle. Asparagus needs a period of rest to replenish its energy reserves. To achieve this indoors, you’ll need to reduce watering and withhold fertilizer for about 2-3 months during the fall or winter. The foliage will likely turn yellow and die back, which is normal. After the dormancy period, resume regular watering and fertilizing to encourage new growth.
3. What size container do I need for growing asparagus indoors?
Asparagus plants have extensive root systems, so they require large containers. A good rule of thumb is to use a container that is at least 12 inches in diameter and 12 inches deep for each crown. Larger containers are even better, as they provide more room for the roots to grow and access nutrients. You can also use long, rectangular containers to accommodate multiple crowns.
4. What type of soil is best for growing asparagus indoors?
Asparagus prefers well-draining soil that is rich in organic matter. A good mix would be equal parts of potting soil, compost, and perlite or vermiculite. The compost provides nutrients, while the perlite or vermiculite improves drainage and aeration. Avoid using heavy clay soils, as they can become waterlogged and lead to root rot.
5. How much sunlight does indoor asparagus need?
Asparagus needs at least 6-8 hours of direct sunlight per day to thrive. If you don’t have a sunny window, you can supplement with grow lights. LED grow lights are a good option, as they are energy-efficient and provide the full spectrum of light that plants need. Position the grow lights about 6-12 inches above the plants.
6. How often should I water my indoor asparagus plants?
Water asparagus plants regularly, keeping the soil consistently moist but not waterlogged. Check the soil moisture level regularly by sticking your finger into the soil. If the top inch of soil feels dry, it’s time to water. Avoid overwatering, as this can lead to root rot. During the dormancy period, reduce watering significantly.
7. What kind of fertilizer should I use for indoor asparagus?
Asparagus is a heavy feeder, so it needs regular fertilization. Use a balanced fertilizer with an NPK ratio of 10-10-10 or 14-14-14. Apply the fertilizer according to the package directions. You can also supplement with organic fertilizers, such as compost tea or fish emulsion. Fertilize regularly during the growing season, but withhold fertilizer during the dormancy period.
8. How do I harvest asparagus spears indoors?
Harvest asparagus spears when they are about 6-8 inches tall and about as thick as your finger. Use a sharp knife to cut the spears at ground level. Avoid harvesting all of the spears at once, as this can weaken the plant. Instead, harvest only the spears that are ready and leave the rest to grow. In the first year of harvesting, only harvest for a few weeks to allow the plants to continue to mature.
9. Why are my asparagus spears thin and spindly?
Thin and spindly asparagus spears can be caused by several factors, including insufficient sunlight, lack of nutrients, or overcrowding. Make sure your plants are getting enough sunlight and fertilizer. If you have multiple crowns in the same container, they may be competing for resources. Consider thinning them out or transplanting them into separate containers.
10. How do I deal with pests and diseases on my indoor asparagus plants?
Indoor asparagus plants are generally less susceptible to pests and diseases than outdoor plants. However, they can still be affected by common pests such as aphids and spider mites. Inspect your plants regularly for signs of infestation. If you find pests, you can try washing them off with a strong stream of water or using insecticidal soap. For fungal diseases, ensure good air circulation and avoid overwatering. You can also use a fungicide if necessary.
11. Can I move my indoor asparagus plants outdoors during the summer?
Yes, you can move your indoor asparagus plants outdoors during the summer, but you need to acclimate them gradually to the outdoor conditions. Start by placing them in a shady spot for a few hours each day, gradually increasing the amount of sunlight they receive. Bring them back indoors before the first frost.
12. What are the benefits of growing asparagus indoors?
Growing asparagus indoors offers several benefits, including:
* Access to fresh, homegrown asparagus year-round.
* Control over the growing environment, ensuring pesticide-free produce.
* The satisfaction of nurturing plants from seed to harvest.
* A unique and rewarding gardening experience.
* The ability to grow varieties that may not be available locally.
13. Is growing asparagus indoors worth the effort?
While growing asparagus indoors requires patience and effort, the reward of fresh, homegrown asparagus is well worth it for many gardeners. The taste and texture of homegrown asparagus are far superior to store-bought varieties, and the satisfaction of growing your own food is unmatched. If you enjoy gardening and are looking for a challenging and rewarding project, growing asparagus indoors is definitely worth considering. Remember to share your **DIY trick** successes!
Leave a Comment