
Grow Garlic in Kitchen – sounds impossible, right? Well, get ready to ditch that grocery store run because I’m about to show you how to cultivate your own flavorful garlic right from the comfort of your kitchen! For centuries, garlic has been revered not only for its pungent flavor but also for its medicinal properties. From ancient Egyptian tombs to traditional Italian kitchens, garlic has held a place of honor. But who knew you could bring this culinary staple into your own home, regardless of your outdoor space?
Let’s face it, buying garlic can be a gamble. Sometimes you get a bulb that’s already sprouting, other times it’s just… bland. But with this simple DIY trick, you’ll have a constant supply of fresh, flavorful garlic at your fingertips. Imagine the satisfaction of snipping off a few green shoots to add to your pasta sauce or using your homegrown cloves to create the perfect aioli. This isn’t just about saving money; it’s about connecting with your food and experiencing the joy of nurturing something from seed (or in this case, clove) to table. So, are you ready to grow garlic in kitchen and unlock a world of culinary possibilities? Let’s get started!

Growing Garlic in the Kitchen: A DIY Guide for Fresh Garlic from Your Own Home
I love having fresh ingredients in my kitchen, and garlic is no exception. It’s incredibly easy to grow garlic in the kitchen, and it’s a great way to always have fresh garlic on hand. Here is a detailed guide on how you can do it too!
What you need:
- Garlic cloves: Organic garlic from the supermarket or a farmer’s market is best. Avoid supermarket garlic that may have been treated to prevent sprouting.
- A container: A glass, a cup, or a small pot.
- Water: Tap water is usually sufficient.
- Toothpicks (optional): To hold the garlic clove above the water.
- Potting soil (optional): For planting the garlic clove in soil.
- A sunny spot: A windowsill or another place with plenty of light.
Method 1: Growing Garlic in Water
This method is super easy and requires very little effort. you can harvest and use the green shoots while the clove sits in the water.
Step-by-Step Guide:
- Prepare the garlic cloves: Carefully separate the garlic cloves from the bulb. Be careful not to damage the skin of the cloves. Choose the largest and healthiest cloves, as these are most likely to sprout.
- Prepare the container: Fill your container with water. The amount of water should be just enough so that only the bottom part of the garlic clove is in the water.
- Position the garlic cloves: You have two options for placing the cloves:
- Directly in the water: Place the garlic cloves with the root end down (the root end is the side where the clove was attached to the bulb) in the water. Make sure only the bottom part of the clove is in the water.
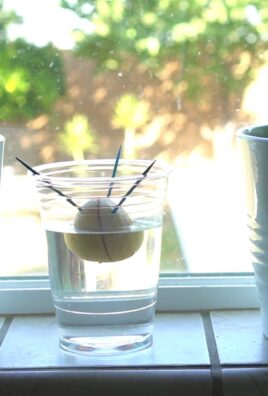
- With toothpicks: Insert three or four toothpicks into the middle of the garlic clove so they form a small “scaffold.” Then place the clove on the container so the toothpicks hold it above the water. The root end should touch the water, but the rest of the clove should stay dry. This method prevents the clove from rotting.
- Place and observe: Put the container in a sunny spot, such as on a windowsill. Change the water every few days to keep it fresh and prevent the formation of bacteria.
- Watch it grow: Within a few days, you should see roots growing from the bottom part of the clove and green shoots sprouting from the top.
- Harvesting: You can harvest the green shoots as soon as they have reached a decent size. Simply cut them with scissors. They have a mild garlic flavor and are excellent for salads, soups, or as a garnish.
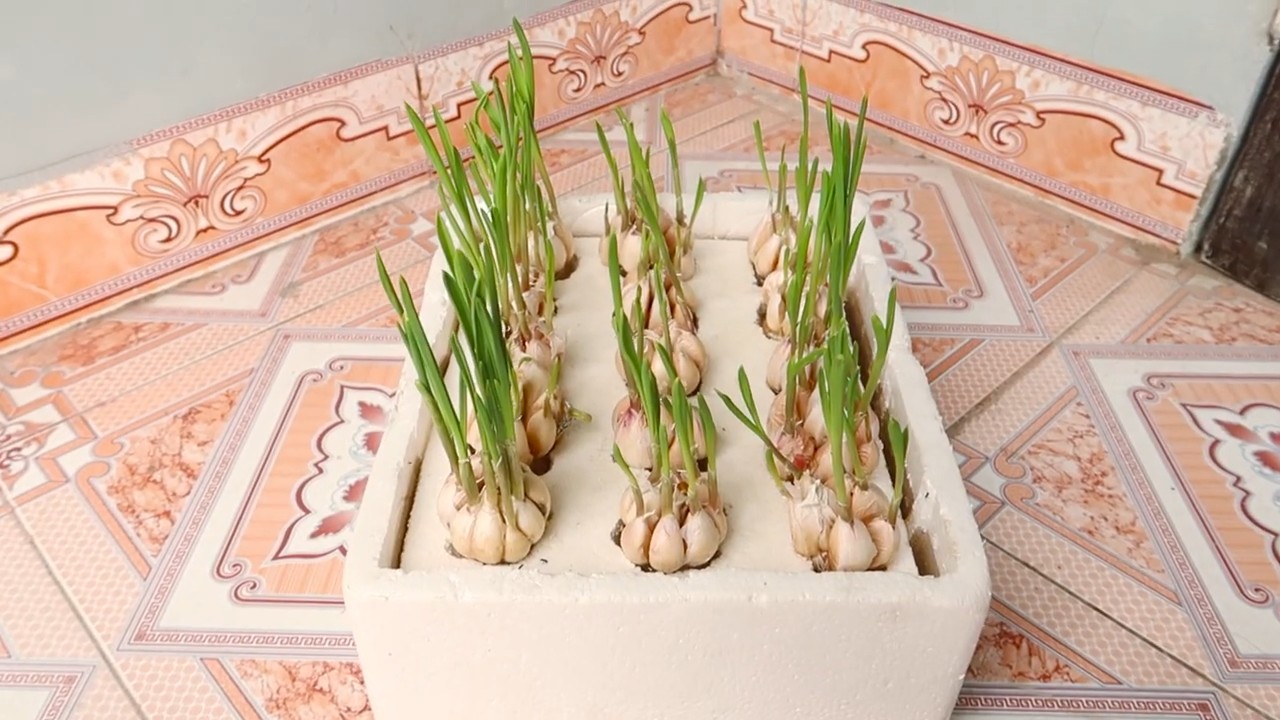
Method 2: Planting Garlic in Soil
This method is ideal if you want to harvest not only the green shoots but also a new garlic bulb. However, it takes longer to harvest a bulb.
Step-by-Step Guide:
- Prepare the garlic cloves: Carefully separate the garlic cloves from the bulb. Choose the largest and healthiest cloves.
- Prepare the container and soil: Choose a small pot with drainage holes. Fill the pot with potting soil.
- Plant the garlic cloves: Stick the garlic cloves with the root end down about 5 cm (2 inches) deep into the soil. Leave about 8-10 cm (3-4 inches) of space between the cloves if you are planting several in one pot.
- Watering: Water the soil until it is moist, but not soaked.
- Placing and caring: Place the pot in a sunny spot. Keep the soil moist, but avoid waterlogging. Water when the top layer of soil feels dry.
- Watch it grow: Within a few weeks, you should see green shoots sprouting from the soil.
- Harvesting the green shoots: You can harvest the green shoots just as you would with the water method.
- Harvesting the garlic bulb: The garlic bulb will only be ready after about 8-9 months. You can tell it’s ripe when the leaves turn yellow and die back. Carefully dig up the bulb and let it dry in a dry, airy place before storing it.
Tips and Tricks for Successfully Growing Garlic in the Kitchen
- Choose the right variety: Some garlic varieties are better suited for growing in pots than others. Try varieties like ‘Softneck’ or ‘Artichoke’.
- Good drainage: Make sure your pot has drainage holes so excess water can run off. Waterlogging can lead to rot.
- Regular watering: Keep the soil moist, but not soaked. Check the soil moisture regularly and water when the top layer feels dry.
- Fertilizing (optional): If you wish, you can fertilize your garlic with an organic fertilizer during the growing phase.
- Pests and diseases: Watch for signs of pests or diseases. If you notice problems, treat them as quickly as possible with a suitable remedy.
- Patience: Growing garlic takes time. Be patient and don’t give up if you don’t see results immediately.
- Sunlight: Garlic needs a lot of sunlight to grow well. Make sure your garlic gets at least 6 hours of sunlight per day.
- Rotation: If you are growing garlic in soil, change the soil regularly to prevent the buildup of diseases.
- Experiment: Try different methods and varieties to find out what works best for you.
- Observation: Observe your garlic plants closely and adjust your care accordingly.
Common Problems and Solutions
- Yellow leaves: Yellow leaves can be a sign of overwatering, underwatering, or a nutrient deficiency. Check the soil moisture and fertilize if necessary.
- Rot: Rot can be caused by waterlogging or poor ventilation. Ensure good drainage and avoid overwatering.
- Pests: Aphids and other pests can infest garlic. Treat them with a suitable insecticide or a natural solution like neem oil.
- Slow growth: Slow growth can be caused by too little sunlight, a nutrient deficiency, or poor soil quality. Make sure your garlic gets enough sunlight, fertilize it if necessary, and use high-quality potting soil.
Why Grow Garlic in the Kitchen?
Relaxation: Growing garlic can be a relaxing and rewarding activity.
*
Fresh garlic always on hand: You always have fresh garlic available without having to go to the supermarket.
Sustainability: You reduce your ecological footprint by growing your own garlic.
Save money: you save money since you no longer have to buy garlic.
Conclusion
So, there you have it! Growing garlic in your kitchen is not only possible, but it’s surprisingly simple and rewarding. Forget those last-minute grocery store runs when you realize you’re out of this essential ingredient. With this easy DIY trick, you can have a fresh supply of garlic greens right at your fingertips, ready to add a burst of flavor to your favorite dishes.
This isn’t just about convenience; it’s about connecting with your food and experiencing the satisfaction of growing something yourself, even in a small space. Plus, those vibrant green shoots are packed with nutrients and offer a milder, more delicate garlic flavor than the cloves themselves. They’re perfect for garnishing salads, stirring into soups, or adding a zing to your morning eggs.
But don’t stop there! Experiment with different varieties of garlic to see which ones thrive best in your indoor environment. Try using different containers, from repurposed jars to stylish planters, to add a touch of personality to your kitchen garden. You can even try planting multiple cloves in the same container for a more abundant harvest of garlic greens.
Consider using different growing mediums as well. While water works perfectly well for sprouting, transferring the sprouted cloves to a pot with soil can encourage bulb development, although this will take significantly longer and require more space and sunlight. You could also experiment with hydroponics for a more controlled and efficient growing environment.
The beauty of this DIY trick is its adaptability. It’s perfect for apartment dwellers, urban gardeners, or anyone who simply wants to add a touch of green to their kitchen. It’s also a fantastic project to do with kids, teaching them about the wonders of nature and the importance of growing your own food.
We wholeheartedly encourage you to give this a try. It’s a low-risk, high-reward project that will not only provide you with fresh garlic greens but also bring a little bit of joy and connection to your daily life. Once you’ve experienced the satisfaction of growing your own garlic in your kitchen, you’ll wonder why you didn’t start sooner!
Don’t forget to share your experiences with us! We’d love to see your kitchen gardens and hear about your favorite ways to use your homegrown garlic greens. Share your photos and tips on social media using #KitchenGarlic or tag us in your posts. Let’s create a community of indoor gardeners and inspire others to embrace the joy of growing their own food.
Ready to ditch the store-bought garlic and embrace the freshness of homegrown?
What are you waiting for? Grab a few cloves of garlic, a glass of water, and get started today! You’ll be amazed at how easy it is to grow your own delicious and nutritious garlic greens right in your kitchen. Happy growing!
Frequently Asked Questions (FAQ)
What kind of garlic should I use?
You can use any type of garlic you find at the grocery store or farmer’s market. However, organic garlic is often recommended to avoid any potential pesticide residue. Softneck varieties tend to sprout more readily in water than hardneck varieties, but both will work. Experiment with different types to see which ones you prefer and which ones thrive best in your indoor environment. Elephant garlic, while technically a type of leek, can also be sprouted for its greens, offering a milder garlic flavor.
How long does it take for the garlic to sprout?
You should start to see sprouts within a few days to a week. The warmer the environment, the faster the garlic will sprout. Make sure to change the water every few days to prevent mold growth and keep the water fresh. The speed of sprouting can also depend on the freshness of the garlic; older garlic may take longer to sprout or may not sprout at all.
How much sunlight does the garlic need?
While garlic greens don’t require intense sunlight, they do benefit from some indirect light. A spot near a window is ideal. Avoid direct sunlight, which can scorch the leaves. If you don’t have a sunny window, you can use a grow light to supplement the natural light.
Can I eat the garlic cloves after I’ve harvested the greens?
Yes, you can! The cloves will be smaller and softer than unsprouted garlic, but they are still perfectly edible. You can use them in cooking just like regular garlic, although their flavor may be slightly milder. Alternatively, you can plant the sprouted cloves in soil to grow a full garlic bulb, although this will require more space and time.
How often should I harvest the garlic greens?
You can harvest the garlic greens as needed, snipping them off with scissors. Avoid cutting off all the greens at once, as this can weaken the plant. Allow the greens to regrow between harvests. Regular harvesting will encourage the plant to produce more greens.
What if my garlic doesn’t sprout?
There are a few reasons why your garlic might not sprout. First, make sure the garlic is fresh and not too old. Second, check the water level and make sure the base of the clove is submerged. Third, ensure the garlic is in a warm enough environment. If you’ve tried all of these things and the garlic still doesn’t sprout, it’s possible that the garlic is not viable. Try using a different clove or a different batch of garlic.
Can I grow garlic in soil instead of water?
Yes, you can grow garlic in soil. In fact, this is the traditional way to grow garlic. However, growing garlic in water is a quicker and easier way to harvest the greens. If you want to grow a full garlic bulb, you’ll need to plant the sprouted clove in soil. Use a well-draining potting mix and plant the clove about 2 inches deep, with the pointed end facing up. Water regularly and provide plenty of sunlight.
Are there any pests or diseases that affect indoor garlic?
Indoor garlic is generally less susceptible to pests and diseases than outdoor garlic. However, you may occasionally encounter problems such as aphids or fungus gnats. These can usually be controlled with insecticidal soap or neem oil. Make sure to provide good air circulation to prevent fungal diseases.
How long will the garlic greens last?
The garlic greens will continue to grow as long as the clove has energy reserves. However, eventually, the clove will start to decompose, and the greens will stop growing. You can extend the life of the greens by changing the water regularly and providing adequate light. Once the greens start to yellow or wilt, it’s time to discard the clove and start with a fresh one.
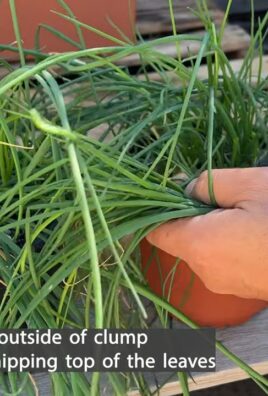
Can I use this method to grow other herbs?
While this method is specifically designed for garlic, you can use similar techniques to sprout other herbs, such as green onions or scallions. Simply place the root end of the herb in a glass of water and watch it regrow. This is a great way to reduce food waste and have a constant supply of fresh herbs at your fingertips.
Leave a Comment