
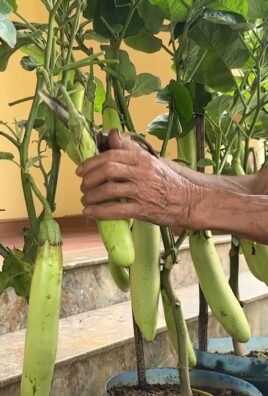
Growing Radicchio Indoors might sound like a challenge reserved for seasoned gardeners, but trust me, it’s totally achievable, even if you’re just starting out! Have you ever dreamt of snipping fresh, slightly bitter, and beautifully colored radicchio leaves right from your kitchen windowsill? Well, dream no more! This guide is packed with simple, DIY tricks and hacks to help you cultivate your own thriving radicchio patch, all without stepping foot outside.
Radicchio, with its vibrant hues and distinctive flavor, has a rich history, particularly in Italian cuisine. For centuries, it’s been a staple in salads and cooked dishes, adding a unique depth of flavor. But beyond its culinary appeal, growing your own radicchio offers a fantastic connection to nature and a sense of accomplishment.
In today’s busy world, finding time for a full-fledged garden can be tough. That’s where these indoor gardening tricks come in! Growing Radicchio Indoors allows you to enjoy fresh, healthy produce year-round, regardless of your outdoor space or climate. Plus, it’s a fun and rewarding project that can brighten up your home and your meals. I’m excited to share these easy-to-follow steps that will have you harvesting your own delicious radicchio in no time!
Growing Radicchio Indoors: A Beginner’s Guide
Okay, so you want to grow radicchio indoors? Awesome! It’s totally doable, and you’ll have fresh, slightly bitter, and beautifully colored leaves right at your fingertips. I’ve been growing radicchio indoors for a while now, and I’m excited to share my tips and tricks with you. Let’s get started!
What You’ll Need
Before we dive into the nitty-gritty, let’s gather our supplies. Here’s a checklist of everything you’ll need to successfully grow radicchio indoors:
* Radicchio Seeds: Choose a variety that you like. Some popular options include ‘Chioggia’, ‘Treviso’, and ‘Castelfranco’. I personally love ‘Chioggia’ for its beautiful round heads.
* Seed Starting Trays or Small Pots: These are essential for starting your seeds. I prefer using seed starting trays with a humidity dome to help with germination.
* Seed Starting Mix: This is a lightweight, sterile mix that’s perfect for delicate seedlings. Don’t use regular potting soil for starting seeds!
* Potting Soil: Once your seedlings are ready to be transplanted, you’ll need a good quality potting soil. Look for a mix that’s well-draining and contains some organic matter.
* Grow Lights: Radicchio needs plenty of light to thrive indoors. A good set of grow lights is crucial, especially during the shorter days of winter. I use LED grow lights because they’re energy-efficient and don’t produce too much heat.
* Pots: Choose pots that are at least 6 inches in diameter. Radicchio needs room to grow!
* Watering Can or Spray Bottle: For watering your seedlings and plants.
* Fertilizer: A balanced liquid fertilizer will help your radicchio plants grow strong and healthy.
* Optional: Heat Mat: A heat mat can help speed up germination, especially if your home is cool.
* Optional: Small Fan: A small fan can help improve air circulation and prevent fungal diseases.
Starting Your Seeds
This is where the magic begins! Getting your seeds started properly is key to a successful radicchio harvest.
1. Prepare Your Seed Starting Trays: Fill your seed starting trays or small pots with seed starting mix. Gently pat down the mix to remove any air pockets.
2. Sow Your Seeds: Sow 2-3 seeds per cell or pot, about ¼ inch deep.
3. Water Gently: Water the seed starting mix gently with a spray bottle or watering can. You want to moisten the mix without disturbing the seeds.
4. Cover and Wait: Cover the seed starting trays with a humidity dome or plastic wrap to create a humid environment. Place the trays in a warm location, ideally around 70-75°F (21-24°C). A heat mat can be helpful here.
5. Monitor Germination: Radicchio seeds typically germinate in 5-10 days. Once you see seedlings emerge, remove the humidity dome or plastic wrap and place the trays under your grow lights.
6. Provide Light: Keep the grow lights on for 14-16 hours per day. Position the lights a few inches above the seedlings.
7. Water Regularly: Keep the seed starting mix consistently moist, but not soggy. Water when the top inch of the mix feels dry to the touch.
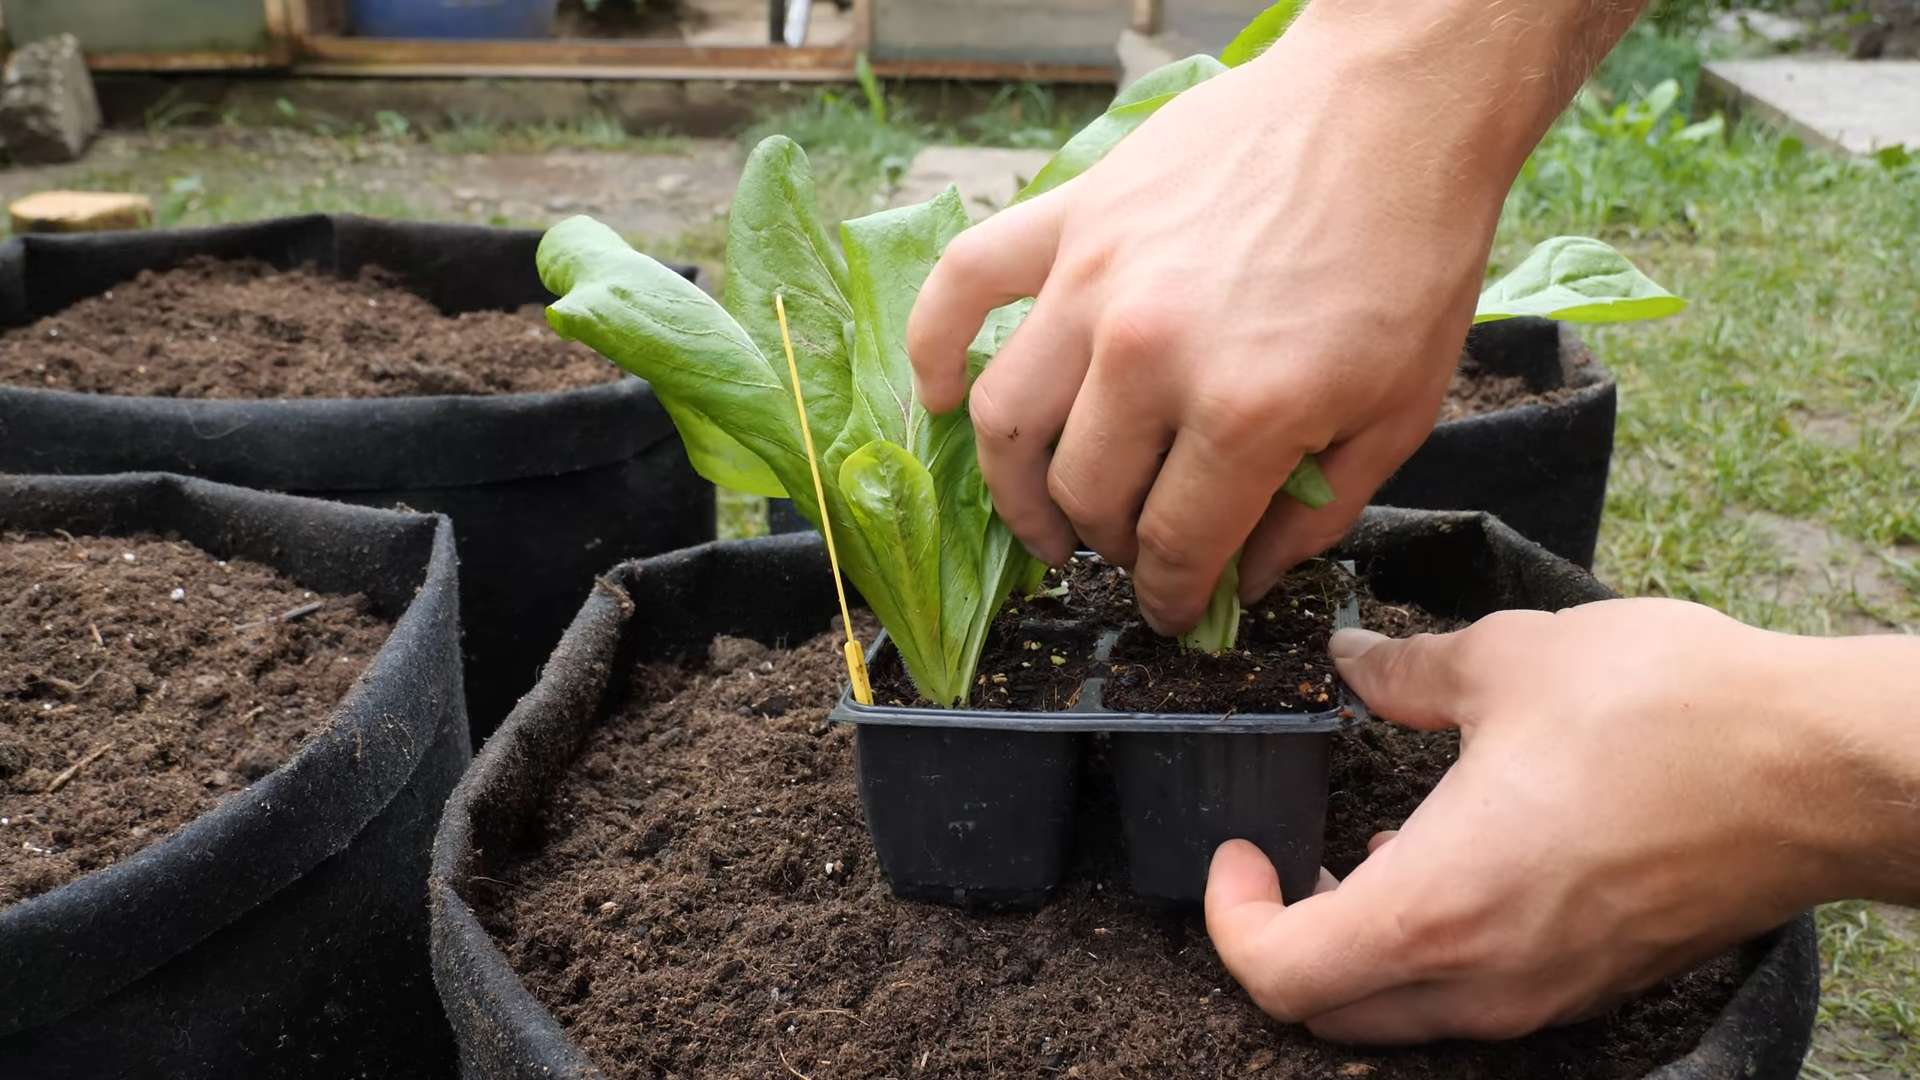
Transplanting Your Seedlings
Once your seedlings have developed a few sets of true leaves (the leaves that look like miniature radicchio leaves), it’s time to transplant them into larger pots.
1. Prepare Your Pots: Fill your pots with potting soil. Again, gently pat down the soil to remove any air pockets.
2. Carefully Remove Seedlings: Gently remove the seedlings from the seed starting trays or pots. Be careful not to damage the roots. If you sowed multiple seeds per cell, you may need to thin them out, leaving only the strongest seedling.
3. Plant Seedlings: Make a small hole in the potting soil and carefully place the seedling in the hole. The top of the root ball should be level with the surface of the soil.
4. Water Thoroughly: Water the seedlings thoroughly after transplanting.
5. Place Under Grow Lights: Place the transplanted seedlings under your grow lights. Continue to provide 14-16 hours of light per day.
Caring for Your Radicchio Plants
Now that your radicchio plants are in their permanent pots, it’s time to focus on providing them with the care they need to thrive.
1. Watering: Water your radicchio plants regularly, keeping the soil consistently moist but not soggy. Check the soil moisture by sticking your finger into the soil. If the top inch feels dry, it’s time to water.
2. Fertilizing: Fertilize your radicchio plants every 2-3 weeks with a balanced liquid fertilizer. Follow the instructions on the fertilizer label.
3. Light: Radicchio needs plenty of light to produce those beautiful, tightly packed heads. Make sure your grow lights are providing adequate light. If you notice your plants are leggy (tall and spindly), they’re not getting enough light.
4. Temperature: Radicchio prefers cooler temperatures, ideally between 60-70°F (15-21°C). Avoid placing your plants near heat sources.
5. Air Circulation: Good air circulation is important to prevent fungal diseases. Use a small fan to circulate the air around your plants.
6. Pest Control: Keep an eye out for pests like aphids and spider mites. If you notice any pests, treat them with an insecticidal soap or neem oil.
7. Bolting: Bolting is when the plant starts to produce a flower stalk. This can happen if the plant gets too hot or stressed. To prevent bolting, keep your plants cool and well-watered. If your plant does bolt, you can still harvest the leaves, but they may be more bitter.
Harvesting Your Radicchio
The best part! You’ve put in the work, and now it’s time to reap the rewards.
1. When to Harvest: You can start harvesting radicchio leaves when the heads are about 3-4 inches in diameter.
2. How to Harvest: You can harvest the entire head by cutting it off at the base of the plant with a sharp knife. Alternatively, you can harvest individual leaves as needed.
3. Succession Planting: To ensure a continuous harvest, sow new seeds every few weeks. This is called succession planting.
4. Enjoy Your Harvest: Radicchio is delicious in salads, grilled, or roasted. Its slightly bitter flavor adds a unique touch to any dish.
Troubleshooting
Even with the best care, you might encounter some problems along the way. Here are some common issues and how to fix them:
* Leggy Plants: This means your plants aren’t getting enough light. Move your grow lights closer to the plants or increase the amount of time they’re on.
* Yellowing Leaves: This could be a sign of overwatering or underwatering. Check the soil moisture and adjust your watering accordingly. It could also be a nutrient deficiency. Try fertilizing your plants.
* Slow Growth: This could be due to a lack of light, nutrients, or water. Make sure your plants are getting enough of all three.
* Pests: Treat pests with insecticidal soap or neem oil.
* Bolting: Keep your plants cool and well-watered to prevent bolting.
Choosing the Right Radicchio Variety
There are several different types of radicchio, each with its own unique flavor and appearance. Here are a few popular varieties to consider:
* Chioggia: This is the most common type of radicchio. It has round, tightly packed heads with red and white leaves. It has a slightly bitter flavor.
* Treviso: This type of radicchio has elongated heads with red and white leaves. It has a more delicate flavor than Chioggia.
* Castelfranco: This type of radicchio has loose, ruffled leaves with creamy white and red speckles. It has a mild, slightly sweet flavor.
* Verona: Similar to Chioggia, but often slightly smaller and more compact.
I hope this guide has been helpful! Growing radicchio indoors can be a rewarding experience. With a little bit of care and attention, you can enjoy fresh, delicious radicchio leaves all year round. Happy gardening!
Conclusion
So, there you have it! Growing radicchio indoors might seem like a challenge, but with a little patience and the right approach, you can enjoy the slightly bitter, beautifully colored leaves of this Italian chicory right from your own home. This DIY trick isn’t just about saving money; it’s about connecting with your food, understanding its growth cycle, and experiencing the satisfaction of nurturing something from seed to table.
Why is this a must-try? Because fresh radicchio from the grocery store often lacks the vibrancy and crispness of homegrown. Plus, you have complete control over the growing environment, ensuring organic, pesticide-free produce. Imagine adding freshly harvested radicchio to your salads, pizzas, or grilled dishes – the flavor difference is remarkable!
Don’t be afraid to experiment with different varieties of radicchio. ‘Chioggia’ is a classic choice, known for its round heads and tightly packed leaves. ‘Treviso’ offers a more elongated shape and a slightly milder flavor. ‘Castelfranco’ is prized for its variegated leaves, adding a touch of elegance to any dish. You can even try growing different varieties simultaneously to create a colorful and flavorful mix.
Consider using different types of growing mediums. While a standard potting mix works well, you could also explore hydroponics or aquaponics for a more advanced and potentially faster-growing system. Adjust the lighting based on your specific indoor environment. If you don’t have a sunny windowsill, invest in a grow light to ensure your radicchio receives adequate illumination.
Remember to monitor your plants regularly for pests and diseases. Aphids and slugs can sometimes be a problem, but they can usually be controlled with organic methods like neem oil or insecticidal soap. Proper ventilation is also crucial to prevent fungal diseases.
We wholeheartedly encourage you to give this DIY trick a try. It’s a rewarding experience that will not only provide you with fresh, delicious radicchio but also deepen your appreciation for the art of gardening. Once you’ve harvested your first head of homegrown radicchio, we’d love to hear about your experience! Share your photos, tips, and challenges in the comments below. Let’s build a community of indoor radicchio growers and learn from each other. Embrace the joy of indoor gardening and discover the delicious possibilities that await! Growing radicchio indoors is easier than you think, and the rewards are well worth the effort.
Frequently Asked Questions (FAQ)
What is the best time of year to start growing radicchio indoors?
Radicchio thrives in cooler temperatures, making fall and winter ideal times to start growing it indoors. You can start seeds indoors about 6-8 weeks before the last expected frost if you plan to transplant them outdoors later, or you can grow them entirely indoors year-round. The key is to provide consistent cool temperatures and adequate light.
How much light does radicchio need when grown indoors?
Radicchio requires at least 6 hours of direct sunlight per day. If you don’t have a sunny windowsill, you’ll need to supplement with grow lights. Fluorescent or LED grow lights are excellent options. Position the lights a few inches above the plants and adjust as they grow. Insufficient light can result in leggy growth and poor head formation.
What type of soil is best for growing radicchio indoors?
A well-draining potting mix is essential for growing radicchio indoors. You can use a commercially available potting mix or create your own by combining equal parts peat moss, perlite, and vermiculite. Ensure the soil is slightly acidic to neutral, with a pH between 6.0 and 7.0. Avoid using garden soil, as it can be too heavy and may contain pests or diseases.
How often should I water my indoor radicchio plants?
Water radicchio plants regularly, keeping the soil consistently moist but not waterlogged. Check the soil moisture by sticking your finger about an inch deep. If it feels dry, it’s time to water. Avoid overwatering, as this can lead to root rot. Ensure your pots have drainage holes to allow excess water to escape.
What is the ideal temperature for growing radicchio indoors?
Radicchio prefers cool temperatures, ideally between 60°F and 70°F (15°C and 21°C). Avoid exposing your plants to temperatures above 75°F (24°C), as this can cause them to bolt (go to seed) and become bitter. If your home is too warm, consider using a fan to circulate air and keep the plants cool.
How long does it take to harvest radicchio grown indoors?
Radicchio typically takes 80-90 days to mature from seed to harvest. However, you can start harvesting individual leaves earlier for salads. The heads are ready to harvest when they are firm and well-formed. Cut the head at the base of the plant, leaving the roots intact. You may be able to get a second harvest from the same plant.
What are some common pests and diseases that affect indoor radicchio?
Common pests that can affect indoor radicchio include aphids, slugs, and spider mites. Aphids can be controlled with insecticidal soap or neem oil. Slugs can be handpicked or trapped. Spider mites can be controlled by increasing humidity and using miticides. Diseases that can affect radicchio include downy mildew and root rot. Prevent these by providing good ventilation and avoiding overwatering.
Can I grow radicchio in containers? What size container is best?
Yes, radicchio grows well in containers. Choose a container that is at least 8-10 inches in diameter and depth to allow enough room for the roots to develop. Ensure the container has drainage holes to prevent waterlogging. You can grow one radicchio plant per container.
How do I prevent radicchio from becoming too bitter?
Several factors can contribute to radicchio’s bitterness, including high temperatures and stress. To minimize bitterness, provide consistent cool temperatures, adequate water, and sufficient light. Harvesting the heads in the cooler part of the day can also help. Some varieties of radicchio are naturally less bitter than others.
Can I eat the entire radicchio plant, or just the head?
While the head is the most commonly consumed part of the radicchio plant, the leaves can also be eaten. The outer leaves may be tougher and more bitter, but they can still be used in cooking. The inner leaves are generally more tender and less bitter, making them ideal for salads.
Leave a Comment