
Okra Gardening Tips Home: Ready to grow your own delicious okra right in your backyard? I’m so excited to share my favorite secrets for a bountiful okra harvest! For generations, okra has been a staple in Southern cuisine and beyond, with roots tracing back to Africa. It’s not just a tasty vegetable; it’s packed with nutrients and adds a unique texture to stews, gumbos, and even fried dishes. But let’s be honest, growing okra can sometimes feel like a challenge.
Have you ever struggled with stunted growth, yellowing leaves, or a disappointing yield? I know I have! That’s why I’ve compiled this guide filled with easy-to-follow okra gardening tips home and DIY hacks that will transform your gardening game. Whether you’re a seasoned gardener or just starting out, these proven methods will help you cultivate healthy, thriving okra plants that produce an abundance of pods.
Imagine stepping outside your door and picking fresh, vibrant okra for your next meal. No more trips to the grocery store or settling for less-than-perfect produce. With these simple tricks, you’ll be enjoying homegrown okra all season long. Let’s dive in and unlock the secrets to successful okra gardening!
Growing Okra: A Beginner’s Guide to Bountiful Harvests
Okra, also known as lady’s fingers, is a warm-season vegetable that’s surprisingly easy to grow, even if you’re a beginner gardener like I once was! I remember my first attempt – a few spindly plants that barely produced anything. But with a little research and some trial and error, I’ve learned the secrets to a thriving okra patch. This guide will walk you through everything you need to know, from choosing the right variety to harvesting those delicious pods.
Choosing the Right Okra Variety
Before you even think about planting, you need to pick the right okra variety for your climate and preferences. There are tons of options out there, each with its own unique characteristics. Here are a few popular choices:
* Clemson Spineless: This is a classic for a reason! It’s a reliable producer with smooth, dark green pods and, as the name suggests, fewer spines, making harvesting a breeze. I highly recommend this one for beginners.
* Burgundy: If you want to add a pop of color to your garden, Burgundy okra is the way to go. It has beautiful red pods that turn green when cooked. Plus, it’s just as productive as Clemson Spineless.
* Emerald: This variety is known for its tender, spineless pods and excellent flavor. It’s a great choice if you plan on eating your okra fresh or pickling it.
* Dwarf Green Long Pod: Perfect for smaller gardens or containers, this variety produces long, slender pods on compact plants.
Consider your space, climate, and taste preferences when making your decision. Don’t be afraid to try a few different varieties to see which ones you like best!
Preparing Your Garden Bed
Okra loves sunshine and well-drained soil. So, finding the perfect spot is crucial. Here’s what I do to get my garden bed ready:
* Sunlight: Okra needs at least 6-8 hours of direct sunlight per day. Choose a location in your garden that gets plenty of sun.
* Soil: Okra prefers well-drained, fertile soil with a pH between 6.0 and 7.0. If your soil is heavy clay or sandy, amend it with compost or other organic matter to improve drainage and fertility. I usually add a generous amount of compost to my garden bed before planting.
* Weed Removal: Clear the area of any weeds and grass. Weeds compete with okra plants for nutrients and water, so it’s important to get rid of them before planting.
* Tilling: Till the soil to a depth of 8-10 inches to loosen it up and improve drainage. This also helps the okra roots penetrate the soil more easily.
* Fertilizing: Incorporate a balanced fertilizer into the soil before planting. I like to use a slow-release fertilizer that will provide nutrients to the plants over time.
Planting Okra Seeds
Okra is a warm-season vegetable, so it’s important to wait until the soil has warmed up to at least 65°F (18°C) before planting. I usually plant my okra seeds in late spring or early summer, after the last frost.
Step-by-Step Planting Instructions:
1. Soaking Seeds (Optional): To speed up germination, soak the okra seeds in water for 12-24 hours before planting. This helps soften the seed coat and allows the seeds to absorb moisture more easily. I’ve found this really helps, especially if the weather is a bit cooler.
2. Planting Depth: Plant the seeds 1/2 to 1 inch deep.
3. Spacing: Space the seeds 6-12 inches apart in rows that are 3-4 feet apart. This gives the plants enough room to grow and allows for good air circulation.
4. Watering: Water the soil thoroughly after planting. Keep the soil moist but not soggy until the seeds germinate.
5. Germination: Okra seeds typically germinate in 5-14 days, depending on the soil temperature and moisture levels.
Caring for Your Okra Plants
Once your okra plants have sprouted, it’s important to provide them with the care they need to thrive. Here’s what I do to keep my okra plants healthy and productive:
* Watering: Water your okra plants regularly, especially during hot, dry weather. Okra needs about 1 inch of water per week. Water deeply and less frequently, rather than shallowly and often. This encourages the roots to grow deeper into the soil.
* Fertilizing: Fertilize your okra plants every 4-6 weeks with a balanced fertilizer. I like to use a liquid fertilizer that I can apply directly to the soil.
* Weeding: Keep the area around your okra plants free of weeds. Weeds compete with okra plants for nutrients and water.
* Mulching: Apply a layer of mulch around your okra plants to help retain moisture, suppress weeds, and regulate soil temperature. I use straw or wood chips for mulch.
* Pruning: Prune your okra plants to encourage branching and increase pod production. Remove any yellow or brown leaves and any suckers that grow from the base of the plant. I usually prune my okra plants every few weeks.
* Pest Control: Keep an eye out for pests such as aphids, flea beetles, and corn earworms. If you notice any pests, treat them with an appropriate insecticide or organic pest control method. I prefer to use organic methods whenever possible.
Dealing with Common Okra Problems
Even with the best care, okra plants can sometimes encounter problems. Here are a few common issues and how to address them:
* Yellowing Leaves: Yellowing leaves can be a sign of nutrient deficiency, overwatering, or underwatering. Check the soil moisture and nutrient levels and adjust your watering and fertilizing accordingly.
* Stunted Growth: Stunted growth can be caused by poor soil, lack of sunlight, or pest infestation. Make sure your okra plants are getting enough sunlight and nutrients and that they are free of pests.
* Blossom End Rot: Blossom end rot is a condition that causes the ends of the okra pods to rot. It is usually caused by calcium deficiency or inconsistent watering. Make sure your soil is rich in calcium and that you are watering your okra plants regularly.
* Pest Infestations: Okra plants can be susceptible to a variety of pests, including aphids, flea beetles, and corn earworms. Inspect your plants regularly for pests and treat them with an appropriate insecticide or organic pest control method.
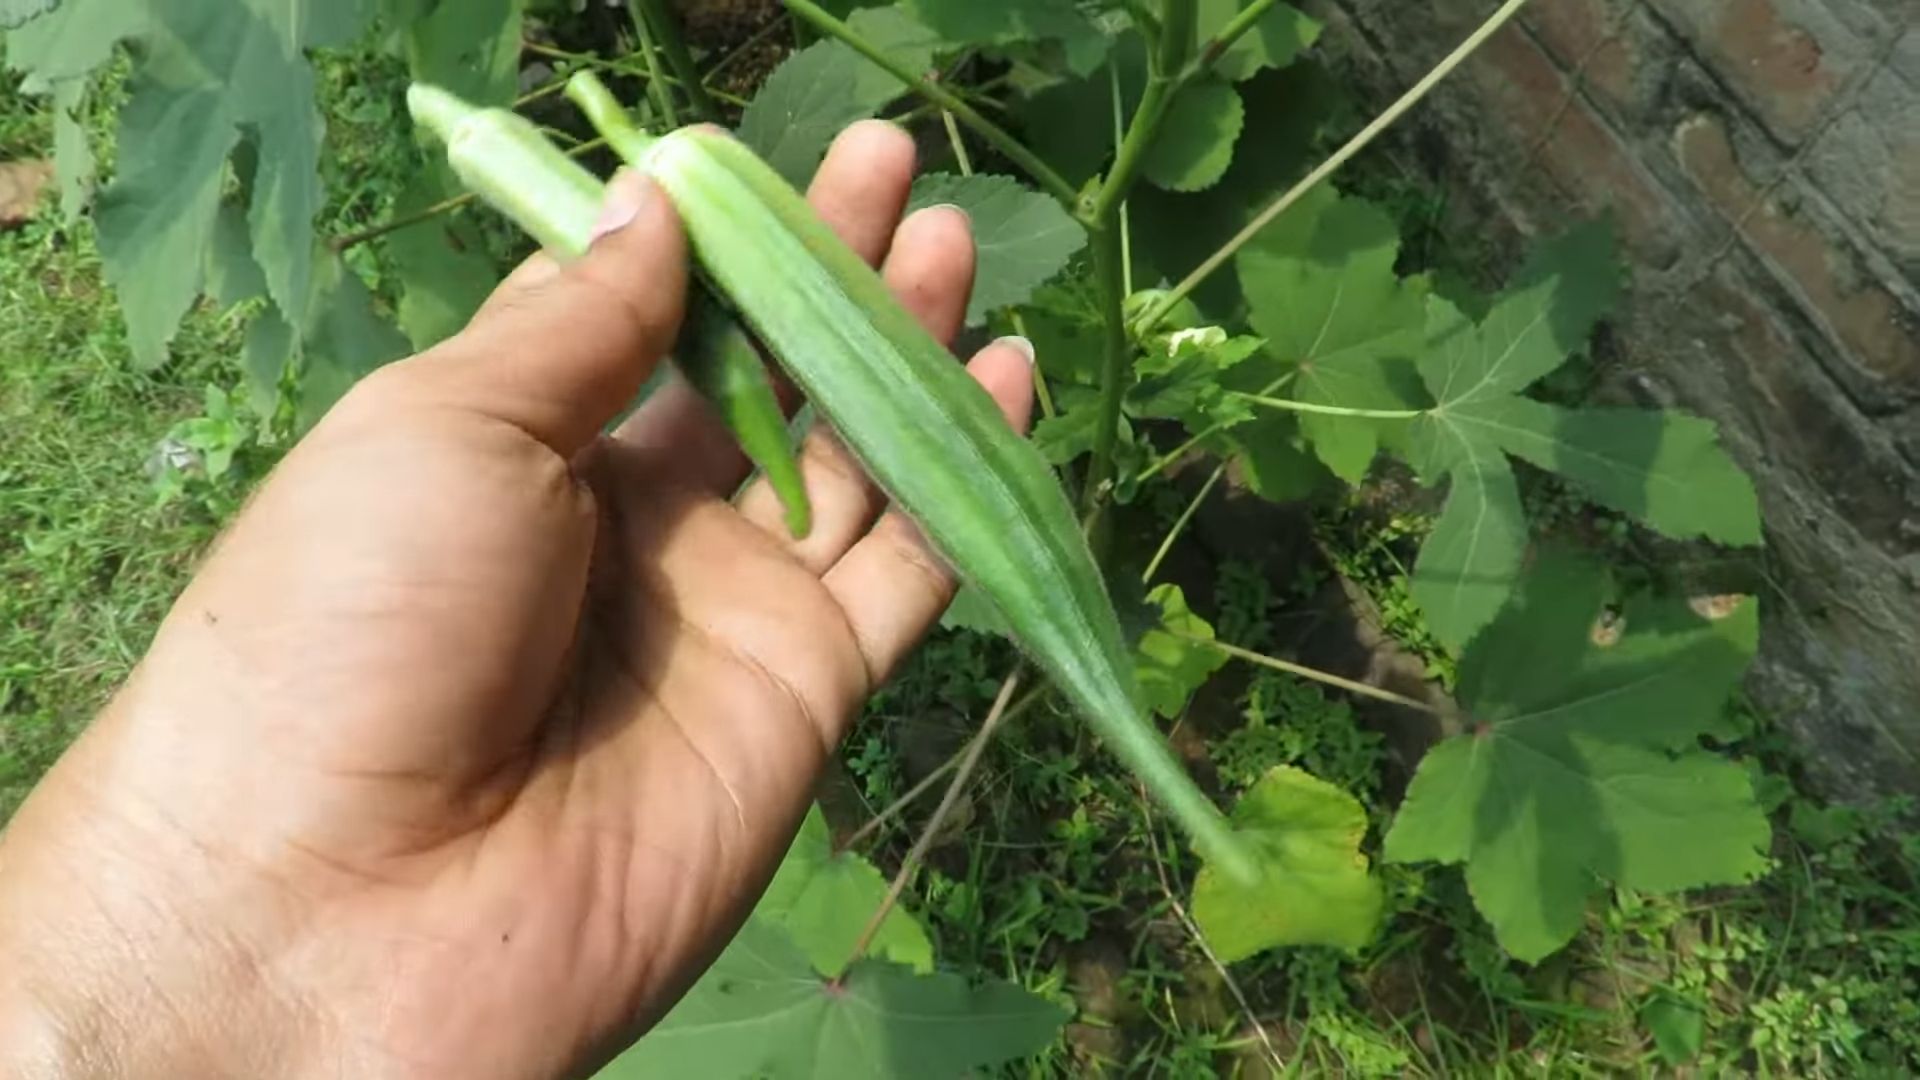
Harvesting Your Okra
Harvesting okra at the right time is crucial for getting the best flavor and texture. Okra pods are typically ready to harvest 50-65 days after planting.
Harvesting Tips:
1. Pod Size: Harvest okra pods when they are 2-4 inches long. Larger pods tend to be tough and fibrous.
2. Tenderness: The pods should be tender and easy to snap off the plant.
3. Frequency: Harvest okra pods every 1-2 days. Okra plants produce pods quickly, so it’s important to harvest them regularly to prevent them from becoming too large and tough.
4. Tools: Use a sharp knife or pruning shears to cut the pods from the plant. Be careful not to damage the plant.
5. Gloves: Wear gloves when harvesting okra, as the pods can be prickly and irritating to the skin. I learned this the hard way!
Storing Your Okra
Okra is best eaten fresh, but it can also be stored for later use.
* Refrigerating: Store okra pods in the refrigerator for up to a week. Wrap them in a paper towel and place them in a plastic bag.
* Freezing: Okra can also be frozen for longer storage. Blanch the pods in boiling water for 2-3 minutes, then cool them in ice water. Drain the pods and freeze them in a single layer on a baking sheet. Once frozen, transfer the pods to a freezer bag or container.
* Pickling: Pickled okra is a delicious and easy way to preserve your harvest. There are many different pickling recipes available online.
Enjoying Your Okra Harvest
Now for the best part – enjoying the fruits (or rather, vegetables) of your labor! Okra is a versatile vegetable that can be cooked in many different ways. Here are a few of my favorite ways to enjoy okra:
* Fried Okra: This is a classic Southern dish that’s crispy, crunchy, and oh-so-delicious.
* Okra Gumbo: Okra is a key ingredient in gumbo, a hearty and flavorful stew.
* Roasted Okra: Roasting okra brings out its natural sweetness and makes it a healthy and delicious side dish.
* Grilled Okra: Grilling okra gives it a smoky flavor that’
Conclusion
So, there you have it! Mastering these simple yet effective okra gardening tips at home can truly transform your gardening experience. No longer will you be at the mercy of unpredictable yields or struggling with common okra-growing challenges. By implementing these strategies, you’re not just growing okra; you’re cultivating a thriving, productive garden that provides you with fresh, delicious produce all season long.
The beauty of these okra gardening tips lies in their adaptability. Feel free to experiment with different companion plants, soil amendments, and watering schedules to find what works best for your specific climate and garden conditions. Perhaps you’ll discover that marigolds are particularly effective at deterring pests in your area, or that a specific type of compost yields even more impressive results. Don’t be afraid to get creative and tailor these techniques to your unique needs.
Consider these variations to further enhance your okra harvest:
* Succession Planting: Plant okra seeds every two to three weeks to ensure a continuous supply of pods throughout the growing season. This is especially useful if you have a large family or enjoy preserving okra for later use.
* Vertical Gardening: If you’re short on space, try growing okra in containers and training the plants to climb a trellis or fence. This not only saves space but also improves air circulation and reduces the risk of fungal diseases.
* Heirloom Varieties: Explore different heirloom okra varieties to discover unique flavors, colors, and textures. Some popular choices include ‘Clemson Spineless,’ ‘Burgundy,’ and ‘Emerald.’
* Seed Saving: Save seeds from your best-performing okra plants to ensure a consistent supply of high-quality seeds for future seasons. This is a great way to adapt your okra crop to your local environment and preserve valuable genetic diversity.
We’ve covered everything from soil preparation and seed starting to pest control and harvesting. Remember, consistent care and attention are key to success. Keep a close eye on your plants, address any issues promptly, and don’t be afraid to ask for help if you encounter any challenges.
We are confident that these okra gardening tips will empower you to grow a bountiful crop of okra right in your own backyard. But don’t just take our word for it! We encourage you to try these techniques for yourself and see the difference they can make.
Once you’ve had a chance to put these okra gardening tips into practice, we’d love to hear about your experience. Share your successes, challenges, and any additional tips you’ve discovered in the comments section below. Your feedback will not only help other gardeners but also contribute to our collective knowledge of okra cultivation. Let’s work together to make okra gardening accessible and rewarding for everyone! Happy gardening!
Frequently Asked Questions (FAQ)
Q: How often should I water my okra plants?
A: Okra plants need consistent moisture, especially during hot weather. Water deeply at least once a week, providing about 1 inch of water. Check the soil moisture regularly, and water more frequently if the top inch of soil feels dry. Avoid overhead watering, as this can promote fungal diseases. Drip irrigation or soaker hoses are ideal for delivering water directly to the roots.
Q: What are the most common pests that attack okra plants, and how can I control them?
A: Common okra pests include aphids, flea beetles, corn earworms, and stink bugs. To control these pests, consider the following strategies:
* Inspect Plants Regularly: Check your okra plants frequently for signs of pest infestation, such as leaf damage, discoloration, or the presence of insects.
* Handpicking: Remove pests by hand and drop them into a bucket of soapy water. This is effective for small infestations.
* Insecticidal Soap: Spray plants with insecticidal soap to control aphids, flea beetles, and other soft-bodied insects. Follow the product instructions carefully.
* Neem Oil: Apply neem oil to control a wide range of pests, including aphids, caterpillars, and fungal diseases.
* Companion Planting: Plant companion plants like marigolds, basil, and dill to repel pests and attract beneficial insects.
* Row Covers: Use row covers to protect young okra plants from pests.
Q: When is the best time to harvest okra pods?
A: Okra pods are typically ready for harvest 50-65 days after planting. Harvest pods when they are 2-4 inches long and still tender. Use a sharp knife or pruning shears to cut the pods from the plant, leaving a short stem attached. Harvest okra pods every 1-2 days to encourage continuous production. Overripe pods become tough and fibrous.
Q: What kind of soil is best for growing okra?
A: Okra thrives in well-drained, fertile soil with a pH of 6.0-7.0. Amend the soil with compost or other organic matter to improve drainage, fertility, and water retention. Avoid heavy clay soils, as they can become waterlogged and inhibit root growth. If you have clay soil, consider growing okra in raised beds or containers.
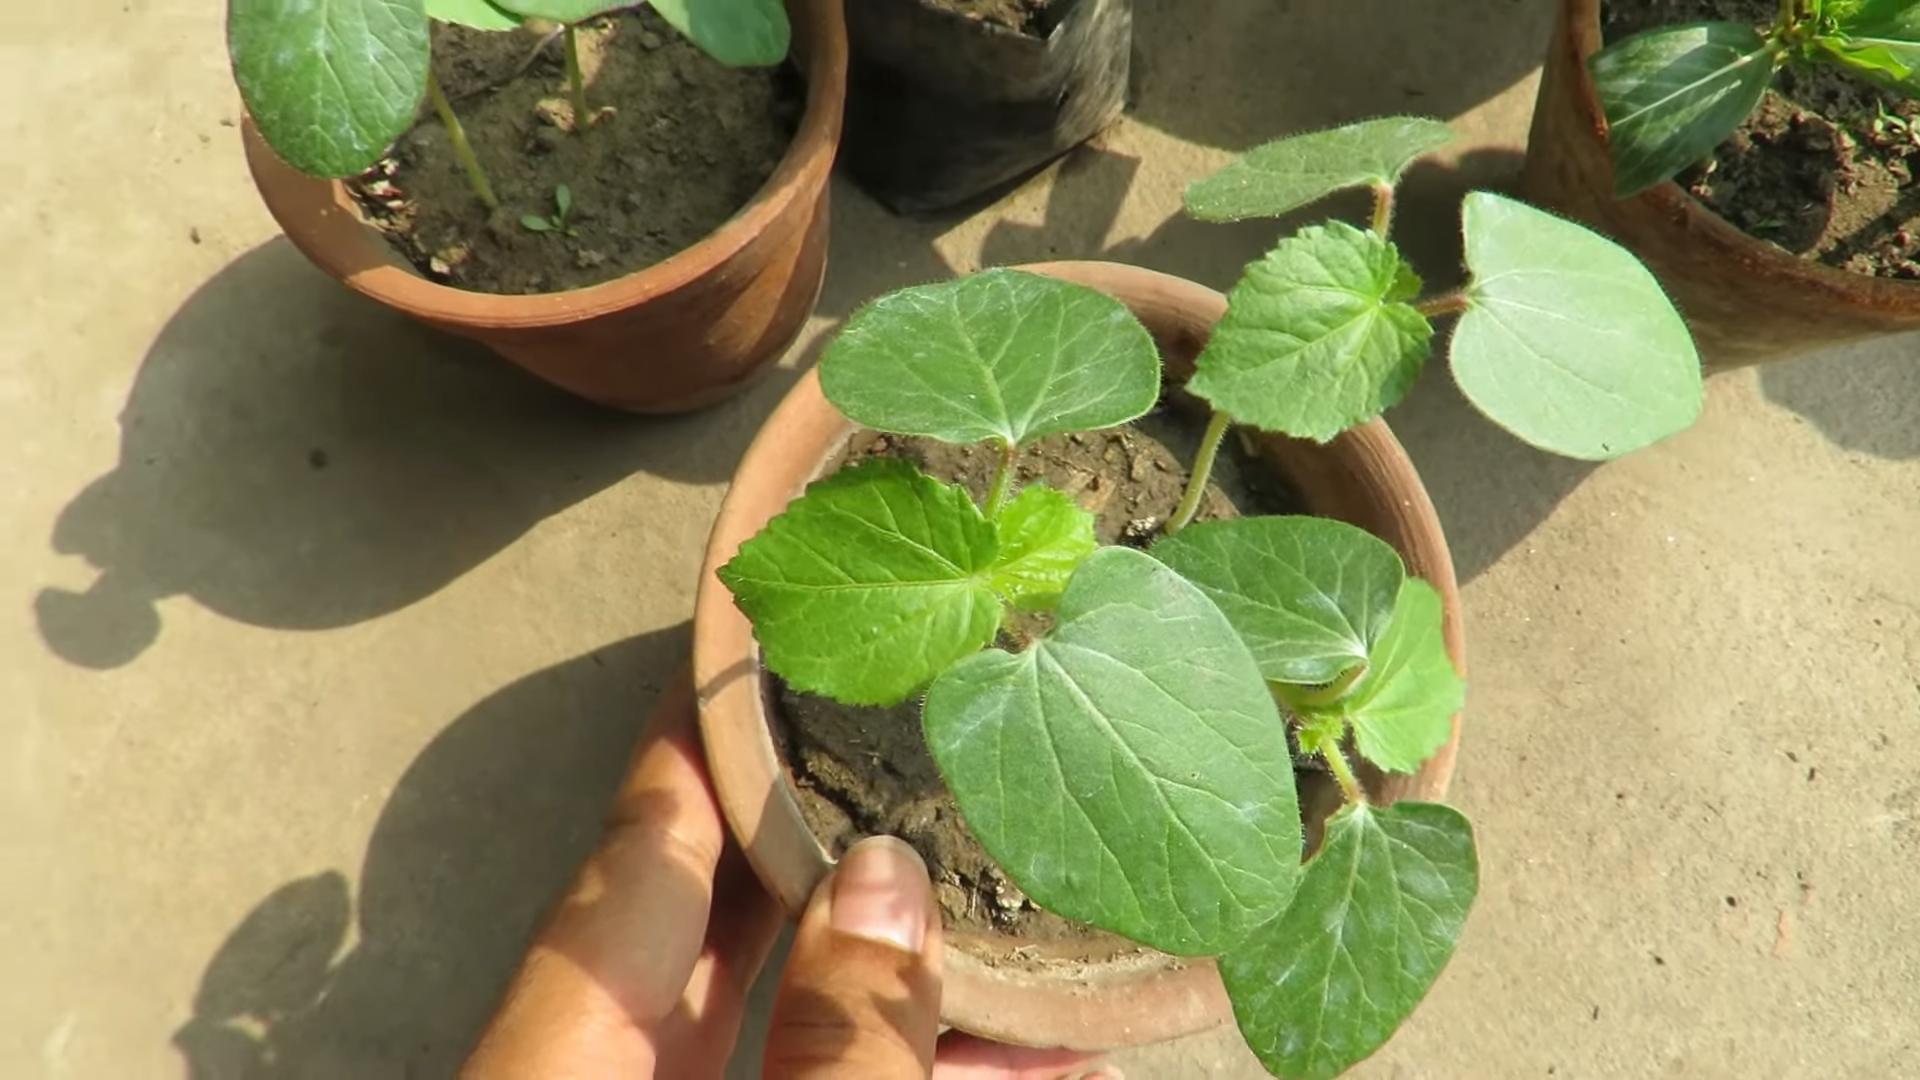
Q: Can I grow okra in containers?
A: Yes, okra can be successfully grown in containers. Choose a large container (at least 10 gallons) with drainage holes. Use a high-quality potting mix and provide regular watering and fertilization. Select a sunny location that receives at least 6-8 hours of sunlight per day. Consider using a stake or trellis to support the plants as they grow.
Q: How can I prevent my okra plants from getting diseases?
A: To prevent okra diseases, follow these tips:
* Choose Disease-Resistant Varieties: Select okra varieties that are known to be resistant to common diseases.
* Provide Good Air Circulation: Space plants adequately to allow for good air circulation, which helps to prevent fungal diseases.
* Avoid Overhead Watering: Water plants at the base to avoid wetting the foliage, which can promote fungal growth.
* Remove Diseased Leaves: Prune away any diseased leaves or stems to prevent the spread of infection.
* Rotate Crops: Avoid planting okra in the same location year after year to prevent the buildup of soilborne diseases.
* Use Organic Fungicides: If necessary, apply organic fungicides to control fungal diseases.
Q: What are some good companion plants for okra?
A: Good companion plants for okra include:
* Basil: Repels aphids, whiteflies, and other pests.
* Marigolds: Repel nematodes and other soil pests.
So, there you have it! Mastering these simple yet effective okra gardening tips at home can truly transform your gardening experience. No longer will you be at the mercy of unpredictable yields or struggling with common okra-growing challenges. By implementing these strategies, you’re not just growing okra; you’re cultivating a thriving, productive garden that provides you with fresh, delicious produce all season long.
The beauty of these okra gardening tips lies in their adaptability. Feel free to experiment with different companion plants, soil amendments, and watering schedules to find what works best for your specific climate and garden conditions. Perhaps you’ll discover that marigolds are particularly effective at deterring pests in your area, or that a specific type of compost yields even more impressive results. Don’t be afraid to get creative and tailor these techniques to your unique needs.
Consider these variations to further enhance your okra harvest:
* Succession Planting: Plant okra seeds every two to three weeks to ensure a continuous supply of pods throughout the growing season. This is especially useful if you have a large family or enjoy preserving okra for later use.
* Vertical Gardening: If you’re short on space, try growing okra in containers and training the plants to climb a trellis or fence. This not only saves space but also improves air circulation and reduces the risk of fungal diseases.
* Heirloom Varieties: Explore different heirloom okra varieties to discover unique flavors, colors, and textures. Some popular choices include ‘Clemson Spineless,’ ‘Burgundy,’ and ‘Emerald.’
* Seed Saving: Save seeds from your best-performing okra plants to ensure a consistent supply of high-quality seeds for future seasons. This is a great way to adapt your okra crop to your local environment and preserve valuable genetic diversity.
We’ve covered everything from soil preparation and seed starting to pest control and harvesting. Remember, consistent care and attention are key to success. Keep a close eye on your plants, address any issues promptly, and don’t be afraid to ask for help if you encounter any challenges.
We are confident that these okra gardening tips will empower you to grow a bountiful crop of okra right in your own backyard. But don’t just take our word for it! We encourage you to try these techniques for yourself and see the difference they can make.
Once you’ve had a chance to put these okra gardening tips into practice, we’d love to hear about your experience. Share your successes, challenges, and any additional tips you’ve discovered in the comments section below. Your feedback will not only help other gardeners but also contribute to our collective knowledge of okra cultivation. Let’s work together to make okra gardening accessible and rewarding for everyone! Happy gardening!
Frequently Asked Questions (FAQ)
Q: How often should I water my okra plants?
A: Okra plants need consistent moisture, especially during hot weather. Water deeply at least once a week, providing about 1 inch of water. Check the soil moisture regularly, and water more frequently if the top inch of soil feels dry. Avoid overhead watering, as this can promote fungal diseases. Drip irrigation or soaker hoses are ideal for delivering water directly to the roots.
Q: What are the most common pests that attack okra plants, and how can I control them?
A: Common okra pests include aphids, flea beetles, corn earworms, and stink bugs. To control these pests, consider the following strategies:
* Inspect Plants Regularly: Check your okra plants frequently for signs of pest infestation, such as leaf damage, discoloration, or the presence of insects.
* Handpicking: Remove pests by hand and drop them into a bucket of soapy water. This is effective for small infestations.
* Insecticidal Soap: Spray plants with insecticidal soap to control aphids, flea beetles, and other soft-bodied insects. Follow the product instructions carefully.
* Neem Oil: Apply neem oil to control a wide range of pests, including aphids, caterpillars, and fungal diseases.
* Companion Planting: Plant companion plants like marigolds, basil, and dill to repel pests and attract beneficial insects.
* Row Covers: Use row covers to protect young okra plants from pests.
Q: When is the best time to harvest okra pods?
A: Okra pods are typically ready for harvest 50-65 days after planting. Harvest pods when they are 2-4 inches long and still tender. Use a sharp knife or pruning shears to cut the pods from the plant, leaving a short stem attached. Harvest okra pods every 1-2 days to encourage continuous production. Overripe pods become tough and fibrous.
Q: What kind of soil is best for growing okra?
A: Okra thrives in well-drained, fertile soil with a pH of 6.0-7.0. Amend the soil with compost or other organic matter to improve drainage, fertility, and water retention. Avoid heavy clay soils, as they can become waterlogged and inhibit root growth. If you have clay soil, consider growing okra in raised beds or containers.
Q: Can I grow okra in containers?
A: Yes, okra can be successfully grown in containers. Choose a large container (at least 10 gallons) with drainage holes. Use a high-quality potting mix and provide regular watering and fertilization. Select a sunny location that receives at least 6-8 hours of sunlight per day. Consider using a stake or trellis to support the plants as they grow.
Q: How can I prevent my okra plants from getting diseases?
A: To prevent okra diseases, follow these tips:
* Choose Disease-Resistant Varieties: Select okra varieties that are known to be resistant to common diseases.
* Provide Good Air Circulation: Space plants adequately to allow for good air circulation, which helps to prevent fungal diseases.
* Avoid Overhead Watering: Water plants at the base to avoid wetting the foliage, which can promote fungal growth.
* Remove Diseased Leaves: Prune away any diseased leaves or stems to prevent the spread of infection.
* Rotate Crops: Avoid planting okra in the same location year after year to prevent the buildup of soilborne diseases.
* Use Organic Fungicides: If necessary, apply organic fungicides to control fungal diseases.
Q: What are some good companion plants for okra?
A: Good companion plants for okra include:
* Basil: Repels aphids, whiteflies, and other pests.
* Marigolds: Repel nematodes and other soil pests.
* Dill: Attracts beneficial insects, such as ladybugs and lacewings, which prey on aphids and other pests.
* Lettuce: Provides ground cover and helps to suppress weeds.
* Peppers: Can benefit from the shade provided by okra plants.
* Tomatoes: Can benefit from the shade provided by okra plants.
Q: How do I save okra seeds for next year?
A: To save okra seeds, allow some pods to mature fully on the plant. The pods will turn brown and dry out. Once the pods are completely dry, harvest them and remove the seeds. Spread the seeds out on a tray to dry completely for a few days. Store the dried seeds in an airtight container in a cool, dry place.
Q: My okra plants are growing tall but not producing many pods. What could be the problem?
A: Several factors can contribute to poor pod production in okra plants:
* Insufficient Sunlight: Okra plants need at least 6-8 hours of sunlight per day to produce well.
* Lack of Nutrients: Okra plants need adequate nutrients, especially phosphorus and potassium, to produce pods. Fertilize with a balanced fertilizer or a fertilizer specifically formulated for vegetables.
* Overwatering or Underwatering: Inconsistent watering can stress plants and reduce pod production.
* High Temperatures: Extremely high temperatures can inhibit pod formation.
* Pest or Disease Problems: Pests and diseases can weaken plants and reduce pod production.
By addressing these potential issues, you can improve pod production in your okra plants.

Leave a Comment