
Grow Onions at Home, you say? Absolutely! Imagine stepping outside your back door and harvesting fresh, flavorful onions whenever you need them. No more last-minute grocery store runs or settling for bland, store-bought varieties. This isn’t just a dream; it’s an achievable reality with a few simple tricks and a little DIY spirit!
Onions have been cultivated for thousands of years, dating back to ancient Egypt, where they were even revered as symbols of eternity. From humble peasant fare to gourmet cuisine, onions have played a vital role in culinary traditions worldwide. Now, you can participate in this rich history by cultivating your own crop.
But why should you bother to grow onions at home? Well, for starters, the taste is simply unmatched. Homegrown onions boast a freshness and intensity of flavor that you just can’t find in commercially grown produce. Plus, you have complete control over the growing process, ensuring that your onions are free from harmful pesticides and chemicals. In this article, I’m going to share some easy-to-follow DIY tricks and hacks that will help you cultivate a thriving onion patch, even if you have limited space or gardening experience. Get ready to enjoy the satisfaction of harvesting your own delicious, homegrown onions!

Grow Your Own Onions: A Beginner’s Guide
Okay, so you want to grow onions at home? Awesome! It’s easier than you might think, and there’s nothing quite like the taste of a freshly harvested onion from your own garden. I’m going to walk you through everything you need to know, from choosing the right type of onion to harvesting your bounty. Let’s get started!
Choosing Your Onions: Sets, Seeds, or Transplants?
Before we dive into the nitty-gritty, let’s talk about how you can actually *start* growing onions. You have three main options:
* Onion Sets: These are small, immature onion bulbs that were started last year. They’re the easiest and fastest way to get a harvest. Think of them as “pre-started” onions.
* Onion Seeds: Starting from seed gives you the widest variety to choose from and is generally the most economical option. However, it requires more time and effort.
* Onion Transplants: These are young onion plants that have already been started indoors or in a greenhouse. They offer a good balance between ease and variety.
For beginners, I usually recommend starting with onion sets. They’re the most forgiving and will give you a quicker sense of accomplishment. But if you’re feeling adventurous, seeds are a great option too!
Materials You’ll Need
Here’s a list of everything you’ll need to grow your own onions:
* Onion Sets, Seeds, or Transplants: Choose your preferred method.
* Well-Draining Soil: Onions need soil that drains well to prevent rot. A loamy soil is ideal.
* Compost or Aged Manure: To enrich the soil and provide nutrients.
* Gardening Gloves: To protect your hands.
* Trowel or Garden Fork: For planting.
* Watering Can or Hose: For watering your onions.
* Fertilizer (Optional): A balanced fertilizer can help boost growth. Look for one with a higher phosphorus content.
* Mulch (Optional): To help retain moisture and suppress weeds. Straw, shredded leaves, or wood chips work well.
* Row Covers (Optional): To protect against pests and frost.
Planting Your Onions: Step-by-Step Guide
Alright, let’s get our hands dirty! Here’s how to plant your onions, whether you’re using sets, seeds, or transplants:
Planting Onion Sets
1. Prepare the Soil: Choose a sunny spot in your garden that gets at least 6-8 hours of sunlight per day. Onions love sunshine! Use a garden fork or trowel to loosen the soil to a depth of at least 12 inches. Mix in plenty of compost or aged manure to improve drainage and fertility.
2. Create Furrows: Make shallow furrows in the soil, about 1 inch deep and 4-6 inches apart.
3. Plant the Sets: Place the onion sets in the furrows, pointy side up, spacing them about 2-3 inches apart. Gently push them into the soil so that only the very top of the bulb is visible.
4. Cover and Water: Cover the sets with soil and gently pat down. Water thoroughly to settle the soil around the bulbs.
5. Mulch (Optional): Apply a layer of mulch around the onions to help retain moisture and suppress weeds.
Planting Onion Seeds
1. Start Indoors (Recommended): For best results, start your onion seeds indoors about 8-10 weeks before the last expected frost. This gives them a head start.
2. Prepare Seed Trays: Fill seed trays or small pots with a seed-starting mix.
3. Sow the Seeds: Sow the seeds about 1/4 inch deep and 1/2 inch apart.
4. Water Gently: Water the seeds gently to avoid disturbing them.
5. Provide Light: Place the seed trays under grow lights or in a sunny window. Keep the soil moist but not soggy.
6. Harden Off: Once the seedlings are a few inches tall, gradually acclimate them to outdoor conditions by placing them outside for a few hours each day, increasing the time over a week or two. This is called “hardening off.”
7. Transplant Outdoors: Once the danger of frost has passed, transplant the seedlings into your garden, spacing them about 4-6 inches apart in rows that are 12-18 inches apart.
8. Direct Sowing (Alternative): If you live in a mild climate, you can sow onion seeds directly into the garden in early spring. Follow steps 1-3 above, but sow the seeds directly into the prepared soil.
Planting Onion Transplants
1. Prepare the Soil: Just like with onion sets, choose a sunny spot and loosen the soil to a depth of at least 12 inches. Mix in plenty of compost or aged manure.
2. Dig Holes: Dig small holes in the soil, spacing them about 4-6 inches apart in rows that are 12-18 inches apart.
3. Plant the Transplants: Gently remove the transplants from their containers and place them in the holes. Make sure the top of the root ball is level with the soil surface.
4. Backfill and Water: Backfill the holes with soil and gently pat down. Water thoroughly to settle the soil around the plants.
5. Mulch (Optional): Apply a layer of mulch around the onions to help retain moisture and suppress weeds.
Caring for Your Onions: Watering, Fertilizing, and Weeding
Once your onions are planted, it’s important to provide them with the care they need to thrive. Here’s what you need to do:
* Watering: Onions need consistent moisture, especially during bulb formation. Water deeply whenever the top inch of soil feels dry. Avoid overwatering, as this can lead to rot.
* Fertilizing: Onions are heavy feeders, so fertilizing them regularly will help them grow big and strong. Apply a balanced fertilizer every 2-3 weeks, following the instructions on the package. You can also side-dress with compost or aged manure.
* Weeding: Keep the area around your onions free of weeds, as weeds can compete for nutrients and water. Gently pull weeds by hand or use a hoe to cultivate the soil. Be careful not to damage the onion roots.
* Pest Control: Keep an eye out for pests like onion maggots and thrips. If you notice any signs of infestation, take action immediately. You can use insecticidal soap or other organic pest control methods. Row covers can also help prevent pest problems.
* Bolting: Sometimes, onions will “bolt,” which means they send up a flower stalk. This usually happens when they experience stress, such as extreme temperature fluctuations. If your onions bolt, remove the flower stalk as soon as you see it. Bolted onions will still be edible, but they won’t store as well.
Harvesting Your Onions: When and How
The moment you’ve been waiting for! Harvesting your onions is the most rewarding part of the process. Here’s how to know when your onions are ready and how to harvest them:
* When to Harvest: Onions are typically ready to harvest when the tops start to turn yellow and fall over. This usually happens in late summer or early fall, depending on the variety and your climate.
* How to Harvest: Gently loosen the soil around the onions with a garden fork or trowel. Then, carefully pull the onions out of the ground.
* Curing: After harvesting, you’ll need to cure your onions to help them store properly. To cure onions, spread them out in a single layer in a warm, dry, well-ventilated place for 2-3 weeks. The outer skins will dry and become papery.
* Storing: Once the onions are cured, you can store them in a cool, dry, dark place. Braiding the tops together and hanging them is a traditional way to store onions. You can also store them in mesh bags or crates. Properly cured and stored onions can last for several months.
Troubleshooting: Common Onion Problems
Even with the best care, you might encounter some problems while growing onions. Here are a few common issues and how to deal with them:
* Yellowing Leaves: This can be caused by a variety of factors, including nutrient deficiencies, pests, or diseases. Make sure your onions are getting enough water and fertilizer. Check for pests and diseases and take appropriate action.
* Small Bulbs: Small bulbs can be caused by overcrowding, poor soil, or insufficient sunlight. Thin out your onions to give them more space. Improve the soil with compost or aged manure. Make sure your onions are getting at least 6-8 hours of sunlight per day.
Conclusion
So, there you have it! Growing onions at home, especially using this simple DIY trick, is more than just a gardening project; it’s a gateway to fresher, more flavorful meals and a deeper connection with the food you eat. We’ve shown you how easy it is to transform those humble onion scraps into a thriving supply of this essential kitchen staple. Forget those bland, store-bought onions that have been sitting on shelves for weeks. Imagine the satisfaction of harvesting your own, bursting with flavor and grown with your own two hands.
This method isn’t just about saving money (though that’s certainly a perk!). It’s about reducing food waste, embracing sustainable practices, and adding a touch of green to your living space. Plus, the process itself is incredibly rewarding. Watching those little green shoots emerge and develop into full-fledged onions is a testament to the power of nature and your own gardening skills.
But the beauty of this DIY trick lies in its adaptability. Feel free to experiment with different varieties of onions. Try growing red onions for a vibrant addition to salads, or shallots for a more delicate flavor in sauces. You can even try growing green onions (scallions) exclusively for a continuous supply of fresh toppings.
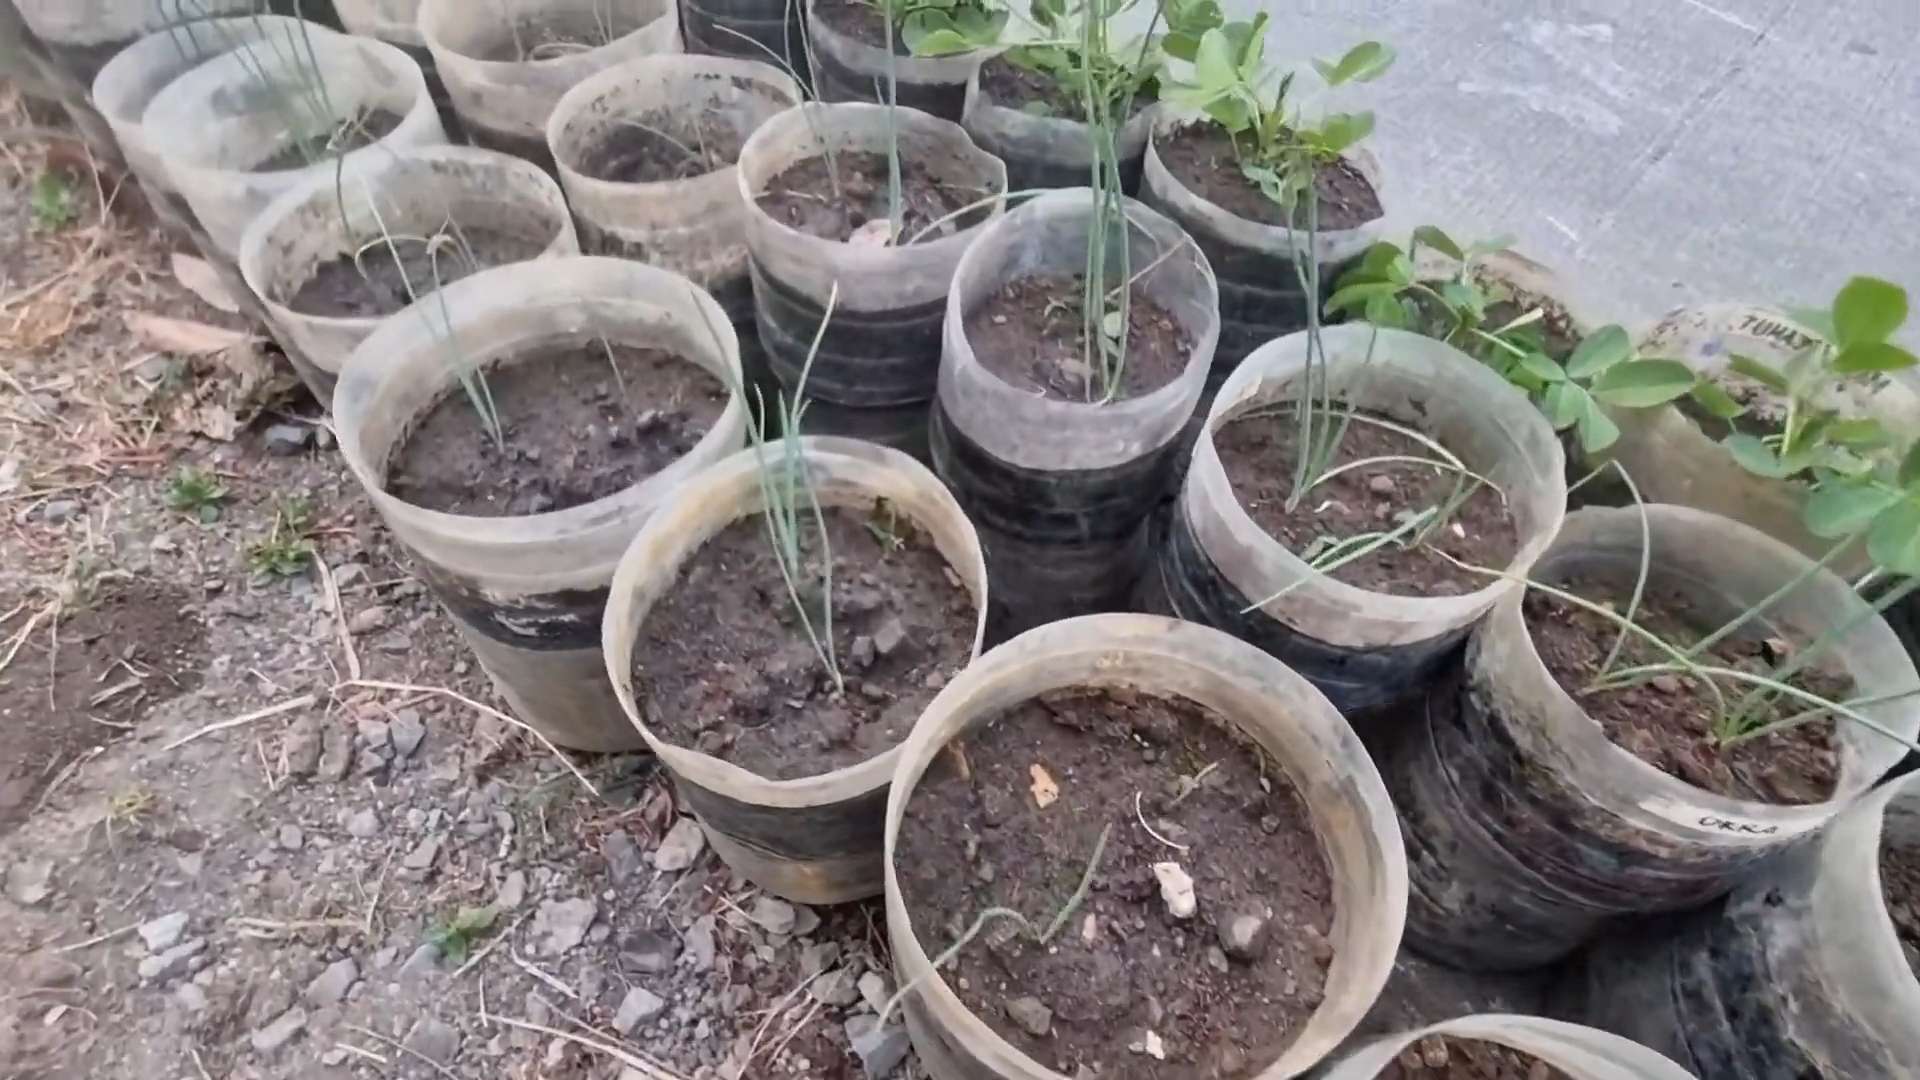
Consider the growing medium as well. While water propagation is a great starting point, you can eventually transplant your sprouted onions into pots filled with soil for even more robust growth. Experiment with different soil mixes to see what works best in your climate. Adding compost or other organic matter will provide essential nutrients for healthy onion development.
Don’t be afraid to get creative with your setup. Use recycled containers to house your onions, adding a touch of rustic charm to your kitchen windowsill. Or, create a dedicated indoor garden space with grow lights for year-round onion production.
The key is to have fun and embrace the learning process. Gardening is all about experimentation, and there’s no right or wrong way to do it. So, gather your onion scraps, grab a jar of water, and get ready to embark on your own home-growing adventure.
We are confident that once you try this simple DIY trick, you’ll be amazed at how easy it is to grow your own onions at home. The flavor difference is undeniable, and the satisfaction of harvesting your own produce is unparalleled.
We encourage you to try this method and share your experiences with us! Post pictures of your onion gardens on social media using #HomeGrownOnions and let us know what tips and tricks you discover along the way. Let’s build a community of home gardeners and inspire others to embrace the joy of growing their own food. Happy growing!
Frequently Asked Questions (FAQs)
1. What kind of onions can I grow using this DIY trick?
You can grow almost any type of onion from scraps, including yellow onions, white onions, red onions, and even shallots. The key is to use the root end of the onion, the part that would normally be discarded. Green onions (scallions) are particularly easy to regrow using this method. Experiment with different varieties to see which ones thrive best in your environment. Keep in mind that the flavor of the regrown onion may be slightly different from the original, depending on the growing conditions.
2. How long does it take to grow onions from scraps?
The time it takes to grow onions from scraps depends on several factors, including the variety of onion, the growing conditions (light, temperature, humidity), and the size of the original onion scrap. Generally, you can expect to see new green shoots emerging within a few days to a week. Within a few weeks, you’ll have a decent amount of green onion to harvest. To grow a full-sized bulb onion, you’ll need to transplant the sprouted onion into soil and provide it with adequate sunlight and nutrients. This process can take several months.
3. What is the best way to care for my regrown onions?
Once your onion scraps have sprouted roots and green shoots, it’s important to provide them with proper care. Here are some tips:
* **Sunlight:** Onions need plenty of sunlight to grow. Place your onion scraps in a sunny location, such as a windowsill that receives at least 6-8 hours of direct sunlight per day. If you don’t have enough natural light, you can supplement with grow lights.
* **Water:** Keep the water level in the jar or container consistent, ensuring that the roots are always submerged. Change the water every few days to prevent the growth of algae and bacteria.
* **Nutrients:** While onions can grow in water alone, they will benefit from the addition of nutrients. You can add a diluted liquid fertilizer to the water every few weeks to promote healthy growth.
* **Transplanting:** Once the roots are well-developed, you can transplant your sprouted onions into pots filled with soil. Use a well-draining potting mix and provide the onions with regular watering and fertilization.
* **Pest Control:** Keep an eye out for pests such as aphids or spider mites. If you notice any pests, treat them with an appropriate insecticide or organic pest control method.
4. Can I grow onions indoors year-round?
Yes, you can grow onions indoors year-round, provided you have adequate light and temperature. Use grow lights to supplement natural sunlight, especially during the winter months. Maintain a consistent temperature of around 60-70°F (15-21°C). With proper care, you can enjoy a continuous supply of fresh onions, even when it’s cold outside.
5. What if my onion scraps start to rot instead of growing?
If your onion scraps start to rot, it’s likely due to a few factors:
* **Poor Water Quality:** Using tap water with high chlorine content can inhibit growth and promote rotting. Use filtered water or let tap water sit for 24 hours to allow the chlorine to dissipate.
* **Lack of Air Circulation:** Stagnant water can lead to bacterial growth and rotting. Change the water frequently and ensure that the onion scraps are not overcrowded in the container.
* **Damaged Onion Scraps:** If the onion scrap is already damaged or bruised, it’s more likely to rot. Choose healthy, firm onion scraps for best results.
* **Overwatering (if in soil):** If you’ve transplanted the onion into soil, ensure the soil is well-draining and avoid overwatering. Soggy soil can lead to root rot.
If you notice any signs of rotting, remove the affected onion scrap immediately to prevent the spread of the problem. Start with fresh onion scraps and follow the tips above to ensure successful growth.
6. How do I harvest my regrown onions?
For green onions (scallions), you can harvest them as soon as they reach a desired size. Simply snip off the green tops with scissors, leaving about an inch of the base intact. The onions will continue to grow, providing you with a continuous supply of fresh greens.
For bulb onions, you’ll need to wait until the bulbs have matured. This can take several months. The onions are ready to harvest when the green tops start to turn yellow and fall over. Gently dig up the onions and let them cure in a dry, well-ventilated place for a few weeks before storing them.
7. Can I use this method to grow other vegetables?
While this method is particularly effective for growing onions, you can also use it to regrow other vegetables from scraps, such as garlic, celery, lettuce, and basil. The key is to use the appropriate part of the vegetable and provide it with the right growing conditions. Research the specific requirements for each vegetable to ensure successful growth.
8. Is it safe to eat onions grown from scraps?
Yes, it is generally safe to eat onions grown from scraps, provided you follow proper hygiene practices. Wash the onions thoroughly before eating them to remove any dirt or debris. If you’re concerned about pesticides or other chemicals, use organic onions to start with.
9. My onions are growing, but they are very small. What can I do?
Small onion growth can be attributed to a few factors: insufficient sunlight, lack of nutrients, or overcrowding. Ensure your onions receive at least 6-8 hours of direct sunlight daily. Supplement with grow lights if needed. Fertilize regularly with a diluted liquid fertilizer to provide essential nutrients. If you have multiple onions growing in the same container, consider transplanting them into separate pots to give them more space to grow.
10. Can I grow onions from seed instead of scraps?
Yes, you can definitely grow onions from seed. Growing from seed offers more variety options and allows you to start from scratch. However, it requires more time and effort compared to regrowing from scraps. You’ll need to start the seeds indoors a few weeks before the last frost and then transplant them outdoors once the weather warms up. Growing from scraps is a quicker and easier way to get started, especially for beginners.
Leave a Comment