
Growing Tomatoes in your Kitchen Garden: Imagine plucking a sun-ripened, juicy tomato straight from your own kitchen garden and adding it to your salad. Sounds idyllic, right? Well, it’s more achievable than you might think! For centuries, cultivating food close to home has been a cornerstone of self-sufficiency and a connection to nature. From ancient Roman courtyard gardens to the victory gardens of wartime, the desire to nurture our own food supply has deep roots.
But let’s face it, not everyone has acres of land or the time for extensive gardening. That’s where these DIY tricks and hacks come in! I’m going to share some simple, effective methods to help you successfully start growing tomatoes in your kitchen garden, even if you’re a complete beginner. We’ll cover everything from choosing the right varieties for small spaces to clever container gardening techniques and natural pest control.
Why do you need these DIY tricks? Because store-bought tomatoes often lack the vibrant flavor and nutritional value of homegrown ones. Plus, there’s something incredibly rewarding about nurturing a plant from seed to harvest. So, get ready to roll up your sleeves and discover the joy of fresh, homegrown tomatoes right at your fingertips!
Growing Tomatoes in Your Own Kitchen Garden: Here’s How!
Hello, dear garden friends! Today I’m going to show you how you can fulfill your dream of juicy, sun-ripened tomatoes straight from your own kitchen garden. Whether you have a large garden, a small balcony, or just a sunny windowsill – with the right tips and tricks, you can grow your own tomatoes and enjoy their incomparable taste. Let’s get started!
The Preparation: The Foundation for a Bountiful Harvest
Before we begin the actual growing process, we need to make a few important preparations. It’s just like cooking – without the right ingredients, the dish won’t be perfect!
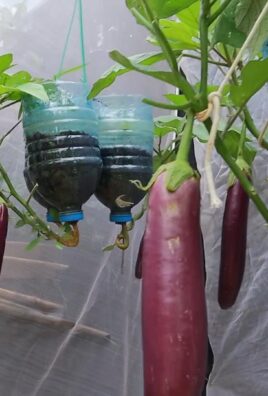
- Choosing the right variety: There are countless tomato varieties, from small cherry tomatoes to huge beefsteak tomatoes. Think about which tomatoes you like to eat most and how much space you have. For balconies, for example, bush tomatoes or hanging tomatoes that don’t grow as tall are suitable. For the garden, you can also choose indeterminate (vining) tomatoes, but they will need support.
- The right location: Tomatoes love the sun! Find the sunniest spot you can, one that gets at least 6 hours of sun per day. The location should also be protected from wind so the plants don’t get knocked over.
- The right soil: Tomatoes need nutrient-rich, loose, and well-draining soil. you can buy special tomato soil or mix your own. A good mixture consists of garden soil, compost, and a little sand.
- Starting seeds: You can either sow tomatoes directly outdoors or start them indoors beforehand. Starting them indoors has the advantage that the plants get a head start and you can harvest earlier. I recommend starting them indoors, especially if you live in a region with short summers.
Starting Seeds: From Seed to Small Plant
Starting seeds is an exciting phase where you can watch the little seeds grow.
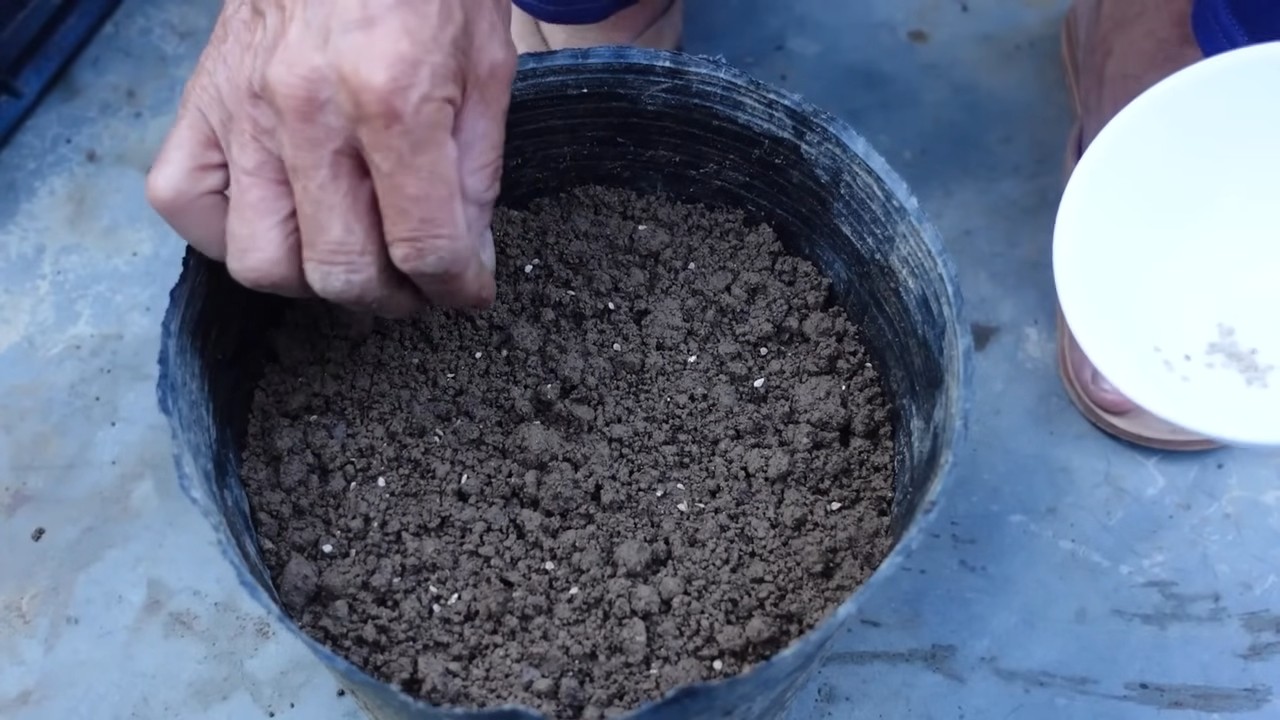
- Sowing: Fill small starter pots or a seed tray with seed starting mix. Lightly press the soil down and place 1-2 tomato seeds on the soil per pot or cell. Cover the seeds with a thin layer of soil (approx. 0.5 cm or 1/4 inch) and gently moisten the soil with a spray bottle.
- The right location: Place the starter pots in a bright and warm place. A temperature of 20-25 degrees Celsius (68-77°F) is ideal. You can also cover the pots with plastic wrap or a mini-greenhouse to increase humidity.
- Care: Keep the soil moist, but not wet. Ventilate the plastic wrap or mini-greenhouse regularly to prevent mold. After about 1-2 weeks, the first seedlings should be visible.
- Pricking out: As soon as the seedlings have formed their first true leaves (after the initial seed leaves), it’s time to prick them out. This means you carefully take the small plants out of the seed tray and transplant them into individual pots. Be careful not to damage the roots. Use seed starting mix for this as well.
- Further care: Place the pricked-out seedlings back in a bright and warm place and water them regularly. Rotate the pots now and then so the plants don’t grow crooked towards the light.
Planting Out: Off to the Outdoors!
Once the tomato plants are strong enough and there is no more danger of frost (usually mid-May, after the last frost date), they can be transplanted outdoors or into larger pots.
- Preparing the soil: Loosen the soil well and remove weeds. Mix in compost or organic fertilizer to enrich it with nutrients.
- Planting: Dig a hole that is slightly larger than the root ball of the tomato plant. Carefully place the plant in the hole and fill it with soil. Press the soil down lightly and water the plant well.
- Spacing: Pay attention to the correct plant spacing. For indeterminate (vining) tomatoes, you should maintain a distance of about 60-80 cm (24-32 inches); for bush tomatoes, a distance of about 40-50 cm (16-20 inches) is sufficient.
- Support: Indeterminate tomatoes need a support to grow up on. You can use tomato stakes, spiral stakes, or a trellis for this. Tie the tomato plants to the support regularly so they don’t break.
- Mulching: Mulch the soil around the tomato plants with straw, hay, or grass clippings. This keeps the soil moist, suppresses weeds, and protects the plants from splashing water.
Care: Ensuring the Tomatoes Thrive
Proper care is crucial for a rich tomato harvest.
- Watering: Tomatoes need regular water, especially during the flowering and fruiting phase. It’s best to water the plants in the morning or evening directly at the roots to avoid wetting the leaves. Avoid waterlogging.
- Fertilizing: Tomatoes are heavy feeders and need regular fertilizer. You can use special tomato fertilizer or organic fertilizer like compost or horn shavings. Fertilize the plants every 2-3 weeks.
- Pruning (Suckering): For indeterminate tomatoes, you must regularly remove the side shoots (suckers) that form in the leaf axils. This promotes the growth of the main stems and ensures better ventilation for the plants. It’s best to remove the suckers early when they are still small.
- Removing leaves: Remove the lower leaves of the tomato plants as soon as they turn yellow or touch the ground. This improves ventilation and prevents diseases.
- Protection from diseases and pests: Tomatoes can be affected by various diseases and pests. Watch for signs like yellow leaves, spots, or bite marks. If necessary, you can use organic pesticides. Good ventilation and a sunny location help prevent diseases.
The Harvest: The Reward for Your Efforts
The time has finally come: the tomatoes are ripe and can be harvested!
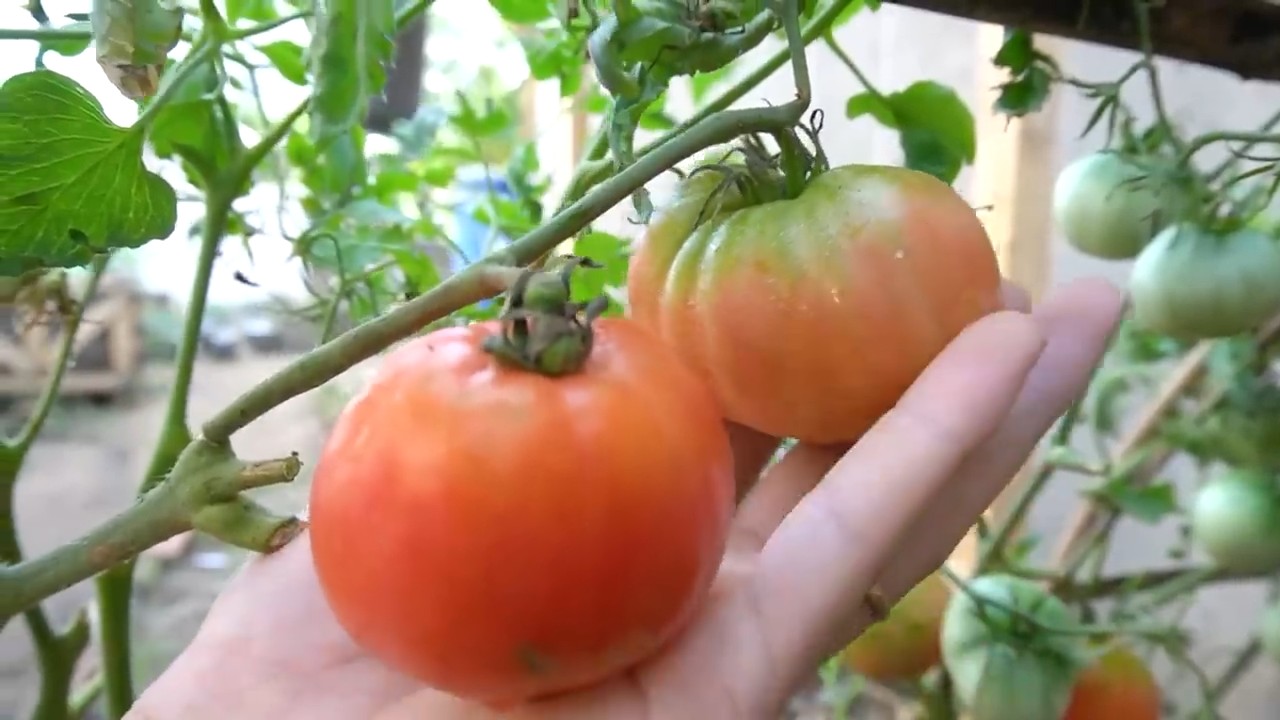
- Recognizing ripeness: Ripe tomatoes have an intense color and give slightly to gentle pressure. They are easily detached from the stem.
- Harvesting: Harvest the tomatoes carefully to avoid damaging the plants. Cut the tomatoes with scissors or a knife.
- Storage: Store the tomatoes in a cool and dry place. Not in the refrigerator, as they will lose their flavor.
- Enjoying: Enjoy your homegrown tomatoes plain, in a salad, on bread, or in your favorite dishes!
Additional Tips for a Successful Tomato Harvest
- Practice crop rotation: Do not grow tomatoes in the same location every year to prevent diseases.
- Rain protection: If you live in a region with a lot of rain, you should provide your tomatoes with a rain cover. This protects the plants from fungal diseases.
- Promote pollination: Gently shake the tomato plants during the flowering period to promote pollination.
- Variety: Try different tomato varieties to find your favorite.
- Save your own seeds: If you have a particularly delicious tomato, you can save the seeds for next year.
I hope this guide helps you to successfully grow your own tomatoes. It’s truly a great feeling to harvest the fruits of your labor and enjoy the incomparable taste of homegrown tomatoes. Happy gardening
Conclusion
So, there you have it! Transforming your kitchen scraps into a thriving tomato patch is not only incredibly rewarding but also a fantastic way to reduce waste and connect with the food you eat. This DIY trick for growing tomatoes from your kitchen garden is a game-changer for both novice and experienced gardeners alike. It’s simple, cost-effective, and yields delicious, homegrown tomatoes that are bursting with flavor. Forget those bland, store-bought tomatoes – imagine the taste of sun-ripened, juicy tomatoes grown right in your own backyard, or even on your balcony!
The beauty of this method lies in its adaptability. Feel free to experiment with different tomato varieties. Cherry tomatoes, Roma tomatoes, beefsteak tomatoes – the possibilities are endless! You can also adjust the soil composition to suit your specific climate and growing conditions. Consider adding compost or other organic matter to enrich the soil and provide your tomato plants with the nutrients they need to flourish.
Beyond the basic method, consider exploring variations to further enhance your tomato-growing experience. For example, companion planting can be incredibly beneficial. Basil, marigolds, and garlic are excellent companions for tomatoes, helping to deter pests and improve the overall health of your plants. You can also try different methods of staking or caging your tomato plants to provide support and prevent them from sprawling.
Don’t be afraid to get creative and personalize your tomato-growing journey! The most important thing is to have fun and enjoy the process. There’s nothing quite like the satisfaction of nurturing a plant from seed (or in this case, from kitchen scraps) and watching it grow into a bountiful source of delicious tomatoes.
We wholeheartedly encourage you to give this DIY trick a try. It’s a fantastic way to get your hands dirty, learn about the wonders of nature, and enjoy the fruits (or vegetables!) of your labor. And most importantly, we want to hear about your experience! Share your tips, tricks, and triumphs in the comments below. Let’s create a community of tomato-growing enthusiasts and learn from each other. Tell us what varieties you’re growing, what challenges you’ve faced, and what successes you’ve celebrated. Your insights could be invaluable to other gardeners who are just starting out.
Growing tomatoes from your kitchen garden is more than just a gardening project; it’s a sustainable practice that connects you to the earth and provides you with fresh, healthy food. So, grab your trowel, gather your kitchen scraps, and get ready to embark on a rewarding tomato-growing adventure! We can’t wait to hear about your success!
Frequently Asked Questions (FAQ)
What kind of tomatoes work best for this method?
Almost any type of tomato can be grown from kitchen scraps, but some varieties tend to be more successful than others. Heirloom varieties, known for their robust flavor and adaptability, often thrive when grown from seed or cuttings. Cherry tomatoes and Roma tomatoes are also good choices, as they tend to be more resilient and produce abundant yields. However, don’t be afraid to experiment with other varieties! The key is to use ripe, healthy tomatoes as your starting point. Avoid using tomatoes that are bruised, damaged, or show signs of disease.
How long does it take to grow tomatoes from kitchen scraps?
The time it takes to grow tomatoes from kitchen scraps can vary depending on several factors, including the variety of tomato, the growing conditions, and the method you use. Generally, it takes about 6-8 weeks for tomato seedlings to develop from seeds or cuttings. Once the seedlings are large enough, they can be transplanted into larger pots or directly into the garden. From transplanting to harvesting, it typically takes another 60-85 days, depending on the variety. So, from start to finish, you can expect it to take approximately 3-4 months to harvest your first tomatoes.
What kind of soil is best for growing tomatoes?
Tomatoes thrive in well-drained, fertile soil that is rich in organic matter. The ideal soil pH for tomatoes is between 6.0 and 6.8. Before planting, amend your soil with compost, aged manure, or other organic materials to improve its fertility and drainage. You can also add a slow-release fertilizer specifically formulated for tomatoes. Avoid using soil that is heavy clay or sandy, as these types of soil do not retain moisture or nutrients well. If you have heavy clay soil, consider adding gypsum to improve its drainage. If you have sandy soil, add compost or peat moss to help it retain moisture.
How much sunlight do tomatoes need?
Tomatoes need at least 6-8 hours of direct sunlight per day to thrive. Choose a location in your garden that receives plenty of sunlight throughout the day. If you are growing tomatoes in containers, make sure to place them in a sunny spot. If you live in a hot climate, you may need to provide some afternoon shade to protect your tomato plants from scorching.
How often should I water my tomato plants?
Water your tomato plants deeply and regularly, especially during hot, dry weather. Aim to water them at the base of the plant, avoiding getting the leaves wet, as this can increase the risk of disease. The frequency of watering will depend on the weather conditions and the type of soil you have. Generally, you should water your tomato plants when the top inch of soil feels dry to the touch. Avoid overwatering, as this can lead to root rot.
What are some common tomato pests and diseases, and how can I prevent them?
Tomatoes are susceptible to a variety of pests and diseases, including aphids, whiteflies, tomato hornworms, blossom end rot, and early blight. To prevent these problems, practice good gardening hygiene. Remove any dead or diseased leaves from your tomato plants, and keep the area around them clean and free of weeds. Use organic pest control methods, such as insecticidal soap or neem oil, to control pests. To prevent blossom end rot, make sure your tomato plants receive consistent watering and that the soil is rich in calcium. Choose disease-resistant tomato varieties to reduce the risk of disease.
Can I grow tomatoes indoors?
Yes, you can grow tomatoes indoors, but it requires some extra effort. You’ll need to provide your tomato plants with plenty of light, either from a sunny window or from grow lights. You’ll also need to pollinate the flowers manually, as there will be no bees or other pollinators indoors. Choose a compact tomato variety that is well-suited for container gardening.
What are some tips for getting the most out of my tomato harvest?
To maximize your tomato harvest, prune your tomato plants regularly to remove suckers (the small shoots that grow between the main stem and the branches). This will help to improve air circulation and allow more sunlight to reach the tomatoes. Fertilize your tomato plants regularly with a balanced fertilizer. Harvest your tomatoes when they are fully ripe and have a deep, rich color. Store your tomatoes at room temperature, as refrigeration can affect their flavor and texture. Enjoy your homegrown tomatoes in salads, sauces, sandwiches, or simply eat them fresh off the vine!
Leave a Comment