
Grow Microgreens at Home – sounds intimidating, right? But trust me, it’s easier than you think, and I’m here to show you how! Forget those expensive trips to the grocery store for a handful of these nutrient-packed powerhouses. Imagine having a constant supply of fresh, flavorful greens right on your windowsill.
Microgreens, tiny seedlings of edible plants, have been gaining popularity in recent years, but their history actually stretches back centuries. Some believe they were first cultivated in the 1980s in California, but the concept of eating young sprouts has roots in various cultures around the world. Think of it as a modern twist on ancient practices!
Why should you bother learning to grow microgreens at home? Well, for starters, they’re incredibly nutritious, often packing more vitamins and minerals than their mature counterparts. Plus, they add a burst of flavor and vibrant color to salads, sandwiches, soups, and just about anything else you can imagine. But the real reason I love them is the sheer convenience and satisfaction of growing my own food, even in a small apartment. This DIY guide will walk you through everything you need to know, from choosing the right seeds to harvesting your first batch. So, let’s get our hands dirty and bring a little bit of the garden indoors!
Grow Your Own Microgreens: A Beginner’s Guide
Hey there, fellow plant enthusiasts! Ever wanted to add a burst of fresh flavor and nutrients to your meals without breaking the bank? Well, you’re in the right place! I’m going to walk you through the super simple process of growing your own microgreens right at home. Trust me, it’s easier than you think, and the rewards are delicious!
What are Microgreens Anyway?
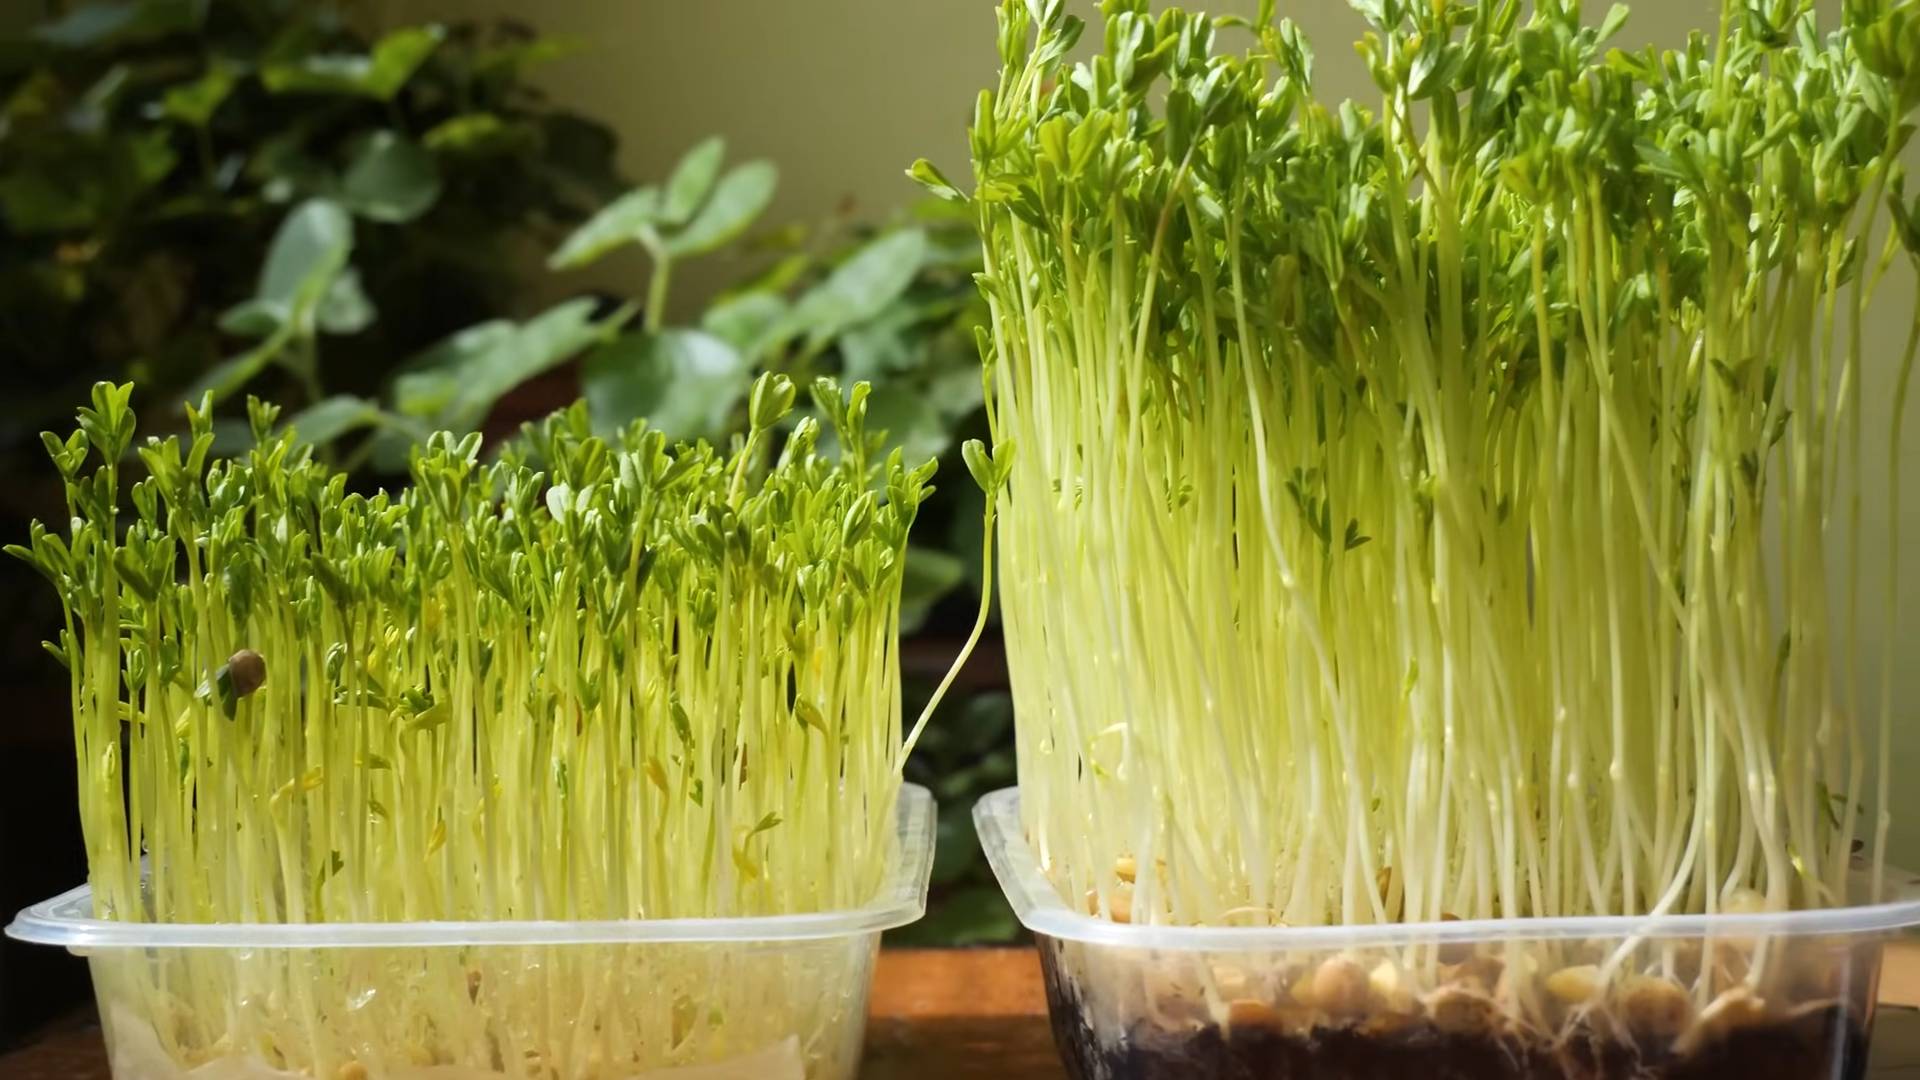
Before we dive in, let’s quickly cover what microgreens actually are. They’re basically baby versions of vegetables and herbs, harvested just a week or two after germination. Think of them as super-powered sprouts! They’re packed with vitamins, minerals, and antioxidants, and they add a vibrant pop of color and flavor to salads, sandwiches, soups, and just about anything else you can imagine.
Why Grow Your Own?
You might be wondering, “Why not just buy them at the store?” Well, for starters, store-bought microgreens can be pretty pricey. Plus, growing your own lets you control the entire process, ensuring they’re fresh, organic, and free from any unwanted chemicals. And honestly, there’s something incredibly satisfying about nurturing these little guys from seed to plate.
Getting Started: What You’ll Need
Okay, let’s gather our supplies. The beauty of this project is that you probably already have most of what you need lying around the house. Here’s a list:
* Seeds: This is the most important part! Choose seeds specifically labeled for microgreens. Some popular options include:
* Radish
* Broccoli
* Sunflower
* Pea shoots
* Arugula
* Mustard
* Kale
* Cress
* Arugula
* Beet
Experiment with different varieties to find your favorites!
* Growing Trays: You’ll need two trays: one with drainage holes and one without. The one without holes will act as a water reservoir. You can find these at most garden centers or even reuse plastic takeout containers (just make sure they’re clean!).
* Growing Medium: I recommend using a soilless mix like coco coir or seed starting mix. These are lightweight, retain moisture well, and are less prone to mold. You can also use potting soil, but make sure it’s a fine-textured variety.
* Spray Bottle: For misting the seeds and seedlings.
* Water: Filtered water is best, but tap water will work in most cases.
* Light Source: Microgreens need light to grow. A sunny windowsill can work, but a grow light will give you more consistent results, especially during the winter months.
* Weight (Optional): A small weight, like a book or a brick wrapped in plastic, can help the seeds germinate evenly.
* Paper Towels (Optional): For lining the bottom of the tray.
Step-by-Step Instructions: From Seed to Salad
Alright, let’s get our hands dirty! Here’s a detailed guide to growing your own microgreens:
1. Prepare Your Trays
1. Clean Your Trays: Start by thoroughly cleaning your growing trays with soap and water to prevent any mold or bacteria growth.
2. Line the Tray (Optional): If you’re using a tray with large drainage holes, you can line the bottom with a layer of paper towels to prevent the growing medium from falling through.
3. Add Growing Medium: Fill the tray with drainage holes with your chosen growing medium. Moisten the medium thoroughly with water until it’s damp but not soggy. You should be able to squeeze a handful of the medium without water dripping out. Level the surface of the medium with your hand.
2. Sow Your Seeds
1. Scatter the Seeds: This is where the magic happens! Sprinkle the seeds evenly over the surface of the growing medium. Don’t overcrowd them; you want them to have enough space to grow. A good rule of thumb is to aim for about 1/4 inch between seeds.
2. Gently Press the Seeds: Use your hand or a flat object to gently press the seeds into the growing medium. This will help them make good contact with the moisture.
3. Mist with Water: Use your spray bottle to mist the seeds with water. You want to keep them moist but not soaking wet.
3. Germination Phase: Darkness is Key
1. Cover the Seeds: Cover the tray with the second tray (the one without drainage holes) or a dark lid. This will create a dark, humid environment that’s ideal for germination.
2. Weigh it Down (Optional): Place a small weight on top of the cover to help
Hey there, fellow plant enthusiasts! Ever wanted to add a burst of fresh flavor and nutrients to your meals without breaking the bank? Well, you’re in the right place! I’m going to walk you through the super simple process of growing your own microgreens right at home. Trust me, it’s easier than you think, and the rewards are delicious!
What are Microgreens Anyway?
Before we dive in, let’s quickly cover what microgreens actually are. They’re basically baby versions of vegetables and herbs, harvested just a week or two after germination. Think of them as super-powered sprouts! They’re packed with vitamins, minerals, and antioxidants, and they add a vibrant pop of color and flavor to salads, sandwiches, soups, and just about anything else you can imagine.
Why Grow Your Own?
You might be wondering, “Why not just buy them at the store?” Well, for starters, store-bought microgreens can be pretty pricey. Plus, growing your own lets you control the entire process, ensuring they’re fresh, organic, and free from any unwanted chemicals. And honestly, there’s something incredibly satisfying about nurturing these little guys from seed to plate.
Getting Started: What You’ll Need
Okay, let’s gather our supplies. The beauty of this project is that you probably already have most of what you need lying around the house. Here’s a list:
* Seeds: This is the most important part! Choose seeds specifically labeled for microgreens. Some popular options include:
* Radish
* Broccoli
* Sunflower
* Pea shoots
* Arugula
* Mustard
* Kale
* Cress
* Arugula
* Beet
Experiment with different varieties to find your favorites!
* Growing Trays: You’ll need two trays: one with drainage holes and one without. The one without holes will act as a water reservoir. You can find these at most garden centers or even reuse plastic takeout containers (just make sure they’re clean!).
* Growing Medium: I recommend using a soilless mix like coco coir or seed starting mix. These are lightweight, retain moisture well, and are less prone to mold. You can also use potting soil, but make sure it’s a fine-textured variety.
* Spray Bottle: For misting the seeds and seedlings.
* Water: Filtered water is best, but tap water will work in most cases.
* Light Source: Microgreens need light to grow. A sunny windowsill can work, but a grow light will give you more consistent results, especially during the winter months.
* Weight (Optional): A small weight, like a book or a brick wrapped in plastic, can help the seeds germinate evenly.
* Paper Towels (Optional): For lining the bottom of the tray.
Step-by-Step Instructions: From Seed to Salad
Alright, let’s get our hands dirty! Here’s a detailed guide to growing your own microgreens:
1. Prepare Your Trays
1. Clean Your Trays: Start by thoroughly cleaning your growing trays with soap and water to prevent any mold or bacteria growth.
2. Line the Tray (Optional): If you’re using a tray with large drainage holes, you can line the bottom with a layer of paper towels to prevent the growing medium from falling through.
3. Add Growing Medium: Fill the tray with drainage holes with your chosen growing medium. Moisten the medium thoroughly with water until it’s damp but not soggy. You should be able to squeeze a handful of the medium without water dripping out. Level the surface of the medium with your hand.
2. Sow Your Seeds
1. Scatter the Seeds: This is where the magic happens! Sprinkle the seeds evenly over the surface of the growing medium. Don’t overcrowd them; you want them to have enough space to grow. A good rule of thumb is to aim for about 1/4 inch between seeds.
2. Gently Press the Seeds: Use your hand or a flat object to gently press the seeds into the growing medium. This will help them make good contact with the moisture.
3. Mist with Water: Use your spray bottle to mist the seeds with water. You want to keep them moist but not soaking wet.
3. Germination Phase: Darkness is Key
1. Cover the Seeds: Cover the tray with the second tray (the one without drainage holes) or a dark lid. This will create a dark, humid environment that’s ideal for germination.
2. Weigh it Down (Optional): Place a small weight on top of the cover to help the seeds germinate evenly. This is especially helpful for larger seeds like sunflower or pea shoots.
3. Keep it Dark: Place the tray in a dark, cool place (around 65-70°F) for the next 2-3 days.
4. Check Moisture Levels: Check the moisture levels daily. If the growing medium feels dry, mist it lightly with water.
4. The Light Phase: Time to Shine!
1. Uncover the Tray: After 2-3 days, or when you see the seeds starting to sprout, remove the cover and the weight.
2. Introduce Light: Place the tray under a grow light or in a sunny windowsill. If using a grow light, position it a few inches above the seedlings.
3. Watering: Now, instead of misting from the top, we’ll start bottom watering. Pour water into the bottom tray (the one without drainage holes) and let the growing medium absorb the water from below. This will help prevent mold growth. Keep the bottom tray filled with about an inch of water.
4. Rotate the Tray: If you’re using a windowsill, rotate the tray daily to ensure that the seedlings receive even light on all sides. This will prevent them from leaning towards the light source.
5. Harvesting Your Microgreens: The Grand Finale!
1. Harvest Time: Your microgreens will be ready to harvest in about 7-14 days, depending on the variety. They’re ready when they have developed their first set of true leaves (the leaves that look like miniature versions of the adult plant’s leaves).
2. Harvesting Technique: Use a pair of sharp scissors or a knife to cut the microgreens just above the soil line.
3. Rinse and Enjoy: Rinse the harvested microgreens with water and gently pat them dry. They’re now ready to add to your favorite dishes!
Troubleshooting: Common Issues and Solutions
Even with the best intentions, things can sometimes go wrong. Here are a few common issues you might encounter and how to fix them:
* Mold Growth: Mold is a common problem, especially in humid environments. To prevent mold, make sure your trays are clean, use a well-draining growing medium, and avoid overwatering. If you see mold, remove the affected areas and improve ventilation. You can also try spraying the microgreens with a diluted hydrogen peroxide solution (1 part hydrogen peroxide to 10 parts water).
* Leggy Seedlings: Leggy seedlings are tall and spindly, with long stems and small leaves. This is usually caused by insufficient light. Make sure your microgreens are getting enough light, either from a grow light or a sunny windowsill.
* Uneven Germination: Uneven germination can be caused by uneven watering or uneven seed distribution. Make sure you’re watering evenly and that you’re scattering the seeds evenly over the growing medium. Using a weight during the germination phase can also help.
* Slow Growth: Slow growth can be caused by a variety of factors, including low temperatures, insufficient light, or poor-quality seeds. Make sure your microgreens are growing in a warm, well-lit environment and that you’re using fresh, high-quality seeds.
Tips and Tricks for Success
Here are a few extra tips to help you grow the best microgreens possible:
* Experiment with Different Varieties: Don’t be afraid to try different types of microgreens. Each variety has its own unique flavor and texture.
* Succession Planting: To ensure a continuous supply of microgreens, plant a new batch every week or two.
* Use a Seed Sprouter: For some varieties, like broccoli and radish, using a seed sprouter for the first few days can improve germination rates.
* Store Your Microgreens Properly: Store harvested microgreens in the refrigerator in a sealed container lined with a paper towel. They should last for about a week.
* Don’t Give Up! Growing microgreens is a learning process. Don’t be discouraged if your first batch isn’t perfect. Keep experimenting and you’ll soon be harvesting delicious, nutritious microgreens like a pro!
So there you have it! Everything you need to know to
Conclusion
So, there you have it! Growing microgreens at home is not just a fun project; it’s a gateway to fresher, more nutritious meals and a more sustainable lifestyle. We’ve walked you through the simple steps, highlighting how incredibly easy and rewarding it is to cultivate these tiny powerhouses right in your own kitchen. Forget those expensive, pre-packaged containers from the grocery store – with minimal effort and resources, you can have a constant supply of vibrant, flavorful microgreens at your fingertips.
Why is this DIY trick a must-try? Because it empowers you to take control of your food source, ensuring you’re consuming the freshest, most nutrient-dense greens possible. Microgreens are packed with vitamins, minerals, and antioxidants, often exceeding the nutritional value of their mature counterparts. Plus, the satisfaction of nurturing something from seed to harvest is incredibly fulfilling. It’s a small act of self-sufficiency that can have a big impact on your well-being.
But the beauty of growing microgreens at home lies in its versatility. Feel free to experiment with different seed varieties. Radish microgreens offer a peppery kick, while sunflower microgreens provide a nutty flavor. Broccoli microgreens are known for their sulforaphane content, a potent antioxidant. You can even create your own custom blends to suit your taste preferences.
Consider using different growing mediums as well. While soil is a classic choice, you can also try coco coir, hemp mats, or even paper towels. Each medium offers its own unique benefits and challenges, so don’t be afraid to explore and find what works best for you.
Another variation to consider is the type of container you use. While we suggested a simple tray, you can also repurpose plastic containers, yogurt cups, or even egg cartons. Just make sure your container has drainage holes to prevent waterlogging.
Growing microgreens at home is an incredibly rewarding experience. It’s a simple, affordable, and sustainable way to add fresh, nutritious greens to your diet.
We wholeheartedly encourage you to give this DIY trick a try. It’s easier than you think, and the results are well worth the effort. Once you’ve harvested your first batch of microgreens, we’d love to hear about your experience. Share your photos, tips, and favorite recipes in the comments below. Let’s build a community of microgreen enthusiasts and inspire others to embrace the joy of growing their own food. What are you waiting for? Get those seeds soaking and start your microgreen journey today!
Frequently Asked Questions (FAQ)
What exactly are microgreens?
Microgreens are young vegetable greens that are typically harvested 7-14 days after germination, when the first true leaves have emerged. They are larger than sprouts but smaller than baby greens, and they offer a concentrated burst of flavor and nutrients. Think of them as miniature versions of your favorite vegetables, packed with goodness.
What kind of seeds can I use to grow microgreens?
The possibilities are almost endless! Some popular choices include:
* **Brassicas:** Broccoli, kale, cabbage, cauliflower, radish, arugula
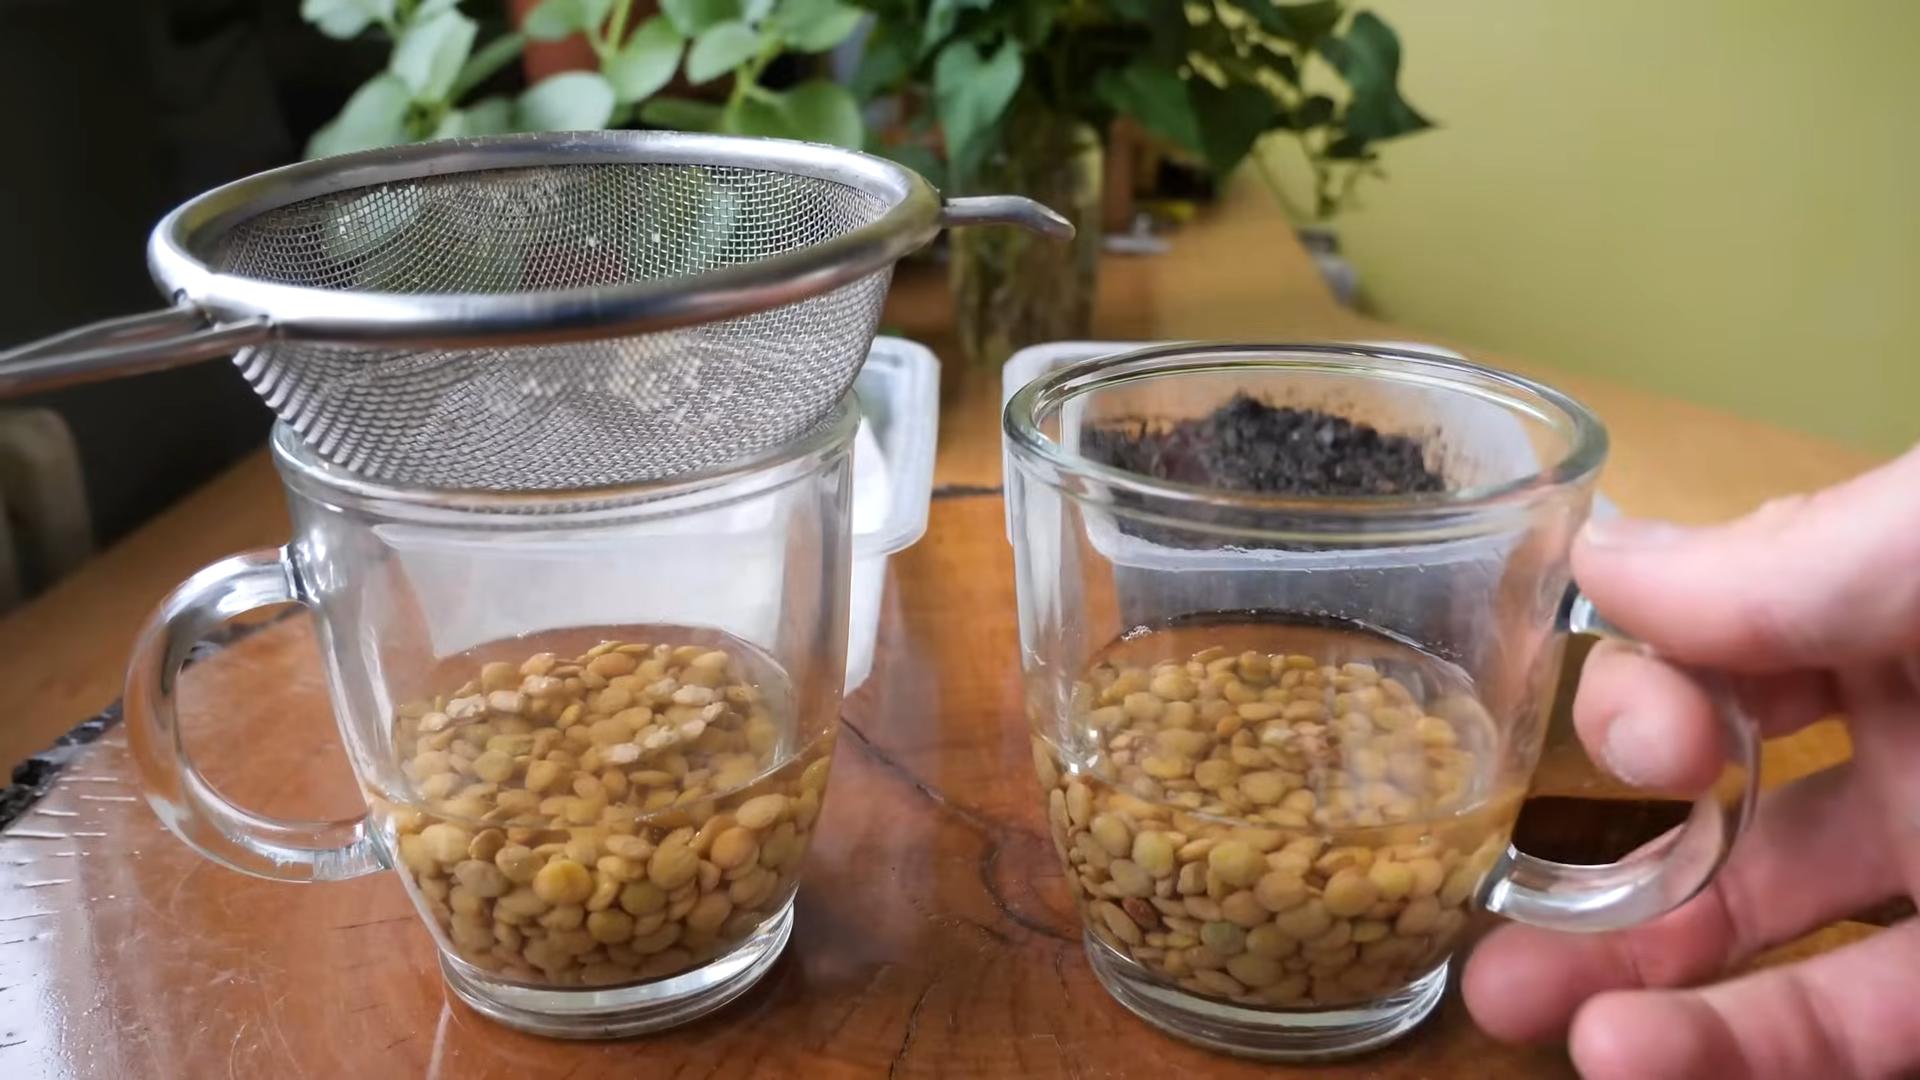
* **Legumes:** Peas, lentils, chickpeas
* **Cereals:** Wheatgrass, barley, oats
* **Amaranthaceae:** Amaranth, quinoa, beets, Swiss chard
* **Asteraceae:** Sunflower, lettuce, endive, chicory
* **Apiaceae:** Carrot, celery, dill, fennel
Avoid using seeds that have been treated with fungicides or other chemicals, as these are not safe for consumption. Look for seeds specifically labeled for sprouting or microgreen production.
How much light do microgreens need?
Microgreens need adequate light to thrive. Initially, while the seeds are germinating, they don’t need light. However, once the seedlings emerge, they require bright, indirect light. A sunny windowsill is often sufficient, but if you don’t have access to enough natural light, you can use a grow light. Position the grow light a few inches above the microgreens and keep it on for 12-16 hours per day. Insufficient light can lead to leggy, pale microgreens.
How often should I water my microgreens?
Maintaining consistent moisture is crucial for successful microgreen growth. Water your microgreens once or twice a day, or as needed, to keep the growing medium consistently moist but not waterlogged. The best way to water is to gently mist the surface with a spray bottle. Avoid overwatering, as this can lead to mold growth. You can also bottom-water by placing the tray in a shallow dish of water and allowing the growing medium to absorb the water from below.
How do I prevent mold growth on my microgreens?
Mold growth is a common problem when growing microgreens, but it can be prevented with proper care. Here are some tips:
* **Use clean equipment:** Sanitize your trays and containers before planting.
* **Ensure good air circulation:** Provide adequate ventilation to prevent moisture buildup.
* **Avoid overwatering:** Water only when necessary and ensure proper drainage.
* **Use a well-draining growing medium:** This will help prevent waterlogging.
* **Remove any dead or decaying plant matter:** This can attract mold.
* **Consider using a diluted hydrogen peroxide solution:** A very weak solution (1 part hydrogen peroxide to 10 parts water) can be sprayed on the microgreens to inhibit mold growth.
If you do notice mold, remove the affected area immediately. If the mold is widespread, it’s best to discard the entire batch.
When are microgreens ready to harvest?
Microgreens are typically ready to harvest 7-14 days after germination, when the first true leaves have emerged. The exact timing will depend on the variety of microgreen you’re growing. Look for vibrant color and a good amount of leaf development.
How do I harvest microgreens?
Harvesting microgreens is easy! Simply use a pair of scissors or a sharp knife to cut the stems just above the growing medium. Wash the microgreens gently before using them.
How long do microgreens last after harvesting?
Microgreens are best consumed fresh, but they can be stored in the refrigerator for up to a week. To store them, gently pat them dry and place them in a sealed container lined with a paper towel.
Can I regrow microgreens after harvesting?
Unfortunately, microgreens cannot be regrown after harvesting. They are a one-time crop. However, you can easily start a new batch of seeds to ensure a continuous supply of fresh microgreens.
Is growing microgreens at home organic?
Yes, growing microgreens at home can be organic, as long as you use organic seeds
So, there you have it! Growing microgreens at home is not just a fun project; it’s a gateway to fresher, more nutritious meals and a more sustainable lifestyle. We’ve walked you through the simple steps, highlighting how incredibly easy and rewarding it is to cultivate these tiny powerhouses right in your own kitchen. Forget those expensive, pre-packaged containers from the grocery store – with minimal effort and resources, you can have a constant supply of vibrant, flavorful microgreens at your fingertips.
Why is this DIY trick a must-try? Because it empowers you to take control of your food source, ensuring you’re consuming the freshest, most nutrient-dense greens possible. Microgreens are packed with vitamins, minerals, and antioxidants, often exceeding the nutritional value of their mature counterparts. Plus, the satisfaction of nurturing something from seed to harvest is incredibly fulfilling. It’s a small act of self-sufficiency that can have a big impact on your well-being.
But the beauty of growing microgreens at home lies in its versatility. Feel free to experiment with different seed varieties. Radish microgreens offer a peppery kick, while sunflower microgreens provide a nutty flavor. Broccoli microgreens are known for their sulforaphane content, a potent antioxidant. You can even create your own custom blends to suit your taste preferences.
Consider using different growing mediums as well. While soil is a classic choice, you can also try coco coir, hemp mats, or even paper towels. Each medium offers its own unique benefits and challenges, so don’t be afraid to explore and find what works best for you.
Another variation to consider is the type of container you use. While we suggested a simple tray, you can also repurpose plastic containers, yogurt cups, or even egg cartons. Just make sure your container has drainage holes to prevent waterlogging.
Growing microgreens at home is an incredibly rewarding experience. It’s a simple, affordable, and sustainable way to add fresh, nutritious greens to your diet.
We wholeheartedly encourage you to give this DIY trick a try. It’s easier than you think, and the results are well worth the effort. Once you’ve harvested your first batch of microgreens, we’d love to hear about your experience. Share your photos, tips, and favorite recipes in the comments below. Let’s build a community of microgreen enthusiasts and inspire others to embrace the joy of growing their own food. What are you waiting for? Get those seeds soaking and start your microgreen journey today!
Frequently Asked Questions (FAQ)
What exactly are microgreens?
Microgreens are young vegetable greens that are typically harvested 7-14 days after germination, when the first true leaves have emerged. They are larger than sprouts but smaller than baby greens, and they offer a concentrated burst of flavor and nutrients. Think of them as miniature versions of your favorite vegetables, packed with goodness.
What kind of seeds can I use to grow microgreens?
The possibilities are almost endless! Some popular choices include:
* **Brassicas:** Broccoli, kale, cabbage, cauliflower, radish, arugula
* **Legumes:** Peas, lentils, chickpeas
* **Cereals:** Wheatgrass, barley, oats
* **Amaranthaceae:** Amaranth, quinoa, beets, Swiss chard
* **Asteraceae:** Sunflower, lettuce, endive, chicory
* **Apiaceae:** Carrot, celery, dill, fennel
Avoid using seeds that have been treated with fungicides or other chemicals, as these are not safe for consumption. Look for seeds specifically labeled for sprouting or microgreen production.
How much light do microgreens need?
Microgreens need adequate light to thrive. Initially, while the seeds are germinating, they don’t need light. However, once the seedlings emerge, they require bright, indirect light. A sunny windowsill is often sufficient, but if you don’t have access to enough natural light, you can use a grow light. Position the grow light a few inches above the microgreens and keep it on for 12-16 hours per day. Insufficient light can lead to leggy, pale microgreens.
How often should I water my microgreens?
Maintaining consistent moisture is crucial for successful microgreen growth. Water your microgreens once or twice a day, or as needed, to keep the growing medium consistently moist but not waterlogged. The best way to water is to gently mist the surface with a spray bottle. Avoid overwatering, as this can lead to mold growth. You can also bottom-water by placing the tray in a shallow dish of water and allowing the growing medium to absorb the water from below.
How do I prevent mold growth on my microgreens?
Mold growth is a common problem when growing microgreens, but it can be prevented with proper care. Here are some tips:
* **Use clean equipment:** Sanitize your trays and containers before planting.
* **Ensure good air circulation:** Provide adequate ventilation to prevent moisture buildup.
* **Avoid overwatering:** Water only when necessary and ensure proper drainage.
* **Use a well-draining growing medium:** This will help prevent waterlogging.
* **Remove any dead or decaying plant matter:** This can attract mold.
* **Consider using a diluted hydrogen peroxide solution:** A very weak solution (1 part hydrogen peroxide to 10 parts water) can be sprayed on the microgreens to inhibit mold growth.
If you do notice mold, remove the affected area immediately. If the mold is widespread, it’s best to discard the entire batch.
When are microgreens ready to harvest?
Microgreens are typically ready to harvest 7-14 days after germination, when the first true leaves have emerged. The exact timing will depend on the variety of microgreen you’re growing. Look for vibrant color and a good amount of leaf development.
How do I harvest microgreens?
Harvesting microgreens is easy! Simply use a pair of scissors or a sharp knife to cut the stems just above the growing medium. Wash the microgreens gently before using them.
How long do microgreens last after harvesting?
Microgreens are best consumed fresh, but they can be stored in the refrigerator for up to a week. To store them, gently pat them dry and place them in a sealed container lined with a paper towel.
Can I regrow microgreens after harvesting?
Unfortunately, microgreens cannot be regrown after harvesting. They are a one-time crop. However, you can easily start a new batch of seeds to ensure a continuous supply of fresh microgreens.
Is growing microgreens at home organic?
Yes, growing microgreens at home can be organic, as long as you use organic seeds and growing medium, and avoid using any synthetic fertilizers or pesticides. Look for seeds and growing mediums that are certified organic.
What are the nutritional benefits of microgreens?
Microgreens are packed with vitamins, minerals, and antioxidants. They often contain higher concentrations of these nutrients than their mature counterparts. Some of the key nutrients found in microgreens include vitamins A, C, E, and K, as well as folate, iron, magnesium, and potassium. The specific nutritional profile will vary depending on the variety of microgreen.
Can I grow microgreens indoors year-round?
Absolutely! One of the great advantages of growing microgreens at home is that you can do it year-round, regardless of the weather outside. With proper lighting and temperature control, you can enjoy a continuous supply of fresh, nutritious greens.
What if my microgreens are not growing well?
If your microgreens are not growing well, consider the following factors:
* **Light:** Are they getting enough light?
* **Water:** Are they being watered properly?
* **Temperature:** Is the temperature too hot or too cold?
* **Growing medium:** Is the growing medium suitable for microgreens?
* **Seed quality:** Are you using high-quality seeds?
By addressing these factors, you can often troubleshoot and improve the growth of your microgreens.


Leave a Comment