
Grow Coral Bells from Seed and unlock a world of vibrant color and texture in your garden! Have you ever admired those stunning, ruffled leaves in shades of burgundy, lime green, or even shimmering silver and thought, “I wish I could have those!”? Well, you absolutely can, and it’s easier than you might think to cultivate these beauties from the very beginning.
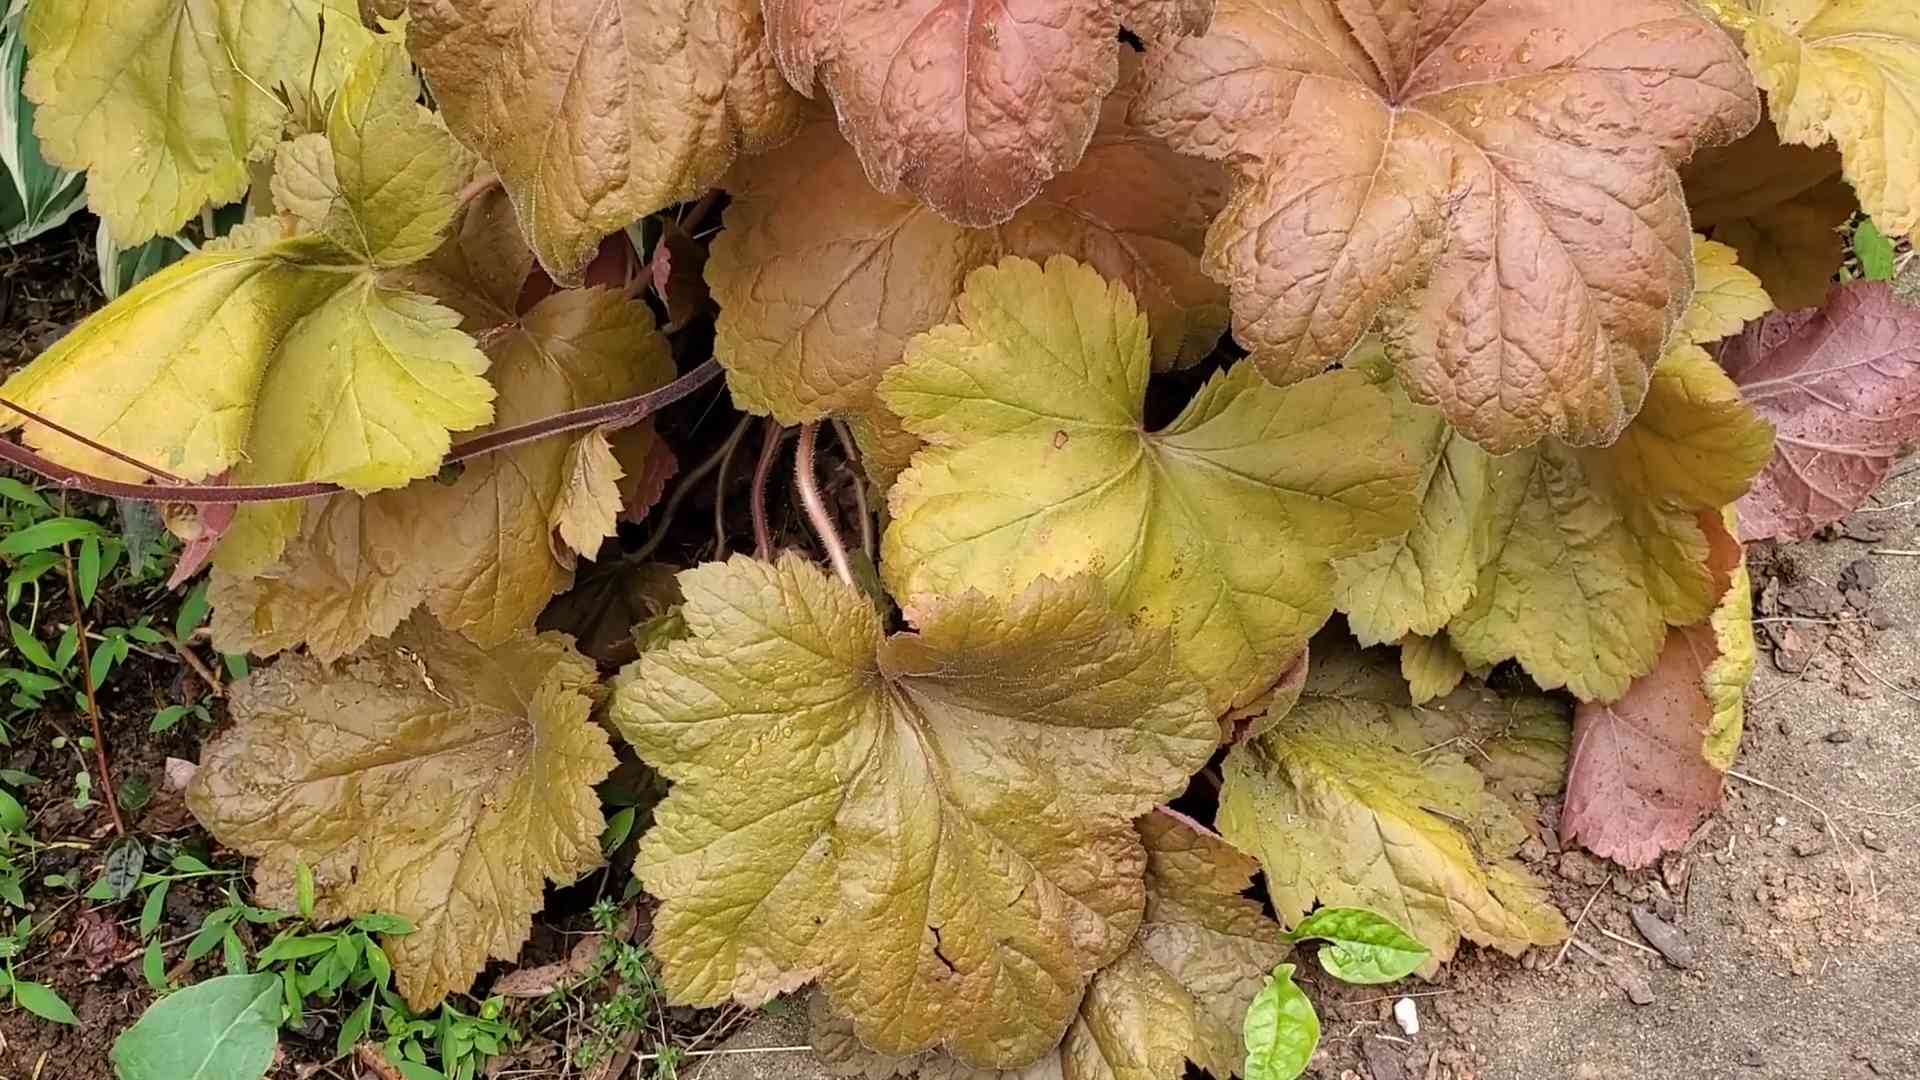
Coral Bells, also known as Heuchera, have a rich history in horticulture, gaining popularity in the early 20th century for their unique foliage and adaptability. Native to North America, these plants have been hybridized extensively, resulting in the incredible array of colors and forms we see today. For centuries, gardeners have cherished them for their ability to brighten shady spots and add visual interest to borders and containers.
Many gardeners shy away from starting plants from seed, but with Coral Bells, it’s a rewarding and cost-effective way to expand your collection. Plus, you’ll have the satisfaction of nurturing these plants from tiny seeds into thriving additions to your landscape. I’m here to guide you through the process, sharing my best tips and tricks to ensure your success. Whether you’re a seasoned gardener or just starting out, learning to grow Coral Bells from seed will open up a whole new world of possibilities for your home garden. Let’s get started!
Growing Coral Bells (Heuchera) from Seed: A Comprehensive DIY Guide
Hey there, fellow gardening enthusiasts! Are you ready to dive into the rewarding world of growing Coral Bells, also known as Heuchera, from seed? These vibrant, low-maintenance plants are a fantastic addition to any garden, offering a stunning array of foliage colors and textures. While you can certainly buy them as established plants, starting them from seed is a budget-friendly and incredibly satisfying experience. Trust me, the feeling of nurturing a tiny seed into a thriving plant is unbeatable!
This guide will walk you through every step of the process, from preparing your seeds to transplanting your seedlings. Let’s get our hands dirty!
What You’ll Need
Before we begin, let’s gather our supplies. Here’s a checklist of everything you’ll need to successfully grow Coral Bells from seed:
* Coral Bell Seeds: Purchase high-quality seeds from a reputable source. Coral Bell seeds are tiny, so handle them with care.
* Seed Starting Trays or Pots: Choose trays with drainage holes to prevent waterlogging. Small pots work just as well.
* Seed Starting Mix: This is crucial! Use a fine-textured, sterile mix specifically designed for seed starting. Regular potting soil is often too heavy and can hinder germination.
* Spray Bottle: For gently misting the soil.
* Humidity Dome or Plastic Wrap: To maintain consistent moisture levels.
* Grow Lights (Optional but Recommended): Coral Bells need bright light, especially during the early stages.
* Heat Mat (Optional): To provide bottom heat, which can speed up germination.
* Small Containers for Transplanting: Once your seedlings are large enough, you’ll need individual pots.
* Potting Soil: For transplanting into larger containers.
* Tweezers or a Toothpick: For handling the tiny seeds.
* Labels and a Permanent Marker: To keep track of your different varieties.
Preparing for Success: Understanding Coral Bell Seeds
Coral Bell seeds are notoriously small, almost like dust! This makes them a bit challenging to handle, but don’t let that discourage you. Here are a few things to keep in mind:
* Light is Key: Coral Bell seeds need light to germinate. This means you shouldn’t bury them too deeply.
* Moisture is Essential: Consistent moisture is vital for successful germination. The seed starting mix should be consistently damp, but not soggy.
* Patience is a Virtue: Germination can take anywhere from 14 to 28 days, sometimes even longer. Don’t give up if you don’t see sprouts right away!
Sowing Your Coral Bell Seeds: A Step-by-Step Guide
Now for the fun part! Let’s get those seeds planted.
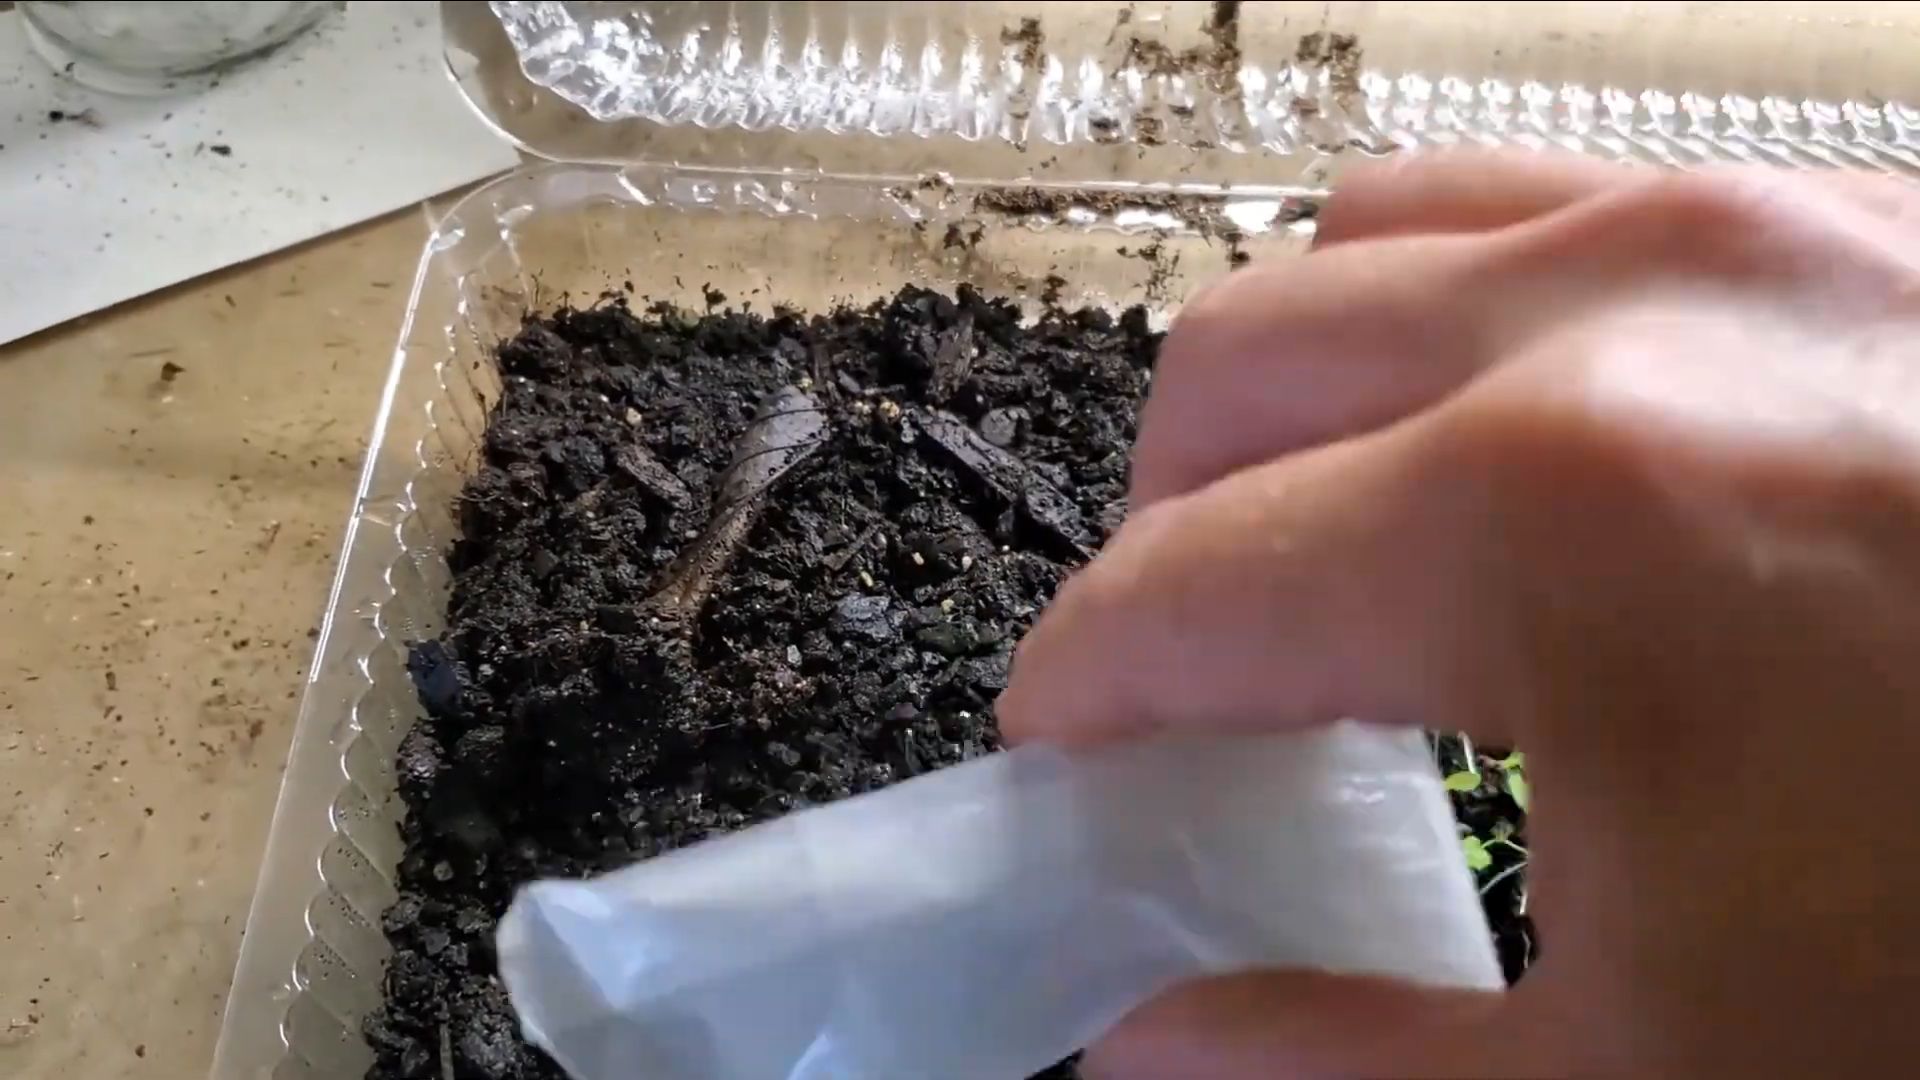
1. Prepare Your Seed Starting Trays or Pots: Fill your seed starting trays or pots with the seed starting mix. Gently tap the trays to settle the mix and remove any air pockets.
2. Moisten the Soil: Use your spray bottle to thoroughly moisten the seed starting mix. The soil should be damp, but not dripping wet.
3. Sow the Seeds: This is where those tweezers or toothpick come in handy! Carefully sprinkle the Coral Bell seeds evenly over the surface of the soil. Remember, they need light to germinate, so don’t bury them. You can gently press them into the soil surface, but avoid covering them with more mix.
4. Mist Again: Lightly mist the seeds with water to ensure good contact with the soil.
5. Cover with a Humidity Dome or Plastic Wrap: This will help maintain consistent moisture levels. If using plastic wrap, make sure to poke a few small holes for ventilation.
6. Provide Light and Warmth: Place your seed starting trays under grow lights or in a bright, sunny location. If using a heat mat, place the trays on top of it. The ideal temperature for germination is between 65°F and 75°F (18°C and 24°C).
7. Monitor Moisture Levels: Check the soil moisture daily. If the soil surface starts to dry out, mist it lightly with water.
8. Be Patient: As mentioned earlier, germination can take several weeks. Keep the soil moist and the environment warm and bright, and eventually, you should see tiny sprouts emerge.
Nurturing Your Seedlings: From Sprouts to Strong Plants
Once your Coral Bell seeds have germinated, it’s time to focus on nurturing your seedlings. This is a crucial stage, so pay close attention to their needs.
1. Remove the Humidity Dome or Plastic Wrap: Once the seedlings emerge, gradually remove the humidity dome or plastic wrap over a period of a few days. This will help them acclimate to the lower humidity levels.
2. Provide Adequate Light: Coral Bell seedlings need plenty of light to grow strong and healthy. If you’re using grow lights, keep them on for 14-16 hours per day. If you’re relying on natural sunlight, place the seedlings in a bright, sunny window.
3. Water Carefully: Water the seedlings when the soil surface feels dry to the touch. Avoid overwatering, as this can lead to fungal diseases. Water from the bottom by placing the trays in a shallow dish of water and allowing the soil to absorb the moisture.
4. Thin the Seedlings (If Necessary): If you sowed the seeds too thickly, you may need to thin them out to prevent overcrowding. Use small scissors to snip off the weaker seedlings at the soil line, leaving the strongest seedlings spaced about an inch apart.
5. Fertilize Sparingly: Once the seedlings have developed their first true leaves (the leaves that look like miniature versions of the adult plant’s leaves), you can start fertilizing them with a diluted liquid fertilizer. Use a balanced fertilizer (e.g., 10-10-10) diluted to half strength. Fertilize every two weeks.
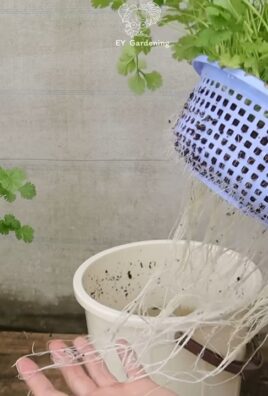
Transplanting Your Seedlings: Giving Them Room to Grow
Once your Coral Bell seedlings have grown large enough to handle, it’s time to transplant them into individual pots. This will give them more room to develop their root systems and grow into strong, healthy plants.
1. Prepare Your Pots: Fill small pots (2-3 inches in diameter) with potting soil. Make a small hole in the center of each pot.
2. Carefully Remove the Seedlings: Gently loosen the soil around the seedlings with a small tool, such as a fork or spoon. Carefully lift the seedlings out of the seed starting tray, being careful not to damage the roots.
3. Transplant the Seedlings: Place each seedling into the hole in the center of the pot. Gently fill in the hole with potting soil, making sure the seedling is planted at the same depth it was growing in the seed starting tray.
4. Water Thoroughly: Water the transplanted seedlings thoroughly to help settle the soil.
5. Provide Light and Warmth: Place the transplanted seedlings under grow lights or in a bright, sunny location.
6. Continue to Care for Your Seedlings: Continue to water and fertilize the seedlings as needed.
Hardening Off Your Seedlings: Preparing Them for the Outdoors
Before you can plant your Coral Bell seedlings in the garden, you need to “harden them off.” This process gradually acclimates them to the outdoor environment, making them less susceptible to shock and damage.
1. Start Gradually: Begin by placing the seedlings outdoors in a sheltered location for just a few hours each day. Choose a spot that is protected from direct sunlight and strong winds.
2. Increase Exposure: Gradually increase the amount of time the seedlings spend outdoors each day, exposing them to more sunlight and wind.
3. Monitor the Weather: Avoid hardening off your seedlings on days with extreme temperatures or strong winds.
4. After a Week or Two: After a week or two of hardening off, your seedlings should be ready to be planted in the garden.
Planting Your Coral Bells in the Garden: The Final Step
Congratulations! You’ve successfully grown Coral Bells from seed. Now it’s time to plant them in the garden and enjoy their beauty.
1. Choose a Location: Coral Bells prefer partial shade, especially in hot climates. They can tolerate full sun in cooler climates. Choose a location with well-drained soil.
2. Prepare the Soil: Amend the soil with compost or other organic matter to improve drainage and fertility.
3. Dig a Hole: Dig a hole that is slightly larger than the root ball of the seedling.
4. Plant the Seedling: Gently remove the seedling from its pot and place it in the hole. Make sure the top of the root ball is level with the surrounding soil.
5. Fill in the Hole: Fill in the hole with soil and gently firm it around the base of the plant.
6. Water Thoroughly:
Conclusion
So, there you have it! Growing Coral Bells from seed might seem a little daunting at first, but with a little patience and the right approach, you can cultivate a vibrant collection of these stunning plants right in your own backyard. This DIY trick is a must-try for any gardener looking to expand their plant collection on a budget and experience the unique satisfaction of nurturing life from its very beginning. Forget relying solely on nursery-bought plants; embrace the rewarding journey of seed starting and unlock a world of possibilities.
Why is this method so compelling? Firstly, it’s incredibly cost-effective. A single packet of Coral Bells seeds can yield dozens of plants, far exceeding the value of purchasing individual plants from a garden center. Secondly, it allows you to access a wider variety of cultivars. Nurseries often stock only the most popular varieties, but seed catalogs offer a treasure trove of unique colors and leaf patterns. Imagine a tapestry of ‘Black Pearl,’ ‘Lime Marmalade,’ and ‘Purple Palace’ Coral Bells, all grown from seeds you nurtured yourself!
But the benefits extend beyond economics and variety. Growing Coral Bells from seed fosters a deeper connection with nature. You’ll witness the miracle of germination, the slow and steady growth of tiny seedlings, and the eventual transformation into mature, thriving plants. This hands-on experience is incredibly rewarding and provides a profound appreciation for the natural world.
Looking for variations? Consider experimenting with different seed starting mediums. While a standard seed starting mix works well, you could also try using coco coir or vermiculite. Each medium offers slightly different properties in terms of water retention and aeration, so experimenting can help you find what works best for your specific environment. Another variation involves cold stratification. Some Coral Bells varieties benefit from a period of cold stratification before sowing, which mimics the natural winter conditions they would experience in the wild. Check your seed packet for specific instructions. You can also try different lighting conditions for your seedlings. While bright, indirect light is generally recommended, you might find that your seedlings thrive under slightly different conditions.
Don’t be afraid to experiment and adapt the process to suit your needs and preferences. Gardening is all about learning and discovering what works best for you. The key is to be patient, observant, and willing to adjust your approach as needed.
We strongly encourage you to try this DIY trick and experience the joy of growing Coral Bells from seed. It’s a rewarding and cost-effective way to expand your garden and connect with nature. Once you’ve successfully grown your own Coral Bells, we’d love to hear about your experience! Share your tips, tricks, and photos in the comments below. Let’s create a community of Coral Bells enthusiasts and inspire others to embrace the magic of seed starting. Let us know what Coral Bells varieties you are growing!
Frequently Asked Questions (FAQ)
What is the best time of year to start Coral Bells seeds?
The ideal time to start Coral Bells seeds indoors is typically 8-10 weeks before the last expected frost in your area. This usually falls around late winter or early spring. Starting them indoors gives them a head start and allows them to develop a strong root system before being transplanted outdoors. If you live in a warmer climate with a longer growing season, you can start them a bit later. Check your local frost dates to determine the best timing for your region. You can also direct sow seeds outdoors after the last frost, but germination rates may be lower and the plants will take longer to mature.
How long does it take for Coral Bells seeds to germinate?
Coral Bells seeds can be a bit slow to germinate. You can expect to see seedlings emerge within 14-21 days, but it can sometimes take longer depending on the variety and environmental conditions. Maintaining consistent moisture and warmth is crucial for successful germination. Use a humidity dome or plastic wrap to create a humid environment and keep the seed starting mix consistently moist but not waterlogged. Bottom watering can also help prevent damping off, a fungal disease that can affect young seedlings. Be patient and don’t give up if you don’t see sprouts right away.
What kind of soil is best for Coral Bells seedlings?
Coral Bells seedlings thrive in a well-draining and nutrient-rich seed starting mix. Avoid using garden soil, as it can be too heavy and may contain pathogens that can harm young seedlings. A good seed starting mix typically consists of peat moss, vermiculite, and perlite. These ingredients provide good drainage, aeration, and water retention. You can also add a small amount of compost to provide additional nutrients. Once the seedlings are large enough to transplant, you can use a potting mix that is specifically formulated for perennials.
How much light do Coral Bells seedlings need?
Coral Bells seedlings need bright, indirect light to thrive. Avoid placing them in direct sunlight, as this can scorch their delicate leaves. A south-facing window with a sheer curtain or a grow light can provide the ideal amount of light. If you’re using a grow light, position it a few inches above the seedlings and adjust the height as they grow. Insufficient light can cause the seedlings to become leggy and weak.
When can I transplant Coral Bells seedlings outdoors?
You can transplant Coral Bells seedlings outdoors once they have developed several sets of true leaves and the danger of frost has passed. Before transplanting, harden off the seedlings by gradually exposing them to outdoor conditions for a week or two. Start by placing them in a sheltered location for a few hours each day and gradually increase the amount of time they spend outdoors. This will help them acclimate to the sun, wind, and temperature changes. When transplanting, choose a location with well-draining soil and partial shade. Space the plants about 12-18 inches apart.
Are Coral Bells easy to care for once established?
Yes, Coral Bells are relatively easy to care for once they are established. They are low-maintenance plants that require minimal watering and fertilization. Water them deeply when the soil is dry to the touch, and fertilize them once or twice a year with a balanced fertilizer. Deadhead spent flower stalks to encourage continued blooming. In colder climates, mulch around the base of the plants in the fall to protect them from frost. Coral Bells are generally pest and disease resistant, but they can be susceptible to root rot in poorly draining soil.
What are some common problems when growing Coral Bells from seed?
Some common problems when growing Coral Bells from seed include damping off, leggy seedlings, and slow germination. Damping off is a fungal disease that can kill young seedlings. To prevent damping off, use a sterile seed starting mix, avoid overwatering, and provide good ventilation. Leggy seedlings are caused by insufficient light. To prevent leggy seedlings, provide bright, indirect light or use a grow light. Slow germination can be caused by cold temperatures or dry soil. To improve germination rates, maintain consistent moisture and warmth.
Can I save seeds from my Coral Bells plants?
Yes, you can save seeds from your Coral Bells plants, but keep in mind that the resulting plants may not be true to type. This means that they may not look exactly like the parent plants. Coral Bells are often hybridized, so the seeds may produce plants with different colors and leaf patterns. If you want to ensure that you get plants that are true to type, it’s best to purchase seeds from a reputable seed company. However, saving seeds from your own plants can be a fun and rewarding experiment.
What are some good companion plants for Coral Bells?
Coral Bells make excellent companion plants for a variety of other shade-loving perennials. Some good companion plants include hostas, ferns, astilbes, and bleeding hearts. These plants all thrive in similar conditions and complement each other beautifully. Coral Bells can also be used to add color and texture to shady borders and woodland gardens.
How do I choose the right Coral Bells variety to grow from seed?
Consider your local climate, soil conditions, and personal preferences when choosing a Coral Bells variety to grow from seed. Some varieties are more heat-tolerant or cold-hardy than others. Also, think about the colors and leaf patterns that you find most appealing. Seed catalogs and online resources can provide detailed information about different Coral Bells varieties.
Leave a Comment