
Growing Sage for Beginners doesn’t have to be intimidating! Have you ever dreamed of stepping outside your back door and snipping fresh herbs to elevate your cooking from ordinary to extraordinary? Imagine the aroma of garden-fresh sage infusing your kitchen, transforming simple dishes into culinary masterpieces. That dream is closer than you think, and I’m here to guide you through it!
Sage, with its velvety leaves and earthy fragrance, has a rich history steeped in tradition. For centuries, it’s been revered not only for its culinary uses but also for its medicinal properties. Ancient Romans considered sage a sacred herb, believing it could grant immortality. While I can’t promise eternal life, I can promise that growing sage for beginners is surprisingly easy and rewarding!
In today’s fast-paced world, many of us are disconnected from the natural world. We rely on grocery stores for everything, often missing out on the simple joys of nurturing our own food. Growing your own sage is a fantastic way to reconnect with nature, reduce your reliance on store-bought herbs (which can be expensive!), and add a touch of homegrown goodness to your meals. Plus, it’s incredibly satisfying to watch your little sage plant thrive under your care. This DIY guide will provide you with all the essential tips and tricks you need to successfully cultivate this versatile herb, even if you’ve never gardened before. Let’s get started!
Growing Sage for Beginners: Your DIY Guide for a Lush Harvest
I love sage! Not just for its earthy, slightly peppery taste that enhances so many dishes, but also for its low-maintenance nature. Even if you don’t have a green thumb, I promise that with this guide, you can successfully grow sage. Let’s get started!
What You Need:
- Sage seeds or a sage plant: Seeds are cheaper, but a plant will give you quicker results.
- Seed starting pots or a small garden bed: To get started if you begin with seeds.
- Good seed starting mix: Light and well-draining.
- Garden soil: For later transplanting.
- A sunny location: Sage loves the sun!
- Watering can or hose: For watering.
- Garden shears: For harvesting and pruning.
- Optional: Compost or organic fertilizer.
Growing Sage from Seed:
I always find it fascinating to see a strong plant grow from a tiny seed. Here’s how you do it:
- Prepare for sowing: Fill your seed starting pots with seed starting mix. Lightly moisten the soil, but don’t soak it.
- Sow the seeds: Distribute the sage seeds evenly on the soil. They are quite small, so be careful. Then, cover them with a thin layer of soil (about 0.5 cm / ¼ inch).
- Maintain moisture: Gently spray the soil with water to keep it moist. You can also cover the pots with plastic wrap to increase humidity. Don’t forget to air them out regularly to prevent mold.
- Keep it warm and bright: Place the pots in a warm, bright location. A windowsill is ideal. The ideal germination temperature is between 20 and 25 degrees Celsius (68-77°F).
- Be patient: Germination can take 10-21 days. Keep the soil moist, but not wet, during this time.
- Pricking out: Once the seedlings have a few true leaves (not just the initial seed leaves), you can transplant them into larger pots. Use regular garden soil for this.
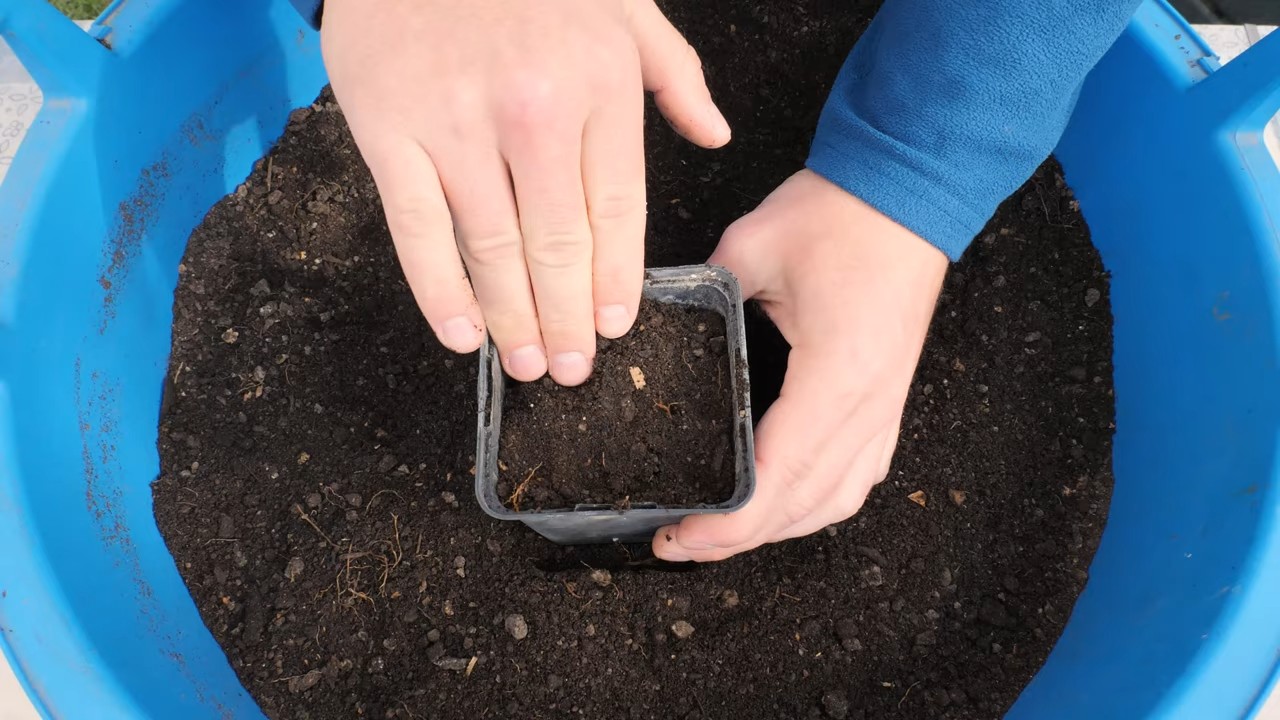
Planting Sage (from a plant or seedling):
If you’ve bought a sage plant or your seedlings are large enough, it’s time to plant them outdoors.
- Prepare the location: Choose a sunny spot with well-draining soil. Sage does not like to sit in waterlogged soil.
- Prepare the soil: Loosen the soil and remove any weeds. You can also work in some compost or organic fertilizer to improve the soil.
- Dig the planting hole: Dig a hole that is slightly larger than the plant’s root ball.
- Insert the plant: Carefully remove the plant from its pot and place it in the hole. Be careful not to damage the root ball.
- Fill the hole: Fill the hole with soil and press it down lightly.
- Water: Water the plant thoroughly.
Caring for Sage:
Sage is truly undemanding, but you should keep a few things in mind to maintain a healthy and lush plant.
- Watering: Water the sage regularly, especially during dry periods. Let the soil dry out slightly between waterings. Avoid waterlogging, as this can lead to root rot.
- Fertilizing: Sage doesn’t need much fertilizer. A light feeding in the spring with compost or organic fertilizer is usually sufficient.
- Pruning: Prune the sage regularly to make it bushier and to encourage flowering. Cut off faded flower stalks and trim the shoots back by about a third in the spring.
- Overwintering: Sage is hardy, but in very cold regions, it can be a good idea to cover the plant with brushwood or leaves. If you have the sage in a pot, you can also move it to a cool, bright place.
- Diseases and pests: Sage is relatively resistant to diseases and pests. Occasionally, aphids may appear. You can combat them with a jet of water or a mild soap solution.
Harvesting Sage:
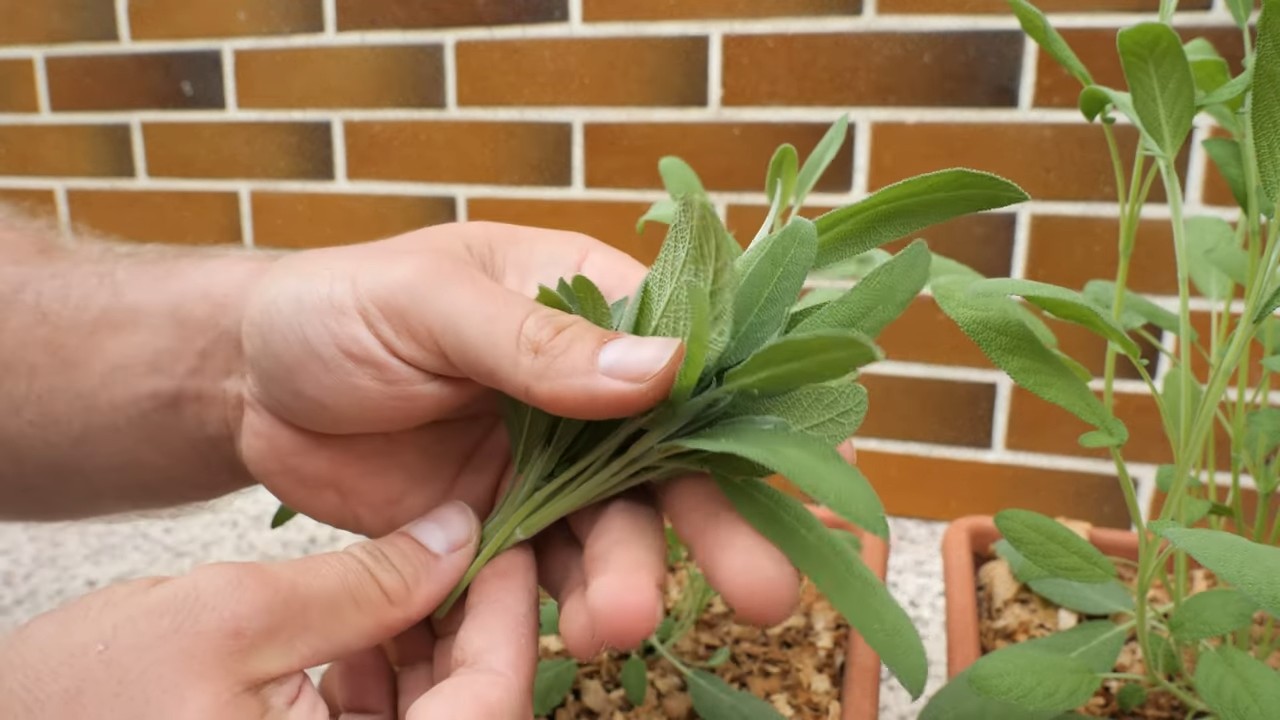
Harvesting sage is very simple and fun!
- When to harvest: You can harvest sage all year round, but the best time is in the morning after the dew has dried. That’s when the essential oils are most concentrated.
- How to harvest: Cut the leaves with garden shears. You can harvest individual leaves or entire shoots. Make sure not to remove more than a third of the plant at once.
- How to use: Fresh sage is the most aromatic. You can use it directly in your dishes or dry it to make it last longer.
Drying Sage:
Dried sage is a great way to preserve your harvest and enjoy it all year round.
- Form bundles: Tie the sage shoots into small bundles.
- Hang them up: Hang the bundles in a dry, dark, and well-ventilated place.
- Drying time: Drying usually takes 1-3 weeks. The leaves are dry when they crumble easily.
- Storage: Store the dried sage in an airtight container in a cool, dark place.
Using Sage:
Sage is a versatile herb that can be used in many dishes.
- In the kitchen: Sage pairs wonderfully with meat dishes, poultry, fish, pasta, vegetables, and soups. Try it fried in butter with gnocchi or as a seasoning for stuffings.
- As a tea: Sage tea is said to have a calming effect and help with sore throats.
- In natural medicine: Sage is traditionally used for digestive issues, inflammation, and to relieve hot flashes. (Please note: Always consult a doctor or pharmacist for health problems.)
Avoiding Common Mistakes:
- Overwatering: Sage likes it dry. Avoid waterlogged soil.
- Too little sun: Sage needs at least 6 hours of sun per day.
- Not pruning: Regular pruning promotes growth and prevents the plant from becoming woody.
- Wrong location: Ensure the soil is well-draining.
Additional Tips:
- Sage in a pot: Sage can also be grown well in a pot. Choose a pot with good drainage and use high-quality garden soil.
- Propagating sage: You can also propagate sage from cuttings. Cut a shoot in spring or summer and stick it in moist soil.
- Different varieties: There are different varieties of sage with various flavors and colors. Why not try purple sage or pineapple sage!
I hope this guide has helped you to grow your own sage. It’s really easier than you think! Happy gardening and enjoy your own sage harvest
Conclusion
So, there you have it! Growing sage, even if you’re a complete beginner, is not only achievable but incredibly rewarding. We’ve explored the simple steps, from selecting the right variety to nurturing your plant for a bountiful harvest. But why is this DIY trick a must-try? Because fresh sage, bursting with flavor and aroma, elevates your culinary creations to a whole new level. Imagine the difference between dried, store-bought sage and the vibrant, earthy notes of freshly picked leaves in your next roast chicken, pasta dish, or even a simple sage butter sauce. The difference is truly remarkable.
Beyond the culinary benefits, growing your own sage offers a connection to nature, a sense of accomplishment, and a sustainable way to access this versatile herb. It’s a small step towards self-sufficiency and a mindful approach to cooking. Plus, the beautiful silvery-green foliage of the sage plant adds a touch of elegance to any garden or windowsill.
But don’t stop there! Experiment with different varieties of sage to discover your favorite flavor profiles. Consider growing purple sage for its ornamental value and slightly milder taste, or try golden sage for its striking foliage and unique aroma. You can also explore different methods of propagation, such as taking cuttings from your established plant to create new sage bushes. This is a great way to expand your sage collection and share the joy of growing with friends and family.
Another variation to consider is companion planting. Sage is known to deter certain pests, making it a valuable addition to your vegetable garden. Plant it near rosemary, cabbage, or carrots to help protect them from unwanted insects.
We encourage you to embrace this simple yet transformative DIY project. Start small, be patient, and enjoy the process of nurturing your own sage plant. The rewards, both culinary and personal, are well worth the effort.
Now, it’s your turn! We’re eager to hear about your experiences with growing sage. Share your tips, challenges, and successes in the comments below. Let’s create a community of sage enthusiasts and learn from each other. Don’t forget to tag us in your photos on social media – we can’t wait to see your thriving sage plants! Happy growing!
Frequently Asked Questions (FAQ)
What is the best time of year to plant sage?
The best time to plant sage depends on your climate. In warmer climates, you can plant sage in the early spring or fall. In colder climates, it’s best to wait until after the last frost in the spring. This ensures that the young plants have a chance to establish themselves before the harsh winter weather arrives. Starting sage from seed indoors 6-8 weeks before the last frost is also a viable option, allowing you to get a head start on the growing season.
How much sunlight does sage need?
Sage thrives in full sun, requiring at least 6-8 hours of direct sunlight per day. Insufficient sunlight can lead to leggy growth, reduced flowering, and a less intense flavor. If you’re growing sage indoors, place it near a sunny window or supplement with grow lights. Rotate the plant regularly to ensure even exposure to sunlight.
What type of soil is best for growing sage?
Sage prefers well-draining soil with a slightly alkaline pH (around 6.5 to 7.0). Heavy clay soil can lead to root rot, so it’s important to amend the soil with compost or other organic matter to improve drainage. You can also grow sage in raised beds or containers filled with a well-draining potting mix. Avoid overwatering, as sage is relatively drought-tolerant once established.
How often should I water my sage plant?
Water sage deeply but infrequently, allowing the soil to dry out slightly between waterings. Overwatering is a common mistake that can lead to root rot. Check the soil moisture by sticking your finger about an inch deep. If the soil feels dry, it’s time to water. During hot, dry weather, you may need to water more frequently.
How do I harvest sage?
You can begin harvesting sage leaves once the plant is established, typically after a few months of growth. Harvest leaves in the morning, after the dew has dried. Simply snip off the leaves with scissors or pruning shears, taking care not to remove more than one-third of the plant at a time. Regular harvesting encourages bushier growth.
How do I dry sage?
There are several ways to dry sage. One common method is to tie the stems together in small bundles and hang them upside down in a cool, dry, and well-ventilated place. Another option is to spread the leaves out on a screen or baking sheet and allow them to air dry. You can also use a dehydrator to dry sage quickly. Once the leaves are completely dry, store them in an airtight container in a cool, dark place.
What are some common pests and diseases that affect sage?
Sage is generally resistant to pests and diseases, but it can be susceptible to spider mites, aphids, and powdery mildew. Spider mites are tiny pests that suck the sap from leaves, causing them to become speckled and yellow. Aphids are small, soft-bodied insects that can also damage leaves. Powdery mildew is a fungal disease that appears as a white, powdery coating on the leaves. To prevent these problems, ensure good air circulation around the plants and avoid overwatering. If pests or diseases do occur, treat them with insecticidal soap or a fungicide.
Can I grow sage in a container?
Yes, sage grows well in containers. Choose a pot that is at least 12 inches in diameter and has drainage holes. Use a well-draining potting mix and place the container in a sunny location. Water regularly, allowing the soil to dry out slightly between waterings. Fertilize occasionally with a balanced fertilizer.
How do I propagate sage?
Sage can be propagated from seeds, cuttings, or layering. Taking cuttings is the easiest and most common method. In the spring or summer, take a 4-6 inch cutting from a healthy stem. Remove the lower leaves and dip the cut end in rooting hormone. Plant the cutting in a pot filled with moist potting mix and cover it with a plastic bag to create a humid environment. Keep the soil moist and the cutting should root in a few weeks.
Is sage a perennial?
Yes, sage is a perennial herb, meaning it will live for several years. However, in colder climates, it may need some protection during the winter. Mulch around the base of the plant to insulate the roots and protect it from freezing temperatures. You can also bring container-grown sage indoors for the winter.
What are some culinary uses for sage?
Sage has a strong, earthy flavor that pairs well with a variety of dishes. It is commonly used in stuffings, sauces, soups, and stews. It also complements meats such as pork, chicken, and turkey. Sage can be used fresh or dried, but fresh sage has a more intense flavor. Try adding sage to your next batch of roasted vegetables, or use it to make a flavorful sage butter sauce for pasta.
Does sage have any medicinal properties?
Sage has been used for centuries for its medicinal properties. It is believed to have anti-inflammatory, antioxidant, and antimicrobial effects. Sage tea is often used to soothe sore throats and relieve digestive problems. Some studies have also suggested that sage may improve cognitive function and memory. However, it’s important to consult with a healthcare professional before using sage for medicinal purposes, especially if you have any underlying health conditions or are taking medications.


Leave a Comment