
Grow Lemongrass Indoors Successfully and unlock a world of fragrant possibilities right in your own home! Have you ever dreamed of snipping fresh lemongrass for your Thai curries or brewing a soothing herbal tea whenever the mood strikes? Well, dream no more! This DIY guide will empower you to cultivate this tropical treasure, regardless of your outdoor space or climate.
Lemongrass, with its vibrant citrusy aroma, has been a staple in Asian cuisine and traditional medicine for centuries. From adding depth to Vietnamese pho to infusing Indian chai with its invigorating zest, lemongrass boasts a rich cultural history. But you don’t need to travel to Southeast Asia to enjoy its benefits.
Many people struggle to grow lemongrass, especially in cooler climates, leading to expensive grocery store runs and often, disappointment with the quality. That’s where this DIY trick comes in! I’m going to share my secrets for successfully growing lemongrass indoors, ensuring you have a constant supply of fresh, flavorful stalks. Imagine the satisfaction of harvesting your own lemongrass, knowing exactly where it came from and how it was grown. This guide will cover everything from choosing the right container and soil to providing the perfect amount of light and water. Let’s embark on this exciting journey and grow lemongrass indoors successfully together!

Successfully Growing Lemongrass Indoors: Your DIY Guide
Hello plant friends! Have you ever wondered how you could bring the fresh, lemony scent and taste of lemongrass into your kitchen without constantly running to the supermarket? The answer is simpler than you think: just grow your own lemongrass indoors! I’ll show you how. It’s a great project that is not only fun but also provides you with fresh ingredients for your favorite dishes.
What You Need: The Materials List for Your Indoor Lemongrass Garden
Before we get started, make sure you have everything on hand. Here is a list of the things you’ll need:
- Lemongrass stalks: It’s best to buy them at an Asian market or a well-stocked supermarket. Make sure the stalks look healthy and show no signs of rot. They should ideally still have the root base intact.
- A glass or a vase: A simple glass is perfectly fine. It should be tall enough to hold the stalks upright.
- Water: Tap water is usually sufficient.
- A planter: Choose a pot with a diameter of at least 15 cm (6 inches). Lemongrass likes to have space.
- High-quality potting soil: A well-draining potting soil is important to avoid waterlogging. I recommend a mixture of potting soil, compost, and a little sand.
- Liquid fertilizer: An organic liquid fertilizer is ideal for promoting growth.
- A sunny location: Lemongrass loves the sun! A windowsill with direct sunlight is perfect.
- A spray bottle: To regularly moisten the leaves.
Phase 1: Rooting the Lemongrass Stalks
This step is crucial for the success of your indoor lemongrass project. We want to encourage the stalks to sprout roots before we plant them in soil.
- Prepare the stalks: Cut off the top ends of the lemongrass stalks, leaving only about 10-15 cm (4-6 inches). Also, remove any dry or damaged leaves.
- Soak in water: Place the prepared stalks in the glass or vase with water. Make sure the root base (the bottom end of the stalk) is completely covered with water.
- The right location: Place the glass in a bright, but not directly sunny, spot. Direct sunlight can dry out the stalks before they form roots.
- Regular water changes: Change the water every 1-2 days to prevent the growth of bacteria. Fresh water also provides the stalks with oxygen.
- Patience is required: After about 2-3 weeks, you should see the first roots. Wait until the roots are at least 5 cm (2 inches) long before proceeding to the next step.
Phase 2: Planting in Soil
Once the roots are strong enough, it’s time to plant the lemongrass in soil.
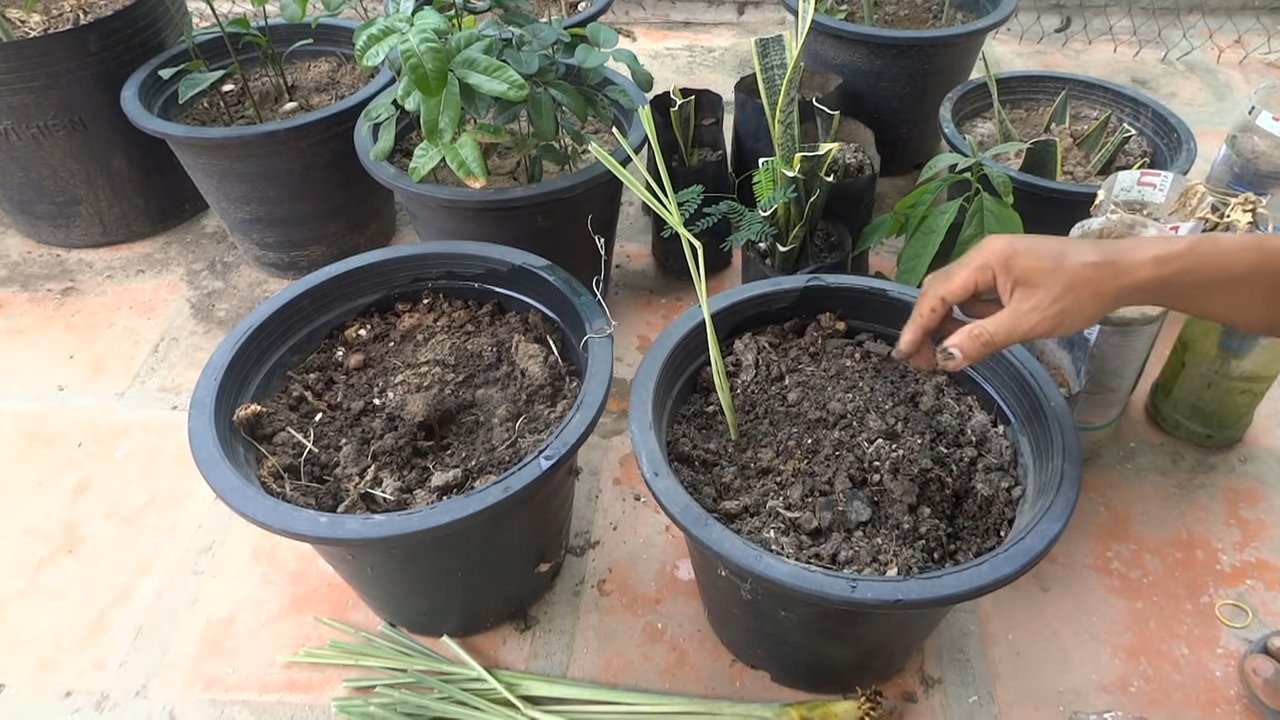
- Prepare the planter: Fill the pot with the prepared potting soil. Leave about 2-3 cm (1 inch) of space to the rim of the pot.
- Planting: Dig a small hole in the center of the soil. Carefully place the lemongrass stalk into the hole and cover the roots with soil. Lightly press the soil down.
- Watering: Water the lemongrass thoroughly after planting. Make sure the soil is well-moistened.
- The right location: Place the pot in a sunny location. Lemongrass needs at least 6 hours of direct sunlight per day. A south-facing window is ideal.
Phase 3: Caring for Your Indoor Lemongrass Garden
Proper care is crucial for your lemongrass to grow healthy and strong.
- Regular watering: Water the lemongrass regularly, but avoid waterlogging. The soil should always be slightly moist. Check the soil’s moisture by sticking your finger about 2 cm (1 inch) deep into it. If the soil feels dry, it’s time to water.
- Humidity: Lemongrass loves high humidity. Spray the leaves regularly with water, especially during the winter months when the air is dry from heating. You can also place a tray of water near the pot to increase humidity.
- Fertilizing: Fertilize the lemongrass every 2-4 weeks with an organic liquid fertilizer. Follow the instructions on the fertilizer’s packaging.
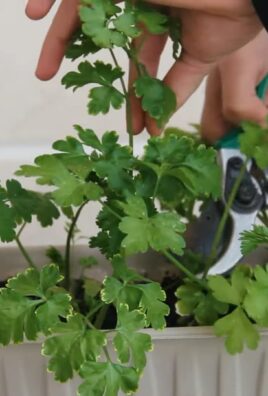
- Pruning: Trim the leaves regularly to promote growth. You can use the cut leaves for cooking or dry them to make tea. Also, remove any dry or brown leaves.
- Repotting: When the pot becomes too small, you will need to repot the lemongrass into a larger one. This is usually the case every 1-2 years.
Common Problems and Solutions
Problems can also arise when growing lemongrass. Here are some common issues and how to solve them:
- Yellow leaves: Yellow leaves can be a sign of overwatering, underwatering, or a nutrient deficiency. Check the soil’s moisture and adjust your watering accordingly. Fertilize the lemongrass regularly to prevent nutrient deficiencies.
- Brown leaf tips: Brown leaf tips are often a sign of dry air. Spray the leaves regularly with water to increase humidity.
- Pests: Lemongrass is relatively resistant to pests, but it can occasionally be infested by aphids or spider mites. Spray the leaves with a solution of water and dish soap to combat the pests.
The Harvest: When and How to Harvest Your Lemongrass
You can harvest your lemongrass as soon as the stalks are thick enough (about 1 cm / 0.4 inches in diameter).
- The harvest: Cut the stalks with a sharp knife or scissors just above the soil level.
- How to use: Use the stalks fresh for cooking or dry them for later use. You can also use the leaves for tea.
- Storage: Fresh lemongrass will keep in the refrigerator for about 1-2 weeks. Dried lemongrass can be stored in an airtight container in a cool, dark place.
Additional Tips for a Successful Lemongrass Project
- The right variety: There are different varieties of lemongrass. The most commonly grown variety is Cymbopogon citratus.
- Lighting: If you don’t have enough sunlight, you can use a grow light to promote growth.
- Ventilation: Ensure good ventilation to prevent fungal diseases.
- Observation: Observe your lemongrass regularly to identify and address problems early.
With these tips and tricks, you can successfully grow your own lemongrass indoors and enjoy fresh ingredients for your kitchen at any time. Happy gardening
Use Arrow Up and Arrow Down to select a turn, Enter to jump to it, and Escape to return to the chat.
Conclusion
So, there you have it! Growing lemongrass indoors successfully is not only achievable, but it’s also incredibly rewarding. Imagine having fresh, fragrant lemongrass readily available whenever you need it for your favorite Thai curries, soothing teas, or even as a natural insect repellent. Forget those expensive trips to the grocery store or the disappointment of finding wilted, lackluster stalks. With a little patience and the right approach, you can cultivate your own thriving lemongrass patch right in your kitchen.
This DIY trick is a must-try for several reasons. First and foremost, it empowers you to control the quality and freshness of your ingredients. You know exactly where your lemongrass comes from and how it’s been grown, ensuring a pesticide-free and flavorful addition to your meals. Secondly, it’s a sustainable and cost-effective solution. Instead of constantly buying lemongrass, you’re creating a self-sustaining source that will keep on giving. Finally, it’s a fantastic way to bring a touch of greenery and fragrance into your home, creating a more vibrant and inviting atmosphere.
Don’t be afraid to experiment with variations! Try different types of containers, from terracotta pots to repurposed buckets. Explore different soil mixes to find what works best for your growing conditions. You can even try propagating lemongrass from store-bought stalks, giving new life to what would otherwise be food waste. Consider using a grow light if you live in an area with limited sunlight, especially during the winter months.
We encourage you to take the plunge and try growing lemongrass indoors successfully. It’s a simple yet satisfying project that will enhance your culinary creations and bring a touch of nature into your home. Once you’ve harvested your first batch of homegrown lemongrass, be sure to share your experience with us! We’d love to hear about your successes, challenges, and any tips you’ve discovered along the way. Share your photos and stories in the comments below, and let’s create a community of indoor lemongrass growers! Let us know what recipes you used your fresh lemongrass in!
Frequently Asked Questions (FAQ)
Why should I grow lemongrass indoors instead of buying it from the store?
Growing lemongrass indoors offers several advantages over purchasing it from the store. Firstly, you have complete control over the quality and freshness of your lemongrass. Store-bought lemongrass can sometimes be wilted, bruised, or even treated with pesticides. By growing your own, you can ensure that you’re using the freshest, healthiest, and most flavorful lemongrass possible. Secondly, it’s a more sustainable and cost-effective option in the long run. Instead of constantly buying lemongrass, you’re creating a self-sustaining source that will provide you with a continuous supply. Finally, growing lemongrass indoors adds a touch of greenery and fragrance to your home, creating a more vibrant and inviting atmosphere.
What kind of pot and soil should I use for growing lemongrass indoors?
For growing lemongrass indoors, choose a pot that is at least 12 inches in diameter and has good drainage holes. Lemongrass has an extensive root system, so a larger pot will provide ample space for it to grow. As for soil, a well-draining potting mix is essential. A mixture of potting soil, perlite, and compost works well. The perlite helps to improve drainage, while the compost provides essential nutrients. Avoid using heavy clay soil, as it can retain too much moisture and lead to root rot.
How much sunlight does lemongrass need when grown indoors?
Lemongrass thrives in bright sunlight, so it needs at least 6-8 hours of direct sunlight per day when grown indoors. Place your lemongrass plant near a sunny window, preferably one that faces south or west. If you don’t have access to enough natural sunlight, you can supplement with a grow light. Position the grow light about 6-12 inches above the plant and keep it on for 12-14 hours per day.
How often should I water my indoor lemongrass plant?
Water your indoor lemongrass plant regularly, keeping the soil consistently moist but not waterlogged. Water when the top inch of soil feels dry to the touch. During the growing season (spring and summer), you may need to water more frequently than during the dormant season (fall and winter). Ensure that the pot has good drainage to prevent root rot.
How do I harvest lemongrass from my indoor plant?
To harvest lemongrass, simply cut off the stalks near the base of the plant using a sharp knife or scissors. Choose stalks that are at least 1/2 inch in diameter. You can harvest individual stalks as needed, or you can harvest the entire plant at once. After harvesting, the plant will regrow from the base.
Can I propagate lemongrass from store-bought stalks?
Yes, you can propagate lemongrass from store-bought stalks. Choose stalks that are firm and healthy-looking, with a small root base. Place the stalks in a glass of water, making sure that the root base is submerged. Change the water every day. After a few weeks, the stalks should start to develop roots. Once the roots are about an inch long, you can transplant the stalks into a pot filled with well-draining potting mix.
What are some common problems I might encounter when growing lemongrass indoors, and how can I fix them?
Some common problems you might encounter when growing lemongrass indoors include:
* **Yellowing leaves:** This can be caused by overwatering, underwatering, or nutrient deficiency. Adjust your watering schedule and fertilize your plant with a balanced fertilizer.
* **Brown leaf tips:** This is often caused by dry air. Increase humidity by misting your plant regularly or placing it on a pebble tray filled with water.
* **Root rot:** This is caused by overwatering and poor drainage. Ensure that your pot has good drainage and avoid overwatering.
* **Pests:** Lemongrass can be susceptible to pests such as aphids and spider mites. Inspect your plant regularly and treat any infestations with insecticidal soap or neem oil.
How can I use my homegrown lemongrass?
Homegrown lemongrass can be used in a variety of culinary applications. It’s a key ingredient in many Southeast Asian dishes, such as Thai curries, Vietnamese pho, and Indonesian soups. You can also use it to make lemongrass tea, which is known for its soothing and digestive properties. Additionally, lemongrass can be used as a natural insect repellent. Simply crush a few stalks and rub them on your skin to ward off mosquitoes and other insects.
Is lemongrass safe for pets?
While lemongrass is generally considered safe for pets in small quantities, it’s best to keep it out of their reach. Some pets may experience digestive upset if they ingest large amounts of lemongrass. If you have pets, place your lemongrass plant in a location where they cannot access it.
How do I store harvested lemongrass?
Freshly harvested lemongrass can be stored in the refrigerator for up to two weeks. Wrap the stalks in a damp paper towel and place them in a plastic bag. You can also freeze lemongrass for longer storage. Chop the stalks into small pieces and freeze them in a freezer bag or airtight container. Frozen lemongrass can be stored for up to six months.
Leave a Comment