
Grow Spinach in Planters: Your Guide to a Bountiful Harvest
Grow Spinach in Planters – it sounds simple, right? But transforming a small space into a thriving spinach patch brimming with delicious, nutritious leaves is more rewarding than you might think! This isn’t just about throwing some seeds into a pot; it’s about unlocking the secrets to a consistently successful harvest, even if you’ve got limited outdoor space or a less-than-perfect green thumb. I’ve always loved the earthy taste of fresh spinach, and the satisfaction of harvesting my own is unparalleled. That’s why I’m sharing my tried-and-true Grow Spinach in Planters techniques with you today.
Historically, spinach has played a significant role in various cultures, from ancient Persia to medieval Europe. Its nutritional value has been recognized for centuries, making it a staple in many cuisines. But today, access to fresh, high-quality produce isn’t always easy. Grocery store spinach can be expensive and often lacks the vibrant flavor of homegrown varieties. That’s where the magic of Grow Spinach in Planters comes in.
Why Grow Your Own Spinach?
This DIY guide isn’t just about saving money; it’s about taking control of your food source. You’ll know exactly where your spinach comes from, ensuring it’s free from pesticides and other harmful chemicals. Plus, nothing beats the taste of freshly picked spinach straight from your planter! Whether you’re a seasoned gardener or a complete beginner, this article will equip you with the knowledge and confidence to successfully grow spinach in planters, no matter the size of your space. Let’s get started on your journey to a bountiful harvest!
Growing Spinach in Planters: A Step-by-Step Guide
I love fresh spinach, but grocery store spinach can be expensive and doesn’t always taste as good as homegrown. So, I decided to try growing my own in planters! It’s easier than you think. Here’s how I did it, and how you can too.
Choosing Your Planters and Location
- Planter Size and Material: I opted for large, rectangular planters (at least 12 inches deep and 24 inches long) made of plastic or wood. These offer ample space for the spinach roots to spread. Make sure they have drainage holes to prevent waterlogging. Smaller containers will work, but you’ll need to water more frequently.
- Number of Planters: The number of planters you need depends on how much spinach you want to grow. Start with one or two and increase as needed.
- Location, Location, Location: Spinach thrives in full sun to partial shade. Aim for at least six hours of sunlight per day. A spot that receives morning sun and afternoon shade is ideal, especially in hotter climates. Protect your planters from strong winds.
Preparing the Soil
- Gather your supplies: You’ll need high-quality potting mix, not garden soil. Garden soil is too heavy and can compact, hindering root growth. I also recommend adding some compost to enrich the soil with nutrients.
- Fill the planters: Fill your chosen planters with the potting mix, leaving about an inch of space from the top. Gently mix in the compost. Ensure the soil is evenly distributed.
- Water thoroughly: Before planting, water the soil until it’s evenly moist but not soggy. This helps the soil settle and prepares it for the spinach seeds.
Planting the Spinach Seeds
- Choose your seeds: Select spinach seeds from a reputable supplier. There are many varieties available, so choose one that suits your climate and preferences. I prefer a variety that’s known for its heat tolerance.
- Sow the seeds: Sow the seeds about ½ inch deep and 1-2 inches apart. Don’t overcrowd the seeds, as this can lead to stunted growth. If you’re using a smaller container, space them further apart.
- Cover with soil: Gently cover the seeds with soil, ensuring they are completely buried. Lightly press down on the soil to ensure good seed-to-soil contact.
- Water gently: After planting, water the soil gently using a watering can with a rose head to avoid disturbing the seeds. Avoid using a strong jet of water.
Caring for Your Spinach Plants
- Watering: Keep the soil consistently moist but not waterlogged. Water regularly, especially during dry periods. The frequency will depend on your climate and the type of planter you are using. Check the soil moisture regularly by sticking your finger a couple of inches into the soil. If it feels dry, it’s time to water.
- Weeding: Regularly remove any weeds that may compete with your spinach plants for nutrients and water. This is crucial for healthy growth.
- Fertilizing: While spinach doesn’t require heavy fertilization, a balanced liquid fertilizer applied every two to three weeks can boost growth. Follow the instructions on the fertilizer packaging carefully.
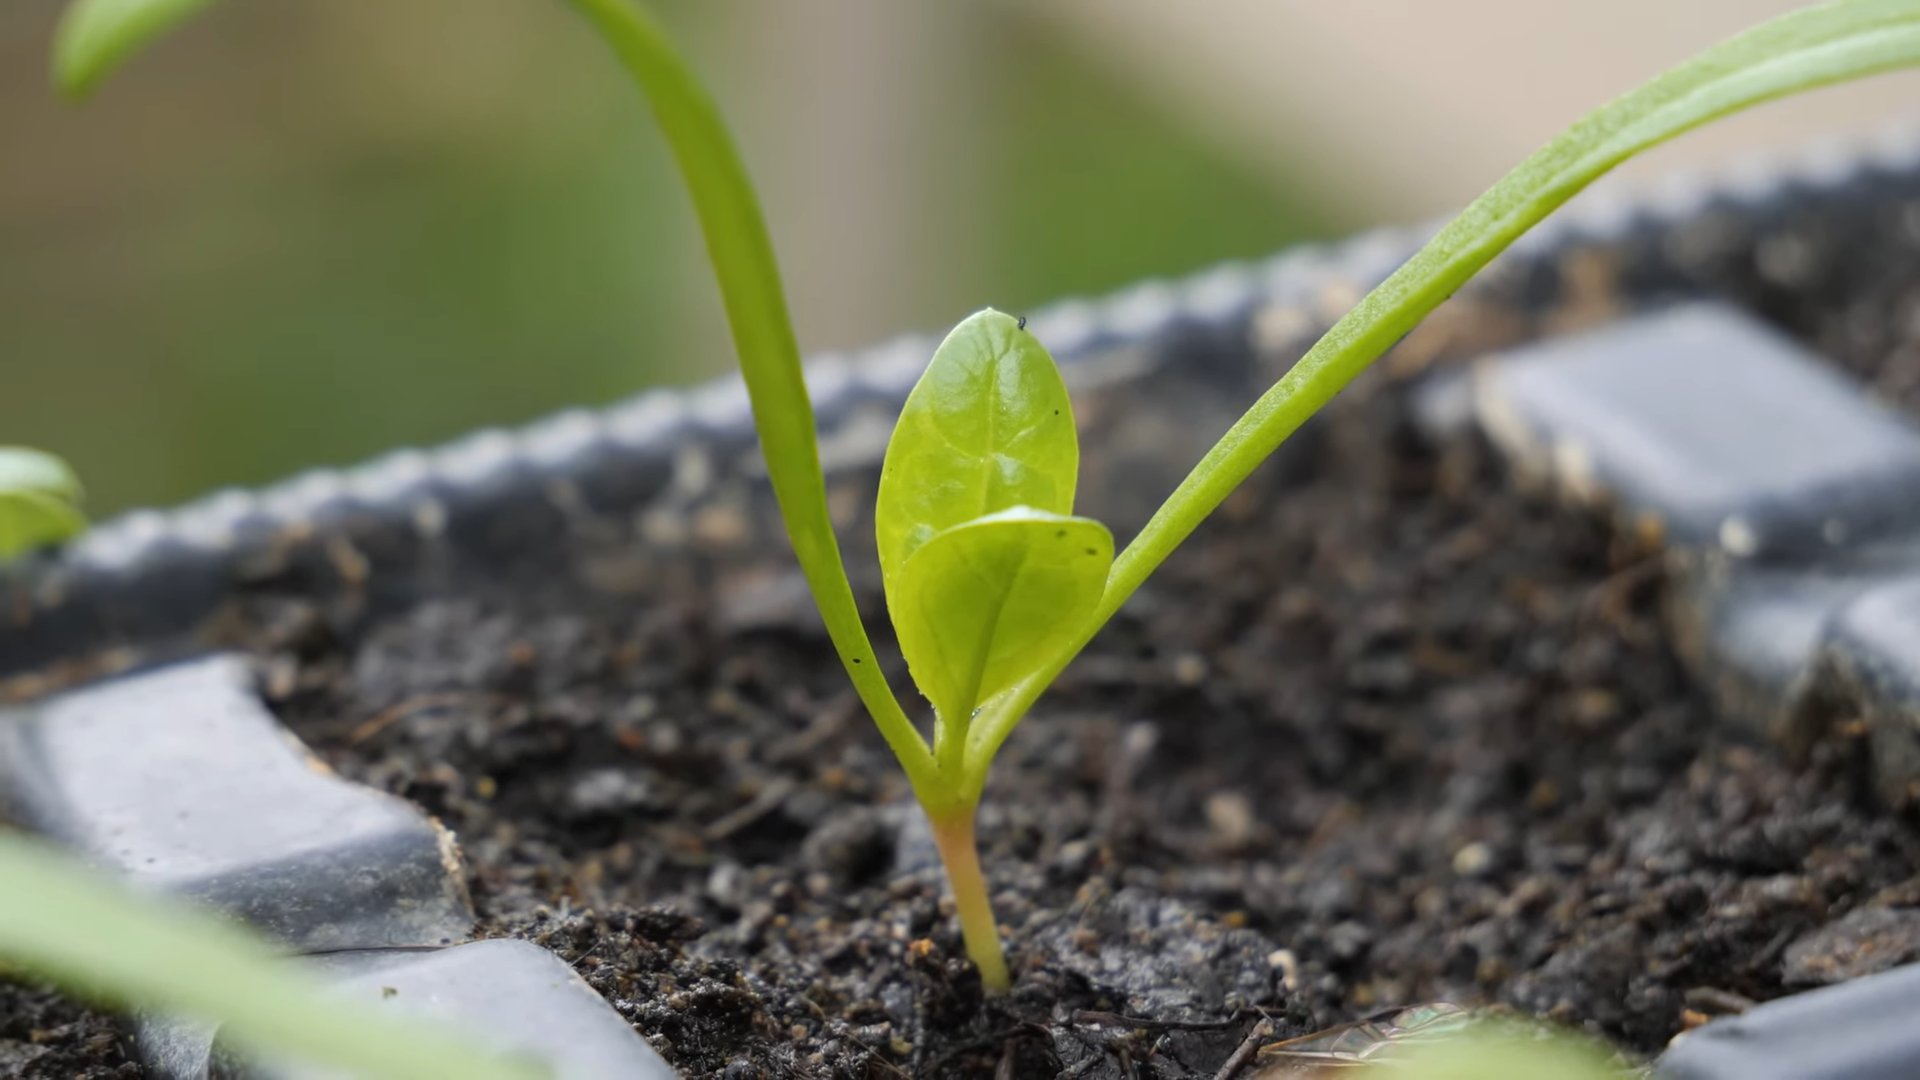
- Thinning: Once the spinach seedlings have a few true leaves (the leaves that appear after the initial cotyledons), thin them out to give each plant enough space to grow. Leave about 4-6 inches between plants. You can eat the thinned-out seedlings!
- Pest and Disease Control: Regularly inspect your plants for pests and diseases. Common spinach pests include aphids and slugs. Use organic pest control methods if necessary, such as insecticidal soap or diatomaceous earth. Good air circulation can help prevent fungal diseases.
Harvesting Your Spinach
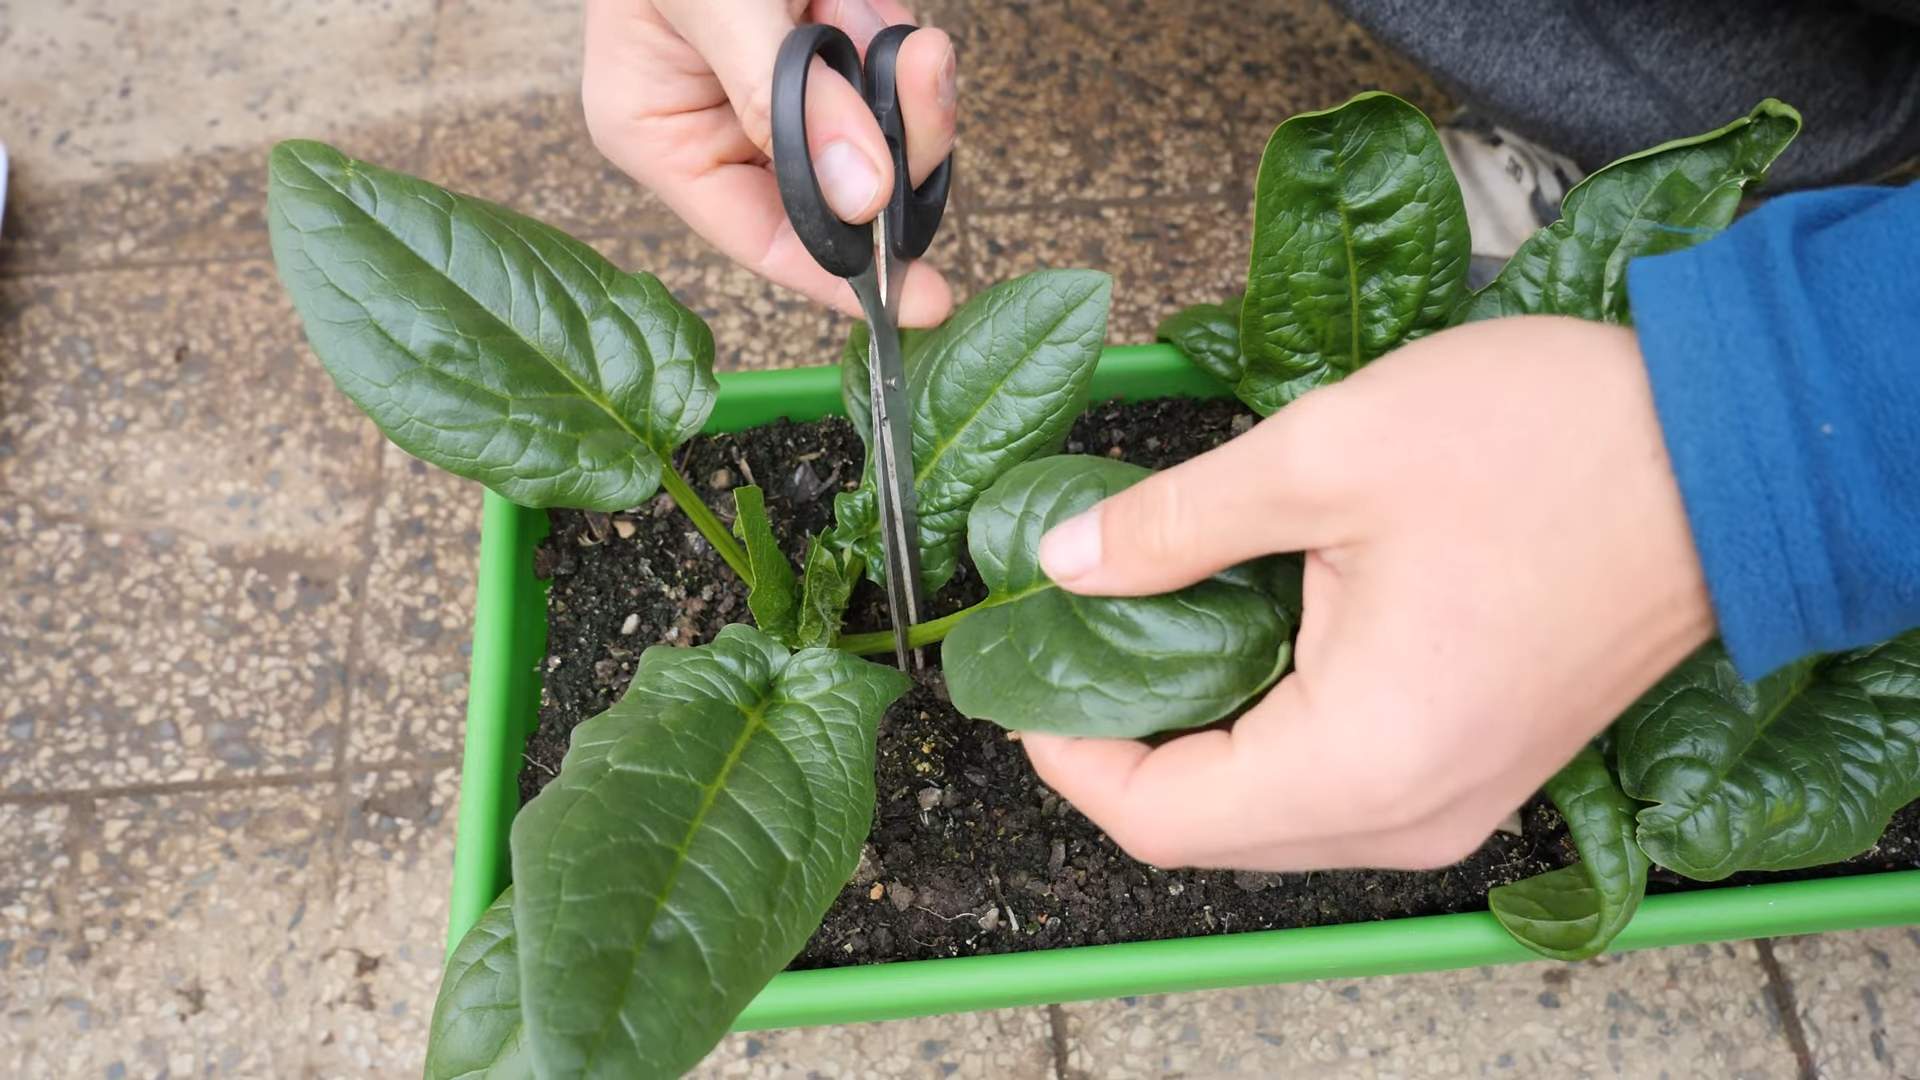
- Harvesting Time: Spinach is ready for harvest about 4-6 weeks after planting, depending on the variety and growing conditions. The leaves should be large and dark green.
- Harvesting Method: You can harvest the entire plant at once or harvest individual leaves as needed. To harvest individual leaves, simply cut or snap them off at the base of the stem. This allows the plant to continue producing more leaves.
- Storage: Store harvested spinach in a plastic bag in the refrigerator. It will last for several days.
Troubleshooting Common Problems
Bolting
Bolting, where the plant sends up a flower stalk, is a common problem, especially in hot weather. It makes the leaves bitter. To prevent bolting, choose a heat-tolerant variety, provide some shade during the hottest part of the day, and harvest frequently.
Yellowing Leaves
Yellowing leaves can indicate nutrient deficiencies or overwatering. Check your soil moisture and consider adding a balanced fertilizer if needed.
Pests
Regularly inspect your plants for pests. Use organic pest control methods as needed.
Remember to always research the specific needs of your chosen spinach variety for optimal results! Happy gardening!
Conclusion
So there you have it! Growing your own spinach in planters is a surprisingly rewarding and straightforward process. This DIY trick offers a wealth of benefits, from the unparalleled freshness and flavor of homegrown spinach to the satisfaction of nurturing a plant from seed to harvest. You’ll be amazed at the quality difference compared to store-bought spinach, and the cost savings over time are significant. Beyond the delicious results, growing your own spinach connects you more deeply with your food, fostering a greater appreciation for the natural world. It’s a fantastic project for beginners, requiring minimal space and effort while delivering maximum taste and satisfaction. This method of growing spinach in planters allows for year-round harvesting in many climates, maximizing your yield and minimizing trips to the grocery store. The control you have over the growing environment, from sunlight exposure to watering frequency, ensures optimal growth and a bountiful harvest. This simple yet effective method truly transforms the ordinary act of eating spinach into a fulfilling and enriching experience. Don’t just take our word for it – try it yourself!
We encourage you to experiment with different planter types and sizes to find what works best for your space and lifestyle. Consider using self-watering planters for even more convenience, or explore vertical gardening techniques to maximize your yield in limited spaces. You can also experiment with companion planting, incorporating herbs like basil or dill near your spinach to deter pests and enhance flavor. For those with limited sunlight, consider using grow lights to supplement natural light, especially during the shorter days of winter. The possibilities are endless! Share your experiences, photos, and tips with us and other gardening enthusiasts online. Let’s build a community of home spinach growers, sharing our successes and learning from each other. We can’t wait to see your flourishing spinach plants! Remember, the journey of growing your own food is as rewarding as the delicious harvest itself. So grab some seeds, get your planters ready, and embark on this fulfilling adventure of growing your own delicious, healthy spinach. You won’t regret it!
Frequently Asked Questions
What type of planter is best for growing spinach?
While you can use almost any type of planter, those with good drainage are crucial. Containers made of plastic, wood, or even repurposed materials work well. The size of the planter depends on the number of spinach plants you want to grow. A depth of at least 6 inches is recommended to allow for proper root development. Consider planters with ample space between plants to prevent overcrowding and promote healthy growth.
How much sunlight does spinach need?
Spinach thrives in full sun to partial shade. Aim for at least 6 hours of sunlight per day. If you live in a particularly hot climate, some afternoon shade might be beneficial to prevent wilting. Observe your plants – if they appear to be struggling in direct sunlight, consider providing some shade during the hottest part of the day.
What kind of soil is best for growing spinach in planters?
Spinach prefers loose, well-draining soil that is rich in organic matter. A good quality potting mix is ideal. You can also amend your soil with compost or other organic materials to improve its drainage and fertility. Ensure the soil pH is slightly acidic to neutral (6.0-7.0).
How often should I water my spinach?
Keep the soil consistently moist but not soggy. Water regularly, especially during dry periods. The frequency of watering will depend on factors such as weather conditions, planter size, and soil type. Check the soil moisture level before watering – if the top inch of soil feels dry, it’s time to water. Avoid overwatering, as this can lead to root rot.
When can I harvest my spinach?
You can begin harvesting your spinach approximately 4-6 weeks after sowing the seeds. For baby spinach, harvest the leaves when they are about 2-3 inches tall. For mature spinach, you can harvest the entire plant or selectively pick outer leaves, allowing the inner leaves to continue growing. Regular harvesting encourages bushier growth and a longer harvest period.
What are some common problems when growing spinach in planters?
Common problems include pests (aphids, slugs, snails), diseases (downy mildew), and nutrient deficiencies. Regularly inspect your plants for signs of pests or diseases. Use organic pest control methods if necessary. Ensure your spinach plants receive adequate nutrients by using a balanced fertilizer. Proper watering and good drainage are also crucial to prevent diseases.
Can I grow spinach in planters year-round?
The possibility of year-round spinach cultivation depends heavily on your climate. In warmer climates, you might achieve this with careful planning and perhaps the use of shade cloth during the hottest months. In colder climates, you’ll likely need to use a greenhouse or grow lights to extend the growing season. However, even in colder regions, you can often enjoy a spring and fall harvest.
What are the benefits of growing spinach in planters compared to in-ground gardening?
Planter gardening offers several advantages: better control over soil conditions, easier pest and disease management, portability (you can move your plants to optimize sunlight), and suitability for smaller spaces or areas with poor soil. It also makes harvesting much easier and cleaner.


Leave a Comment