
Grow Basil From Seed: Your Guide to a Flavorful, Homegrown Herb Garden
Growing basil from seed might seem daunting, but trust me, it’s easier than you think! I’ve always loved the vibrant aroma and taste of fresh basil, but the grocery store versions just never quite compare to homegrown. That’s why I’m sharing my tried-and-true methods for Grow Basil From Seed, transforming your kitchen into a fragrant oasis. This isn’t just about saving money on herbs; it’s about connecting with nature, enjoying the satisfaction of nurturing a plant from its tiny seed to a flourishing herb, and savoring the unparalleled flavor of your own basil.
The cultivation of basil boasts a rich history, dating back thousands of years to ancient civilizations who valued it not only for its culinary uses but also for its medicinal properties. From the Mediterranean to Asia, basil has held a significant place in various cultures, symbolizing everything from love and prosperity to protection and good health. Today, we can continue this tradition by easily growing our own basil at home.
Why Grow Your Own Basil?
Let’s be honest, store-bought basil often wilts before you even get a chance to use it all. Growing basil from seed gives you a constant supply of fresh, flavorful leaves, ready to be plucked and added to your favorite dishes. Imagine the joy of snipping a handful of fragrant leaves for your pasta sauce, pesto, or even a simple Caprese salad – all grown by your own two hands! Plus, you’ll have the satisfaction of knowing exactly where your food comes from, free from pesticides and other unwanted chemicals.
This guide will walk you through every step, from selecting the right seeds and starting them indoors to transplanting them into your garden or containers. Get ready to unlock the secrets of growing basil from seed and experience the magic of a homegrown herb garden. Let’s get started!
Growing Basil from Seed: A Step-by-Step Guide
I love fresh basil! There’s nothing quite like the taste of homegrown basil in your pasta sauce or pesto. And the best part? It’s surprisingly easy to grow from seed. This guide will walk you through the entire process, from seed starting to harvesting your delicious bounty.
Phase 1: Preparing for Planting
- Choose your basil variety: There are many types of basil, each with its own unique flavor profile. Genovese basil is a classic choice, known for its sweet and slightly peppery taste. Sweet basil is another popular option. Consider what you’ll use your basil for when making your selection. Do some research to find the perfect variety for your culinary needs!
- Gather your supplies: You’ll need basil seeds, seed starting mix (not regular garden soil!), small pots or seed trays, a watering can with a fine rose, a humidity dome (optional but helpful), and a sunny location.
- Select your containers: Small pots (around 3-4 inches in diameter) or seed trays with individual cells work well. Make sure they have drainage holes to prevent soggy soil, which can lead to root rot.
- Prepare the seed starting mix: Fill your pots or seed trays with seed starting mix. Gently moisten the mix with water, ensuring it’s evenly damp but not soggy. You want it to be moist enough to hold the seeds in place but not so wet that it’s muddy.
Phase 2: Sowing the Seeds
- Sow the seeds: Basil seeds are tiny! I recommend sowing them about 1/4 inch deep and spacing them about 1 inch apart. If using a seed tray, plant one seed per cell. Don’t bury them too deep; they need light to germinate.
- Gently cover the seeds: Lightly cover the seeds with a thin layer of seed starting mix. Don’t press down too hard; a gentle dusting is all you need.
- Water gently: Use a watering can with a fine rose to gently water the seeds. Avoid dislodging them. A gentle mist is ideal.
- Cover with a humidity dome (optional): A humidity dome helps maintain moisture and warmth, which aids germination. If you don’t have a dome, you can cover the pot or tray with plastic wrap, making sure to poke a few holes for ventilation.
- Place in a warm location: Basil seeds germinate best in temperatures between 70-80°F (21-27°C). Find a warm, sunny spot, but avoid direct sunlight until the seedlings emerge.
Phase 3: Germination and Seedling Care
- Monitor moisture levels: Keep the soil consistently moist but not waterlogged. Check daily and water as needed. The soil should feel damp to the touch but not soggy.
- Germination: Basil seeds typically germinate within 7-14 days. Once you see tiny seedlings emerging, remove the humidity dome or plastic wrap.
- Provide adequate light: Once the seedlings have emerged, move them to a sunny location. They need at least 6-8 hours of sunlight per day. A south-facing window is ideal. If you don’t have enough sunlight, consider using a grow light.
- Thinning (if necessary): If you sowed multiple seeds in a pot, thin the seedlings once they have a few sets of true leaves. Gently remove the weaker seedlings, leaving the strongest ones spaced about 2-3 inches apart.
- Fertilizing: Once the seedlings have several sets of true leaves, you can start fertilizing them with a diluted liquid fertilizer every 2-3 weeks. Follow the instructions on the fertilizer package carefully. Over-fertilizing can harm your plants.
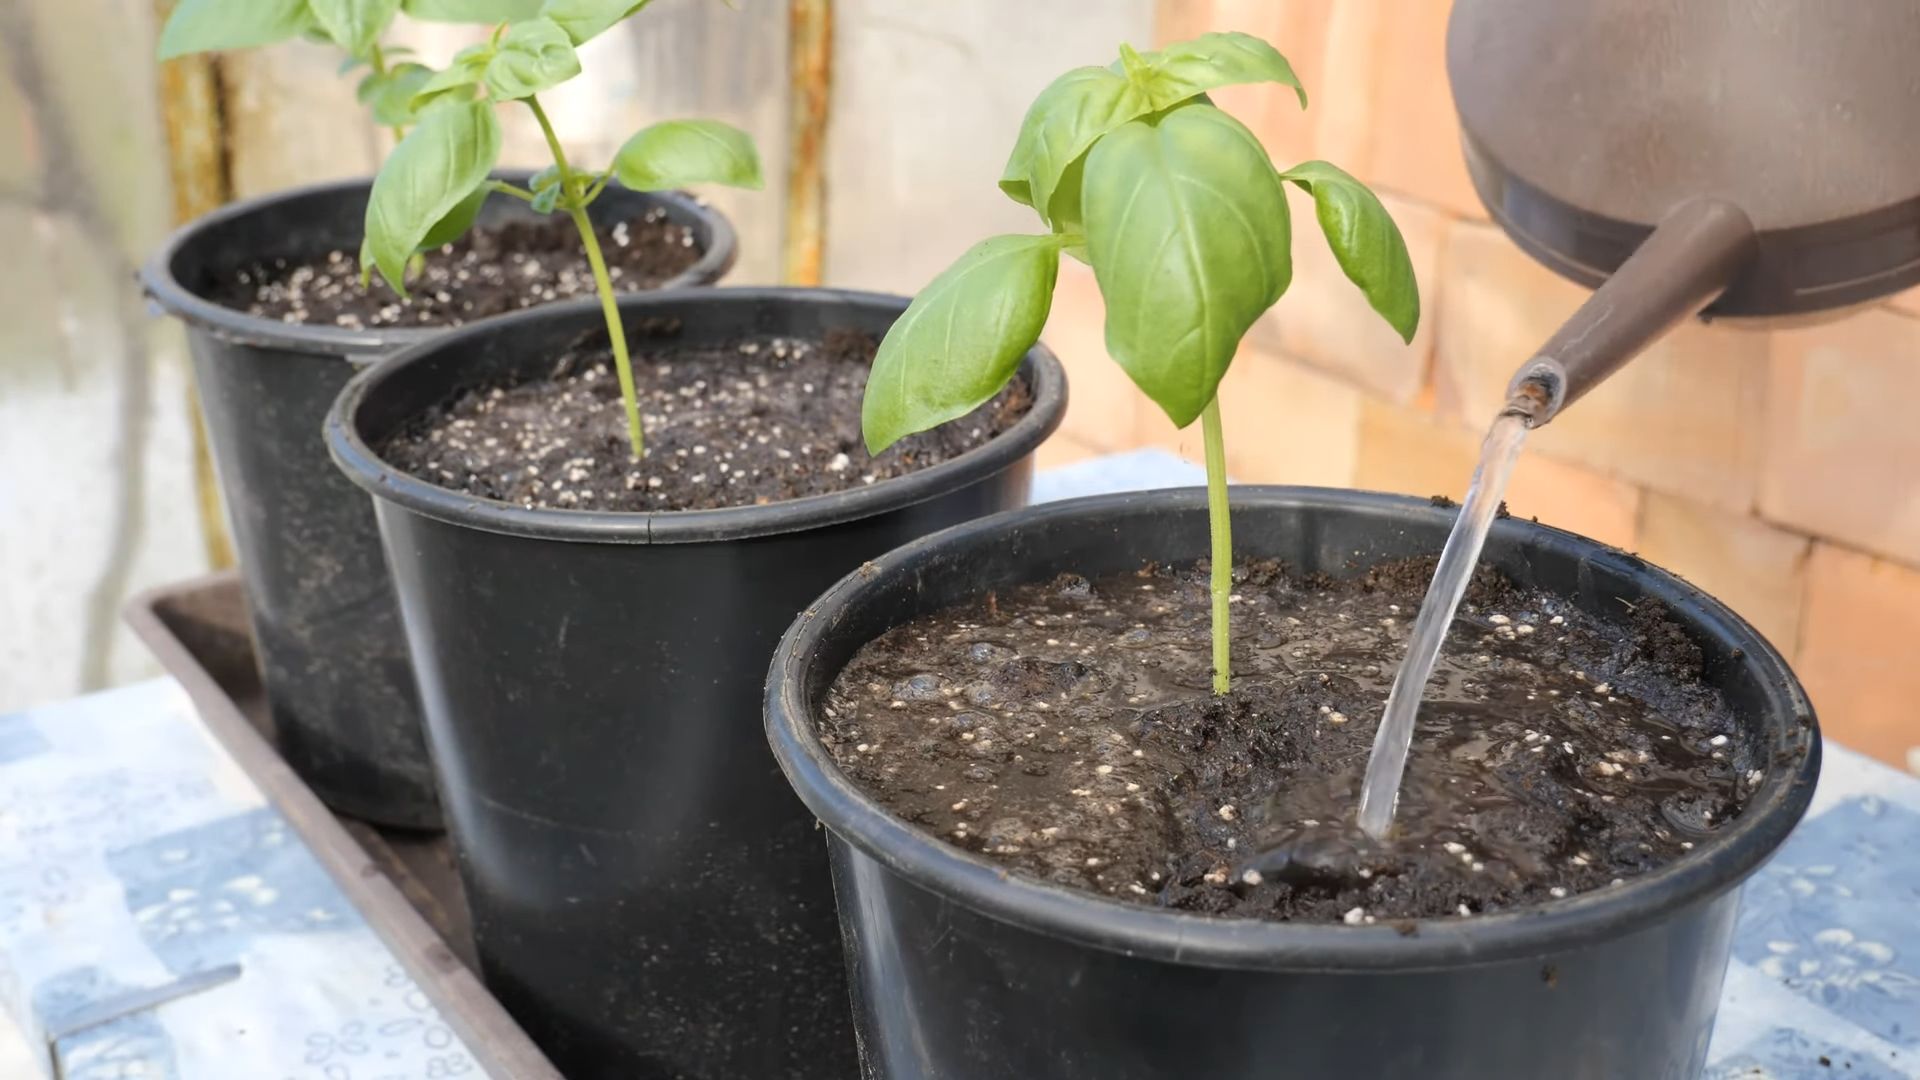
Phase 4: Transplanting and Ongoing Care
- Transplanting: Once your seedlings have several sets of true leaves and are about 4-6 inches tall, it’s time to transplant them into larger pots or directly into your garden. If planting outdoors, wait until after the last frost.
- Hardening off (if transplanting outdoors): If you’re transplanting outdoors, gradually acclimate your seedlings to the outdoor conditions over a period of a week or two. Start by placing them outside for a few hours each day, gradually increasing the amount of time they spend outdoors.
- Watering: Water regularly, keeping the soil consistently moist but not soggy. Water deeply and less frequently rather than shallowly and often. The frequency of watering will depend on your climate and the type of soil.
- Pest and disease control: Regularly inspect your basil plants for pests and diseases. Address any issues promptly to prevent them from spreading. Common pests include aphids and whiteflies. Organic pest control methods are often effective.
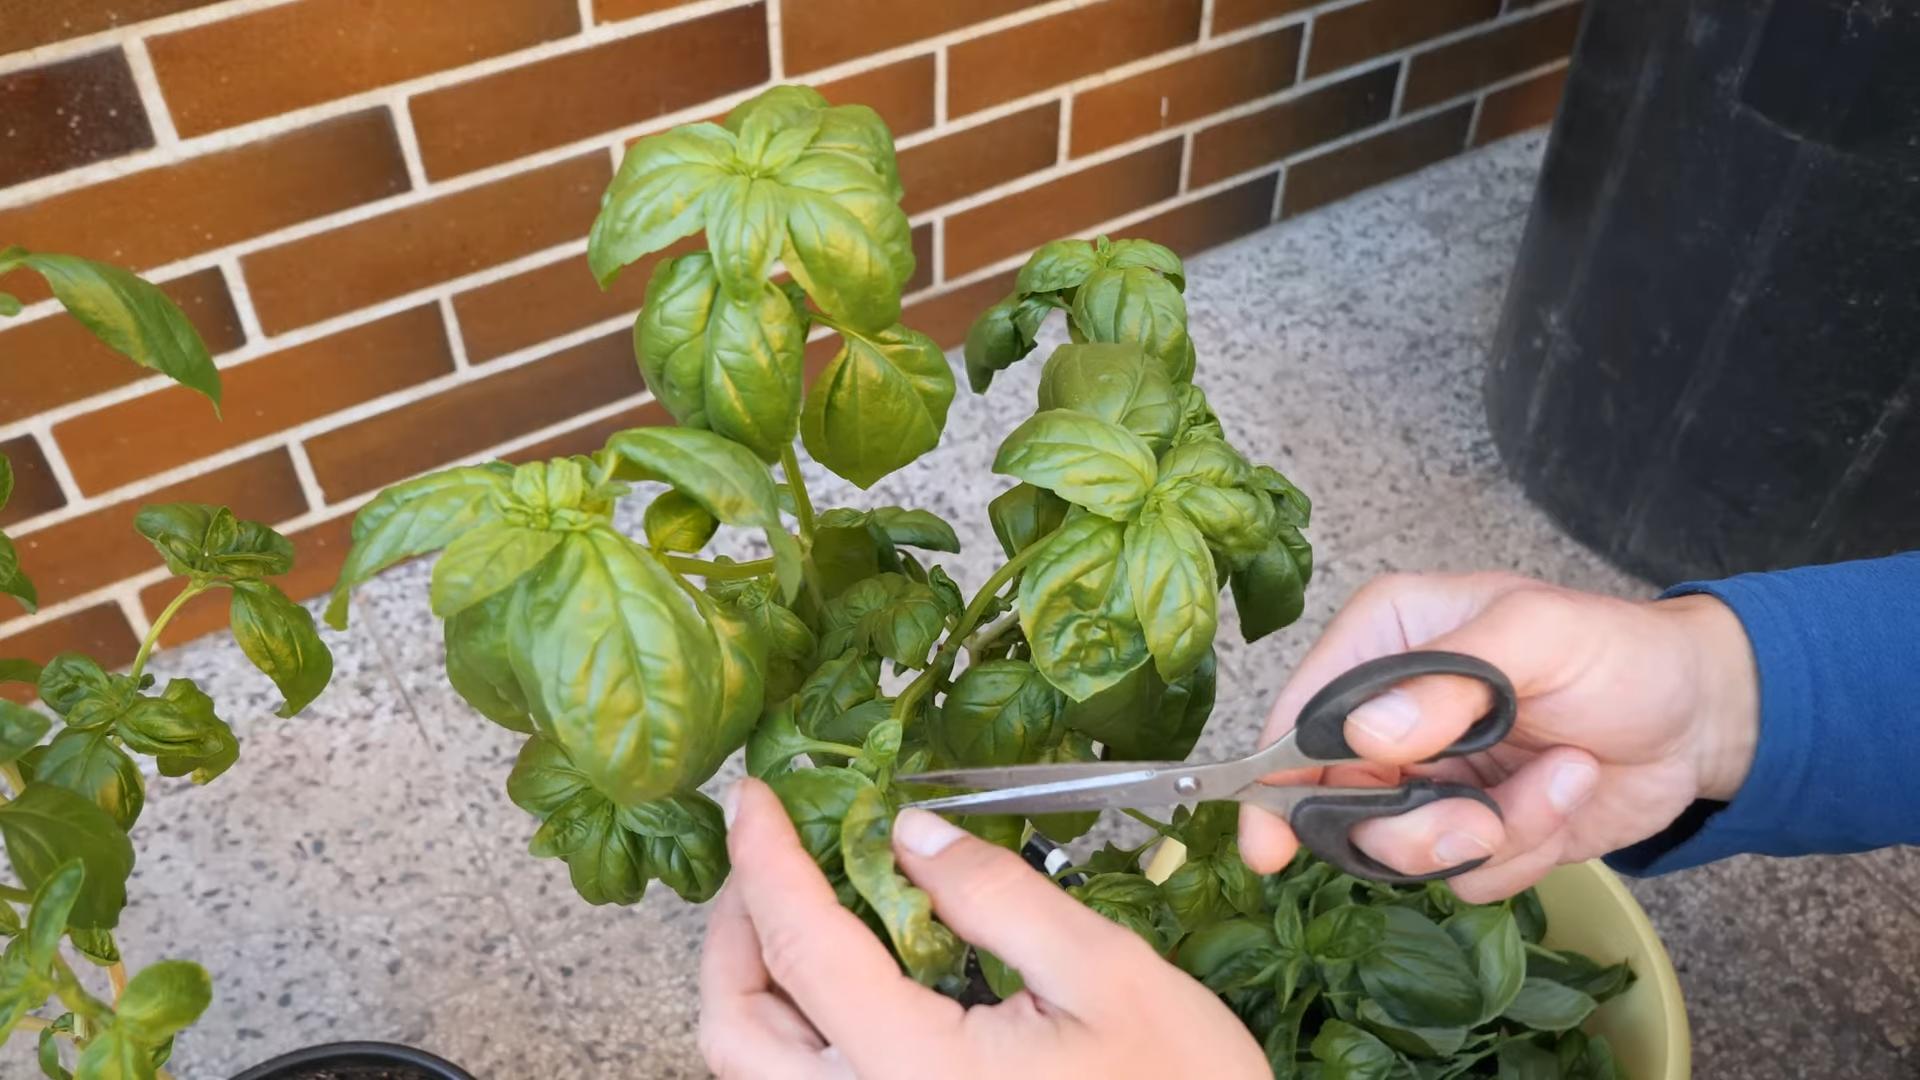
- Pinch back the tops: To encourage bushier growth and prevent the plant from flowering too early, pinch back the top sets of leaves regularly. This will promote more branching and a more abundant harvest.
- Harvesting: You can start harvesting basil leaves once the plants have several sets of leaves. Harvest leaves regularly to encourage new growth. Harvesting can be done by pinching off individual leaves or cutting stems. Avoid harvesting too many leaves at once, as this can stress the plant.
Phase 5: Troubleshooting
Yellowing Leaves:
Yellowing leaves can indicate overwatering, underwatering, nutrient deficiencies, or disease. Check your watering habits and soil moisture. Consider adding fertilizer if needed. If you suspect disease, remove affected leaves and improve air circulation around the plants.
Leggy Seedlings:
Leggy seedlings are caused by insufficient light. Move your seedlings to a sunnier location or supplement with a grow light.
Flowering Too Early:
Basil plants will eventually flower, but you can delay flowering by pinching back the top sets of leaves regularly. Flowering reduces leaf production.
Pests:
Regularly inspect your plants for pests such as aphids, whiteflies, and spider mites. Use appropriate organic pest control methods to address any infestations.
With a little patience and care, you’ll be enjoying the delicious flavor of your homegrown basil in no time! Remember to adapt these instructions to your specific environment and conditions. Happy gardening!
Conclusion
So there you have it – a comprehensive guide to growing your own basil from seed! This simple yet rewarding DIY trick offers a plethora of benefits, far outweighing the minimal effort required. Not only will you enjoy the unparalleled freshness and flavor of homegrown basil, but you’ll also experience the immense satisfaction of nurturing a plant from its tiny seed to its fragrant, leafy maturity. Growing basil from seed is a fantastic way to connect with nature, learn about the life cycle of plants, and ultimately, elevate your culinary creations. The cost savings alone are significant, especially if you’re a regular basil user. Forget those wilting supermarket bunches; you’ll have a constant supply of vibrant, flavorful basil at your fingertips, ready to be incorporated into your favorite pasta sauces, pizzas, salads, and more.
This method is incredibly versatile, allowing you to experiment with different basil varieties to discover your personal favorites. Try growing Genovese basil for its classic sweet flavor, or explore the unique citrusy notes of lemon basil. Experiment with different planting methods – perhaps try starting your seeds in peat pellets for easier transplanting, or sow directly into your garden bed for a more hands-off approach. Don’t be afraid to get creative with your growing environment too. A sunny windowsill, a balcony garden, or even a well-lit indoor space can all provide the perfect conditions for thriving basil plants. Remember to adjust your watering schedule based on the climate and the specific needs of your chosen basil variety. Regularly checking the soil moisture will help you avoid both overwatering and underwatering, ensuring healthy growth.
Beyond the culinary applications, growing your own basil can be a wonderful educational experience for children. It’s a fantastic opportunity to teach them about the importance of patience, responsibility, and the wonders of nature. Watching a tiny seed sprout and grow into a lush plant is a magical experience that can spark a lifelong love of gardening. So, gather your seeds, find a sunny spot, and embark on this rewarding journey. You’ll be amazed at how easy and fulfilling it is to grow your own basil from seed. Don’t hesitate – give it a try! Share your experiences, successes, and even your challenges with us and other fellow basil enthusiasts. Let’s create a thriving community of home basil growers, sharing tips, tricks, and the joy of harvesting our own fresh, flavorful basil. We can’t wait to hear about your basil-growing adventures!
Frequently Asked Questions
What type of soil is best for growing basil from seed?
Basil thrives in well-draining soil that’s rich in organic matter. A good quality potting mix is ideal for starting seeds indoors. If planting directly outdoors, amend your garden soil with compost to improve drainage and fertility. Avoid heavy clay soils, as they can retain too much water and lead to root rot.
How much sunlight does basil need?
Basil is a sun-lover and needs at least six to eight hours of direct sunlight per day to flourish. If growing indoors, place your basil plants in a sunny windowsill or supplement with grow lights to ensure they receive adequate light. Insufficient sunlight can lead to leggy growth and reduced basil production.
How often should I water my basil plants?
Water your basil plants regularly, keeping the soil consistently moist but not soggy. The frequency of watering will depend on factors such as climate, pot size, and soil type. It’s best to check the soil moisture before watering; water when the top inch of soil feels dry to the touch. Avoid overwatering, as this can lead to root rot and other problems.
When can I harvest my basil?
You can begin harvesting your basil once the plants have developed several sets of leaves, typically around 6-8 weeks after sowing. Pinch or cut the leaves just above a set of leaf nodes to encourage bushier growth. Harvest regularly to promote continuous growth and prevent the plant from flowering, which can affect the flavor of the leaves.
Can I grow basil from seed indoors year-round?
Yes, absolutely! With adequate light (either from a sunny windowsill or grow lights) and proper care, you can successfully grow basil indoors year-round. This allows you to enjoy fresh basil even during the colder months when outdoor gardening is not feasible. Consider using grow lights to supplement natural sunlight, especially during winter.
What are some common problems when growing basil from seed and how can I solve them?
Some common problems include leggy growth (due to insufficient light), yellowing leaves (due to overwatering or nutrient deficiencies), and pest infestations (such as aphids or whiteflies). Leggy growth can be addressed by providing more light. Yellowing leaves may indicate overwatering or a need for fertilizer. Pest infestations can be managed using insecticidal soap or neem oil.
What should I do with my basil harvest?
Fresh basil is best used immediately for the most vibrant flavor. However, you can also store it in the refrigerator for a few days by wrapping it in a damp paper towel and placing it in a plastic bag. For longer storage, consider freezing your basil by chopping it and storing it in ice cube trays with water or olive oil. You can also dry basil leaves by hanging them upside down in a cool, dark, and well-ventilated area.
Can I save seeds from my basil plants to grow more basil next year?
Yes, you can save seeds from your basil plants, but it’s important to let the plants flower completely before harvesting the seeds. Allow the flower heads to dry on the plant, then collect the seeds once they are fully mature and dark brown. Store the seeds in a cool, dry place in an airtight container.

Leave a Comment