
Grow Spring Radishes: Your Guide to a Bountiful Harvest
Grow Spring Radishes – it sounds simple, right? But even the seemingly straightforward task of growing these vibrant root vegetables can yield surprisingly rewarding results when you know a few clever tricks. This article isn’t just about throwing some seeds in the ground and hoping for the best; it’s about unlocking the secrets to a truly bountiful spring radish harvest, right from your own backyard. I’ve always loved the satisfying crunch of a freshly pulled radish, and the vibrant color is a welcome sight after a long winter. That’s why I’m so excited to share my favorite home gardening tips and DIY solutions with you.
The history of radishes stretches back millennia, with evidence suggesting cultivation dating back to ancient Egypt. These peppery delights have been a staple in gardens and kitchens across the globe for centuries, prized not only for their flavor but also for their ease of cultivation – making them a perfect choice for beginner gardeners. But even experienced gardeners can benefit from learning new techniques to maximize their yield and enjoy the freshest, most flavorful radishes imaginable.
Why You Need These Grow Spring Radishes Tips
In today’s fast-paced world, many of us crave a connection to nature and the satisfaction of growing our own food. Grow Spring Radishes offers a fantastic opportunity to achieve this, even with limited space. These quick-growing vegetables provide a rewarding experience for both children and adults, fostering a sense of accomplishment and a deeper appreciation for the food we consume. Plus, homegrown radishes are simply bursting with flavor, far surpassing anything you’ll find in the supermarket. This article will equip you with the knowledge and techniques to overcome common challenges and achieve exceptional results, ensuring you enjoy a delicious and abundant harvest of your own homegrown spring radishes.
Growing Spring Radishes: A DIY Guide to a Speedy Harvest
Radishes are one of the easiest vegetables to grow, even for complete beginners! This guide will walk you through everything you need to know to enjoy a delicious harvest of crisp, spicy radishes in your own garden or even a container on your balcony.
Phase 1: Planning and Preparation
- Choose your radish variety: There are tons of varieties available, each with different sizes, colors, and spiciness levels. I like to try a few different ones each year to see which ones I prefer. For spring planting, look for varieties that mature quickly, usually around 20-30 days.
- Select your growing location: Radishes need full sun (at least 6 hours of direct sunlight per day) to thrive. They also prefer well-drained soil. If your soil is heavy clay, amend it with compost or other organic matter to improve drainage. Poor drainage can lead to cracked or bitter radishes.
- Prepare your soil: Before planting, loosen the soil to a depth of about 8-10 inches. This allows the radish roots to easily penetrate the ground. Remove any rocks or debris that might hinder growth. Incorporate a balanced fertilizer, following package instructions. I usually use a slow-release granular fertilizer.
- Gather your supplies: You’ll need radish seeds, a trowel or small hand shovel, a watering can, and optionally, row covers or netting to protect your seedlings from pests.
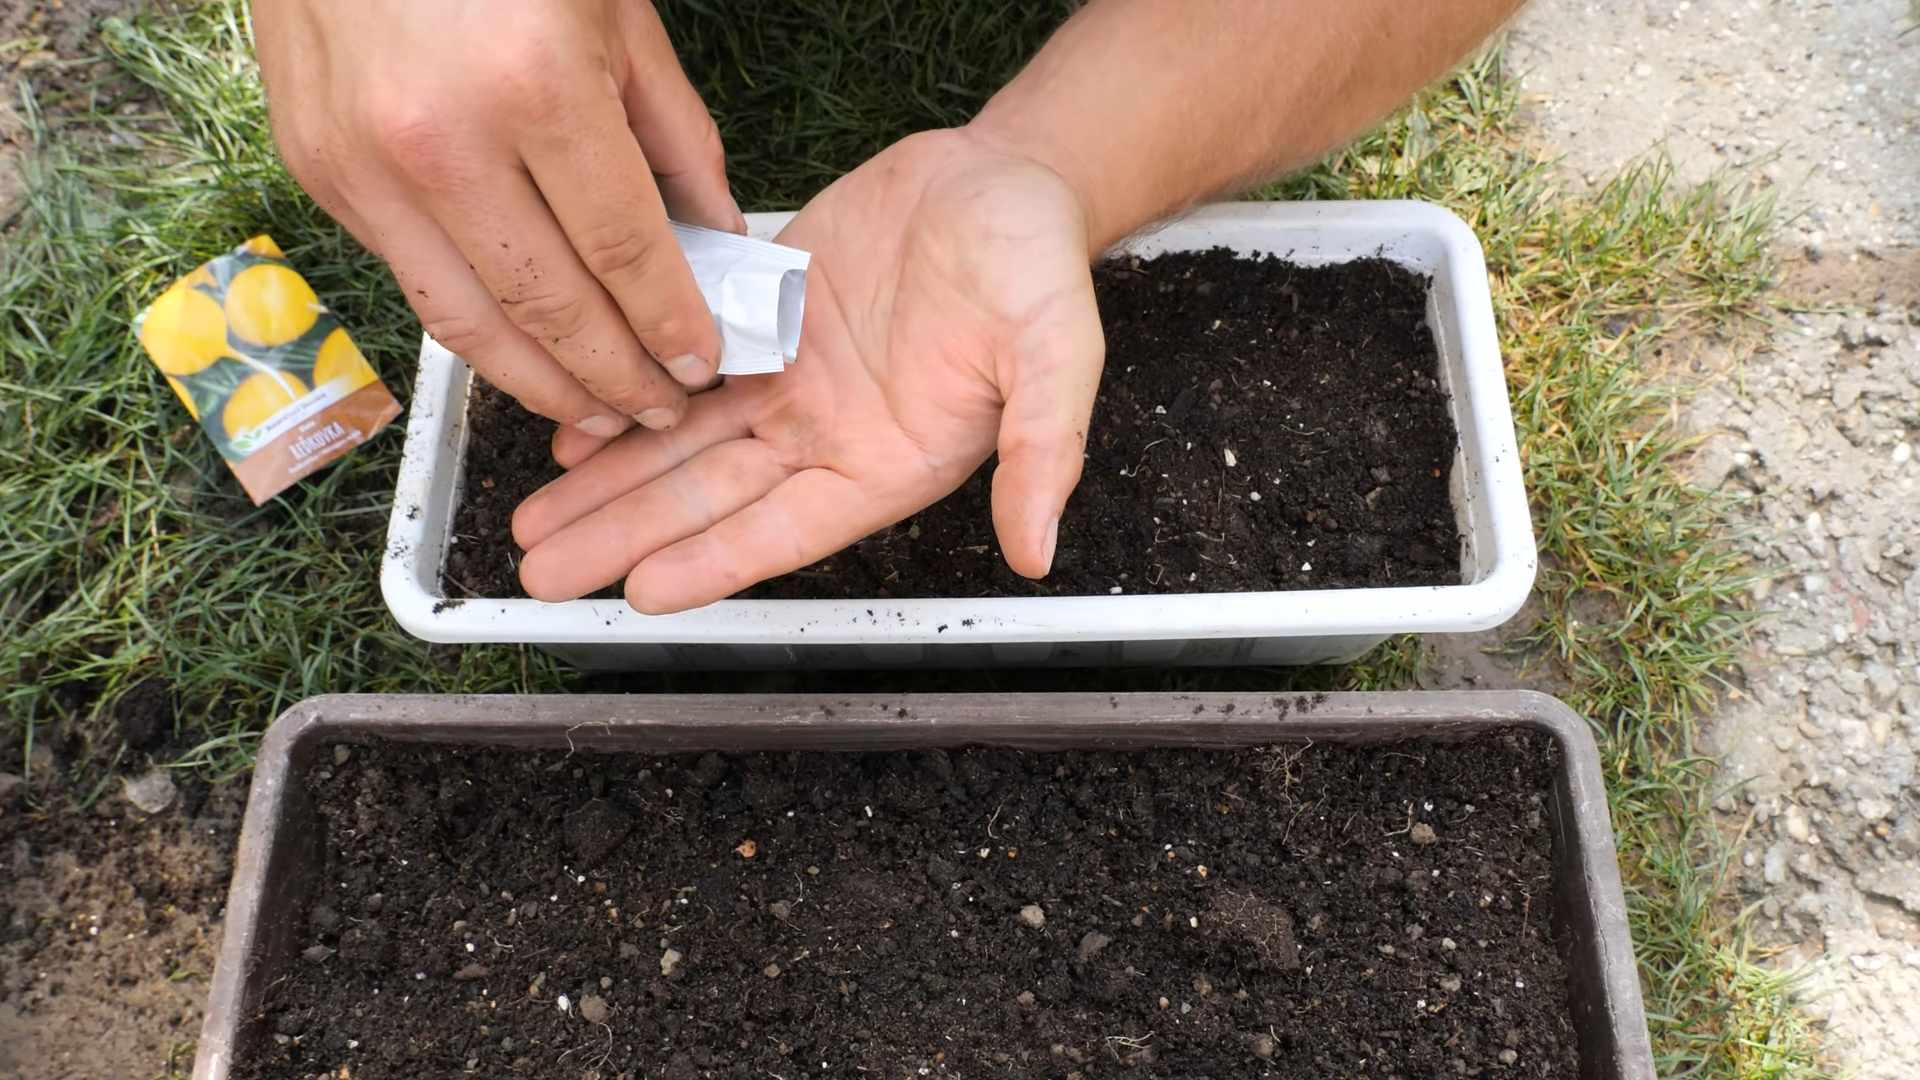
Phase 2: Sowing the Seeds
- Prepare the seedbed: Create shallow furrows, about ½ inch deep, using your trowel. Space the furrows about 1 inch apart for smaller varieties and 2 inches apart for larger ones. This spacing prevents overcrowding.
- Sow the seeds: Plant the seeds about ½ inch apart within the furrows. Don’t plant them too close together, or they will compete for resources and produce smaller radishes.
- Cover the seeds: Gently cover the seeds with soil, ensuring they are completely buried. Firm the soil lightly over the seeds to ensure good contact.
- Water gently: Water the seeds thoroughly after planting, using a gentle stream to avoid disturbing the soil. Keep the soil consistently moist but not soggy throughout the germination period.
Phase 3: Seedling Care and Growth
- Germination: Radish seeds usually germinate within 3-7 days. Keep a close eye on the soil moisture levels during this time. If the soil dries out, water immediately.
- Thinning: Once the seedlings have developed their first true leaves (the leaves that appear after the cotyledons), thin them out to the recommended spacing for your variety. This gives each plant enough room to grow. Gently pull out the weaker seedlings, leaving the strongest ones.
- Watering: Water regularly, especially during dry periods. Aim for consistent moisture, avoiding both overwatering and underwatering. Overwatering can lead to root rot, while underwatering can result in small, bitter radishes.
- Weed control: Regularly remove weeds that compete with your radish plants for water and nutrients. Weeding is easiest when the soil is moist.
- Pest and disease control: Radishes are relatively pest-resistant, but keep an eye out for flea beetles and other common garden pests. If you notice any pests, consider using row covers or insecticidal soap. Good air circulation can help prevent fungal diseases.
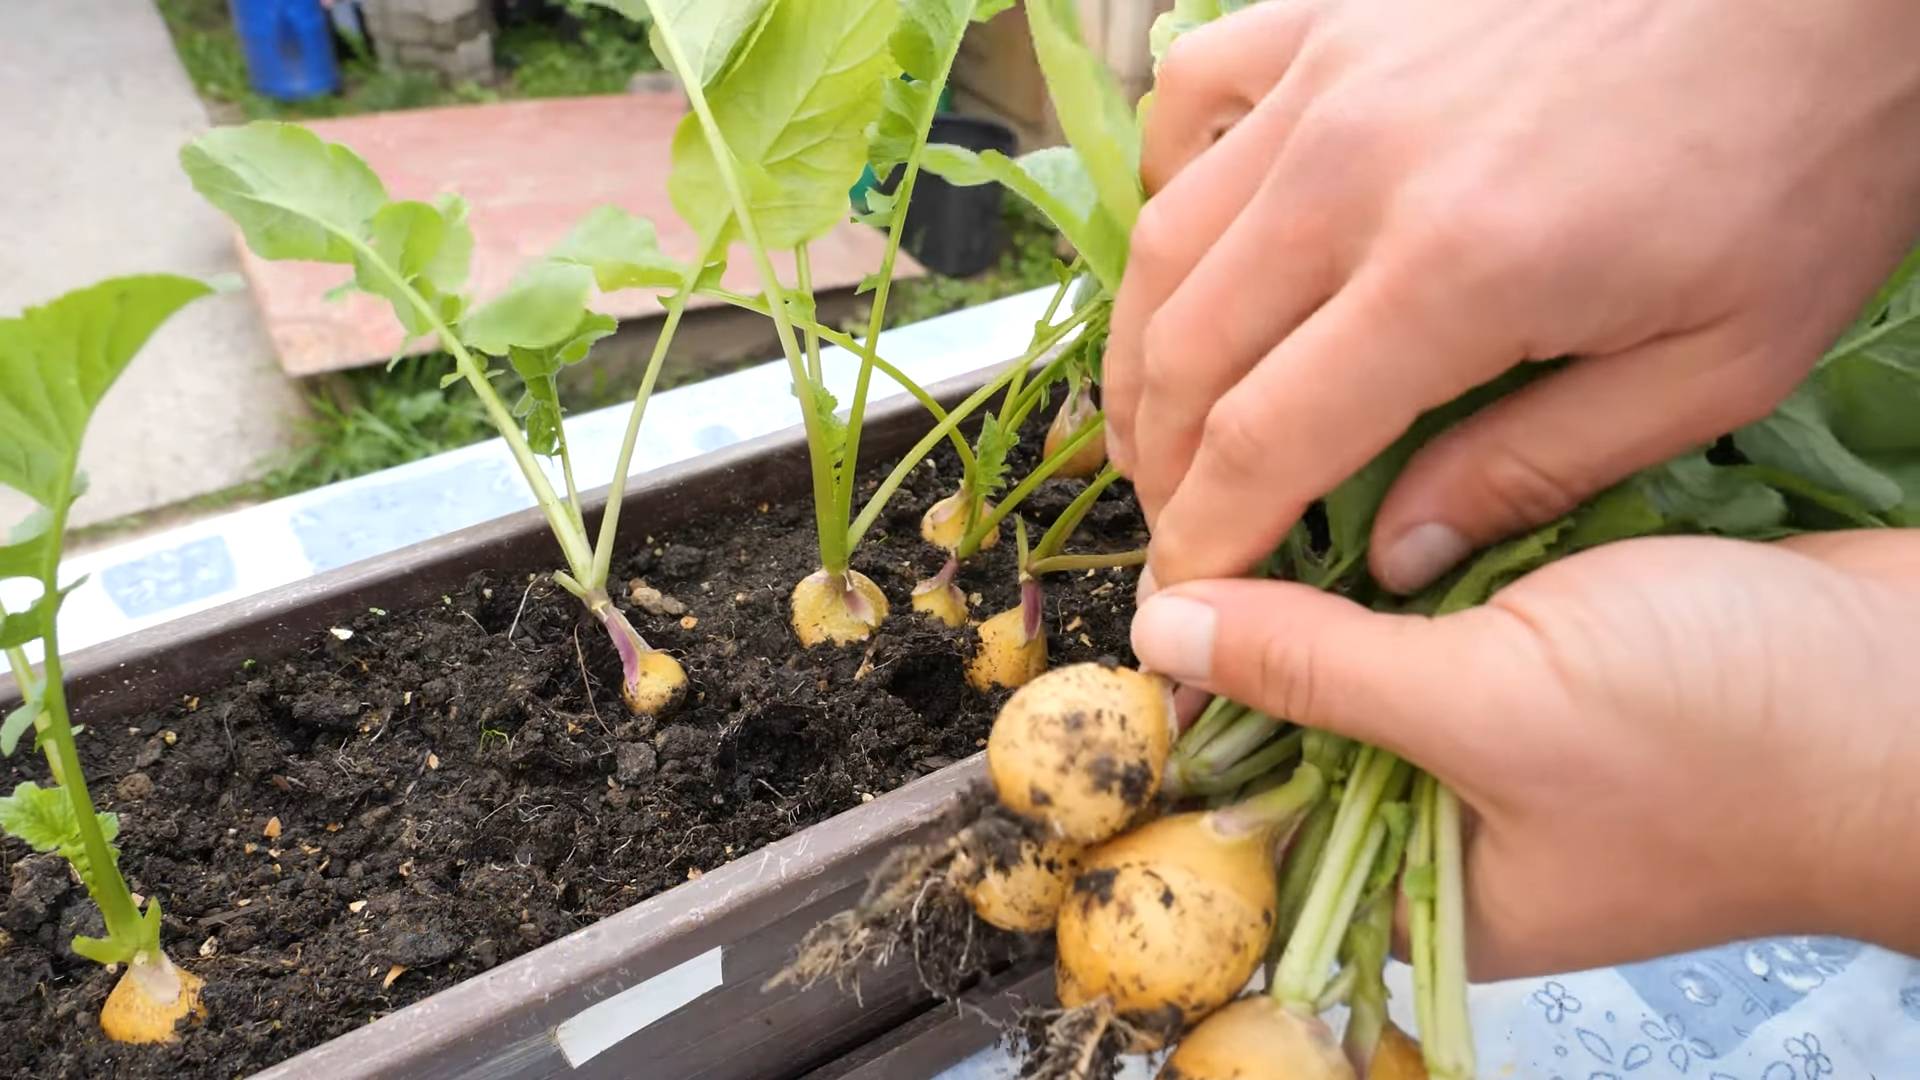
Phase 4: Harvesting Your Radishes
- Harvest timing: Radishes are ready for harvest when they reach the desired size, usually 20-30 days after sowing, depending on the variety. Check the package for specific maturity times.
- Harvesting: Gently pull the radishes from the ground, being careful not to damage the roots. If the radishes are difficult to pull, use a trowel to loosen the soil around them.
- Cleaning: Wash the radishes gently to remove any soil. Trim off the leafy tops, leaving about an inch of stem attached.
- Storage: Store the harvested radishes in a plastic bag in the refrigerator. They will keep for several days.
Troubleshooting Common Problems
- Cracked radishes: This is often caused by inconsistent watering. Aim for consistent moisture to prevent cracking. Heavy clay soil can also contribute to cracking.
- Pests: Flea beetles can be a problem. Use row covers to protect your seedlings or consider using insecticidal soap.
- Bolting: Bolting (going to seed prematurely) can occur if the plants are stressed by heat or drought. Ensure consistent watering and choose a variety suitable for your climate.
- Poor growth: Poor growth can be due to several factors, including poor soil drainage, lack of nutrients, or overcrowding. Amend the soil, fertilize appropriately, and thin the plants if necessary.
Remember: Growing radishes is a rewarding experience. Don’t be discouraged if your first attempt isn’t perfect. With a little practice, you’ll be enjoying fresh, homegrown radishes in no time!
Conclusion
So there you have it – a simple, yet incredibly rewarding guide to growing spring radishes from seed. This DIY method offers a fantastic opportunity to enjoy the freshest, most flavorful radishes imaginable, far surpassing anything you’ll find in the supermarket. The entire process, from sowing the seeds to harvesting your vibrant crop, is surprisingly quick and easy, making it perfect for even the most novice gardener. You’ll be amazed at the speed at which these little root vegetables mature, providing a rapid reward for your efforts and a delicious addition to your meals. The satisfaction of biting into a crisp, homegrown radish, knowing you nurtured it from a tiny seed, is truly unparalleled. This isn’t just about growing radishes; it’s about connecting with nature, understanding the growth cycle, and experiencing the pure joy of harvesting your own food. This Grow Spring Radishes guide empowers you to take control of your food source and enjoy the freshest, most flavorful produce possible.
Beyond the basic method outlined, there are numerous ways to personalize your radish growing experience. Experiment with different radish varieties – from the classic red globe to the spicy French breakfast or the elongated white icicle radishes. Each offers a unique flavor and texture. Consider companion planting; for example, planting radishes alongside carrots can help deter carrot root flies. You can also try succession planting, sowing a new batch of seeds every couple of weeks for a continuous harvest throughout the spring. If you have limited space, consider growing your radishes in containers on your balcony or patio. The possibilities are endless!
We strongly encourage you to try this DIY method and experience the magic of growing your own spring radishes. It’s a fantastic way to introduce yourself to the world of gardening, even if you’ve never grown anything before. Share your experiences with us! Post pictures of your flourishing radish patch on social media using #GrowSpringRadishes and tag us – we’d love to see your success. Let’s inspire each other to grow more of our own food and enjoy the bounty of nature’s gifts. Don’t hesitate – get those seeds in the ground and get ready to enjoy the freshest, most delicious radishes you’ve ever tasted!
Frequently Asked Questions
What type of soil is best for growing spring radishes?
Radishes thrive in loose, well-drained soil that is rich in organic matter. Avoid heavy clay soils, as these can hinder root development and lead to misshapen radishes. Amend heavy clay soils with compost or other organic materials to improve drainage and aeration.
How much sunlight do radishes need?
Radishes prefer at least six hours of sunlight per day. However, they can tolerate some partial shade, especially in hotter climates. In areas with intense afternoon sun, providing some shade during the hottest part of the day can be beneficial.
How often should I water my radishes?
Keep the soil consistently moist, but not waterlogged. Water regularly, especially during dry periods, ensuring the soil remains evenly moist to a depth of a few inches. Overwatering can lead to root rot, while underwatering can result in small, tough radishes.
What are the common problems when growing radishes?
Some common issues include bolting (premature flowering), which is often caused by hot weather or inconsistent watering. Pests like flea beetles can also be a problem. Using row covers can help protect your plants from pests. Proper soil preparation and consistent watering are key to preventing many common problems.
How long does it take to grow spring radishes?
Spring radishes typically mature in 25-30 days, making them a quick and rewarding crop to grow. However, the exact time will vary depending on the variety and growing conditions.
Can I grow radishes in containers?
Absolutely! Radishes are well-suited for container gardening. Use containers at least 6 inches deep and ensure they have adequate drainage holes. Choose a well-draining potting mix and follow the same watering and sunlight guidelines as for in-ground planting.
What should I do with my harvested radishes?
Harvest radishes when they reach the desired size, typically 1-2 inches in diameter. Store them in the refrigerator in a plastic bag to maintain freshness. They are best enjoyed fresh, but can also be added to salads, stir-fries, or other dishes.
What if my radishes are too spicy?
The spiciness of radishes can vary depending on the variety and growing conditions. Some varieties are naturally spicier than others. If you find your radishes too spicy, try a milder variety next time. You can also mitigate the spiciness by adding them to dishes with other strong flavors.
My radishes are splitting. What went wrong?
Splitting radishes are often a result of inconsistent watering. Ensure the soil remains evenly moist throughout the growing period. Avoid letting the soil dry out completely, then overwatering. Also, harvesting at the right time is crucial. Harvest radishes before they become too large.
Can I save seeds from my homegrown radishes to plant next year?
While you can try saving seeds, it’s generally more reliable to purchase fresh seeds each year. Radishes are often hybrids, meaning the seeds from your plants may not produce the same results as the parent plant. However, if you are interested in experimenting, allow some radishes to fully mature and go to seed, then collect the seeds carefully.

Leave a Comment