
Growing potatoes and bell peppers in your own backyard might seem like a daunting task, reserved for seasoned gardeners with acres of land. But what if I told you that with a few clever DIY tricks and hacks, you could be harvesting your own delicious, homegrown produce, even if you only have a small balcony or patio? Imagine the satisfaction of biting into a crisp, juicy bell pepper or a perfectly roasted potato, knowing you nurtured it from seed to table!
The practice of cultivating our own food has deep roots, stretching back to ancient civilizations. From the hanging gardens of Babylon to the kitchen gardens of medieval Europe, people have always sought to connect with the earth and provide for themselves. In many cultures, growing food is more than just a practical necessity; it’s a way to connect with nature, preserve traditions, and foster a sense of community.
In today’s fast-paced world, taking the time to nurture a garden can be incredibly rewarding. Not only does it provide you with fresh, healthy food, but it also offers a therapeutic escape from the stresses of daily life. Plus, let’s be honest, store-bought produce just can’t compare to the flavor of something you’ve grown yourself. That’s why I’m so excited to share these simple yet effective growing potatoes and bell peppers DIY tricks that will empower you to create your own thriving garden, no matter your experience level or space constraints. Let’s get our hands dirty and start growing!
Kartoffeln und Paprika im eigenen Garten anbauen: Eine Schritt-für-Schritt-Anleitung
Hallo Gartenfreunde! Ich freue mich riesig, euch heute zu zeigen, wie ihr Kartoffeln und Paprika in eurem eigenen Garten anbauen könnt. Es ist wirklich einfacher, als man denkt, und das Ergebnis ist einfach unschlagbar: frische, selbst angebaute Zutaten für eure Lieblingsgerichte! Lasst uns loslegen!
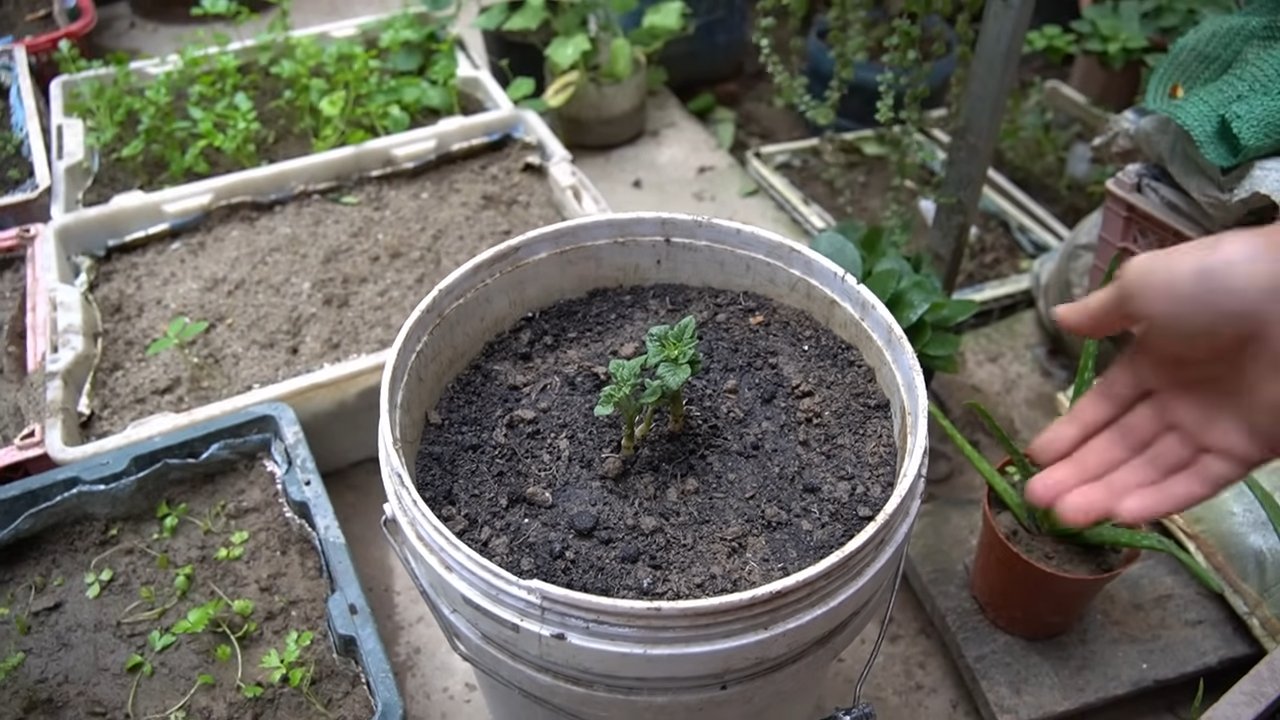
Kartoffeln anbauen: Vom Setzen bis zur Ernte
Kartoffeln sind unglaublich vielseitig und relativ einfach anzubauen, selbst wenn ihr keinen riesigen Garten habt. Hier ist, wie ich es mache:
Vorbereitung ist alles: Die richtige Sorte und der perfekte Standort
* Kartoffelsorte wählen: Es gibt unzählige Kartoffelsorten, von festkochenden bis mehlig kochenden. Überlegt euch, welche Kartoffeln ihr am liebsten esst und wählt dementsprechend. Frühkartoffeln sind schneller erntereif, während späte Sorten länger im Boden bleiben und größere Erträge bringen können. Ich persönlich liebe die festkochende Sorte ‘Annabelle’ für Salate und die mehlig kochende ‘Bamberger Hörnchen’ für Kartoffelbrei.
* Saatkartoffeln besorgen: Verwendet unbedingt Saatkartoffeln, die speziell für den Anbau gezüchtet wurden. Normale Speisekartoffeln können Krankheiten übertragen oder nicht keimen. Ihr bekommt Saatkartoffeln im Gartencenter oder online.
* Vorkeimen (optional, aber empfehlenswert): Legt die Saatkartoffeln etwa 4-6 Wochen vor dem geplanten Pflanztermin an einen hellen, kühlen Ort (ca. 10-15°C). So bilden sie kurze, kräftige Triebe. Das Vorkeimen beschleunigt das Wachstum und die Ernte.
* Der richtige Standort: Kartoffeln lieben die Sonne! Wählt einen sonnigen Standort mit lockerem, gut durchlässigem Boden. Vermeidet Staunässe, da dies zu Fäulnis führen kann.
* Boden vorbereiten: Lockert den Boden gründlich auf und entfernt Unkraut. Mischt Kompost oder gut verrotteten Mist unter, um den Boden mit Nährstoffen anzureichern. Ein leicht saurer Boden (pH-Wert zwischen 5,5 und 6,5) ist ideal.
Das Setzen der Kartoffeln: Ab in die Erde!
1. Zeitpunkt: Der beste Zeitpunkt zum Setzen der Kartoffeln ist, wenn keine Frostgefahr mehr besteht. Das ist in der Regel ab Mitte April bis Anfang Mai der Fall.
2. Pflanzabstand: Grabt Pflanzlöcher im Abstand von etwa 30-40 cm zueinander. Zwischen den Reihen solltet ihr etwa 70-80 cm Platz lassen.
3. Setztiefe: Legt die Saatkartoffeln mit den Trieben nach oben in die Pflanzlöcher und bedeckt sie mit etwa 10-15 cm Erde.
4. Angießen: Gießt die Kartoffeln nach dem Setzen gut an.
Das Anhäufeln: Ein wichtiger Schritt für eine reiche Ernte
* Warum anhäufeln? Das Anhäufeln schützt die Kartoffeln vor Sonnenlicht, das sie grün werden lässt und ungenießbar macht. Außerdem fördert es die Bildung von weiteren Knollen an den Stängeln.
* Wie anhäufeln? Sobald die Kartoffelpflanzen etwa 20-30 cm hoch sind, häufelt ihr Erde um die Stängel an, sodass nur noch die oberen Blätter herausschauen. Wiederholt diesen Vorgang alle paar Wochen, bis ein kleiner Damm entstanden ist.
Pflege während der Wachstumsphase: Gießen, Düngen, Unkraut jäten
* Gießen: Kartoffeln brauchen regelmäßig Wasser, besonders während der Knollenbildung. Achtet darauf, dass der Boden nicht austrocknet, aber vermeidet Staunässe.
* Düngen: Düngt die Kartoffeln während der Wachstumsphase mit einem organischen Dünger oder einem speziellen Kartoffeldünger. Ich verwende gerne Hornspäne oder Kompost.
* Unkraut jäten: Haltet das Beet unkrautfrei, damit die Kartoffeln genügend Nährstoffe und Licht bekommen.
Die Ernte: Der Lohn der Mühe
* Wann ernten? Der Zeitpunkt der Ernte hängt von der Kartoffelsorte ab. Frühkartoffeln können geerntet werden, sobald die Blüten verblüht sind. Späte Sorten bleiben länger im Boden und werden geerntet, wenn das Laub gelb wird und abstirbt.
* Wie ernten? Grabt die Kartoffeln vorsichtig mit einer Grabegabel aus. Achtet darauf, die Knollen nicht zu beschädigen.
* Lagerung: Lagert die Kartoffeln an einem kühlen, dunklen und trockenen Ort. So halten sie sich mehrere Monate.
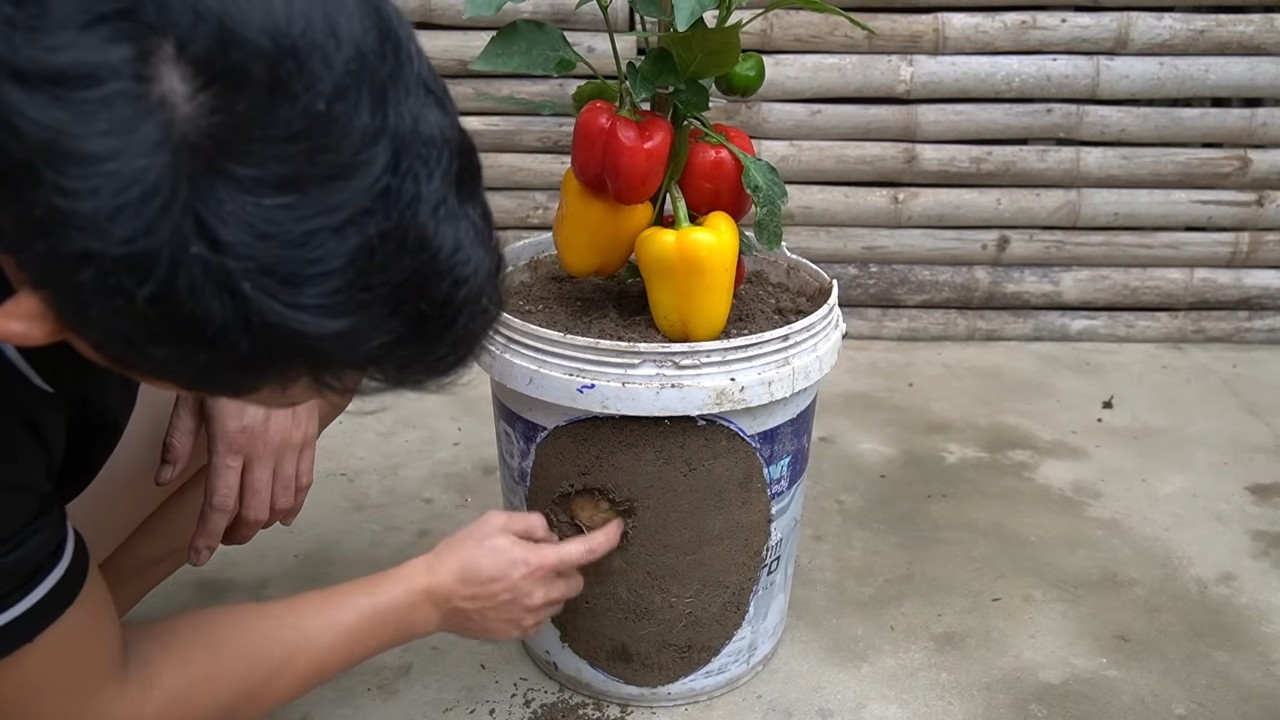
Paprika anbauen: Sonne, Wärme und Geduld
Paprika sind etwas anspruchsvoller als Kartoffeln, aber mit der richtigen Pflege könnt ihr auch hier eine reiche Ernte erzielen.
Vorbereitung: Die richtige Sorte und der perfekte Standort
* Paprikasorte wählen: Es gibt unzählige Paprikasorten in verschiedenen Farben, Formen und Schärfegraden. Überlegt euch, welche Paprika ihr am liebsten esst und wählt dementsprechend. Süßpaprika sind milder, während Chili-Paprika schärfer sind. Ich liebe die rote Spitzpaprika ‘Corno di Toro’ und die gelbe Blockpaprika ‘California Wonder’.
* Vorziehen: Paprika brauchen eine lange Wachstumsperiode, daher ist es ratsam, sie im Haus vorzuziehen. Beginnt damit etwa 8-10 Wochen vor dem letzten Frost.
* Aussaat: Füllt kleine Töpfe oder Anzuchtschalen mit Anzuchterde. Legt die Paprikasamen etwa 0,5 cm tief in die Erde und bedeckt sie leicht. Gießt die Erde vorsichtig an und stellt die Töpfe an einen warmen, hellen Ort (ca. 22-25°C).
* Pikieren: Sobald die Paprikapflanzen 2-4 Blätter haben, könnt ihr sie in größere Töpfe pikieren.
* Der richtige Standort: Paprika lieben die Sonne und Wärme! Wählt einen sonnigen, windgeschützten Standort mit lockerem, gut durchlässigem Boden.
* Boden vorbereiten: Lockert den Boden gründlich auf und entfernt Unkraut. Mischt Kompost oder gut verrotteten Mist unter, um den Boden mit Nährstoffen anzureichern. Ein leicht saurer Boden (pH-Wert zwischen 6,0 und 6,8) ist ideal.
Das Auspflanzen: Raus in den Garten!
1. Zeitpunkt: Der beste Zeitpunkt zum Auspflanzen der Paprika ist, wenn keine Frostgefahr mehr besteht und die Bodentemperatur mindestens 15°C beträgt. Das ist in der Regel ab Mitte Mai der Fall.
2. Pflanzabstand: Pflanzt die Paprikapflanzen im Abstand von etwa 40-50 cm zueinander. Zwischen den Reihen solltet ihr etwa 60-70 cm Platz lassen.
3. Pflanzloch: Grabt ein Pflanzloch, das etwas größer ist als der Wurzelballen der Paprikapflanze.
4. Einsetzen: Setzt die Paprikapflanze vorsichtig in das Pflanzloch und füllt es mit Erde auf.
5. Angießen: Gießt die Paprika nach dem Auspflanzen gut an.
Pflege während der Wachstumsphase: Gießen, Düngen, Stützen
* Gießen: Paprika brauchen regelmäßig Wasser, besonders während der Fruchtbildung. Achtet darauf, dass der Boden nicht austrocknet, aber vermeidet Staunässe.
* Düngen: Düngt die Paprika während der Wachstumsphase mit einem organischen Dünger oder einem speziellen Gemüsedünger. Ich verwende gerne Brennnesseljauche oder Tomatendünger.
* Stützen: Paprikapflanzen können unter dem Gewicht der Früchte umknicken. Stützt sie daher mit Stäben oder einem Rankgitter.
* Ausgeizen: Entfernt regelmäßig die Seitentriebe, die sich in den Blattachseln bilden. So fördert ihr die Bildung von größeren Früchten.
Die Ernte: Der
Conclusion
So, there you have it! Mastering the art of growing potatoes and bell peppers together is not just a gardening experiment; it’s a pathway to a more bountiful and efficient harvest. We’ve explored the symbiotic relationship these two plants can share, maximizing your garden space and potentially even improving the flavor of your homegrown produce.
Why is this DIY trick a must-try? Because it’s a game-changer for small-space gardeners. Imagine doubling your yield without doubling the area you cultivate. It’s also a fantastic way to practice companion planting, a sustainable gardening technique that promotes healthier plants and reduces the need for chemical interventions. Plus, there’s immense satisfaction in nurturing these plants and witnessing their growth, knowing you’ve created a thriving ecosystem in your own backyard.
But don’t stop there! Experiment with different potato and bell pepper varieties to discover your perfect pairing. Try using raised beds or containers for even better control over soil conditions and drainage. Consider adding other companion plants like basil or marigolds to further enhance the health and productivity of your garden. You can also explore different mulching techniques to retain moisture and suppress weeds.
Remember, gardening is a journey of continuous learning and discovery. There will be successes and setbacks, but each experience will bring you closer to becoming a more skilled and confident gardener. The key is to be patient, observant, and willing to adapt your approach as needed.
We wholeheartedly encourage you to give this DIY trick a try. Start small, perhaps with just a few potato and bell pepper plants, and gradually expand your garden as you gain experience. Document your progress, take photos, and most importantly, share your experiences with us and other gardening enthusiasts. Let’s create a community of passionate gardeners who are committed to growing their own food in a sustainable and rewarding way.
Don’t be afraid to experiment and find what works best for you. Whether you’re a seasoned gardener or just starting out, growing potatoes and bell peppers together is a rewarding experience that will bring you closer to nature and provide you with delicious, homegrown produce. So, grab your gardening gloves, get your hands dirty, and start growing! We can’t wait to hear about your success stories!
Frequently Asked Questions (FAQ)
What are the best potato varieties to grow with bell peppers?
Choosing the right potato variety is crucial for successful companion planting with bell peppers. Generally, early-maturing potato varieties are ideal because they are harvested before the bell peppers reach their full size, minimizing competition for resources. Some excellent choices include:
* **Yukon Gold:** A popular all-purpose potato with a buttery flavor and relatively short growing season.
* **Red Norland:** A classic red potato that matures quickly and is great for boiling or roasting.
* **Irish Cobbler:** An early-season white potato known for its excellent flavor and adaptability.
Avoid late-maturing potato varieties like Russet Burbank, as they may overshadow and compete with your bell peppers for too long.
How much space do I need between potato and bell pepper plants?
Proper spacing is essential to ensure both potatoes and bell peppers have enough room to grow and thrive. A good rule of thumb is to space potato plants about 12 inches apart and bell pepper plants about 18 inches apart. When planting them together, alternate the plants in rows, maintaining these distances. This will allow for adequate airflow and sunlight penetration, reducing the risk of disease and promoting healthy growth. If you are planting in containers, make sure the container is large enough to accommodate both plants. A 15-20 gallon container is usually sufficient.
What type of soil is best for growing potatoes and bell peppers together?
Both potatoes and bell peppers prefer well-drained, fertile soil with a slightly acidic to neutral pH (around 6.0 to 7.0). Before planting, amend your soil with plenty of organic matter, such as compost or well-rotted manure, to improve drainage, fertility, and water retention. Avoid heavy clay soils, as they can become waterlogged and lead to root rot. If you have clay soil, consider growing your potatoes and bell peppers in raised beds or containers filled with a suitable potting mix.
How often should I water potatoes and bell peppers?
Consistent watering is crucial for the healthy growth of both potatoes and bell peppers. Water deeply and regularly, especially during dry periods. Aim to keep the soil consistently moist but not waterlogged. A good way to check if your plants need water is to stick your finger into the soil about an inch deep. If the soil feels dry, it’s time to water. Avoid overhead watering, as it can promote fungal diseases. Instead, water at the base of the plants using a soaker hose or drip irrigation system.
What are some common pests and diseases that affect potatoes and bell peppers?
Potatoes and bell peppers are susceptible to various pests and diseases. Common pests include aphids, flea beetles, potato beetles, and tomato hornworms. Common diseases include early blight, late blight, and powdery mildew. To prevent pest and disease problems, practice good garden hygiene, such as removing weeds and debris, and rotate your crops annually. You can also use organic pest control methods, such as insecticidal soap or neem oil, to control pests. For diseases, ensure good airflow around your plants and avoid overhead watering. If you notice signs of disease, remove affected leaves or plants immediately to prevent the spread.
Can I grow potatoes and bell peppers in containers?
Yes, growing potatoes and bell peppers in containers is a great option, especially if you have limited garden space. Choose large containers (at least 15-20 gallons) with good drainage holes. Use a high-quality potting mix and amend it with compost or other organic matter. Follow the same spacing guidelines as you would for in-ground planting. Container-grown plants tend to dry out more quickly, so be sure to water them regularly.
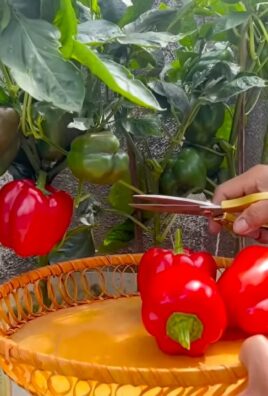
How do I know when to harvest potatoes and bell peppers?
Potatoes are typically ready to harvest when the foliage begins to die back. You can harvest “new potatoes” earlier, about 2-3 weeks after flowering, for a smaller, more tender crop. For mature potatoes, wait until the foliage has completely died back and then dig up the potatoes carefully, avoiding damage to the tubers. Bell peppers are ready to harvest when they have reached their mature size and color. The color will depend on the variety you are growing. Gently twist or cut the peppers from the plant, leaving a short stem attached.
Will growing potatoes and bell peppers together affect the taste of either crop?
While there’s no definitive scientific evidence to prove that companion planting directly alters the taste of crops, some gardeners believe that it can have a subtle effect. The theory is that the interaction between the plants in the soil can influence the uptake of nutrients and minerals, which may, in turn, affect the flavor. However, the taste of potatoes and bell peppers is primarily determined by genetics, soil conditions, and growing practices.
What other plants are good companions for potatoes and bell peppers?
Besides each other, potatoes and bell peppers benefit from other companion plants. Basil is a great companion for bell peppers, as it repels pests and improves flavor. Marigolds are also beneficial, as they deter nematodes and other soil pests. Other good companions for potatoes include beans, peas, and corn. Avoid planting potatoes near tomatoes, as they are both susceptible to the same diseases.
Is it really worth the effort to grow potatoes and bell peppers together?
Absolutely! While it may require a bit more planning and attention, the benefits of growing potatoes and bell peppers together far outweigh the effort. You’ll maximize your garden space, potentially improve the health and productivity of your plants, and enjoy the satisfaction of harvesting your own homegrown produce. Plus, it’s a great way to learn more about sustainable gardening practices and connect with nature. So, give it a try and see for yourself!
Leave a Comment