
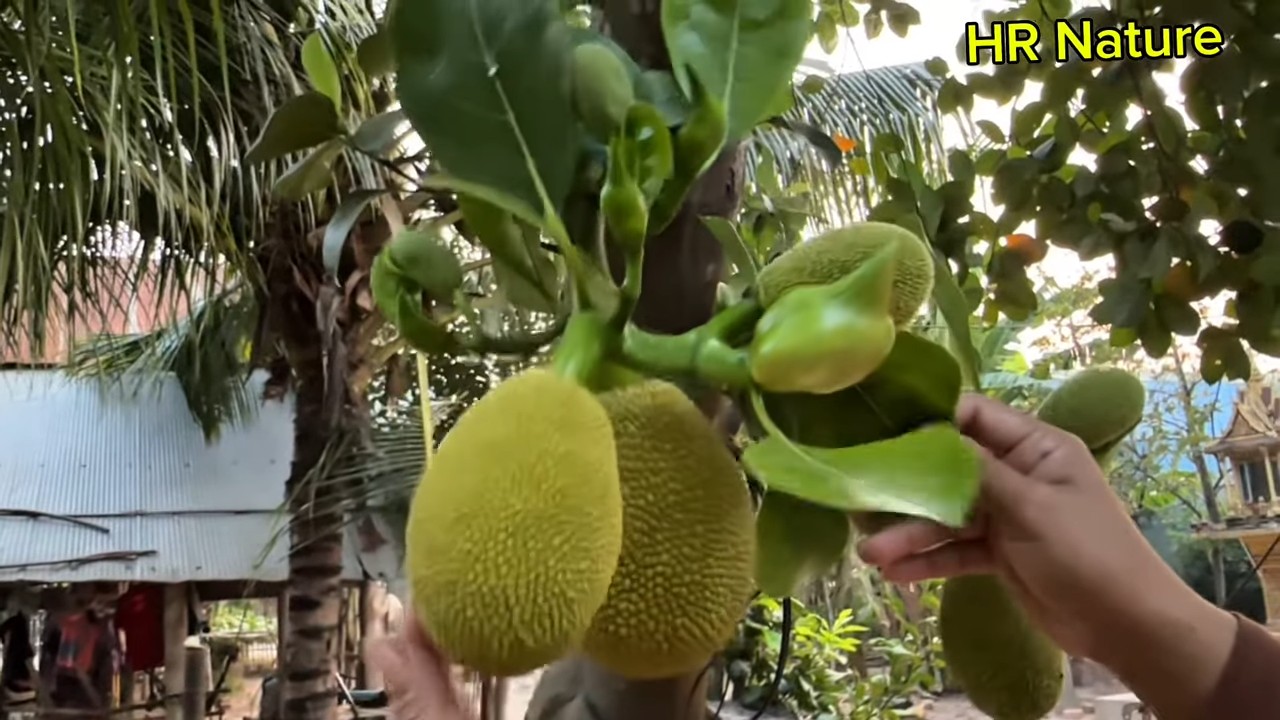
Grafting Jackfruit Trees Technique: Ever dreamed of harvesting your own juicy, sweet jackfruit right in your backyard? Imagine bypassing the years of waiting for a seedling to mature and instead, enjoying the fruits of your labor much sooner! That’s the magic of grafting, and it’s a DIY project that’s surprisingly accessible, even for beginner gardeners like myself.
Grafting, the art of joining two plants together so they grow as one, has been practiced for centuries. Some evidence suggests its roots trace back to ancient China and Mesopotamia! It’s a technique that allows us to combine the desirable traits of two different jackfruit varieties – perhaps the disease resistance of one with the exceptional fruit quality of another. Think of it as plant matchmaking, but with a scientific twist!
Why should you learn this grafting jackfruit trees technique? Well, for starters, it significantly reduces the time it takes for your jackfruit tree to bear fruit. Seed-grown jackfruit trees can take five to seven years to produce, while grafted trees often start producing within two to three years. Plus, you’re ensuring that your tree will produce fruit with the specific characteristics you desire. No more gambling on the quality of the fruit! I know I was tired of waiting and hoping, so I took matters into my own hands. Let’s dive in and unlock the secrets to successfully grafting your own jackfruit trees!
Jackfruit-Bäumchen veredeln: Eine Schritt-für-Schritt-Anleitung für Hobbygärtner
Hallo liebe Gartenfreunde! Habt ihr euch jemals gefragt, wie man die Ernte von Jackfruit-Bäumen beschleunigen und verbessern kann? Die Antwort liegt in der Veredelung! Es mag anfangs einschüchternd wirken, aber mit der richtigen Anleitung und etwas Geduld könnt ihr eure eigenen Jackfruit-Bäume veredeln und schon bald köstliche Früchte ernten. Ich zeige euch, wie es geht!
Warum Jackfruit-Bäume veredeln?
Bevor wir loslegen, lasst uns kurz darüber sprechen, warum die Veredelung überhaupt sinnvoll ist:
* Frühere Ernte: Veredelte Bäume tragen in der Regel früher Früchte als Bäume, die aus Samen gezogen wurden. Das kann den Unterschied zwischen 5-7 Jahren Wartezeit und nur 2-3 Jahren ausmachen!
* Verbesserte Fruchtqualität: Durch die Veredelung könnt ihr die gewünschten Eigenschaften eines Mutterbaums (z.B. Größe, Geschmack, Krankheitsresistenz) auf den neuen Baum übertragen.
* Klonen von Sorten: Wenn ihr eine besonders leckere Jackfruit-Sorte habt, könnt ihr diese durch Veredelung klonen und sicherstellen, dass ihr immer wieder die gleiche Qualität erhaltet.
* Krankheitsresistenz: Ihr könnt einen resistenten Unterstamm verwenden, um einen anfälligeren Edelreis zu veredeln und so einen robusteren Baum zu erhalten.
Die Grundlagen der Jackfruit-Veredelung
Es gibt verschiedene Veredelungstechniken, aber für Jackfruit-Bäume ist die **Geißfußveredelung (Cleft Grafting)** eine der am häufigsten verwendeten und erfolgreichsten Methoden. Hier ist eine Übersicht über die wichtigsten Aspekte:
* Unterlage (Rootstock): Das ist der Baum, auf den ihr den Edelreis veredelt. Er sollte gesund, kräftig und idealerweise 1-2 Jahre alt sein. Jackfruit-Sämlinge eignen sich gut als Unterlage.
* Edelreis (Scion): Das ist der Teil des Baumes, den ihr auf die Unterlage veredelt. Er sollte von einem gesunden, fruchttragenden Baum stammen und die gewünschten Eigenschaften besitzen. Wählt Triebe mit 2-4 Knospen aus.
* Zeitpunkt: Die beste Zeit für die Jackfruit-Veredelung ist in der Regel während der Ruhephase des Baumes, also in den kühleren Monaten (z.B. Winter oder frühes Frühjahr).
* Sauberkeit: Hygiene ist extrem wichtig! Verwendet immer saubere und scharfe Werkzeuge, um Infektionen zu vermeiden. Desinfiziert eure Werkzeuge vor und nach jedem Schnitt mit Alkohol.
* Druck: Sorgt für einen festen und gleichmäßigen Druck zwischen Edelreis und Unterlage, um eine gute Verbindung zu gewährleisten.
* Feuchtigkeit: Haltet die Veredelungsstelle feucht, um das Austrocknen zu verhindern.
Benötigte Materialien und Werkzeuge
Bevor wir mit der Veredelung beginnen, solltet ihr sicherstellen, dass ihr alle notwendigen Materialien und Werkzeuge zur Hand habt:
* Scharfes Veredelungsmesser: Ein spezielles Veredelungsmesser ist ideal, aber ein sehr scharfes Messer tut es auch.
* Gartenschere: Zum Zuschneiden der Unterlage und des Edelreises.
* Veredelungsband oder -folie: Zum Fixieren der Veredelungsstelle und zum Schutz vor Austrocknung.
* Baumwachs oder Veredelungspaste: Zum Versiegeln der Schnittflächen und zum Schutz vor Infektionen.
* Alkohol: Zum Desinfizieren der Werkzeuge.
* Sprühflasche mit Wasser: Zum Befeuchten der Veredelungsstelle.
* Etikett: Zum Beschriften des veredelten Baumes mit der Sorte des Edelreises und dem Datum der Veredelung.
* Handschuhe: Zum Schutz eurer Hände.
Schritt-für-Schritt-Anleitung zur Geißfußveredelung von Jackfruit-Bäumen
Jetzt geht es ans Eingemachte! Hier ist eine detaillierte Anleitung, wie ihr die Geißfußveredelung bei Jackfruit-Bäumen durchführt:
1. Vorbereitung der Unterlage
1. Auswahl der Unterlage: Wählt einen gesunden Jackfruit-Sämling mit einem Stammdurchmesser von etwa 1-2 cm. Der Stamm sollte gerade und frei von Beschädigungen sein.
2. Reinigung der Unterlage: Entfernt alle Blätter und Seitentriebe im Bereich, wo ihr die Veredelung durchführen wollt.
3. Schnitt der Unterlage: Schneidet den Stamm der Unterlage in einer Höhe von etwa 15-20 cm über dem Boden mit einer sauberen und scharfen Gartenschere ab. Achtet darauf, dass der Schnitt glatt und sauber ist.
4. Spalten der Unterlage: Nehmt euer Veredelungsmesser und spaltet den Stamm der Unterlage in der Mitte etwa 3-5 cm tief. Achtet darauf, dass der Spalt gerade und gleichmäßig ist.
2. Vorbereitung des Edelreises
1. Auswahl des Edelreises: Wählt einen gesunden Trieb von einem fruchttragenden Jackfruit-Baum mit den gewünschten Eigenschaften. Der Trieb sollte etwa 10-15 cm lang sein und 2-4 Knospen haben.
2. Entfernung der Blätter: Entfernt alle Blätter vom Edelreis, um die Verdunstung zu reduzieren.
3. Zuschneiden des Edelreises: Schneidet das untere Ende des Edelreises keilförmig zu. Die beiden Seiten des Keils sollten gleichmäßig und glatt sein. Die Länge des Keils sollte etwa 3-5 cm betragen, passend zur Tiefe des Spalts in der Unterlage. Achtet darauf, dass die Knospen nicht beschädigt werden.
3. Zusammenfügen von Unterlage und Edelreis
1. Einsetzen des Edelreises: Spreizt den Spalt in der Unterlage vorsichtig auf und setzt den Edelreis so ein, dass die Kambiumschichten (die grüne Schicht direkt unter der Rinde) von Edelreis und Unterlage möglichst gut aufeinander liegen. Das ist entscheidend für den Erfolg der Veredelung!
2. Fixierung der Veredelungsstelle: Wickelt die Veredelungsstelle fest mit Veredelungsband oder -folie ein. Beginnt unterhalb des Spalts und arbeitet euch nach oben, um sicherzustellen, dass der Edelreis fest in der Unterlage sitzt. Achtet darauf, dass das Band nicht zu fest angezogen wird, um die Kambiumschichten nicht zu beschädigen.
3. Versiegelung der Schnittflächen: Tragt Baumwachs oder Veredelungspaste auf alle Schnittflächen auf, um sie vor Austrocknung und Infektionen zu schützen. Versiegelt auch die Spitze des Edelreises.
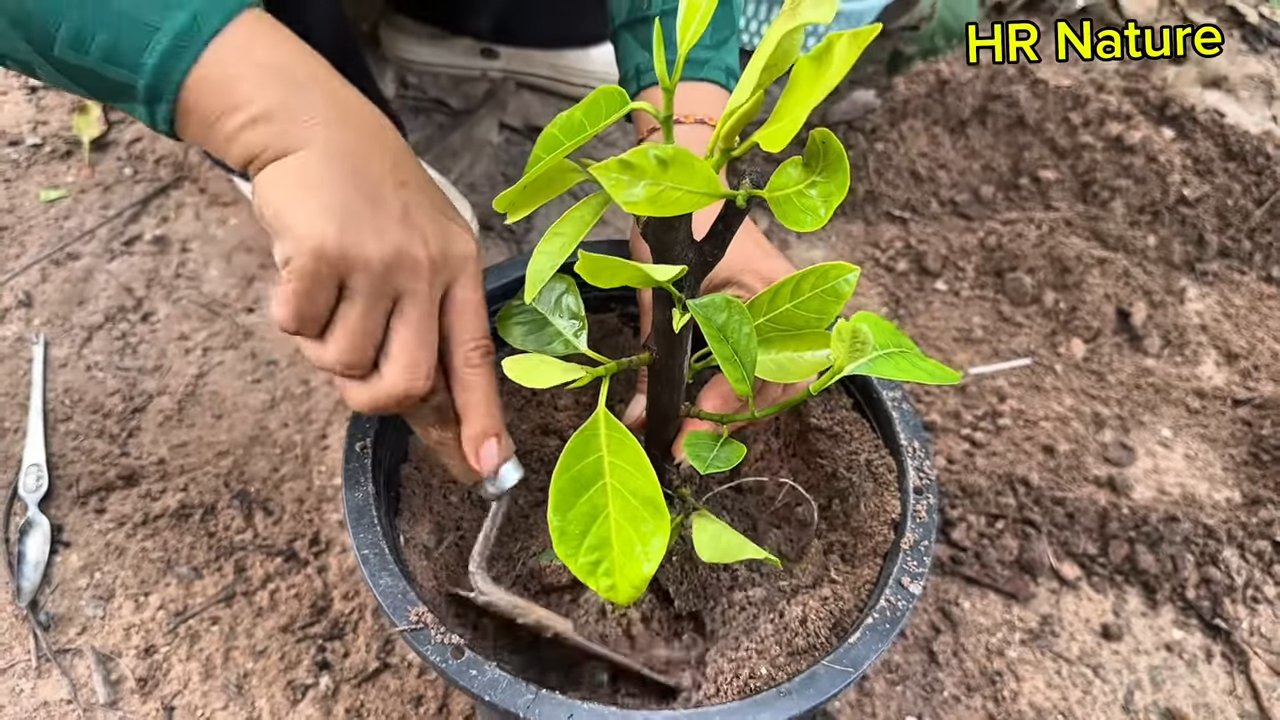
4. Nachsorge
1. Schutz vor Austrocknung: Stellt den veredelten Baum an einen schattigen und geschützten Ort. Besprüht die Veredelungsstelle regelmäßig mit Wasser, um die Luftfeuchtigkeit zu erhöhen. Ihr könnt auch eine Plastiktüte locker über den Baum stülpen, um ein feuchtes Mikroklima zu schaffen. Achtet aber darauf, dass die Tüte nicht direkt mit dem Edelreis in Berührung kommt.
2. Kontrolle der Veredelungsstelle: Kontrolliert die Veredelungsstelle regelmäßig auf Anzeichen von Infektionen oder Austrocknung. Wenn ihr Schimmel oder Fäulnis entdeckt, entfernt die betroffenen Stellen vorsichtig und tragt erneut Baumwachs auf.
3. Entfernung des Veredelungsbandes: Nach etwa 4-6 Wochen, wenn der Edelreis beginnt, auszutreiben, könnt ihr das Veredelungsband vorsichtig entfernen. Achtet darauf, den jungen Trieb nicht zu beschädigen.
4. Entfernung von Wildtrieben: Entfernt alle Wildtriebe, die unterhalb der Veredelungsstelle an der Unterlage wachsen. Diese würden dem Edelreis Nährstoffe entziehen.
5. Weiterpflege: Sobald der Edelreis gut angewachsen ist, könnt ihr den Baum wie gewohnt pflegen. Gießt ihn regelmäßig, düngt ihn bei Bedarf und schützt ihn vor Schädlingen und Krankheiten.
Tipps und Tricks für eine erfolgreiche Jackfruit-Vered
Conclusion
So, there you have it! Mastering the art of grafting jackfruit trees isn’t just a horticultural pursuit; it’s an investment in your future harvests, a step towards preserving desirable traits, and a deeply satisfying connection with the natural world. This DIY trick, while requiring patience and precision, unlocks a world of possibilities for jackfruit enthusiasts. Imagine consistently enjoying the specific flavor profile you adore, or propagating disease-resistant varieties to ensure a bountiful yield year after year.
Why is this a must-try? Because grafting allows you to bypass the genetic lottery inherent in seed propagation. You’re essentially creating a clone of the parent tree, guaranteeing that the offspring will inherit its superior qualities. This is particularly crucial for jackfruit, where variations in fruit size, taste, and texture can be significant. Forget gambling on seeds; with grafting, you’re in control.
Beyond the basic cleft graft described earlier, feel free to explore variations. Consider experimenting with different grafting techniques like side veneer grafting or whip and tongue grafting, especially if you’re working with smaller scion wood. You can also try grafting multiple scions from different jackfruit varieties onto a single rootstock, creating a “multi-flavored” tree – a true conversation starter! Another exciting avenue is to graft jackfruit onto related species like breadfruit, although success rates can vary and require careful attention to compatibility. Remember to always use sharp, sterilized tools to prevent disease transmission and ensure a clean graft union.
Don’t be intimidated by the perceived complexity. Start with a few grafts, practice your technique, and learn from any initial setbacks. The rewards – a thriving jackfruit tree bearing fruit that meets your exact specifications – are well worth the effort. The satisfaction of nurturing a tree from a small graft to a fruit-bearing giant is unparalleled.
We wholeheartedly encourage you to embark on this grafting adventure. It’s a rewarding experience that will deepen your understanding of plant propagation and provide you with a sustainable source of delicious jackfruit for years to come. And most importantly, don’t keep your success (or even your learning experiences!) to yourself. Share your journey with us! Post photos of your grafts, describe your techniques, and let us know what worked (and what didn’t). Your insights can help other aspiring jackfruit grafters and contribute to a growing community of passionate horticulturalists. Let’s collectively unlock the full potential of this amazing fruit through the power of grafting. This **grafting jackfruit trees** technique is more than just a method; it’s a gateway to a more fruitful and sustainable future.
Frequently Asked Questions (FAQ)
What is the best time of year to graft jackfruit trees?
The ideal time for grafting jackfruit trees is typically during the late winter or early spring, just before the tree begins its active growth phase. This is when the sap flow is increasing, which promotes successful graft union formation. Avoid grafting during periods of extreme heat, cold, or heavy rainfall, as these conditions can hinder the healing process and increase the risk of failure. In tropical climates with consistent temperatures, grafting can be attempted year-round, but monitoring weather conditions and providing adequate protection to the grafts is crucial.
How long does it take for a grafted jackfruit tree to bear fruit?
Grafted jackfruit trees generally bear fruit much sooner than those grown from seed. Seedling jackfruit trees can take anywhere from 5 to 10 years to produce fruit, whereas grafted trees can start bearing fruit within 2 to 4 years, depending on the age and maturity of the scion wood used. Proper care, including adequate watering, fertilization, and pest control, can further accelerate the fruiting process.
What type of rootstock is best for grafting jackfruit?
The most common and reliable rootstock for grafting jackfruit is another jackfruit seedling. Using a seedling of a locally adapted jackfruit variety as rootstock increases the chances of compatibility and successful graft union. Other related species, such as breadfruit (Artocarpus altilis), can be used as rootstock, but compatibility issues may arise, leading to lower success rates. It’s essential to select a healthy, vigorous rootstock that is free from diseases and pests.
How do I protect the graft union after grafting?
Protecting the graft union is crucial for its survival and successful development. After grafting, wrap the union tightly with grafting tape or budding tape to provide support and prevent moisture loss. Cover the graft with a plastic bag or a grafting film to create a humid environment, which promotes callus formation and graft union. Shield the graft from direct sunlight and strong winds by providing shade or using a protective cover. Regularly inspect the graft for signs of infection or pest infestation and take appropriate measures to address any issues.
What if my graft fails? What are the common reasons for graft failure?
Graft failure can occur due to various reasons, including incompatibility between the scion and rootstock, improper grafting technique, infection, pest infestation, or unfavorable environmental conditions. If the graft fails, don’t be discouraged. Analyze the potential causes of failure and try again with a different approach. Ensure that you are using compatible scion and rootstock, employing proper grafting techniques, maintaining sterile conditions, and providing adequate protection to the graft. Practice makes perfect, and with persistence, you’ll eventually achieve success.
Can I graft different varieties of jackfruit onto the same tree?
Yes, you can graft different varieties of jackfruit onto the same tree, creating a “multi-variety” or “fruit salad” tree. This allows you to enjoy a diverse range of jackfruit flavors and textures from a single tree. However, it’s essential to ensure that all the varieties you graft are compatible with the rootstock. When grafting multiple varieties, space the grafts adequately to allow each scion to develop properly without overcrowding.
How do I care for a grafted jackfruit tree?
Caring for a grafted jackfruit tree is similar to caring for any other jackfruit tree. Provide adequate watering, especially during dry periods. Fertilize the tree regularly with a balanced fertilizer to promote healthy growth and fruit production. Prune the tree to maintain its shape and remove any dead or diseased branches. Protect the tree from pests and diseases by implementing appropriate pest control and disease management strategies. Regularly monitor the tree for any signs of stress or nutrient deficiencies and address them promptly.
Where can I find scion wood for grafting jackfruit trees?
Obtaining high-quality scion wood is crucial for successful grafting. You can source scion wood from established jackfruit trees that exhibit desirable traits, such as superior fruit quality, disease resistance, or high yield. Ask local jackfruit growers or nurseries if they can provide you with scion wood from their trees. Ensure that the scion wood is healthy, mature, and free from diseases and pests. Collect the scion wood during the dormant season or just before the tree begins its active growth phase.
Is grafting jackfruit trees difficult for beginners?
While grafting requires some skill and precision, it’s not necessarily difficult for beginners. With proper guidance, practice, and attention to detail, anyone can learn to graft jackfruit trees successfully. Start with simple grafting techniques like cleft grafting and gradually progress to more advanced methods as you gain experience. Watch instructional videos, read articles, and seek advice from experienced grafters to improve your skills. Don’t be afraid to experiment and learn from your mistakes.
What tools do I need for grafting jackfruit trees?
The essential tools for grafting jackfruit trees include:
* A sharp grafting knife or budding knife: This is used to make clean, precise cuts on the scion and rootstock.
* Grafting tape or budding tape: This is used to wrap the graft union and provide support.
* Pruning shears: These are used to prune the rootstock and prepare it for grafting.
* Sterilizing solution (e.g., rubbing alcohol or bleach solution): This is used to sterilize the grafting tools and prevent the spread of diseases.
* Plastic bags or grafting film: These are used to cover the graft and create a humid environment.
* Optional: Grafting wax or sealant: This can be used to seal the graft union and prevent moisture loss.
Ensure that all your tools are sharp, clean, and sterilized before use.

Leave a Comment