
Grow Giant Mustard Greens and impress your neighbors with your incredible gardening skills! Have you ever dreamed of harvesting mustard greens so large they practically qualify as leafy green umbrellas? Well, get ready to turn that dream into a reality! This isn’t just about growing mustard greens; it’s about cultivating colossal, flavorful leaves that will elevate your salads, stir-fries, and side dishes to a whole new level.
Mustard greens have a rich history, deeply rooted in Asian and African cuisines for centuries. They’re not just delicious; they’re packed with vitamins and nutrients, making them a healthy and vibrant addition to any diet. Traditionally, mustard greens were valued for their medicinal properties as well as their culinary uses. Now, you can bring this tradition to your own backyard, but with a twist – we’re going BIG!
Why do you need these DIY tricks and hacks? Because growing ordinary mustard greens is, well, ordinary! In today’s world, where space and time are precious, maximizing your yield is essential. These simple yet effective techniques will help you grow giant mustard greens even in small spaces, ensuring you get the most out of your garden. Plus, who doesn’t love a little gardening bragging rights? Let’s dive in and unlock the secrets to cultivating these impressive leafy giants!
Riesige Senfblätter selbst ziehen: Eine Schritt-für-Schritt-Anleitung
Hey Leute! Ich liebe es, frische Zutaten direkt aus meinem Garten zu verwenden, und Senfblätter sind da keine Ausnahme. Sie sind super einfach anzubauen, wachsen schnell und haben diesen tollen, leicht scharfen Geschmack, der Salaten, Suppen und Pfannengerichten das gewisse Etwas verleiht. Aber wisst ihr, was noch besser ist? Riesige Senfblätter! Stellt euch vor, ihr könntet mit nur einem Blatt einen ganzen Salat zubereiten! Klingt gut, oder? Also, lasst uns loslegen und ich zeige euch, wie ihr das auch hinbekommt.
Was ihr braucht:
Hier ist eine Liste der Dinge, die ihr für dieses Projekt benötigt. Keine Sorge, die meisten davon habt ihr wahrscheinlich schon zu Hause!
* Senfsamen (Ich empfehle die Sorte ‘Florida Broadleaf’ oder ‘Giant Red’, da sie für ihre großen Blätter bekannt sind.)
* Hochwertige Blumenerde oder Gartenerde
* Kompost (für zusätzliche Nährstoffe)
* Pflanzgefäße oder ein Gartenbeet
* Gießkanne oder Gartenschlauch mit Brausekopf
* Organischer Dünger (optional, aber empfehlenswert)
* Mulch (optional, hilft Feuchtigkeit zu speichern und Unkraut zu unterdrücken)
* Geduld und Liebe!
Die Vorbereitung: Der Schlüssel zum Erfolg
Bevor wir mit dem Pflanzen beginnen, müssen wir sicherstellen, dass alles bereit ist. Eine gute Vorbereitung ist das A und O für gesunde, riesige Senfblätter.
1. Den richtigen Standort wählen: Senfblätter lieben die Sonne! Sucht euch einen Platz in eurem Garten oder auf eurem Balkon, der mindestens 6 Stunden Sonnenlicht pro Tag bekommt. Wenn ihr in einer sehr heißen Gegend wohnt, kann ein Standort mit etwas Nachmittagsschatten von Vorteil sein, um die Blätter vor Verbrennungen zu schützen.
2. Den Boden vorbereiten: Senfblätter bevorzugen einen gut durchlässigen, fruchtbaren Boden. Wenn ihr Pflanzgefäße verwendet, füllt diese mit hochwertiger Blumenerde. Wenn ihr in einem Gartenbeet pflanzt, lockert den Boden auf und entfernt Steine und Unkraut. Mischt dann reichlich Kompost unter, um die Nährstoffversorgung zu verbessern.
3. Die Samen vorbereiten (optional): Obwohl es nicht unbedingt notwendig ist, könnt ihr die Samen vor dem Pflanzen für 12-24 Stunden in Wasser einweichen. Das hilft, die Keimung zu beschleunigen.
Die Aussaat: Der Start eurer riesigen Senfblätter
Jetzt kommt der spannende Teil: das Pflanzen der Samen!
1. Aussaat in Pflanzgefäßen: Füllt eure Pflanzgefäße mit Erde und befeuchtet sie leicht. Streut die Senfsamen gleichmäßig auf die Oberfläche und bedeckt sie dann mit einer dünnen Schicht Erde (ca. 0,5 cm). Drückt die Erde leicht an.
2. Aussaat im Gartenbeet: Macht kleine Rillen im Abstand von etwa 20-30 cm. Streut die Samen in die Rillen und bedeckt sie mit einer dünnen Schicht Erde. Drückt die Erde leicht an.
3. Gießen: Gießt die Erde vorsichtig, damit die Samen nicht weggespült werden. Die Erde sollte feucht, aber nicht durchnässt sein.
4. Beschriften: Vergesst nicht, eure Pflanzgefäße oder Reihen zu beschriften, damit ihr wisst, was ihr gepflanzt habt!
Die Pflege: Damit eure Senfblätter riesig werden
Die Pflege ist entscheidend, um sicherzustellen, dass eure Senfblätter gesund und groß werden.
1. Gießen: Haltet die Erde feucht, aber nicht durchnässt. Gießt regelmäßig, besonders bei trockenem Wetter. Am besten gießt ihr am Morgen, damit die Blätter Zeit haben, bis zum Abend abzutrocknen und Pilzkrankheiten vermieden werden.
2. Düngen: Senfblätter sind hungrig! Düngt sie alle paar Wochen mit einem organischen Dünger. Ich verwende gerne Fischdünger oder Komposttee. Achtet darauf, die Anweisungen auf der Verpackung zu befolgen, um eine Überdüngung zu vermeiden.
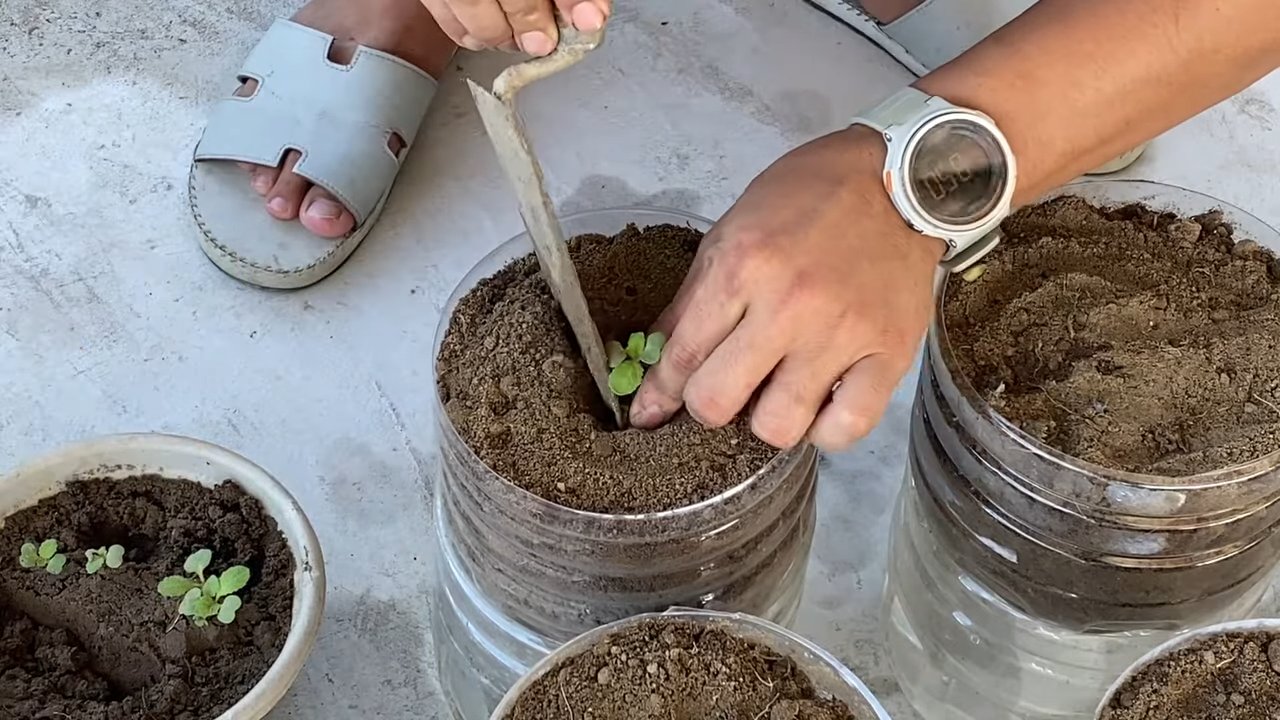
3. Ausdünnen: Sobald die Sämlinge ein paar Zentimeter groß sind, müsst ihr sie ausdünnen, damit sie genügend Platz zum Wachsen haben. Entfernt die schwächsten Sämlinge, so dass die verbleibenden Pflanzen etwa 15-20 cm voneinander entfernt sind.
4. Unkraut jäten: Haltet das Unkraut in Schach, da es mit euren Senfblättern um Nährstoffe und Wasser konkurriert.
5. Schutz vor Schädlingen: Senfblätter können von Blattläusen, Kohlweißlingen und anderen Schädlingen befallen werden. Kontrolliert eure Pflanzen regelmäßig und entfernt Schädlinge von Hand oder mit einem organischen Insektizid. Ich verwende gerne eine Mischung aus Wasser und Neemöl.
6. Mulchen (optional): Eine Schicht Mulch um die Pflanzen hilft, Feuchtigkeit zu speichern, Unkraut zu unterdrücken und den Boden kühl zu halten. Ich verwende gerne Stroh oder Holzhackschnitzel.
Die Ernte: Der Lohn eurer Arbeit
Nach etwa 4-6 Wochen könnt ihr eure riesigen Senfblätter ernten!
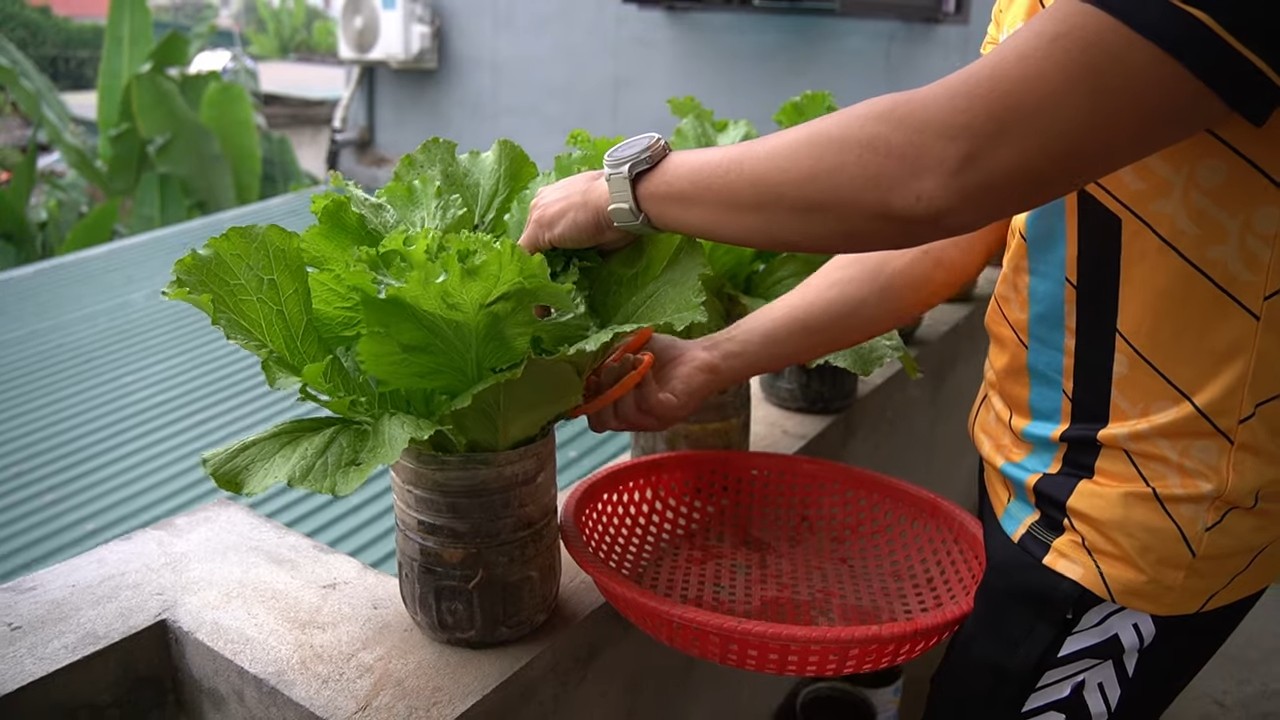
1. Die richtige Zeit: Erntet die Blätter, wenn sie die gewünschte Größe erreicht haben. Je größer die Blätter, desto schärfer der Geschmack.
2. Die richtige Technik: Schneidet die äußeren Blätter mit einem scharfen Messer oder einer Schere ab. Lasst die inneren Blätter stehen, damit die Pflanze weiterwachsen kann.
3. Die Lagerung: Wascht die geernteten Blätter gründlich und trocknet sie ab. Lagert sie in einem Plastikbeutel im Kühlschrank. Sie halten sich dort etwa eine Woche.
Tipps und Tricks für noch größere Senfblätter
Hier sind ein paar zusätzliche Tipps, die euch helfen können, noch größere Senfblätter zu ziehen:
* Regelmäßiges Gießen: Senfblätter brauchen viel Wasser, besonders bei heißem Wetter. Achtet darauf, dass die Erde immer feucht ist.
* Stickstoffreicher Dünger: Stickstoff fördert das Blattwachstum. Verwendet einen Dünger mit einem hohen Stickstoffgehalt, um das Wachstum eurer Senfblätter zu fördern.
* Schattennetz: Wenn ihr in einer sehr heißen Gegend wohnt, kann ein Schattennetz helfen, die Blätter vor Verbrennungen zu schützen und das Wachstum zu fördern.
* Bodenverbesserung: Mischt regelmäßig Kompost oder andere organische Materialien in den Boden, um die Nährstoffversorgung zu verbessern.
* Geduld: Riesige Senfblätter brauchen Zeit zum Wachsen. Seid geduldig und gebt euren Pflanzen die Zeit, die sie brauchen.
Mögliche Probleme und Lösungen
Auch beim Anbau von Senfblättern können Probleme auftreten. Hier sind einige häufige Probleme und wie ihr sie lösen könnt:
* Gelbe Blätter: Gelbe Blätter können ein Zeichen für Nährstoffmangel, Überwässerung oder Schädlingsbefall sein. Überprüft eure Pflanzen sorgfältig und passt eure Pflege entsprechend an.
* Löcher in den Blättern: Löcher in den Blättern werden oft durch Schädlinge verursacht. Kontrolliert eure Pflanzen regelmäßig und entfernt Schädlinge von Hand oder mit einem organischen Insektizid.
* Pilzkrankheiten: Pilzkrankheiten können auftreten, wenn die Blätter zu lange feucht bleiben. Gießt am Morgen und sorgt für eine gute Belüftung.
* Vorzeitige Blüte: Wenn Senfblätter zu früh blühen, werden die Blätter bitter. Dies kann durch Stress, wie z.B. Wassermangel oder Hitze, verursacht werden. Achtet darauf, eure Pflanzen gut zu pflegen, um Stress zu vermeiden.
Rezeptideen mit riesigen Senfblättern
Jetzt, wo ihr eure riesigen Senfblätter geerntet habt, fragt ihr euch vielleicht, was ihr damit anfangen sollt. Hier sind ein paar Rezeptideen:
* Senfblatt-Salat: Schneidet die Blätter in Streifen und mischt sie mit anderen Salatzutaten wie Tomaten, Gurken und Karotten.
* Senfblatt-Suppe: Gebt die Bl
Conclusion
So, there you have it! Growing giant mustard greens isn’t just a gardening experiment; it’s a gateway to a more flavorful, sustainable, and impressive culinary experience. We’ve walked you through the steps, from seed selection to harvesting, highlighting the key factors that contribute to achieving those impressive, plate-sized leaves.
Why is this DIY trick a must-try? Because it empowers you to take control of your food source, ensuring you have access to fresh, nutrient-rich greens whenever you desire. Store-bought mustard greens simply can’t compare to the vibrant flavor and satisfying crunch of homegrown giants. Plus, the sheer size of these leaves opens up a world of culinary possibilities, from wrapping savory fillings to creating stunning salads that are as visually appealing as they are delicious.
But the benefits extend beyond the kitchen. Growing giant mustard greens is a rewarding and educational experience. It connects you to the natural world, teaches you about plant life cycles, and provides a sense of accomplishment as you watch your tiny seeds transform into towering greens. It’s also a fantastic way to reduce your carbon footprint by minimizing your reliance on commercially grown produce that often travels long distances.
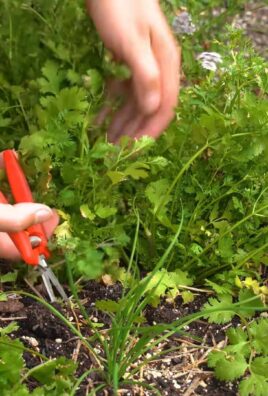
Don’t be afraid to experiment! While we’ve outlined a proven method, there’s always room for personalization. Try different varieties of mustard greens to discover your favorite flavor profile. Some popular choices include ‘Florida Broadleaf,’ ‘Giant Southern Curled,’ and ‘Red Giant.’ You can also adjust the amount of fertilizer based on your soil conditions and the specific needs of your plants. Consider companion planting with herbs like dill or cilantro, which can help deter pests and enhance the flavor of your mustard greens.
For those looking for variations, consider growing your giant mustard greens in raised beds or containers. This can be particularly beneficial if you have poor soil quality or limited space. Just be sure to choose containers that are large enough to accommodate the root systems of these vigorous plants. Another variation is to succession plant your mustard greens, sowing seeds every few weeks to ensure a continuous harvest throughout the growing season. This will prevent you from being overwhelmed with a massive harvest all at once and allow you to enjoy fresh mustard greens for an extended period.
We encourage you to embrace this DIY project and witness the magic of growing giant mustard greens for yourself. It’s a simple yet profound way to connect with nature, enhance your culinary skills, and enjoy the unparalleled flavor of homegrown produce.
Once you’ve embarked on this gardening adventure, we’d love to hear about your experiences! Share your photos, tips, and challenges in the comments section below. Let’s create a community of giant mustard green enthusiasts and learn from each other’s successes and failures. Together, we can unlock the full potential of this incredible plant and inspire others to embrace the joys of homegrown food. So, grab your seeds, prepare your soil, and get ready to grow some truly impressive mustard greens! We are confident that you will find that growing giant mustard greens is a rewarding experience.
Frequently Asked Questions (FAQ)
What are the best varieties of mustard greens to grow for giant leaves?
Several varieties are known for producing larger leaves. ‘Florida Broadleaf’ is a classic choice, known for its mild flavor and impressive size. ‘Giant Southern Curled’ offers a slightly more pungent flavor and deeply ruffled leaves. ‘Red Giant’ is a visually striking option with reddish-purple leaves and a bold, spicy taste. Experiment with different varieties to find the one that best suits your taste preferences and growing conditions. Consider your local climate and soil conditions when selecting your seeds. Some varieties may be better suited to certain regions than others.
How much sunlight do giant mustard greens need?
Mustard greens thrive in full sun, requiring at least 6 hours of direct sunlight per day. However, they can tolerate partial shade, especially in hotter climates. If you live in a region with intense summer heat, providing some afternoon shade can help prevent the leaves from scorching. Monitor your plants closely and adjust their location if necessary to ensure they are receiving adequate sunlight. Insufficient sunlight can result in leggy growth and smaller leaves.
What kind of soil is best for growing giant mustard greens?
Mustard greens prefer well-drained, fertile soil that is rich in organic matter. Amend your soil with compost or well-rotted manure before planting to improve its fertility and drainage. A slightly acidic to neutral soil pH of 6.0 to 7.0 is ideal. You can test your soil pH using a home testing kit or by sending a sample to your local agricultural extension office. If your soil is too acidic, you can add lime to raise the pH. If it’s too alkaline, you can add sulfur to lower the pH.
How often should I water my giant mustard greens?
Water your mustard greens regularly, especially during dry periods. Aim to keep the soil consistently moist but not waterlogged. Water deeply and less frequently, rather than shallowly and more often, to encourage deep root growth. Check the soil moisture level regularly by sticking your finger into the soil. If the top inch of soil feels dry, it’s time to water. Avoid overhead watering, as this can increase the risk of fungal diseases. Instead, water at the base of the plants.
What kind of fertilizer should I use for giant mustard greens?
Mustard greens are heavy feeders and benefit from regular fertilization. Use a balanced fertilizer with equal amounts of nitrogen, phosphorus, and potassium. You can also use a fertilizer that is specifically formulated for leafy greens. Apply fertilizer according to the package directions. Avoid over-fertilizing, as this can lead to excessive leaf growth and reduced flavor. Consider using organic fertilizers, such as compost tea or fish emulsion, to provide your plants with a slow-release source of nutrients.
How do I protect my giant mustard greens from pests?
Mustard greens can be susceptible to pests such as aphids, flea beetles, and cabbage worms. Regularly inspect your plants for signs of infestation. You can control aphids by spraying them with a strong stream of water or by using insecticidal soap. Flea beetles can be controlled by covering your plants with row covers. Cabbage worms can be handpicked off the plants or controlled with Bacillus thuringiensis (Bt), a natural insecticide. Encourage beneficial insects, such as ladybugs and lacewings, to visit your garden by planting flowers that attract them.
When should I harvest my giant mustard greens?
Harvest your mustard greens when the leaves are large and tender, typically about 40-60 days after planting. You can harvest individual leaves as needed or harvest the entire plant at once. To harvest individual leaves, simply cut them off at the base of the plant. To harvest the entire plant, cut it off at the soil line. Avoid harvesting during the hottest part of the day, as this can cause the leaves to wilt.
Can I eat the stems of giant mustard greens?
Yes, the stems of mustard greens are edible, but they can be tough and fibrous. If you plan to eat the stems, it’s best to harvest the plants when they are young and tender. You can also peel the stems to remove the outer layer of fiber. The stems can be chopped and added to stir-fries, soups, or stews.
How do I store giant mustard greens?
Store your mustard greens in the refrigerator in a plastic bag or container. They will keep for several days. To prolong their shelf life, you can wrap them in a damp paper towel before storing them. Avoid washing the greens until you are ready to use them, as this can promote spoilage.
Can I grow giant mustard greens indoors?
Yes, you can grow mustard greens indoors, but you will need to provide them with adequate light. Place them near a sunny window or use grow lights. Be sure to choose a pot that is large enough to accommodate the root systems of these vigorous plants. Water them regularly and fertilize them as needed.
Leave a Comment