
Growing peanuts in plastic bottles might sound like something out of a science fiction novel, but trust me, it’s a surprisingly simple and rewarding DIY project! Have you ever wondered where your favorite peanut butter comes from? Or perhaps you’ve always been curious about the process of cultivating these delicious legumes? Well, now you can experience the joy of harvesting your own peanuts, right from your windowsill or balcony!
While peanuts are now a global snack, their history traces back to South America, where they were cultivated thousands of years ago. They eventually spread across the world, becoming a staple in various cuisines and cultures. Today, we often take for granted the ease with which we can access peanuts, but imagine the satisfaction of nurturing your own plant from seed to harvest.
This DIY trick is perfect for urban dwellers, gardening beginners, or anyone with limited space. Forget sprawling fields – all you need are some recycled plastic bottles, soil, and a handful of peanut seeds. Growing peanuts in plastic bottles not only reduces waste but also provides a fun and educational experience. Plus, who wouldn’t want to impress their friends and family with homegrown peanuts? Let’s dive in and discover how easy it is to cultivate these tasty treats in your own home!

Erdnüsse im Plastikflaschen-Garten: Dein DIY-Guide für den Anbau zu Hause
Hey Gartenfreunde! Habt ihr Lust auf ein spannendes und platzsparendes Gartenprojekt? Dann lasst uns gemeinsam Erdnüsse in Plastikflaschen anbauen! Ja, ihr habt richtig gehört. Das ist nicht nur super einfach, sondern auch eine tolle Möglichkeit, recycelte Materialien zu nutzen und frische, selbst angebaute Erdnüsse zu genießen. Ich zeige euch, wie es geht!
Was du brauchst: Die Materialliste
Bevor wir loslegen, hier eine Liste mit allem, was du für dein Erdnuss-Flaschen-Garten brauchst:
* Plastikflaschen: Am besten eignen sich 1,5-Liter- oder 2-Liter-Flaschen. Je größer, desto besser für die Wurzeln.
* Erdnüsse: Rohe, ungesalzene Erdnüsse in der Schale. Achte darauf, dass sie nicht geröstet sind, denn wir wollen ja, dass sie keimen!
* Blumenerde: Eine gute, nährstoffreiche Blumenerde ist wichtig für das Wachstum.
* Sand: Etwas Sand zur Verbesserung der Drainage.
* Wasser: Zum Gießen, natürlich!
* Messer oder Schere: Zum Zuschneiden der Flaschen.
* Bohrer oder Nagel: Zum Anbringen von Drainagelöchern.
* Sprühflasche: Für die Bewässerung der Keimlinge.
* Etiketten und Stift: Zum Beschriften der Flaschen (optional, aber hilfreich).
* Geduld: Erdnüsse brauchen Zeit zum Wachsen!
Die Vorbereitung: Flaschen und Erde
Bevor wir mit dem Pflanzen beginnen, müssen wir die Flaschen vorbereiten und die Erde mischen. Keine Sorge, das ist ganz einfach!
1. Die Flaschen vorbereiten
1. Reinigung: Spüle die Plastikflaschen gründlich mit Wasser und Spülmittel aus, um alle Rückstände zu entfernen.
2. Drainagelöcher: Bohre oder steche mit einem Nagel mehrere kleine Löcher in den Boden der Flaschen. Diese Löcher sind wichtig, damit überschüssiges Wasser ablaufen kann und die Wurzeln nicht faulen.
3. Zuschneiden (optional): Du kannst die Flaschen entweder ganz lassen oder sie halbieren. Wenn du sie halbierst, hast du zwei separate Behälter. Ich persönlich finde es praktischer, sie ganz zu lassen, da sie dann stabiler sind.
2. Die Erde vorbereiten
1. Mischen: Mische die Blumenerde mit etwas Sand. Das Verhältnis sollte etwa 4:1 sein (4 Teile Blumenerde, 1 Teil Sand). Der Sand sorgt für eine bessere Drainage und verhindert Staunässe.
2. Anfeuchten: Befeuchte die Erde leicht mit Wasser, sodass sie feucht, aber nicht nass ist.
Die Aussaat: Erdnüsse in die Erde bringen
Jetzt kommt der spannende Teil: Wir pflanzen die Erdnüsse!
1. Befüllen: Fülle die vorbereiteten Plastikflaschen mit der Erde. Lasse etwa 2-3 cm Platz bis zum Rand.
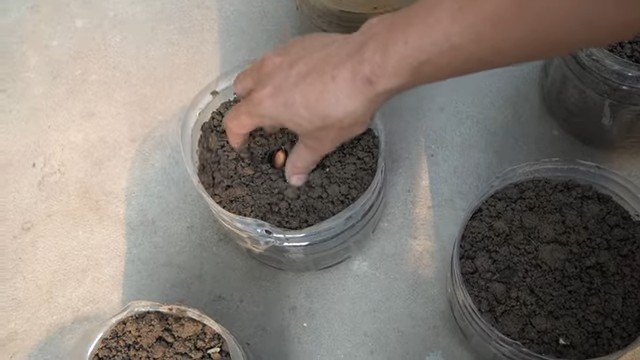
2. Erdnüsse vorbereiten: Wähle die schönsten und prallsten Erdnüsse aus. Du kannst sie entweder direkt in der Schale pflanzen oder die Schale vorsichtig öffnen und die Kerne herausnehmen. Ich habe beides ausprobiert und keinen großen Unterschied festgestellt. Wenn du die Kerne herausnimmst, achte darauf, sie nicht zu beschädigen.
3. Pflanzen: Lege 2-3 Erdnüsse pro Flasche auf die Erde. Drücke sie leicht an und bedecke sie dann mit einer dünnen Schicht Erde (etwa 1-2 cm).
4. Gießen: Gieße die Erde vorsichtig mit einer Sprühflasche, sodass sie gut durchfeuchtet ist. Vermeide es, die Erde zu stark zu gießen, da die Erdnüsse sonst faulen könnten.
5. Beschriften: Beschrifte die Flaschen mit dem Datum und der Sorte (falls du verschiedene Sorten hast).
Die Pflege: Gießen, Licht und Liebe
Nachdem wir die Erdnüsse gepflanzt haben, ist es wichtig, sie gut zu pflegen. Hier sind ein paar Tipps:
1. Gießen: Halte die Erde feucht, aber nicht nass. Gieße regelmäßig, besonders an heißen Tagen. Überprüfe die Feuchtigkeit der Erde, indem du mit dem Finger in die Erde stichst. Wenn sie sich trocken anfühlt, ist es Zeit zum Gießen.
2. Licht: Erdnüsse brauchen viel Sonnenlicht. Stelle die Flaschen an einen sonnigen Ort, z.B. auf einen Balkon, eine Terrasse oder an ein Fensterbrett.
3. Düngen: Nach etwa 4-6 Wochen kannst du mit dem Düngen beginnen. Verwende einen organischen Flüssigdünger und befolge die Anweisungen auf der Verpackung.
4. Schutz vor Schädlingen: Achte auf Schädlinge wie Blattläuse oder Schnecken. Wenn du welche entdeckst, kannst du sie mit natürlichen Mitteln bekämpfen, z.B. mit einer Seifenlauge oder Neemöl.
5. Stützen: Wenn die Pflanzen größer werden, kann es sein, dass sie eine Stütze brauchen. Du kannst Bambusstäbe oder andere Stäbe verwenden, um sie zu stützen.
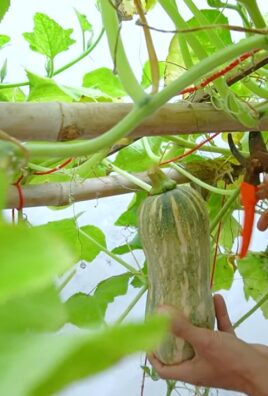
Die Ernte: Wenn die Erdnüsse reif sind
Die Erntezeit ist der aufregendste Teil! Erdnüsse brauchen etwa 4-5 Monate, um zu reifen. Hier sind ein paar Anzeichen, dass es Zeit für die Ernte ist:
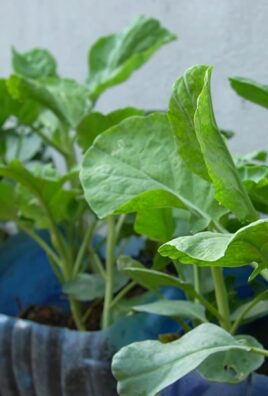
1. Vergilbte Blätter: Die Blätter der Erdnusspflanzen werden gelb und trocken.
2. Braune Schalen: Die Schalen der Erdnüsse werden braun und hart.
3. Volle Schalen: Wenn du eine Erdnuss ausgräbst und die Schale voll mit Erdnüssen ist, ist es Zeit für die Ernte.
Die Ernte durchführen
1. Ausgraben: Gieße die Erde gut an, bevor du die Erdnüsse ausgräbst. Ziehe die Pflanzen vorsichtig aus der Erde.
2. Reinigen: Schüttle die Erde von den Erdnüssen ab und spüle sie mit Wasser ab.
3. Trocknen: Lege die Erdnüsse an einen trockenen, luftigen Ort, um sie zu trocknen. Das kann ein paar Tage bis zu einer Woche dauern.
4. Lagern: Bewahre die getrockneten Erdnüsse an einem kühlen, trockenen Ort auf. Du kannst sie entweder in der Schale lagern oder die Kerne herausnehmen und in einem luftdichten Behälter aufbewahren.
Extra-Tipps für den Erdnuss-Erfolg
* Wähle die richtige Sorte: Es gibt verschiedene Erdnusssorten. Informiere dich, welche Sorte am besten für dein Klima geeignet ist.
* Geduld ist wichtig: Erdnüsse brauchen Zeit zum Wachsen. Sei geduldig und gib nicht auf, wenn es nicht sofort klappt.
* Experimentiere: Probiere verschiedene Anbaumethoden aus und finde heraus, was für dich am besten funktioniert.
* Teile deine Erfahrungen: Tausche dich mit anderen Gartenfreunden aus und teile deine Erfahrungen.
Häufige Probleme und Lösungen
* Keine Keimung: Wenn die Erdnüsse nicht keimen, kann das verschiedene Gründe haben. Vielleicht waren sie zu alt, zu trocken oder zu nass. Versuche es mit frischen Erdnüssen und achte auf die richtige Bewässerung.
* Gelbe Blätter: Gelbe Blätter können ein Zeichen für Nährstoffmangel sein. Dünge die Pflanzen mit einem organischen Dünger.
* Schädlinge: Kontrolliere die Pflanzen regelmäßig auf Schädlinge und bekämpfe sie bei Bedarf mit natürlichen Mitteln.
* Faule Erdnüsse: Faule Erdnüsse sind ein Zeichen für Staunässe. Achte auf eine gute Drainage und gieße nicht zu viel.
Fazit: Dein eigener Erdnuss-Snack aus dem Flaschengarten
Ich hoffe, dieser Guide hat dir geholfen, deine eigenen Erdnüsse im Plastikflaschen-Garten anzubauen. Es ist ein tolles Projekt, das nicht nur Spaß macht, sondern auch nachhaltig ist. Mit etwas Geduld
Conclusion
So, there you have it! Growing peanuts in plastic bottles isn’t just a quirky gardening experiment; it’s a surprisingly effective and rewarding way to cultivate your own fresh, delicious peanuts, even if you’re short on space or live in an area with less-than-ideal soil conditions. This method offers a unique opportunity to witness the entire peanut life cycle up close, from the initial sprouting to the eventual harvest of those satisfyingly crunchy legumes.
Why is this DIY trick a must-try? Because it democratizes peanut cultivation! No sprawling fields or specialized equipment are required. All you need are some recycled plastic bottles, good quality soil, peanut seeds, and a little bit of patience. It’s an incredibly accessible project for beginner gardeners, children, and anyone looking for a fun and educational activity. Plus, it’s a fantastic way to reduce waste by repurposing those plastic bottles that might otherwise end up in a landfill.
Beyond the practical benefits, growing peanuts in plastic bottles offers a unique connection to your food. There’s something incredibly satisfying about nurturing a plant from seed to harvest and then enjoying the fruits (or rather, the nuts!) of your labor. You’ll gain a deeper appreciation for the process of food production and the natural world around you.
Ready to take your peanut growing to the next level? Consider these variations:
* **Vertical Peanut Garden:** Stack multiple bottle planters vertically to create a space-saving peanut tower. This is especially useful for balconies or small patios.
* **Companion Planting:** Experiment with planting herbs like basil or thyme alongside your peanuts. These herbs can help deter pests and improve the overall health of your plants.
* **Different Peanut Varieties:** Explore different peanut varieties to find your favorite flavor and texture. Virginia peanuts are known for their large size, while Spanish peanuts have a sweeter taste.
* **Nutrient Boost:** Supplement your soil with organic fertilizers like compost tea or worm castings to provide your peanuts with the nutrients they need to thrive.
We’re confident that you’ll find growing peanuts in plastic bottles to be a fun, educational, and ultimately delicious experience. Don’t be afraid to experiment, adapt the method to your specific needs and environment, and most importantly, have fun!
We encourage you to embark on this peanut-growing adventure and share your experiences with us. Post photos of your bottle planters, share your tips and tricks, and let us know how your peanuts turn out. We’re eager to see your successes and learn from your challenges. Let’s build a community of bottle-peanut-growing enthusiasts! So, grab those plastic bottles, get your hands dirty, and start growing your own delicious, homegrown peanuts today. This DIY project is a fantastic way to learn about plant life cycles and enjoy the rewarding experience of harvesting your own food.
Frequently Asked Questions (FAQ)
What kind of plastic bottles are best for growing peanuts?
Ideally, you should use clear or translucent plastic bottles that are at least two liters in size. The larger the bottle, the more room the peanut plants will have to grow. Make sure the bottles are clean and free of any residue from previous contents. Avoid using dark-colored bottles, as they can absorb too much heat and potentially damage the roots. You can also use different shapes of bottles, but ensure they are stable and won’t easily tip over.
What type of soil should I use for growing peanuts in plastic bottles?
Peanuts thrive in well-draining, sandy loam soil. You can purchase a pre-mixed potting mix specifically designed for vegetables, or you can create your own mix by combining equal parts of garden soil, sand, and compost. Avoid using heavy clay soil, as it can become waterlogged and hinder root development. Good drainage is crucial for preventing root rot and ensuring healthy peanut growth.
How often should I water my peanut plants in plastic bottles?
Water your peanut plants regularly, especially during hot and dry weather. The soil should be kept consistently moist, but not waterlogged. Check the soil moisture by sticking your finger about an inch into the soil. If it feels dry, it’s time to water. Water deeply, allowing the water to drain out of the bottom of the bottle. Avoid overhead watering, as this can increase the risk of fungal diseases.
How much sunlight do peanut plants need?
Peanut plants need at least 6-8 hours of direct sunlight per day to thrive. Place your bottle planters in a sunny location, such as a south-facing window or a sunny patio. If you live in an area with intense sunlight, you may need to provide some shade during the hottest part of the day to prevent the leaves from scorching.
How long does it take to grow peanuts in plastic bottles?
It typically takes about 120-150 days from planting to harvest. The exact time will depend on the peanut variety, the growing conditions, and the climate. You’ll know your peanuts are ready to harvest when the leaves start to turn yellow and the pods are mature and plump.
How do I harvest peanuts from plastic bottles?
Harvesting is simple! Gently cut open the plastic bottle and carefully remove the soil and peanut plants. Shake off any excess soil and then pull the peanuts from the roots. You can then cure the peanuts by drying them in a well-ventilated area for several weeks.
Are there any pests or diseases that affect peanut plants grown in plastic bottles?
Peanut plants can be susceptible to pests such as aphids, spider mites, and whiteflies. Regularly inspect your plants for signs of infestation and take appropriate action, such as spraying with insecticidal soap or neem oil. Fungal diseases like leaf spot can also be a problem. Ensure good air circulation and avoid overhead watering to minimize the risk of fungal diseases.
Can I grow peanuts indoors in plastic bottles?
While it’s possible to grow peanuts indoors in plastic bottles, it can be challenging to provide them with the necessary sunlight and growing conditions. If you choose to grow them indoors, make sure to place them in a sunny location and supplement with artificial grow lights if needed.
What do I do with the peanut plants after harvesting the peanuts?
After harvesting the peanuts, you can compost the peanut plants. They are a good source of nitrogen and other nutrients for your compost pile. Alternatively, you can use them as mulch around other plants in your garden.
Can I reuse the soil from the plastic bottles for other plants?
Yes, you can reuse the soil from the plastic bottles for other plants, but it’s a good idea to amend it with fresh compost or other organic matter to replenish the nutrients. You may also want to sterilize the soil by baking it in the oven to kill any potential pests or diseases.
Leave a Comment