
Grow Onions in Plastic Bottles: Unlock a world of gardening possibilities with this surprisingly simple DIY trick! Have you ever dreamed of a bountiful onion harvest but felt limited by space or soil conditions? I know I have! For centuries, onions have been a staple in cuisines worldwide, from the humble French onion soup to the vibrant salsas of Mexico. Their pungent flavor and versatility make them indispensable in the kitchen. But what if I told you that you could cultivate these culinary gems right in your own home, using something you probably already have lying around – plastic bottles?
This DIY guide isn’t just about recycling; it’s about empowering you to become a more resourceful and successful gardener. Many people struggle with traditional gardening due to limited space, poor soil quality, or even just the time commitment required. This method of growing onions in plastic bottles offers a fantastic solution, allowing you to bypass these common obstacles. Imagine fresh, homegrown onions readily available for your favorite recipes, all thanks to a few repurposed plastic bottles and a little bit of know-how. Let’s dive in and discover how you can easily grow onions in plastic bottles and enjoy a delicious harvest!
Zwiebeln ziehen in Plastikflaschen: Ein DIY-Gartenprojekt für Jedermann
Hallo Gartenfreunde! Habt ihr euch jemals gefragt, ob es möglich ist, Zwiebeln auf kleinstem Raum anzubauen? Ich zeige euch heute, wie ihr aus alten Plastikflaschen kleine Zwiebelparadiese zaubern könnt. Dieses DIY-Projekt ist nicht nur super nachhaltig, sondern auch unglaublich platzsparend und einfach umzusetzen. Lasst uns loslegen!
Was ihr braucht:
* Plastikflaschen: Am besten eignen sich 1,5-Liter- oder 2-Liter-Flaschen. Je größer die Flasche, desto mehr Platz für eure Zwiebeln.
* Erde: Normale Blumenerde oder Gartenerde ist perfekt. Achtet darauf, dass sie locker und gut durchlässig ist.
* Zwiebeln: Ihr könnt entweder Steckzwiebeln verwenden oder Zwiebeln, die bereits ausgetrieben haben. Letzteres ist eine tolle Möglichkeit, Küchenabfälle zu verwerten!
* Messer oder Schere: Zum Zuschneiden der Plastikflaschen.
* Bohrer oder Nagel: Für die Drainage-Löcher.
* Gießkanne: Zum Bewässern eurer Zwiebeln.
* Optional: Kompost oder organischer Dünger für zusätzliche Nährstoffe.
* Optional: Handschuhe, um eure Hände sauber zu halten.
Vorbereitung der Plastikflaschen
Dieser Schritt ist entscheidend, um die Grundlage für eure kleinen Zwiebelgärten zu schaffen. Nehmt euch Zeit und arbeitet sorgfältig.
1. Reinigung: Zuerst müsst ihr die Plastikflaschen gründlich reinigen. Entfernt alle Etiketten und spült die Flaschen mit warmem Wasser und Spülmittel aus. Achtet darauf, dass keine Spülmittelreste zurückbleiben.
2. Zuschneiden: Jetzt kommt der spannende Teil! Schneidet die Plastikflaschen in der Mitte durch. Ihr könnt entweder beide Hälften verwenden oder nur die untere Hälfte. Wenn ihr beide Hälften verwendet, könnt ihr die obere Hälfte umgedreht als eine Art Mini-Gewächshaus auf die untere Hälfte setzen, um die Zwiebeln vor Kälte und Schädlingen zu schützen. Ich persönlich bevorzuge es, nur die untere Hälfte zu verwenden, da sie stabiler ist.
3. Drainage-Löcher: Damit das Wasser gut ablaufen kann und eure Zwiebeln nicht in Staunässe stehen, bohrt oder nagelt ihr mehrere kleine Löcher in den Boden der Flaschen. Achtet darauf, dass die Löcher nicht zu groß sind, damit die Erde nicht herausfällt.
4. Optional: Wenn ihr die obere Hälfte der Flasche als Mini-Gewächshaus verwenden möchtet, schneidet ihr den Flaschenhals ab und setzt die obere Hälfte umgedreht auf die untere Hälfte.
Das Einpflanzen der Zwiebeln
Jetzt geht es ans Eingemachte! Hier zeige ich euch, wie ihr die Zwiebeln richtig in die vorbereiteten Flaschen pflanzt.
1. Erde einfüllen: Füllt die Plastikflaschen mit Erde. Lasst etwa 2-3 cm Platz bis zum Rand. Die Erde sollte locker und nicht zu fest angedrückt sein.
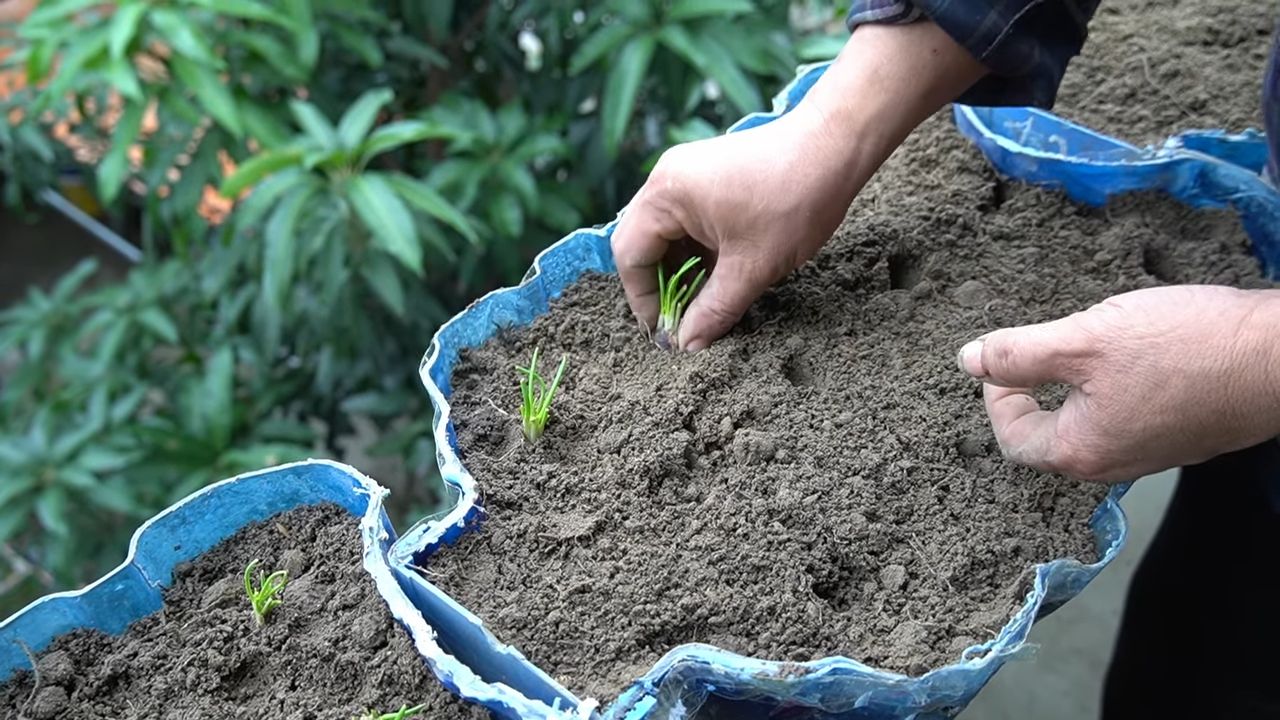
2. Zwiebeln setzen: Setzt die Zwiebeln mit der Wurzel nach unten in die Erde. Achtet darauf, dass die Zwiebeln nicht zu tief in der Erde stecken. Die Spitze der Zwiebel sollte noch aus der Erde herausschauen.
3. Abstand halten: Wenn ihr mehrere Zwiebeln in eine Flasche pflanzt, achtet darauf, dass genügend Abstand zwischen den Zwiebeln ist. Etwa 5-7 cm Abstand sind ideal.
4. Angießen: Gießt die Zwiebeln vorsichtig an. Die Erde sollte gut durchfeuchtet sein, aber nicht zu nass.
Pflege eurer Zwiebeln
Die richtige Pflege ist das A und O für eine erfolgreiche Zwiebelernte. Hier sind meine besten Tipps:
1. Standort: Stellt die Plastikflaschen an einen sonnigen Standort. Zwiebeln lieben die Sonne! Ein Südfenster oder ein sonniger Balkon sind ideal.
2. Bewässerung: Gießt die Zwiebeln regelmäßig, aber nicht zu viel. Die Erde sollte immer leicht feucht sein. Vermeidet Staunässe, da dies zu Fäulnis führen kann.
3. Düngung: Düngt die Zwiebeln alle paar Wochen mit Kompost oder organischem Dünger. Dies sorgt für eine gute Nährstoffversorgung und fördert das Wachstum.
4. Schutz vor Schädlingen: Kontrolliert die Zwiebeln regelmäßig auf Schädlinge. Bei Bedarf könnt ihr natürliche Schädlingsbekämpfungsmittel verwenden.
5. Optional: Wenn ihr die obere Hälfte der Flasche als Mini-Gewächshaus verwendet, lüftet die Zwiebeln regelmäßig, um Schimmelbildung zu vermeiden.
Erntezeit!
Nach einigen Wochen oder Monaten (je nach Zwiebelsorte) sind eure Zwiebeln erntereif.
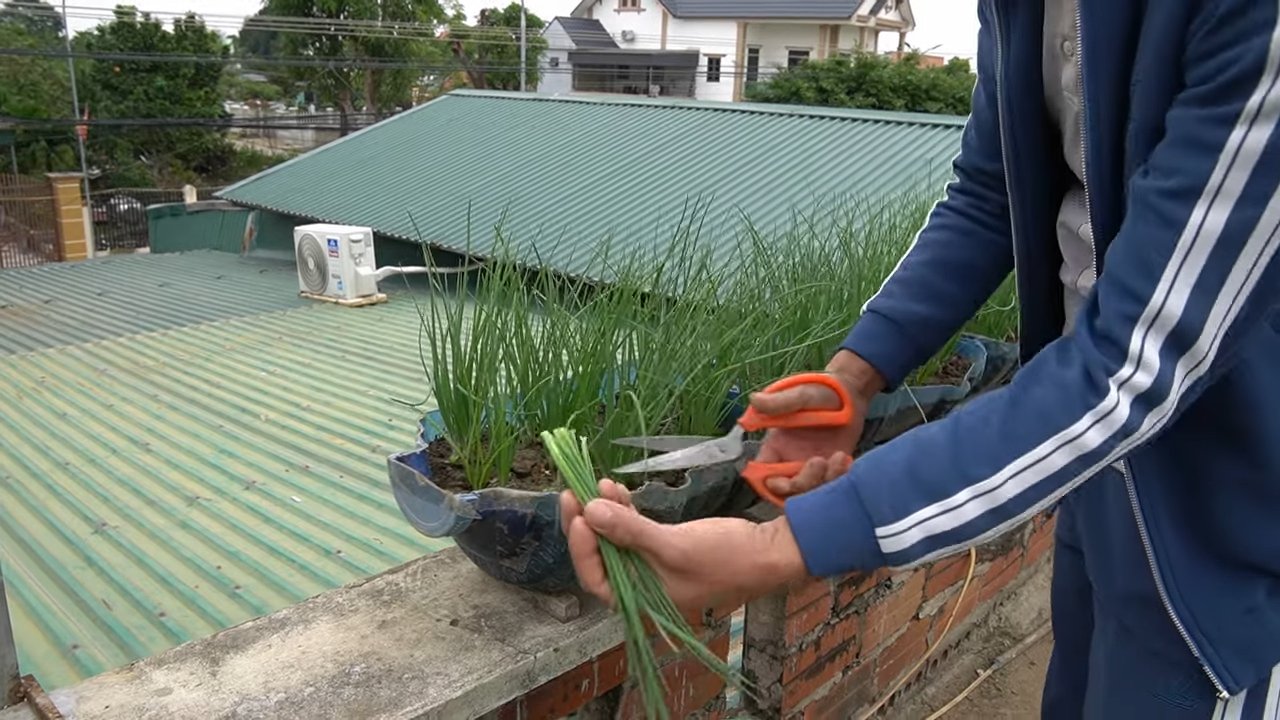
1. Erntezeitpunkt: Die Zwiebeln sind erntereif, wenn das Laub gelb wird und umknickt.
2. Ernten: Zieht die Zwiebeln vorsichtig aus der Erde.
3. Trocknen: Lasst die Zwiebeln einige Tage an einem trockenen und luftigen Ort trocknen.
4. Lagern: Lagert die getrockneten Zwiebeln an einem kühlen und dunklen Ort.
Zusätzliche Tipps und Tricks
* Verschiedene Zwiebelsorten: Probiert verschiedene Zwiebelsorten aus, um herauszufinden, welche am besten in euren Plastikflaschen wachsen.
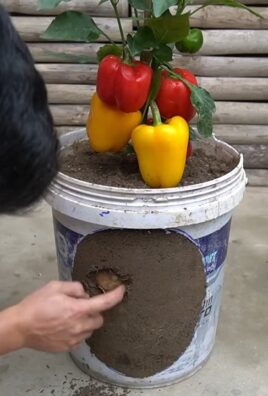
* Kombination mit anderen Pflanzen: Ihr könnt Zwiebeln auch mit anderen Pflanzen kombinieren, die ähnliche Ansprüche haben.
* Upcycling: Verwendet alte Plastikflaschen, um euren Beitrag zur Nachhaltigkeit zu leisten.
* Beschriftung: Beschriftet die Plastikflaschen mit dem Namen der Zwiebelsorte und dem Pflanzdatum.
* Beobachtung: Beobachtet eure Zwiebeln genau und passt die Pflege entsprechend an.
Häufige Probleme und Lösungen
* Gelbe Blätter: Gelbe Blätter können ein Zeichen für Überwässerung oder Nährstoffmangel sein. Reduziert die Bewässerung oder düngt die Zwiebeln.
* Fäulnis: Fäulnis kann durch Staunässe verursacht werden. Achtet auf eine gute Drainage und vermeidet Überwässerung.
* Schädlinge: Kontrolliert die Zwiebeln regelmäßig auf Schädlinge und verwendet bei Bedarf natürliche Schädlingsbekämpfungsmittel.
* Langsames Wachstum: Langsames Wachstum kann durch zu wenig Sonne oder Nährstoffmangel verursacht werden. Stellt die Zwiebeln an einen sonnigeren Standort und düngt sie regelmäßig.
Warum Zwiebeln in Plastikflaschen anbauen?
* Platzsparend: Ideal für kleine Balkone oder Terrassen.
* Nachhaltig: Upcycling von Plastikflaschen.
* Einfach: Auch für Anfänger geeignet.
* Erfolgreich: Mit der richtigen Pflege könnt ihr eine reiche Zwiebelernte erzielen.
* Lehrreich: Eine tolle Möglichkeit, Kindern die Natur näherzubringen.
Fazit
Ich hoffe, dieser Artikel hat euch inspiriert, eure eigenen Zwiebeln in Plastikflaschen anzubauen. Es ist ein einfaches, nachhaltiges und lohnendes Projekt, das euch mit frischen Zwiebeln aus eurem eigenen kleinen Garten belohnt. Viel Spaß beim Gärtnern!
Conclusion
So, there you have it! Growing onions in plastic bottles isn’t just a quirky gardening experiment; it’s a genuinely effective and rewarding way to cultivate fresh, flavorful onions, even if you’re short on space or dealing with less-than-ideal soil conditions. This DIY trick transforms discarded plastic bottles from environmental liabilities into miniature onion farms, allowing you to enjoy the satisfaction of harvesting your own produce right from your windowsill or balcony.
The beauty of this method lies in its simplicity and adaptability. It’s a fantastic project for beginners, teaching fundamental gardening principles in a hands-on, engaging way. Plus, it’s incredibly cost-effective, repurposing materials that would otherwise end up in landfills. Imagine the pride of serving a salad made with onions you nurtured from tiny seedlings within a recycled bottle!
But the benefits extend beyond mere convenience and cost savings. Growing onions in plastic bottles offers superior control over the growing environment. You can easily monitor soil moisture, adjust sunlight exposure, and protect your precious onions from pests and diseases. This level of control often translates to healthier plants and a more bountiful harvest.
Don’t be afraid to experiment with different onion varieties! While traditional bulb onions thrive in this setup, you can also try growing scallions, chives, or even shallots. Consider using different types of soil mixes to see which one yields the best results in your specific climate and conditions. You can also explore different bottle sizes and configurations to optimize space and maximize your yield. Perhaps try a tiered system using multiple bottles stacked vertically!
Ready to ditch the store-bought onions and embrace the joy of homegrown flavor? We wholeheartedly encourage you to give this DIY onion-growing trick a try. It’s a fun, sustainable, and ultimately delicious way to connect with nature and enjoy the fruits (or rather, vegetables) of your labor.
Once you’ve embarked on your plastic bottle onion-growing adventure, we’d love to hear about your experiences! Share your tips, tricks, and triumphs in the comments below. Let’s build a community of bottle-gardening enthusiasts and inspire others to discover the magic of growing their own food, one recycled bottle at a time. Your insights could be invaluable to someone just starting out, and together, we can make a positive impact on both our plates and the planet. So, grab some plastic bottles, some soil, and some onion sets, and get ready to experience the satisfaction of growing your own delicious, homegrown onions! This method of growing onions in plastic bottles is a game changer!
Frequently Asked Questions (FAQ)
What type of plastic bottles are best for growing onions?
Ideally, you should use clear or translucent plastic bottles that are at least 2 liters in size. Larger bottles provide more space for the onion bulbs to develop. Avoid using dark-colored bottles, as they can absorb too much heat and potentially damage the roots. Thoroughly clean the bottles with soap and water before using them to remove any residue that could harm the plants. Make sure to rinse them well to remove all traces of soap. Bottles that previously contained sugary drinks should be cleaned particularly well to prevent attracting pests.
What kind of soil should I use for growing onions in plastic bottles?
A well-draining potting mix is crucial for success. Onions need soil that retains moisture but doesn’t become waterlogged. A good mix would consist of equal parts of potting soil, compost, and perlite or vermiculite. The compost provides essential nutrients, while the perlite or vermiculite improves drainage and aeration. Avoid using garden soil directly, as it can be too heavy and may contain pests or diseases. You can also add a slow-release fertilizer to the soil mix to provide a steady supply of nutrients throughout the growing season.
How often should I water my onions grown in plastic bottles?
Watering frequency depends on the climate, the type of soil, and the size of the bottle. Generally, you should water when the top inch of soil feels dry to the touch. Avoid overwatering, as this can lead to root rot. Ensure that the bottle has drainage holes to allow excess water to escape. During hot, dry weather, you may need to water more frequently. Check the soil moisture daily, especially during the early stages of growth. A good rule of thumb is to water deeply but infrequently, allowing the soil to dry out slightly between waterings.
How much sunlight do onions need when grown in plastic bottles?
Onions need at least 6-8 hours of direct sunlight per day to thrive. Place your plastic bottle gardens in a sunny location, such as a windowsill, balcony, or patio. If you don’t have access to enough natural sunlight, you can supplement with grow lights. Rotate the bottles regularly to ensure that all sides of the plants receive adequate light. Insufficient sunlight can result in weak, leggy growth and smaller bulbs. If you notice your onions are not growing well, try moving them to a sunnier spot.
How do I prevent pests and diseases when growing onions in plastic bottles?
Prevention is key when it comes to pests and diseases. Start with healthy onion sets and use a clean potting mix. Regularly inspect your plants for any signs of pests or diseases. Common onion pests include aphids, thrips, and onion maggots. You can control these pests with insecticidal soap or neem oil. Diseases such as onion rot can be prevented by ensuring good drainage and avoiding overwatering. Remove any infected leaves or plants immediately to prevent the spread of disease. You can also use organic fungicides to protect your onions from fungal infections.
Can I grow onions from seed in plastic bottles?
Yes, you can grow onions from seed in plastic bottles, but it requires more patience and effort than using onion sets. Start the seeds indoors about 8-10 weeks before the last expected frost. Sow the seeds in a seed-starting mix and keep them moist. Once the seedlings are large enough to handle, transplant them into the plastic bottles. Be sure to harden off the seedlings before transplanting them outdoors. Growing onions from seed takes longer than using sets, but it can be a more economical option.
How long does it take to grow onions in plastic bottles?
The time it takes to grow onions in plastic bottles depends on the variety of onion, the growing conditions, and whether you are using sets or seeds. Generally, onions grown from sets take about 90-120 days to mature, while onions grown from seed can take up to 150 days. You’ll know your onions are ready to harvest when the tops start to turn yellow and fall over. At this point, you can gently pull the onions from the soil and allow them to cure in a dry, well-ventilated place for a few days before storing them.
What are some variations I can try when growing onions in plastic bottles?
There are many ways to customize your plastic bottle onion garden. You can try growing different varieties of onions, such as red onions, white onions, or yellow onions. You can also experiment with different soil mixes and fertilizers to see what works best for your plants. Consider adding companion plants, such as marigolds or basil, to help deter pests. You can also create a vertical garden by stacking multiple plastic bottles on top of each other. Get creative and have fun experimenting with different techniques to find what works best for you.
How do I harvest and store onions grown in plastic bottles?
Harvest your onions when the tops start to turn yellow and fall over. Gently pull the onions from the soil and brush off any excess dirt. Allow the onions to cure in a dry, well-ventilated place for a few days until the outer skins are dry and papery. Once cured, you can store the onions in a cool, dark, and dry place. Braided onions can be hung in a pantry or cellar. Properly stored onions can last for several months. Avoid storing onions near potatoes, as they can cause each other to spoil more quickly.
What if my onions don’t seem to be growing well in the plastic bottles?
If your onions are not growing well, there are several factors to consider. First, make sure they are getting enough sunlight, water, and nutrients. Check the soil moisture regularly and adjust your watering schedule as needed. Fertilize your onions with a balanced fertilizer every few weeks. Also, inspect your plants for any signs of pests or diseases. If you find any problems, take action immediately to prevent them from spreading. If you’ve addressed all of these factors and your onions are still not growing well, consider transplanting them into a larger container or a different location.
Leave a Comment