
Grow Bitter Melon Terrace: Imagine stepping onto your terrace and being greeted by a lush, vibrant green canopy, laden with healthy, homegrown bitter melons. Sounds idyllic, right? Well, it’s more achievable than you might think! For centuries, cultivating food in personal spaces has been a cornerstone of self-sufficiency and connection to nature. From ancient rooftop gardens in Babylon to the modern-day victory gardens, the desire to nurture life and reap its rewards is deeply ingrained in us.
But let’s be honest, the thought of growing your own food, especially something like bitter melon, can feel daunting. Where do you even begin? That’s where this DIY guide comes in! We’re going to break down the process of how to grow bitter melon terrace style, making it accessible and enjoyable for everyone, regardless of your gardening experience.
Why bitter melon, you ask? Beyond its unique, slightly bitter flavor (which is delicious in stir-fries and soups!), this vegetable is packed with nutrients and has been used in traditional medicine for generations. Plus, growing your own means you know exactly what’s going into your food – no pesticides or hidden chemicals! This DIY project is not just about growing a vegetable; it’s about embracing a healthier lifestyle, connecting with nature, and adding a touch of beauty to your outdoor space. So, grab your gardening gloves, and let’s get started!
Balkon-Bittermelone: Dein DIY-Leitfaden für eine reiche Ernte
Hallo Gartenfreunde! Habt ihr schon mal überlegt, Bittermelone anzubauen? Diese ungewöhnliche Frucht ist nicht nur super gesund, sondern auch ein echter Hingucker auf dem Balkon. Ich zeige euch, wie ihr mit einfachen Mitteln eine üppige Bittermelonen-Terrasse zaubern könnt. Keine Angst, es ist einfacher als ihr denkt!
Was du für dein Bittermelonen-Paradies brauchst
Bevor wir loslegen, hier eine Liste mit allem, was du benötigst:
* Bittermelonen-Samen: Am besten Bio-Qualität, um sicherzustellen, dass sie nicht behandelt wurden.
* Anzuchttöpfe: Kleine Töpfe oder Anzuchtplatten sind ideal für den Start.
* Anzuchterde: Spezielle Erde für die Anzucht ist nährstoffarm und fördert die Wurzelbildung.
* Große Pflanzgefäße: Mindestens 20 Liter Volumen pro Pflanze, damit die Wurzeln genug Platz haben.
* Kletterhilfe: Ein Rankgitter, Bambusstäbe oder ein stabiles Seilnetz, an dem die Bittermelone hochranken kann.
* Gute Blumenerde: Eine Mischung aus Gartenerde, Kompost und etwas Sand sorgt für eine gute Drainage.
* Organischer Dünger: Hornspäne, Kompost oder ein spezieller Gemüsedünger versorgen die Pflanze mit Nährstoffen.
* Gießkanne oder Schlauch: Zum regelmäßigen Bewässern.
* Gartenschere: Zum Beschneiden der Pflanze.
* Sprühflasche: Für die Bewässerung der Sämlinge und zur Erhöhung der Luftfeuchtigkeit.
* Sonniger Standort: Bittermelonen lieben die Sonne!
* Geduld: Gute Dinge brauchen Zeit!
Die Vorbereitung: Samen zum Leben erwecken
Die Vorbereitung ist das A und O für eine erfolgreiche Bittermelonen-Ernte. Wir starten mit der Anzucht der Samen.
1. Samen vorbereiten: Bittermelonen-Samen haben eine harte Schale. Um die Keimung zu beschleunigen, kannst du sie leicht anrauen. Nimm ein Stück Schleifpapier oder eine Nagelfeile und raue die Oberfläche vorsichtig an. Achte darauf, die Samen nicht zu beschädigen!
2. Einweichen: Lege die angerauten Samen für 24 Stunden in lauwarmes Wasser. Das hilft, die Schale aufzuweichen und die Keimung zu fördern.
3. Aussaat: Fülle die Anzuchttöpfe mit Anzuchterde. Drücke die Erde leicht an und lege in jeden Topf einen Samen. Bedecke die Samen mit etwa einem Zentimeter Erde.
4. Bewässern: Befeuchte die Erde vorsichtig mit einer Sprühflasche. Die Erde sollte feucht, aber nicht nass sein.
5. Warm und hell stellen: Stelle die Anzuchttöpfe an einen warmen und hellen Ort. Eine Temperatur von 25-30°C ist ideal. Ein Mini-Gewächshaus oder eine durchsichtige Plastikfolie über den Töpfen hilft, die Luftfeuchtigkeit zu erhöhen.
6. Geduld haben: Nach etwa einer Woche sollten die ersten Keimlinge zu sehen sein. Halte die Erde weiterhin feucht und lüfte die Töpfe regelmäßig, um Schimmelbildung zu vermeiden.
Umzug ins Freie: Die Bittermelone zieht um
Sobald die kleinen Bittermelonen-Pflänzchen kräftig genug sind (etwa 10-15 cm hoch und mit mehreren Blättern), können sie ins Freie umziehen.
1. Abhärten: Bevor du die Pflanzen ins Freie setzt, solltest du sie langsam an die neuen Bedingungen gewöhnen. Stelle sie für ein paar Stunden am Tag nach draußen und verlängere die Zeit jeden Tag. So vermeidest du einen Schock für die Pflanzen.
2. Pflanzgefäße vorbereiten: Fülle die großen Pflanzgefäße mit guter Blumenerde. Mische etwas Kompost und Sand unter, um die Drainage zu verbessern.
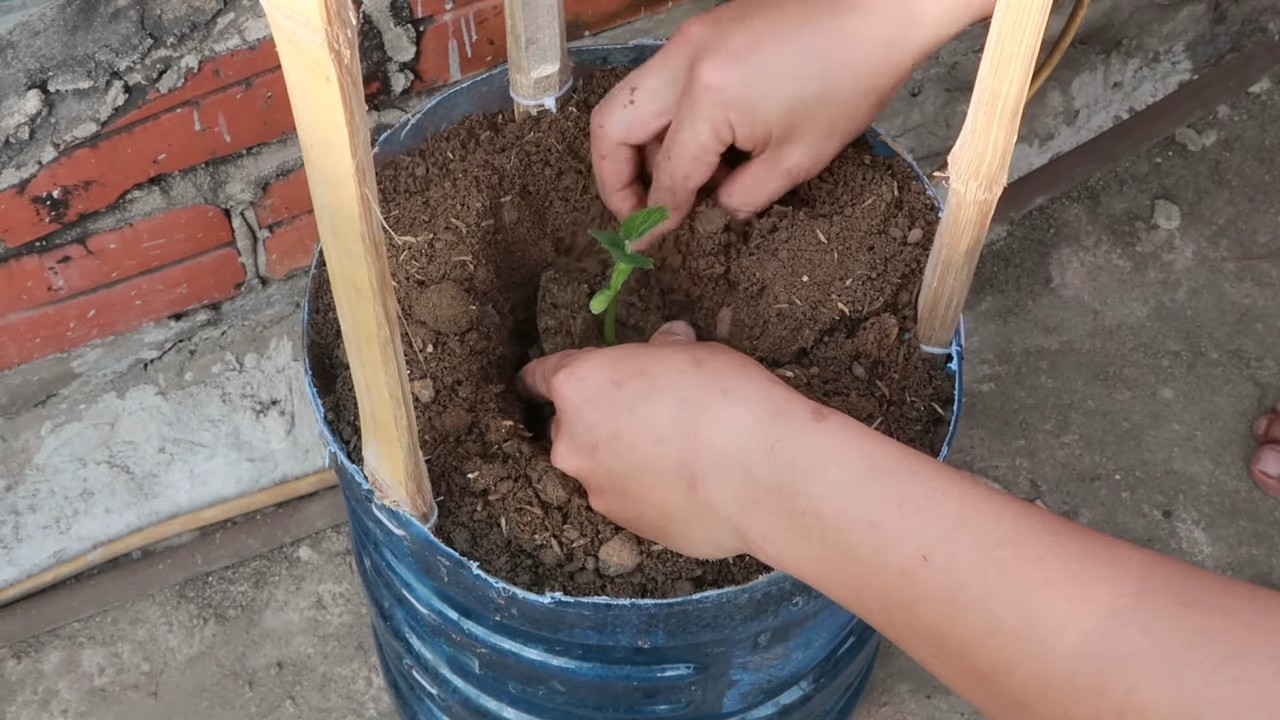
3. Pflanzen umtopfen: Grabe ein Loch in die Erde, das groß genug für den Wurzelballen ist. Nimm die Pflanze vorsichtig aus dem Anzuchttopf und setze sie in das Loch. Fülle das Loch mit Erde auf und drücke sie leicht an.
4. Kletterhilfe installieren: Platziere die Kletterhilfe direkt neben der Pflanze. Die Bittermelone wird sich daran festhalten und hochranken.
5. Angießen: Gieße die Pflanzen nach dem Umtopfen gründlich an.
Pflegeleicht und ertragreich: So bleibt deine Bittermelone glücklich
Die Bittermelone ist relativ pflegeleicht, aber ein paar Dinge solltest du beachten, damit sie sich wohlfühlt und viele Früchte trägt.
1. Bewässerung: Bittermelonen brauchen regelmäßig Wasser, besonders an heißen Tagen. Die Erde sollte immer leicht feucht sein, aber nicht nass. Vermeide Staunässe, da dies zu Wurzelfäule führen kann.
2. Düngung: Dünge die Pflanzen alle zwei bis drei Wochen mit einem organischen Dünger. Hornspäne sind eine gute Wahl, da sie die Pflanze langsam mit Nährstoffen versorgen.
3. Schnitt: Bittermelonen können sehr wuchern. Schneide regelmäßig Seitentriebe ab, um die Pflanze in Form zu halten und die Fruchtbildung zu fördern. Entferne auch gelbe oder kranke Blätter.
4. Bestäubung: Bittermelonen sind einhäusig, das heißt, sie haben männliche und weibliche Blüten auf derselben Pflanze. Die Bestäubung erfolgt durch Insekten oder den Wind. Wenn du sichergehen willst, kannst du die Blüten auch selbst bestäuben. Nimm dazu einen kleinen Pinsel und übertrage den Pollen von den männlichen auf die weiblichen Blüten. Du erkennst die weiblichen Blüten an dem kleinen Fruchtansatz direkt unter der Blüte.
5. Schutz vor Schädlingen: Bittermelonen sind relativ robust, aber manchmal können Blattläuse oder Spinnmilben auftreten. Kontrolliere die Pflanzen regelmäßig und bekämpfe Schädlinge bei Bedarf mit natürlichen Mitteln wie Brennnesseljauche oder Neemöl.
Die Ernte: Der Lohn deiner Mühe
Nach etwa drei bis vier Monaten kannst du die ersten Bittermelonen ernten.
1. Erntezeitpunkt: Die Bittermelonen sind reif, wenn sie eine intensive Farbe haben (je nach Sorte grün, gelb oder orange) und sich leicht vom Stiel lösen lassen.
2. Ernten: Schneide die Bittermelonen mit einer Gartenschere ab.
3. Verwendung: Bittermelonen sind vielseitig verwendbar. Sie können gekocht, gebraten, gefüllt oder in Suppen und Currys verwendet werden. Der bittere Geschmack ist gewöhnungsbedürftig, aber sehr gesund.
Zusätzliche Tipps für eine erfolgreiche Bittermelonen-Ernte
* Sorte wählen: Es gibt verschiedene Bittermelonen-Sorten. Informiere dich, welche Sorte am besten für dein Klima und deinen Geschmack geeignet ist.
* Sonnenschutz: An sehr heißen Tagen kann es sinnvoll sein, die Pflanzen vor direkter Sonneneinstrahlung zu schützen.
* Windschutz: Ein windgeschützter Standort ist ideal, da starker Wind die Pflanzen beschädigen kann.
* Regelmäßige Kontrolle: Kontrolliere die Pflanzen regelmäßig auf Schädlinge und Krankheiten. Je früher du Probleme erkennst, desto einfacher lassen sie sich beheben.
* Freude haben: Das Gärtnern soll Spaß machen! Genieße den Prozess und freue dich über deine selbstgezogenen Bittermelonen.
Ich hoffe, dieser Leitfaden hilft dir dabei, deine eigene Bittermelonen-Terrasse zu gestalten. Mit etwas Geduld und Pflege wirst du bald mit einer reichen Ernte belohnt. Viel Erfolg!
Conclusion
So, there you have it! Transforming your outdoor space into a thriving bitter melon terrace is not only achievable but also incredibly rewarding. We’ve walked you through the essentials, from selecting the right seeds and preparing the soil to constructing a sturdy trellis and providing consistent care. But why is this DIY project a must-try?
Firstly, growing your own bitter melon offers unparalleled freshness and flavor. Store-bought varieties simply can’t compare to the vibrant, slightly bitter taste of a melon harvested straight from your own vine. You control the growing conditions, ensuring that your produce is free from harmful pesticides and chemicals. This is especially important for bitter melon, which is often consumed for its health benefits.
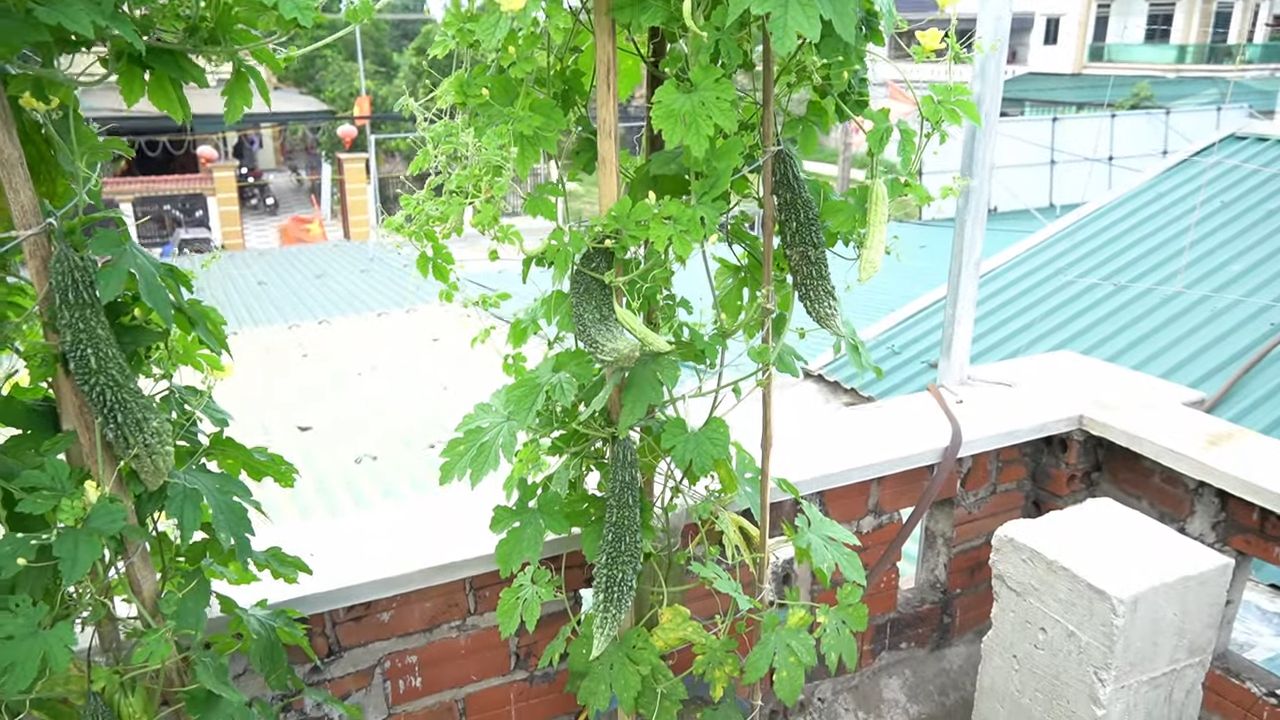
Secondly, creating a bitter melon terrace is a fantastic way to enhance your garden’s aesthetics. The lush green foliage and unique, warty fruits add visual interest and create a sense of abundance. Imagine the satisfaction of showcasing your thriving terrace to friends and family, sharing the fruits of your labor, and educating them about the wonders of home gardening.
Thirdly, this project is surprisingly budget-friendly. While there’s an initial investment in seeds, soil amendments, and trellis materials, the long-term savings are significant. You’ll be reducing your grocery bills and enjoying a sustainable source of fresh produce for months to come. Plus, you can save seeds from your harvest to replant next year, further reducing your costs.
But the benefits extend beyond the practical. Gardening is a therapeutic activity that can reduce stress, improve your mood, and connect you with nature. Tending to your bitter melon terrace provides a sense of accomplishment and fosters a deeper appreciation for the natural world.
Ready to take your bitter melon growing to the next level? Consider these variations:
* Vertical Gardening: If you’re short on space, explore vertical gardening techniques. Use hanging baskets or wall-mounted trellises to maximize your growing area.
* Companion Planting: Enhance your bitter melon’s growth by planting companion plants like beans, peas, or marigolds. These plants can attract beneficial insects, deter pests, and improve soil health.
* Grafting: For advanced gardeners, grafting bitter melon onto a more vigorous rootstock can improve disease resistance and yield.
* Different Varieties: Experiment with different varieties of bitter melon. Some are more bitter than others, and some have different shapes and sizes.
We encourage you to embark on this exciting journey and create your own beautiful and productive bitter melon terrace. Don’t be afraid to experiment, learn from your mistakes, and adapt the techniques to suit your specific climate and growing conditions.
Most importantly, we want to hear about your experience! Share your photos, tips, and challenges in the comments section below. Let’s build a community of passionate bitter melon growers and inspire others to embrace the joys of home gardening. Remember, the key to success is patience, persistence, and a genuine love for the process. So, grab your seeds, get your hands dirty, and prepare to enjoy the delicious rewards of your own homegrown bitter melon. This DIY project is more than just growing a vegetable; it’s about cultivating a connection with nature, nourishing your body, and enriching your life.
Frequently Asked Questions (FAQ)
What is the best time of year to plant bitter melon?
The ideal time to plant bitter melon is in late spring or early summer, after the last frost has passed and the soil has warmed up. Bitter melon thrives in warm weather and requires a long growing season of at least 90-120 days. In regions with shorter summers, you can start seeds indoors 4-6 weeks before the last expected frost and transplant them outdoors once the weather is consistently warm. Check your local climate data to determine the best planting time for your area.
How much sunlight does bitter melon need?
Bitter melon requires at least 6-8 hours of direct sunlight per day to thrive. Choose a location for your terrace that receives ample sunlight throughout the day. If you live in a particularly hot climate, some afternoon shade may be beneficial to prevent the plants from overheating. Insufficient sunlight can lead to stunted growth, reduced flowering, and lower yields.
What type of soil is best for growing bitter melon?
Bitter melon prefers well-drained, fertile soil that is rich in organic matter. Amend your soil with compost, aged manure, or other organic materials to improve its fertility and drainage. A slightly acidic to neutral soil pH of 6.0-7.0 is ideal. Conduct a soil test to determine your soil’s pH and nutrient levels and amend accordingly. Avoid heavy clay soils that retain too much moisture, as this can lead to root rot.
How often should I water my bitter melon plants?
Water your bitter melon plants regularly, especially during hot, dry weather. Aim to keep the soil consistently moist but not waterlogged. Water deeply and less frequently, rather than shallowly and more often, to encourage deep root growth. Check the soil moisture level regularly by sticking your finger into the soil. If the top inch of soil feels dry, it’s time to water. Consider using a soaker hose or drip irrigation system to deliver water directly to the roots and minimize water loss through evaporation.
What kind of trellis is best for bitter melon?
A sturdy trellis is essential for supporting the vigorous growth of bitter melon vines. Choose a trellis that is at least 6-8 feet tall and can withstand the weight of the mature vines and fruits. Options include wooden trellises, metal trellises, bamboo structures, or even sturdy fences. Ensure that the trellis has adequate spacing for the vines to climb and spread. You can also use netting or wire mesh to provide additional support.
How do I fertilize my bitter melon plants?
Fertilize your bitter melon plants regularly throughout the growing season to promote healthy growth and abundant yields. Use a balanced fertilizer with equal amounts of nitrogen, phosphorus, and potassium (e.g., 10-10-10) or a fertilizer specifically formulated for vegetables. Apply fertilizer according to the package instructions, typically every 2-3 weeks. You can also supplement with organic fertilizers like compost tea or fish emulsion. Avoid over-fertilizing, as this can lead to excessive foliage growth and reduced fruit production.
What are some common pests and diseases that affect bitter melon?
Bitter melon can be susceptible to various pests and diseases, including aphids, spider mites, squash bugs, powdery mildew, and fusarium wilt. Regularly inspect your plants for signs of infestation or disease. Use organic pest control methods like insecticidal soap, neem oil, or diatomaceous earth to control pests. Ensure good air circulation around the plants to prevent fungal diseases. Remove any infected leaves or fruits promptly to prevent the spread of disease. Choose disease-resistant varieties of bitter melon whenever possible.
When is bitter melon ready to harvest?
Bitter melon is typically ready to harvest 2-3 months after planting, depending on the variety and growing conditions. The fruits are usually harvested when they are still green and slightly immature, before they turn yellow or orange. The ideal size and color will vary depending on the variety. Check the seed packet or plant tag for specific harvesting instructions. Use a sharp knife or pruning shears to cut the fruits from the vine, leaving a short stem attached.
How do I store bitter melon after harvesting?
Store harvested bitter melon in the refrigerator for up to a week. Wrap the fruits in plastic wrap or place them in a plastic bag to prevent them from drying out. Bitter melon can also be frozen for longer storage. Blanch the fruits in boiling water for 2-3 minutes, then cool them in ice water before freezing. Frozen bitter melon can be used in soups, stews, and stir-fries.
Can I grow bitter melon in containers?
Yes, you can grow bitter melon in containers, but you’ll need to choose a large container that is at least 18-24 inches in diameter and depth. Use a well-draining potting mix and provide a sturdy trellis for the vines to climb. Container-grown bitter melon may require more frequent watering and fertilization than plants grown in the ground. Choose a sunny location for your container and monitor the plants closely for signs of stress.


Leave a Comment