
Grow Chili Peppers at Home and ignite your culinary adventures! Have you ever dreamt of adding a fiery kick to your dishes with peppers you’ve nurtured yourself? Imagine plucking vibrant, sun-ripened chilies straight from your garden, knowing exactly where they came from and how they were grown. This isn’t just a dream; it’s an achievable reality with a few simple DIY tricks!
The history of chili peppers is as vibrant as their colors. Originating in South America, these fiery fruits have been cultivated for thousands of years, playing a significant role in the cuisines and cultures of countless civilizations. From ancient Aztec rituals to modern-day culinary masterpieces, chili peppers have always been prized for their unique flavor and health benefits.
But why should you bother growing your own? Well, store-bought chilies can sometimes lack the punch you’re looking for, and let’s be honest, they can be a bit pricey! Plus, there’s something incredibly satisfying about nurturing a plant from seed to harvest. This DIY guide will equip you with the knowledge and simple hacks to grow chili peppers at home, even if you have limited space or gardening experience. I’m excited to share my favorite tips and tricks that will have you harvesting a bumper crop of delicious chilies in no time. Get ready to turn up the heat in your garden and your kitchen!
Chili selber ziehen: So klappt’s garantiert!
Hey Leute, habt ihr auch genug von langweiligen Supermarkt-Chilis ohne Feuer? Ich zeige euch, wie ihr eure eigenen, super-leckeren und höllisch scharfen Chili-Pflanzen zu Hause ziehen könnt! Keine Angst, es ist einfacher als ihr denkt und macht mega Spaß. Los geht’s!
Die Vorbereitung: Was du brauchst
Bevor wir loslegen, brauchen wir ein paar Dinge. Keine Sorge, das meiste habt ihr wahrscheinlich schon zu Hause oder könnt es günstig besorgen.
* Chili-Samen: Das Wichtigste! Ihr könnt sie aus getrockneten Chilis gewinnen (aber Achtung, die Schärfe kann variieren!) oder online bzw. im Gartencenter kaufen. Achtet auf die Sorte – von mild bis super scharf ist alles dabei. Ich persönlich liebe Jalapeños und Habaneros.
* Anzuchterde: Normale Blumenerde ist zu nährstoffreich für die zarten Keimlinge. Anzuchterde ist locker und enthält weniger Nährstoffe, was das Wurzelwachstum fördert.
* Anzuchtgefäße: Kleine Töpfe, Joghurtbecher mit Löchern im Boden oder ein Mini-Gewächshaus sind perfekt. Ich benutze gerne Eierkartons, die sind biologisch abbaubar.
* Sprühflasche: Zum Befeuchten der Erde.
* Klarsichtfolie oder Deckel: Um ein feuchtes Klima zu schaffen.
* Warmen Standort: Chilis lieben Wärme! Eine Fensterbank über der Heizung oder ein beheiztes Mini-Gewächshaus sind ideal.
* Pikierset: Ein kleiner Spatel oder Löffel zum Vereinzeln der Keimlinge.
* Blumenerde: Später zum Umtopfen in größere Töpfe.
* Dünger: Spezieller Chili-Dünger oder Tomatendünger.
Die Aussaat: Der Start ins Chili-Glück
Jetzt geht’s ans Eingemachte! Die Aussaat ist der erste Schritt zu eurer eigenen Chili-Ernte.
1. Anzuchtgefäße vorbereiten: Füllt eure Anzuchtgefäße mit Anzuchterde. Drückt die Erde leicht an.
2. Samen aussäen: Legt 1-2 Samen pro Gefäß auf die Erde. Bedeckt die Samen mit einer dünnen Schicht Anzuchterde (ca. 0,5 cm).
3. Befeuchten: Besprüht die Erde vorsichtig mit Wasser, sodass sie gut durchfeuchtet ist. Achtung: Nicht ertränken!
4. Feuchtigkeit halten: Deckt die Anzuchtgefäße mit Klarsichtfolie oder einem Deckel ab. Das sorgt für ein feuchtes Klima, das die Keimung fördert.
5. Warm stellen: Stellt die Anzuchtgefäße an einen warmen Ort (22-28°C). Eine Fensterbank über der Heizung ist ideal.
6. Geduld haben: Jetzt heißt es warten! Die Keimung kann je nach Chili-Sorte und Temperatur 1-3 Wochen dauern. Achtet darauf, dass die Erde immer feucht bleibt, aber nicht nass. Lüftet die Folie oder den Deckel regelmäßig, um Schimmelbildung zu vermeiden.
Das Pikieren: Den kleinen Chilis mehr Platz geben
Sobald die ersten Keimlinge ihre Köpfe aus der Erde strecken und die ersten richtigen Blätter (neben den Keimblättern) entwickelt haben, ist es Zeit zum Pikieren. Das bedeutet, dass wir die kleinen Pflänzchen vereinzeln und in größere Töpfe umsetzen.
1. Vorbereitung: Füllt kleine Töpfe (ca. 8-10 cm Durchmesser) mit Blumenerde. Macht in die Mitte jedes Topfes ein kleines Loch.
2. Keimlinge vorsichtig ausheben: Löst die Keimlinge vorsichtig mit einem Pikierset oder einem Löffel aus der Anzuchterde. Achtet darauf, die Wurzeln nicht zu beschädigen.
3. Einsetzen: Setzt jeden Keimling in ein vorbereitetes Loch in einem Topf. Die Keimblätter sollten knapp über der Erde sein.
4. Andrücken: Drückt die Erde um die Keimlinge vorsichtig an.
5. Gießen: Gießt die Keimlinge vorsichtig an.
6. Heller Standort: Stellt die pikierten Chilis an einen hellen, aber nicht vollsonnigen Standort.
Die Pflege: Damit deine Chilis prächtig gedeihen
Nach dem Pikieren brauchen eure Chili-Pflanzen regelmäßige Pflege, damit sie prächtig gedeihen und viele leckere Früchte tragen.
* Gießen: Gießt die Chilis regelmäßig, aber nicht zu viel. Die Erde sollte immer leicht feucht sein, aber nicht nass. Vermeidet Staunässe, da dies zu Wurzelfäule führen kann. Am besten testet ihr mit dem Finger, ob die Erde trocken ist.
* Düngen: Beginnt ca. 2-3 Wochen nach dem Pikieren mit dem Düngen. Verwendet einen speziellen Chili-Dünger oder Tomatendünger. Düngt gemäß den Anweisungen auf der Packung.
* Licht: Chilis brauchen viel Licht! Stellt sie an einen möglichst hellen Standort. Wenn ihr sie drinnen zieht, kann eine Pflanzenlampe sinnvoll sein.
* Temperatur: Chilis lieben Wärme! Die ideale Temperatur liegt zwischen 20 und 25°C. Vermeidet Zugluft und plötzliche Temperaturschwankungen.
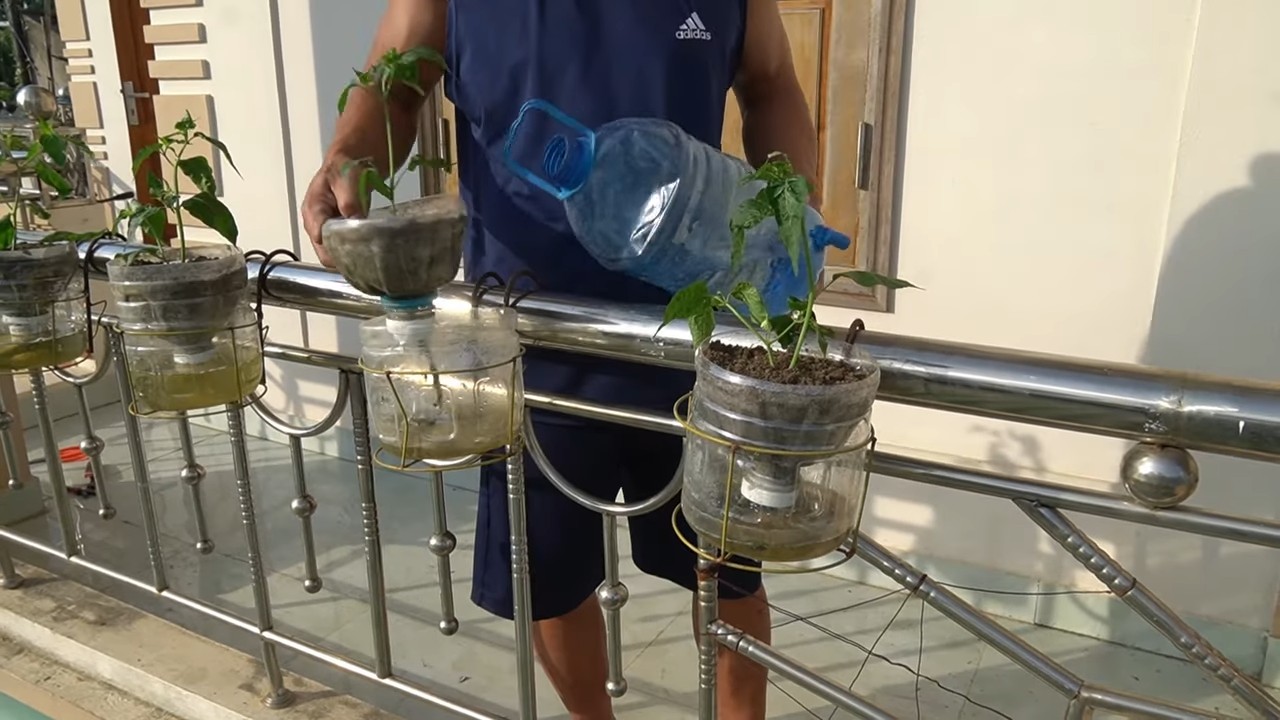
* Umpflanzen: Wenn die Töpfe zu klein werden, müsst ihr die Chilis in größere Töpfe umpflanzen. Wählt Töpfe mit einem Durchmesser von mindestens 20 cm.
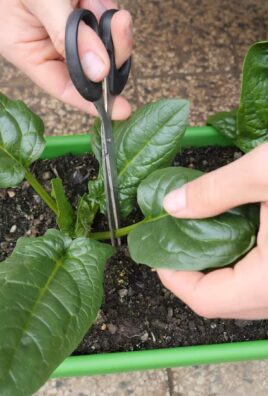
* Ausgeizen: Bei einigen Chili-Sorten (z.B. Paprika-Chilis) kann es sinnvoll sein, die Seitentriebe (Geiztriebe) auszugeizen. Das fördert die Bildung von größeren Früchten.
* Schädlinge: Achtet auf Schädlinge wie Blattläuse oder Spinnmilben. Bei Befall könnt ihr die Pflanzen mit einem natürlichen Insektizid behandeln.
Die Blüte und Fruchtbildung: Es wird scharf!
Wenn eure Chili-Pflanzen groß genug sind, beginnen sie zu blühen. Aus den Blüten entwickeln sich dann die leckeren Chili-Früchte.
* Bestäubung: Chilis sind Selbstbestäuber, aber ihr könnt die Bestäubung unterstützen, indem ihr die Blüten vorsichtig schüttelt oder mit einem Pinsel bestäubt.
* Geduld haben: Die Entwicklung der Früchte dauert einige Zeit. Je nach Sorte kann es mehrere Wochen dauern, bis die Chilis reif sind.
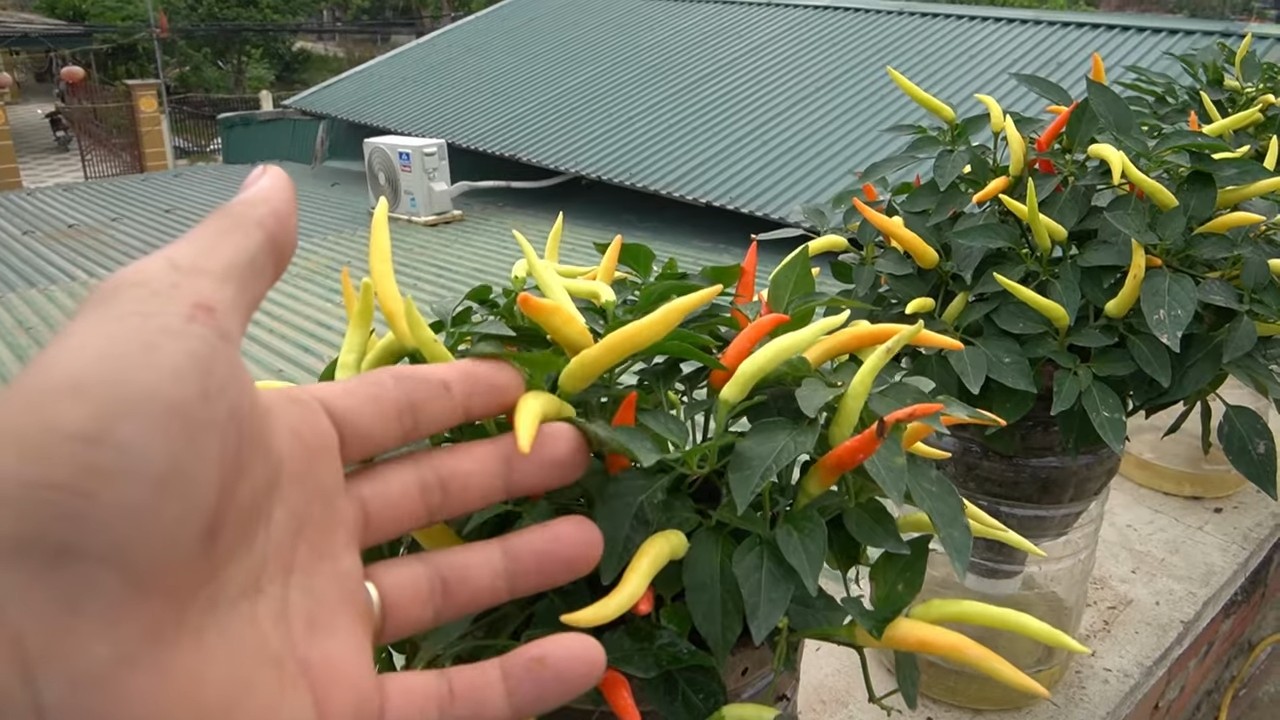
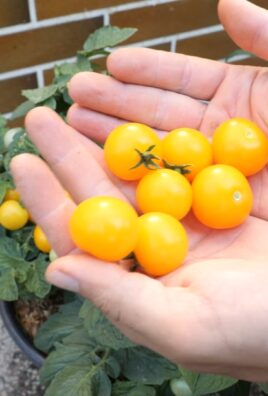
* Ernte: Die Chilis sind reif, wenn sie ihre endgültige Farbe erreicht haben (z.B. rot, gelb, orange oder braun). Ihr könnt sie mit einer Schere oder einem Messer abschneiden.
Zusätzliche Tipps für eine erfolgreiche Chili-Zucht
Hier noch ein paar zusätzliche Tipps, die euch helfen, eure Chili-Zucht noch erfolgreicher zu gestalten:
* Härtung: Bevor ihr die Chilis ins Freie pflanzt, solltet ihr sie abhärten. Das bedeutet, dass ihr sie langsam an die Sonne und die kühleren Temperaturen gewöhnt. Stellt sie dazu tagsüber für ein paar Stunden ins Freie und holt sie abends wieder rein.
* Standort im Freien: Wählt für eure Chilis im Freien einen sonnigen und windgeschützten Standort.
* Winterschutz: Wenn ihr eure Chilis überwintern wollt, müsst ihr sie vor dem ersten Frost ins Haus holen. Stellt sie an einen hellen und kühlen Standort (ca. 10-15°C). Gießt sie nur wenig und düngt sie nicht.
* Sortenwahl: Probiert verschiedene Chili-Sorten aus! Es gibt unzählige Sorten mit unterschiedlichen Schärfegraden, Aromen und Farben.
* Dokumentation: Macht Fotos von euren Chili-Pflanzen und notiert euch, welche Sorte ihr angebaut habt und wie sie gewachsen ist. So könnt ihr im nächsten Jahr noch besser planen.
Ich hoffe, diese Anleitung hilft euch dabei, eure eigenen Chili-Pflanzen erfolgreich zu ziehen. Viel Spaß beim Gärtnern und lasst es euch schmecken! Und denkt dran: Vorsicht, scharf
Conclusion
So, there you have it! Growing chili peppers at home isn’t just a fun gardening project; it’s a gateway to a world of fresh, flavorful possibilities. From adding a fiery kick to your favorite dishes to gifting homegrown heat to friends and family, the rewards are plentiful. We’ve walked you through the essential steps, from selecting the right seeds and nurturing seedlings to providing the ideal growing conditions and harvesting your bounty.
But why is this DIY trick a must-try? Because it puts you in complete control. You know exactly what goes into your peppers – no mystery pesticides or questionable growing practices. You get to choose the varieties that tantalize your taste buds, from the mildest Anaheim to the scorching Scotch Bonnet. And let’s be honest, there’s a unique satisfaction in nurturing a plant from seed to harvest, knowing you played a vital role in its success.
Don’t be afraid to experiment! Try different soil mixes to see what works best in your climate. Consider companion planting with herbs like basil or oregano to deter pests and enhance flavor. If you’re short on space, explore container gardening options – even a sunny balcony can become a chili pepper paradise. For those in colder climates, bringing your plants indoors during the winter months can extend the growing season and ensure a continuous supply of fresh peppers. You can also try different methods of preserving your harvest, such as drying, pickling, or making your own hot sauce. Each method will yield a unique flavor profile, allowing you to enjoy your homegrown chilies in countless ways.
Remember, growing chili peppers at home is a journey, not a destination. There will be challenges along the way – pests, diseases, and unpredictable weather. But with a little patience, persistence, and the knowledge you’ve gained from this guide, you’ll be well-equipped to overcome any obstacles.
We wholeheartedly encourage you to give this DIY project a try. Start small, learn as you go, and most importantly, have fun! Once you’ve harvested your first batch of homegrown chilies, we’d love to hear about your experience. Share your successes, your challenges, and your favorite ways to use your peppers in the comments below. Let’s build a community of chili pepper enthusiasts and inspire others to discover the joys of growing their own. So, grab your seeds, get your hands dirty, and prepare to embark on a flavorful adventure! The world of homegrown heat awaits!
Frequently Asked Questions (FAQ)
What are the easiest chili peppers to grow for beginners?
For beginners, some of the easiest chili peppers to grow include Jalapeños, Anaheim peppers, and Poblano peppers. These varieties are relatively low-maintenance, resilient to common pests and diseases, and offer a good balance of flavor and heat. They also tend to mature relatively quickly, providing a faster sense of accomplishment for new gardeners. Jalapeños are incredibly versatile in the kitchen, while Anaheim and Poblano peppers are great for roasting and stuffing.
How much sunlight do chili peppers need?
Chili peppers thrive in full sunlight, requiring at least 6-8 hours of direct sunlight per day. Adequate sunlight is crucial for healthy growth, abundant flowering, and optimal fruit production. If you’re growing chili peppers indoors, supplement natural light with grow lights, especially during the shorter days of winter. Insufficient sunlight can lead to leggy growth, reduced flowering, and smaller, less flavorful peppers.
What type of soil is best for growing chili peppers?
Chili peppers prefer well-draining soil that is rich in organic matter. A slightly acidic to neutral pH (around 6.0 to 7.0) is ideal. Amend your garden soil with compost, aged manure, or other organic materials to improve drainage, fertility, and water retention. Avoid heavy clay soils that can become waterlogged, as this can lead to root rot. A good potting mix for container-grown chili peppers should contain a blend of peat moss, perlite, and vermiculite.
How often should I water my chili pepper plants?
Water your chili pepper plants regularly, especially during hot, dry weather. The frequency of watering will depend on factors such as the weather, soil type, and size of the plant. Generally, water deeply when the top inch of soil feels dry to the touch. Avoid overwatering, as this can lead to root rot. Container-grown chili peppers may require more frequent watering than those grown in the ground. Mulching around the base of the plants can help retain moisture and suppress weeds.
What are some common pests and diseases that affect chili peppers?
Common pests that affect chili peppers include aphids, spider mites, whiteflies, and pepper weevils. Diseases include fungal infections like powdery mildew, blossom-end rot, and verticillium wilt. Regularly inspect your plants for signs of pests or diseases. Treat infestations with insecticidal soap, neem oil, or other organic pest control methods. Prevent fungal diseases by providing good air circulation, avoiding overhead watering, and using disease-resistant varieties. Blossom-end rot is often caused by calcium deficiency, so ensure your soil has adequate calcium levels.
When and how should I harvest my chili peppers?
The timing of harvest depends on the variety of chili pepper and your desired level of ripeness. Most chili peppers will change color as they ripen, typically from green to red, yellow, or orange. You can harvest chili peppers at any stage of ripeness, but the flavor and heat will intensify as they mature. To harvest, use pruning shears or scissors to cut the pepper from the plant, leaving a small stem attached. Handle the peppers carefully to avoid bruising or damaging them.
Can I grow chili peppers indoors?
Yes, you can successfully grow chili peppers indoors, especially if you live in a climate with cold winters. Choose a sunny location near a south-facing window or supplement with grow lights. Use a well-draining potting mix and provide adequate water and fertilizer. Indoor chili pepper plants may require hand-pollination to ensure fruit set. Consider using a small fan to improve air circulation and prevent fungal diseases.
How can I increase the heat of my chili peppers?
Several factors can influence the heat level of chili peppers, including genetics, growing conditions, and stress. To increase the heat, ensure your plants receive plenty of sunlight, water them regularly but avoid overwatering, and provide adequate nutrients. Some growers believe that stressing the plants slightly by withholding water or fertilizer can also increase heat levels, but this should be done cautiously to avoid damaging the plants. The hottest peppers are often produced during hot, dry summers.
How do I store chili peppers after harvesting?
There are several ways to store chili peppers after harvesting, depending on how you plan to use them. Fresh chili peppers can be stored in the refrigerator for up to a week. For longer storage, you can dry them, pickle them, freeze them, or make hot sauce. To dry chili peppers, string them together and hang them in a well-ventilated area, or use a dehydrator. Pickled chili peppers can be stored in the refrigerator for several months. Frozen chili peppers can be stored in the freezer for up to a year.
What are some creative ways to use homegrown chili peppers?
The possibilities are endless! Use them fresh in salsas, sauces, and stir-fries. Dry them and grind them into chili powder. Pickle them for a tangy snack. Make your own hot sauce. Infuse olive oil with chili peppers for a flavorful cooking oil. Add them to soups, stews, and chili. Use them to make chili flakes. The only limit is your imagination! Growing chili peppers at home opens up a world of culinary possibilities, allowing you to experiment with different flavors and heat levels to create your own unique dishes.

Leave a Comment