
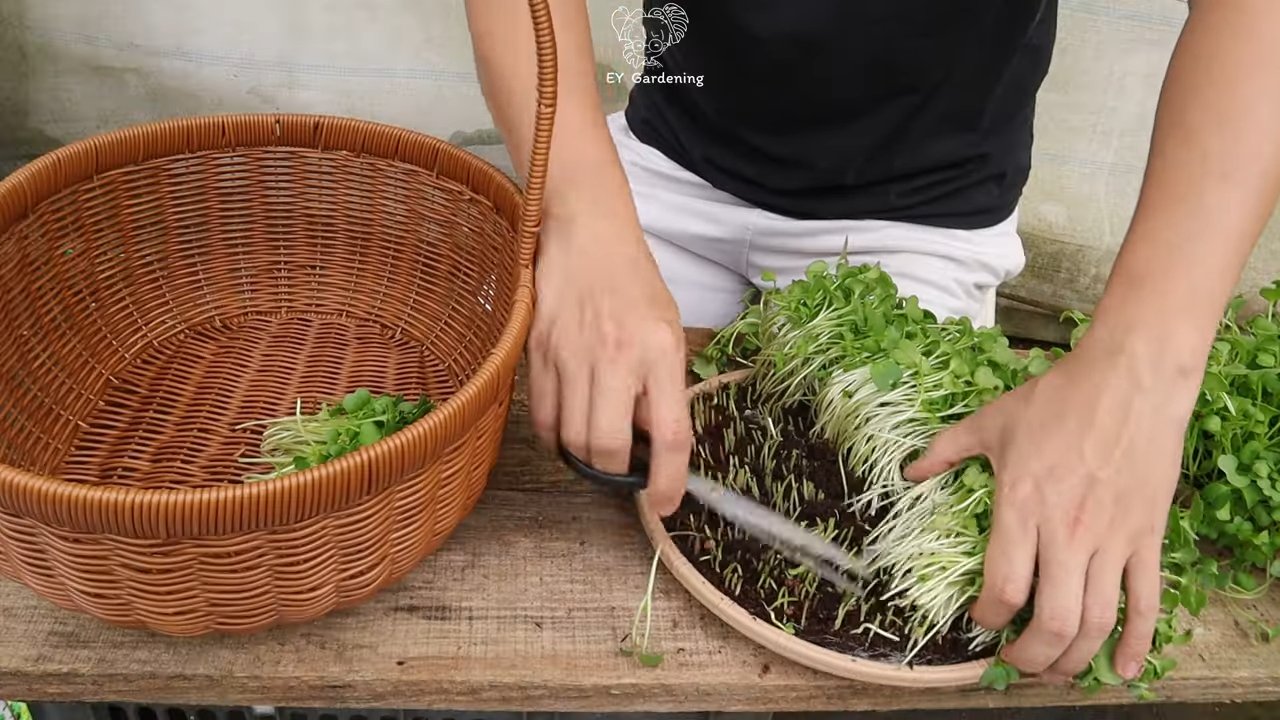
Growing Sprouts at Home is easier than you think, and I’m here to show you how! Forget those expensive, pre-packaged sprouts from the grocery store – imagine having a constant supply of fresh, nutrient-packed goodness right on your kitchen counter. Sounds amazing, right?
Sprouting, in fact, isn’t a new-fangled health trend. It has roots stretching back centuries, with evidence suggesting ancient civilizations in China and other parts of Asia were enjoying the benefits of sprouted grains and legumes long ago. They understood that sprouting unlocked a powerhouse of vitamins and enzymes, making these foods even more nutritious and digestible.
But why should *you* bother with growing sprouts at home? Well, for starters, it’s incredibly cost-effective. A small bag of seeds can yield a surprising amount of sprouts. Plus, you have complete control over the process, ensuring they’re grown organically and free from any unwanted additives. More importantly, in today’s world, where we’re all looking for ways to boost our health and immunity, sprouts are a fantastic addition to any diet. They’re packed with vitamins, minerals, and antioxidants, giving your body a natural boost. So, let’s dive into some simple DIY tricks and hacks that will have you sprouting like a pro in no time!
Sprossen ziehen leicht gemacht: Dein DIY-Guide für zu Hause
Hey, du! Hast du Lust, frische, knackige Sprossen ganz einfach zu Hause zu ziehen? Es ist super easy und macht total Spaß! Außerdem sind Sprossen wahre Nährstoffbomben und peppen jedes Gericht auf. Ich zeige dir, wie es geht – Schritt für Schritt. Keine Angst, du brauchst keine grünen Daumen, nur ein bisschen Geduld und Neugier.
Was du brauchst: Die Grundausstattung
Bevor wir loslegen, hier eine Liste mit den Dingen, die du benötigst. Keine Sorge, das meiste hast du wahrscheinlich schon zu Hause!
* Sprossengläser oder ein Keimgerät: Du kannst spezielle Sprossengläser kaufen (die haben meistens ein Sieb im Deckel), aber ein normales Einmachglas mit einem Stück Mulltuch oder einem feinen Sieb, das du mit einem Gummiband befestigst, tut es auch. Ein Keimgerät ist etwas komfortabler, da es oft mehrere Etagen hat und die Sprossen gleichmäßiger bewässert.
* Sprossenfähiges Saatgut: Das ist das A und O! Achte darauf, dass das Saatgut speziell für Sprossen geeignet ist. Du findest es in Bioläden, Reformhäusern oder online. Beliebte Sorten sind Alfalfa, Radieschen, Brokkoli, Linsen, Mungbohnen und Kresse.
* Sauberes Wasser: Am besten gefiltertes Wasser oder abgekochtes, abgekühltes Wasser verwenden.
* Ein dunkler, kühler Ort: Sprossen mögen es am Anfang lieber dunkel. Ein Küchenschrank oder eine Schublade sind ideal.
* Ein heller, aber nicht sonniger Ort: Sobald die Sprossen gekeimt sind, brauchen sie Licht, aber keine direkte Sonneneinstrahlung. Ein Fensterbrett ohne direkte Sonne ist perfekt.
Die Vorbereitung: Das A und O für erfolgreiche Sprossen
Die richtige Vorbereitung ist entscheidend, damit deine Sprossen auch wirklich sprießen. Hier sind die wichtigsten Schritte:
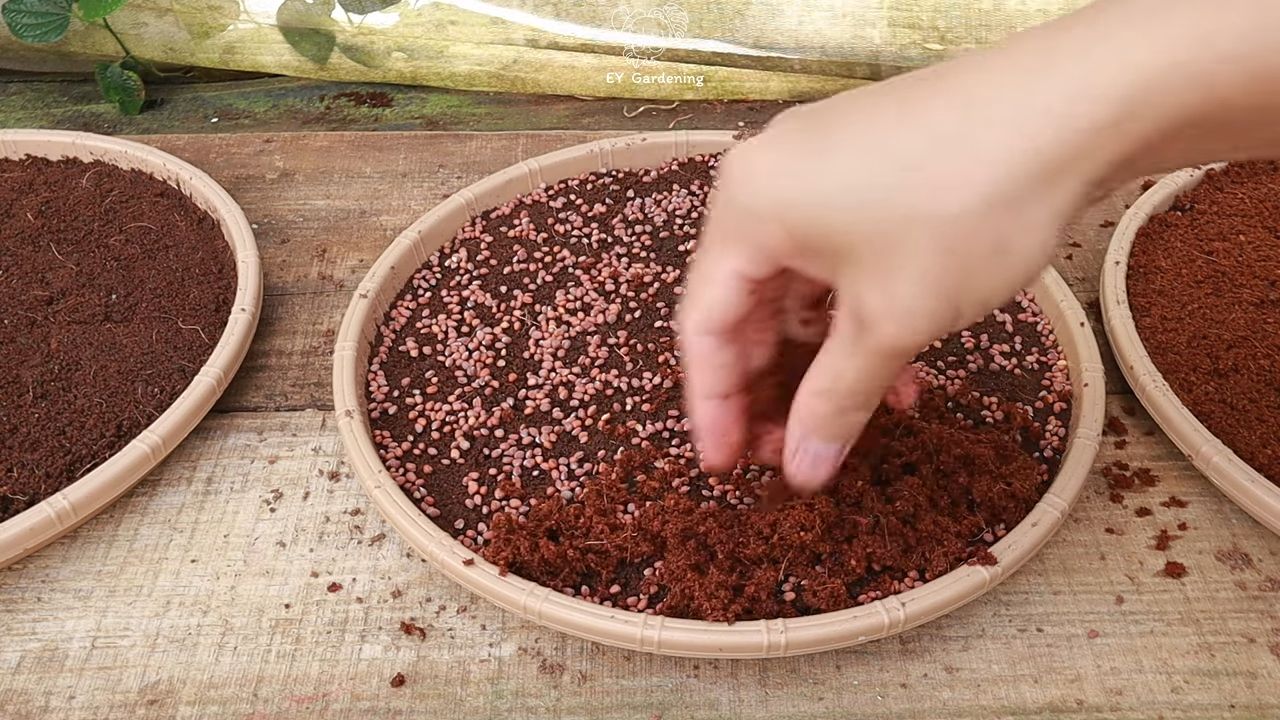
1. Saatgut auswählen: Wähle dein Lieblingssaatgut aus. Achte auf die Keimfähigkeit und das Verfallsdatum. Je frischer das Saatgut, desto besser!
2. Saatgutmenge bestimmen: Nimm nicht zu viel Saatgut! Es quillt auf und braucht Platz. Für ein normales Sprossenglas reicht oft ein bis zwei Esslöffel Saatgut. Bei kleineren Samen wie Alfalfa reicht sogar noch weniger.
3. Saatgut einweichen: Gib das Saatgut in dein Sprossenglas oder eine Schüssel und fülle es mit reichlich Wasser auf. Die Einweichzeit variiert je nach Sorte. Hier eine kleine Übersicht:
* Alfalfa: 4-6 Stunden
* Radieschen: 4-8 Stunden
* Brokkoli: 4-8 Stunden
* Linsen: 8-12 Stunden
* Mungbohnen: 12-24 Stunden
* Kresse: Nicht einweichen! Kresse wird auf einem feuchten Untergrund (z.B. Küchenpapier) gezogen.
Das Einweichen weicht die Samenschale auf und aktiviert den Keimprozess.
4. Wasser abgießen und spülen: Nach der Einweichzeit gießt du das Wasser ab und spülst das Saatgut gründlich mit frischem Wasser durch. Das ist wichtig, um Schimmelbildung vorzubeugen.
Der Keimprozess: So bringst du deine Sprossen zum Wachsen
Jetzt geht’s ans Eingemachte! Hier sind die Schritte, die du täglich wiederholen musst, um deine Sprossen zum Wachsen zu bringen:
1. Sprossenglas vorbereiten: Gib das eingeweichte und gespülte Saatgut in dein Sprossenglas. Achte darauf, dass es nicht zu voll ist. Die Sprossen brauchen Platz zum Wachsen.
2. Sprossenglas abdecken: Verschließe das Sprossenglas mit dem Siebdeckel oder dem Mulltuch und dem Gummiband.
3. Sprossenglas lagern: Stelle das Sprossenglas an einen dunklen, kühlen Ort. Ideal ist eine Temperatur zwischen 18 und 22 Grad Celsius.
4. Spülen: Spüle die Sprossen zwei- bis dreimal täglich mit frischem Wasser durch. Das ist super wichtig, um Schimmelbildung zu verhindern und die Sprossen feucht zu halten. Drehe das Glas dabei so, dass alle Sprossen gut befeuchtet werden.
5. Abtropfen lassen: Nach dem Spülen stelle das Sprossenglas schräg auf, damit das überschüssige Wasser abtropfen kann. Das verhindert Staunässe und Schimmelbildung.
6. Wiederholen: Wiederhole die Schritte 4 und 5 täglich, bis deine Sprossen die gewünschte Größe erreicht haben.
Das Licht: Sprossen brauchen Sonne (aber nicht zu viel!)
Sobald die Sprossen gekeimt sind und kleine Blättchen bilden, brauchen sie Licht.
1. Sprossenglas umstellen: Stelle das Sprossenglas an einen hellen, aber nicht sonnigen Ort. Ein Fensterbrett ohne direkte Sonneneinstrahlung ist ideal.
2. Grün werden lassen: Durch das Licht bilden die Sprossen Chlorophyll und werden grün. Das macht sie noch nährstoffreicher und sieht auch schöner aus.
3. Weiter spülen: Spüle die Sprossen weiterhin zwei- bis dreimal täglich.
Die Ernte: Endlich genießen!
Je nach Sorte sind deine Sprossen nach 3-7 Tagen erntereif.
1. Sprossen ernten: Spüle die Sprossen noch einmal gründlich durch.
2. Schalen entfernen (optional): Wenn du möchtest, kannst du die Samenschalen entfernen. Das ist aber nicht unbedingt notwendig.
3. Sprossen abtropfen lassen: Lasse die Sprossen gut abtropfen.
4. Sprossen lagern: Bewahre die Sprossen im Kühlschrank auf. Sie halten sich dort etwa 3-5 Tage. Am besten in einem luftdichten Behälter.
Tipps und Tricks für Sprossen-Profis
* Hygiene ist wichtig: Achte immer auf saubere Hände und saubere Utensilien. Das minimiert das Risiko von Schimmelbildung.
* Nicht zu viel Saatgut: Lieber weniger Saatgut nehmen und dafür öfter neu ansetzen.
* Regelmäßig spülen: Das ist das A und O!
* Verschiedene Sorten ausprobieren: Es gibt so viele verschiedene Sprossenarten! Probiere dich durch und finde deine Lieblingssorten.
* Schimmelbildung erkennen: Wenn die Sprossen komisch riechen oder schleimig sind, solltest du sie entsorgen.
* Sprossen als Deko: Sprossen sind nicht nur lecker, sondern auch eine tolle Deko für deine Gerichte.
Sprossen in der Küche: Vielseitig und lecker
Sprossen sind unglaublich vielseitig und passen zu vielen Gerichten. Hier ein paar Ideen:
* Salate: Sprossen peppen jeden Salat auf und machen ihn knackiger.
* Sandwiches und Wraps: Sprossen sind eine tolle Ergänzung für Sandwiches und Wraps.
* Suppen und Eintöpfe: Sprossen können kurz vor dem Servieren über Suppen und Eintöpfe gestreut werden.
* Wok-Gerichte: Sprossen passen super zu Wok-Gerichten.
* Smoothies: Sprossen können auch in Smoothies gemixt werden.
* Als Topping: Sprossen sind ein tolles Topping für Brot, Avocado-Toast oder Rührei.
Häufige Fehler und wie du sie vermeidest
* Zu wenig spülen: Das ist der häufigste Fehler. Spüle die Sprossen regelmäßig, um Schimmelbildung zu vermeiden.
* Zu viel Saatgut: Nimm nicht zu viel Saatgut, sonst haben die Sprossen keinen Platz zum Wachsen.
* Falsche Lagerung: Lagere die Sprossen am Anfang dunkel und kühl und später hell, aber nicht in der direkten Sonne.
* Ungeeignetes Saatgut: Verwende nur Saatgut, das speziell für Sprossen geeignet ist.
So, jetzt bist du bestens gerüstet, um deine eigenen Sprossen zu ziehen! Viel Spaß dabei und lass es dir schmecken! Ich bin sicher, du wirst begeistert sein, wie einfach und lohnenswert es ist. Und denk dran:
Conclusion
So, there you have it! Growing sprouts at home is not only incredibly easy and rewarding, but it’s also a fantastic way to boost your nutritional intake and add a burst of fresh flavor to your meals, all while saving money and reducing your reliance on store-bought produce. Forget those expensive, pre-packaged sprouts that often wilt before you even get them home. With just a few simple supplies and a little patience, you can cultivate your own vibrant, nutrient-packed sprouts right on your kitchen counter.
This DIY trick is a must-try for several compelling reasons. First and foremost, the freshness and flavor of homegrown sprouts are unparalleled. They’re bursting with life and vitality, offering a crisp, clean taste that store-bought varieties simply can’t match. Secondly, you have complete control over the growing process, ensuring that your sprouts are free from harmful chemicals and pesticides. This is especially important if you’re health-conscious or have dietary restrictions.
Beyond the health benefits, growing sprouts at home is also an incredibly sustainable practice. You’re reducing your carbon footprint by eliminating the need for transportation and packaging associated with store-bought sprouts. Plus, it’s a fun and educational activity for the whole family, teaching children about the wonders of nature and the importance of healthy eating.
Ready to take your sprouting game to the next level? Consider experimenting with different types of seeds. Mung beans, alfalfa, broccoli, radish, and lentils are all excellent choices for sprouting, each offering its unique flavor profile and nutritional benefits. You can also try mixing different types of seeds together to create your own custom sprout blends. For example, a combination of alfalfa, radish, and broccoli sprouts offers a spicy and nutritious kick.
Another variation to explore is sprouting in different containers. While a mason jar with a sprouting lid is a classic choice, you can also use a sprouting tray or even a clean plastic container with drainage holes. The key is to ensure proper drainage and ventilation to prevent mold growth.
Don’t be afraid to get creative with your sprouts! Add them to salads, sandwiches, wraps, soups, and stir-fries. Use them as a garnish for your favorite dishes or simply enjoy them on their own as a healthy snack. The possibilities are endless!
We wholeheartedly encourage you to give this DIY trick a try. It’s a simple, affordable, and rewarding way to enhance your health and culinary experiences. Once you’ve mastered the basics, you’ll be amazed at how easy it is to grow your own fresh, nutritious sprouts at home.
And most importantly, we want to hear about your experience! Share your sprouting successes (and any challenges you encounter) in the comments below. Let us know what types of seeds you’ve tried, what variations you’ve experimented with, and how you’re incorporating your homegrown sprouts into your meals. Your feedback will not only help other readers but also inspire us to continue sharing valuable tips and tricks for healthy living. So, grab your seeds, your jar, and get sprouting! You won’t regret it.
Frequently Asked Questions (FAQ)
What types of seeds are best for sprouting?
The best seeds for sprouting are those specifically labeled for sprouting or microgreens. These seeds have been tested for germination rates and are free from harmful pathogens. Popular choices include alfalfa, broccoli, radish, mung beans, lentils, clover, and sunflower seeds. Avoid using seeds that have been treated with pesticides or fungicides, as these chemicals can be harmful to your health. Always purchase your seeds from a reputable source to ensure their quality and safety.
How long does it take for sprouts to grow?
The sprouting time varies depending on the type of seed and the environmental conditions. Generally, most sprouts will be ready to harvest in 3 to 7 days. Mung beans, for example, typically sprout within 3 to 4 days, while alfalfa sprouts may take 5 to 7 days. Keep an eye on your sprouts and harvest them when they reach your desired size and flavor. Overgrown sprouts can become bitter and less palatable.
How do I prevent mold growth in my sprouts?
Mold growth is a common concern when sprouting, but it can be easily prevented with proper hygiene and ventilation. Rinse your sprouts thoroughly at least twice a day with fresh, cool water. Ensure that your sprouting container has adequate drainage to prevent water from pooling at the bottom. Provide good ventilation by placing your sprouts in a well-lit area with good airflow. Avoid overcrowding the container with too many seeds, as this can restrict airflow and increase the risk of mold growth. If you notice any signs of mold, discard the affected sprouts immediately.
How do I store sprouts after harvesting?
Once your sprouts are ready to harvest, rinse them thoroughly and drain them well. Pat them dry with a clean paper towel to remove excess moisture. Store the sprouts in an airtight container in the refrigerator. They should stay fresh for up to a week. Check the sprouts regularly for any signs of spoilage and discard them if they become slimy or develop an off odor.
Can I eat the roots of sprouts?
Yes, the roots of sprouts are perfectly edible and nutritious. They contain valuable enzymes and nutrients that contribute to the overall health benefits of sprouts. Some people prefer to trim the roots before eating, but this is purely a matter of personal preference.
Are there any health risks associated with eating sprouts?
While sprouts are generally safe to eat, there is a small risk of foodborne illness associated with consuming raw sprouts. This is because sprouts are grown in warm, moist conditions, which can promote the growth of bacteria such as Salmonella and E. coli. To minimize this risk, always purchase your seeds from a reputable source, rinse your sprouts thoroughly before eating, and store them properly in the refrigerator. Individuals with weakened immune systems, pregnant women, and young children should exercise extra caution and consider cooking sprouts before eating them.
Can I grow sprouts without a special sprouting jar?
Yes, you can grow sprouts without a special sprouting jar. A mason jar with a cheesecloth or mesh lid secured with a rubber band works just as well. You can also use a sprouting tray or even a clean plastic container with drainage holes. The key is to ensure proper drainage and ventilation to prevent mold growth.
What do I do if my sprouts don’t seem to be growing?
If your sprouts aren’t growing, there could be several reasons. First, make sure that your seeds are viable and haven’t expired. Second, ensure that you’re rinsing your sprouts regularly and providing them with adequate moisture. Third, check the temperature of your sprouting environment. Sprouts generally prefer a temperature between 65°F and 75°F (18°C and 24°C). If the temperature is too cold or too hot, it can inhibit growth. Finally, make sure that your sprouts are getting enough light. While they don’t need direct sunlight, they do need some light to thrive.
Can I sprout seeds that I already have in my pantry?
While you can technically sprout some seeds that you already have in your pantry, it’s generally not recommended. Pantry seeds may not have been tested for germination rates and may be treated with chemicals that are not safe for consumption. It’s always best to use seeds specifically labeled for sprouting or microgreens to ensure their quality and safety.

Leave a Comment