
Growing Kale in Soil Bags: Unlock the secrets to a bountiful harvest, even without a traditional garden! Have you ever dreamed of fresh, homegrown kale gracing your dinner table, but felt limited by space or soil conditions? Well, dream no more! This DIY guide is your passport to a thriving kale patch, all contained within the humble soil bag.
For centuries, humans have cultivated kale, a nutritional powerhouse, for its resilience and health benefits. From its ancient Roman roots to its modern-day superfood status, kale has nourished generations. But let’s face it, not everyone has the perfect garden setup for this leafy green to flourish. That’s where the magic of soil bag gardening comes in!
I’m going to show you how to transform ordinary soil bags into mini-kale gardens, perfect for balconies, patios, or even small yards. This method is not only incredibly space-efficient but also offers excellent drainage and weed control. Plus, it’s a fantastic way to recycle those used soil bags! So, ditch the gardening woes and get ready to enjoy a continuous supply of fresh, delicious kale. Let’s get started on growing kale in soil bags and unlock a world of gardening possibilities!
Kohl in Pflanzsäcken anbauen: Eine einfache DIY-Anleitung
Hallo liebe Gartenfreunde! Ich liebe es, frischen Kohl direkt aus meinem Garten zu ernten. Aber nicht jeder hat den Platz für ein großes Gemüsebeet. Deshalb zeige ich euch heute, wie ihr Kohl ganz einfach in Pflanzsäcken anbauen könnt. Das ist platzsparend, kostengünstig und super effektiv!
Warum Kohl in Pflanzsäcken anbauen?
* Platzsparend: Ideal für Balkone, Terrassen oder kleine Gärten.
* Mobil: Die Säcke können leicht umgestellt werden, um die Sonneneinstrahlung zu optimieren.
* Kostengünstig: Benötigt weniger Erde und Dünger als ein herkömmliches Beet.
* Weniger Unkraut: Die Säcke reduzieren das Unkrautwachstum erheblich.
* Bessere Drainage: Die Säcke sorgen für eine gute Drainage, was Staunässe verhindert.
Was du brauchst:
* Pflanzsäcke: Am besten eignen sich robuste, UV-beständige Pflanzsäcke aus Kunststoff oder Jute. Die Größe sollte mindestens 40 Liter betragen, damit der Kohl genügend Platz zum Wachsen hat.
* Kohlpflanzen: Du kannst entweder vorgezogene Kohlpflanzen im Gartencenter kaufen oder Kohl aus Samen selbst ziehen. Beliebte Kohlsorten für den Anbau im Pflanzsack sind Grünkohl, Palmkohl (Cavolo Nero), Rosenkohl und Wirsing.
* Pflanzerde: Verwende hochwertige Pflanzerde, die gut drainiert und reich an Nährstoffen ist. Du kannst auch Kompost oder organischen Dünger untermischen.
* Kompost oder organischer Dünger: Für eine optimale Nährstoffversorgung.
* Gießkanne oder Gartenschlauch: Zum regelmäßigen Gießen.
* Gartenschere oder Messer: Zum Ernten des Kohls.
* Optional: Mulchmaterial (z.B. Stroh oder Holzhackschnitzel) zur Feuchtigkeitsspeicherung und Unkrautunterdrückung.
* Optional: Pflanzstäbe oder Rankgitter, je nach Kohlsorte, zur Unterstützung des Wachstums.
Schritt-für-Schritt-Anleitung: Kohl in Pflanzsäcken anbauen
1. Vorbereitung der Pflanzsäcke
1. Pflanzsäcke auswählen: Wähle Pflanzsäcke mit einer Größe von mindestens 40 Litern. Größere Säcke sind besser, da sie mehr Platz für die Wurzeln bieten und weniger schnell austrocknen. Achte darauf, dass die Säcke stabil sind und über Abzugslöcher am Boden verfügen, um Staunässe zu vermeiden.
2. Abzugslöcher überprüfen: Stelle sicher, dass die Abzugslöcher nicht verstopft sind. Gegebenenfalls kannst du zusätzliche Löcher bohren, um eine gute Drainage zu gewährleisten.
3. Standort wählen: Suche einen sonnigen Standort für deine Pflanzsäcke. Kohl benötigt mindestens 6 Stunden Sonnenlicht pro Tag, um optimal zu wachsen.
4. Säcke befüllen: Fülle die Pflanzsäcke zu etwa zwei Dritteln mit Pflanzerde. Mische Kompost oder organischen Dünger unter die Erde, um die Nährstoffversorgung zu verbessern.
2. Kohlpflanzen einsetzen
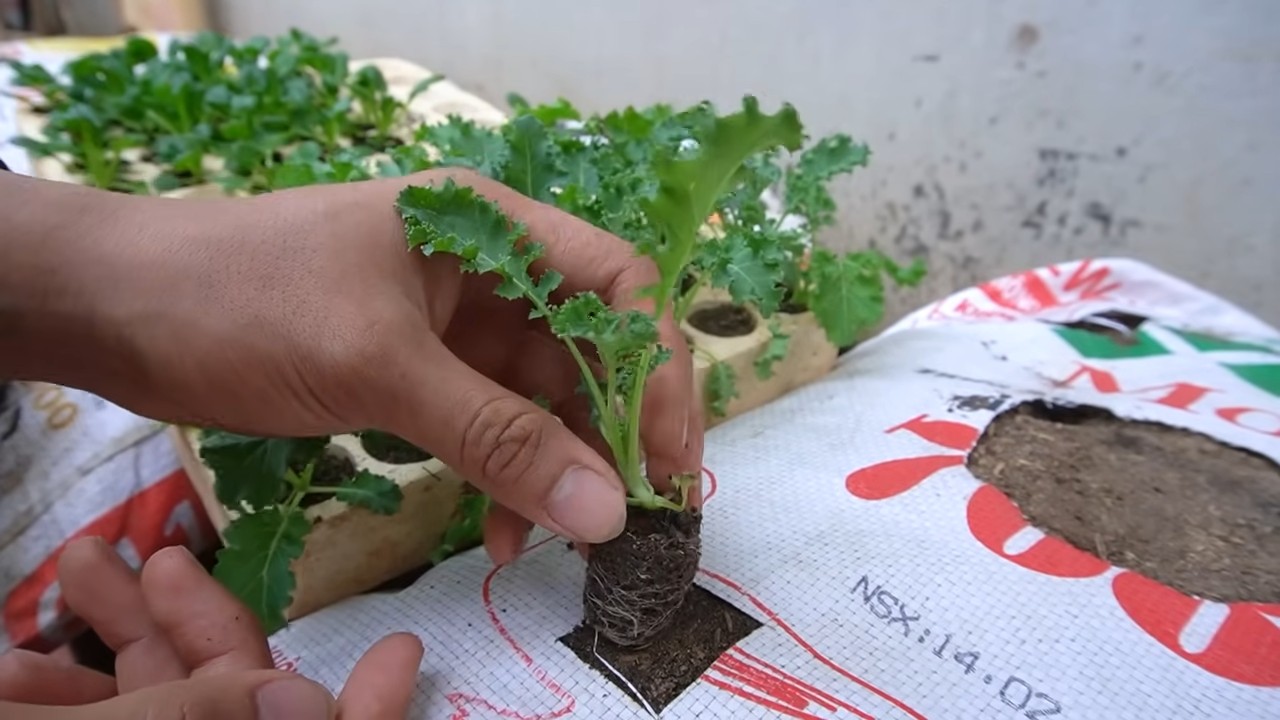
1. Pflanzen vorbereiten: Wenn du vorgezogene Kohlpflanzen gekauft hast, wässere sie vor dem Einsetzen gründlich. Lockere die Wurzeln vorsichtig auf, um das Anwachsen zu erleichtern.
2. Pflanzlöcher graben: Grabe in der Pflanzerde Löcher, die groß genug sind, um die Wurzelballen der Kohlpflanzen aufzunehmen. Der Abstand zwischen den Pflanzen sollte je nach Kohlsorte etwa 30-40 cm betragen.
3. Pflanzen einsetzen: Setze die Kohlpflanzen in die Löcher und fülle die Löcher mit Erde auf. Drücke die Erde leicht an, um die Pflanzen zu stabilisieren.
4. Angießen: Gieße die Pflanzen nach dem Einsetzen gründlich an.
3. Pflege der Kohlpflanzen
1. Regelmäßiges Gießen: Kohl benötigt viel Wasser, besonders während der Wachstumsphase. Gieße die Pflanzen regelmäßig, besonders an heißen Tagen. Achte darauf, dass die Erde immer leicht feucht ist, aber nicht nass.
2. Düngen: Dünge die Kohlpflanzen alle 2-3 Wochen mit einem organischen Dünger oder Komposttee. Kohl ist ein Starkzehrer und benötigt viele Nährstoffe, um gut zu wachsen.
3. Unkraut entfernen: Entferne regelmäßig Unkraut, das in den Pflanzsäcken wächst. Unkraut konkurriert mit den Kohlpflanzen um Nährstoffe und Wasser.
4. Schutz vor Schädlingen: Kohl ist anfällig für verschiedene Schädlinge, wie z.B. Kohlweißlinge, Blattläuse und Schnecken. Kontrolliere die Pflanzen regelmäßig auf Schädlinge und bekämpfe sie bei Bedarf mit natürlichen Mitteln, wie z.B. Neemöl oder Brennnesseljauche. Du kannst auch ein Insektenschutznetz über die Pflanzen spannen, um sie vor Schädlingen zu schützen.
5. Mulchen: Bedecke die Erde um die Kohlpflanzen mit Mulchmaterial, wie z.B. Stroh oder Holzhackschnitzel. Mulch hilft, die Feuchtigkeit im Boden zu halten, Unkrautwachstum zu unterdrücken und den Boden vor Erosion zu schützen.
6. Unterstützung: Je nach Kohlsorte kann es notwendig sein, die Pflanzen mit Pflanzstäben oder Rankgittern zu unterstützen, besonders wenn sie groß und schwer werden.
4. Ernte des Kohls
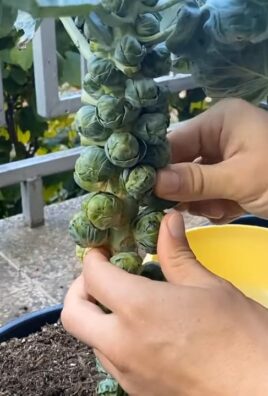
1. Erntezeitpunkt: Der Erntezeitpunkt hängt von der Kohlsorte ab. Grünkohl kann in der Regel ab Herbst geerntet werden, während Rosenkohl erst nach dem ersten Frost geerntet wird. Wirsing kann geerntet werden, sobald die Köpfe fest und geschlossen sind.
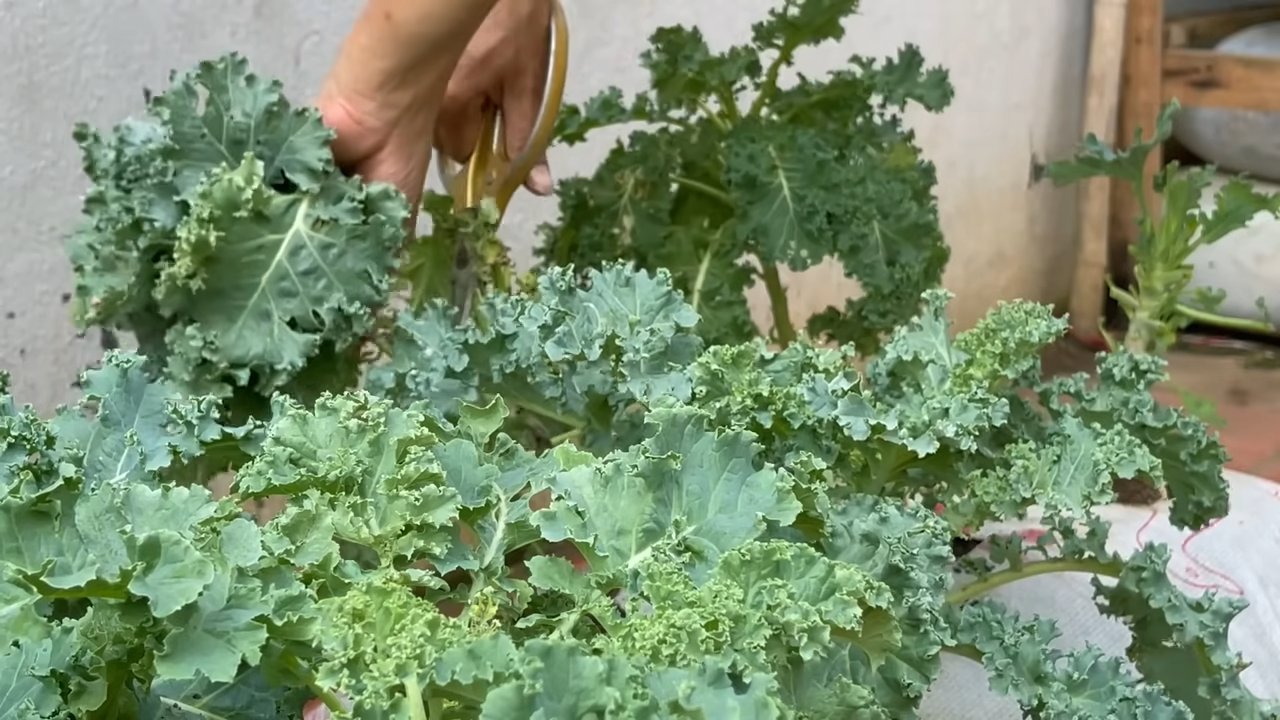
2. Erntemethode: Schneide die Blätter oder Köpfe des Kohls mit einer Gartenschere oder einem Messer ab. Bei Grünkohl kannst du die äußeren Blätter nach Bedarf ernten, während die inneren Blätter weiterwachsen. Bei Rosenkohl brichst du die Röschen von unten nach oben ab. Bei Wirsing schneidest du den ganzen Kopf ab.
3. Lagerung: Frischer Kohl kann im Kühlschrank einige Tage gelagert werden. Grünkohl und Rosenkohl können auch eingefroren werden, um sie länger haltbar zu machen.
Zusätzliche Tipps für den erfolgreichen Kohlanbau im Pflanzsack
* Sortenwahl: Wähle Kohlsorten, die für den Anbau im Pflanzsack geeignet sind. Kleinwüchsige Sorten sind oft besser geeignet als großwüchsige Sorten.
* Fruchtfolge: Baue Kohl nicht jedes Jahr am selben Standort an, um Krankheiten und Schädlingen vorzubeugen. Wechsle den Standort der Pflanzsäcke regelmäßig.
* Beipflanzung: Pflanze Kohl zusammen mit anderen Pflanzen, die ihn vor Schädlingen schützen oder sein Wachstum fördern. Gute Nachbarn für Kohl sind z.B. Ringelblumen, Kapuzinerkresse, Dill und Salbei.
* Schneckenbekämpfung: Schnecken können Kohlpflanzen stark schädigen. Schütze deine Pflanzen vor Schnecken, indem du Schneckenkorn streust oder Schneckenzäune aufstellst.
* Kohlhernie: Kohlhernie ist eine Pilzkrankheit, die die Wurzeln des Kohls befällt. Um Kohlhernie vorzubeugen, solltest du nur gesunde Pflanzen verwenden und den Boden regelmäßig kalken.
Häufige Probleme und Lösungen
* Gelbe Blätter: Gelbe Blätter können ein Zeichen für Nährstoffmangel sein. Dünge die Pflanzen mit einem organischen Dünger oder Komposttee.
* Blattläuse: Blattläuse saugen Pflanzensaft und können das Wachstum der Pflanzen beeinträchtigen. Bekämpfe Blattläuse mit natürlichen Mitteln, wie z.B. Neemöl oder Brennnesseljauche.
* Kohlweißlinge: Kohlweißlinge legen ihre Eier auf die Kohlblätter, aus denen dann Raupen schlüpfen, die die Blätter fressen
Conclusion
So, there you have it! Growing kale in soil bags is not just a gardening trend; it’s a game-changer for anyone looking to enjoy fresh, nutritious greens with minimal effort and maximum yield. We’ve explored how this method bypasses many of the common challenges associated with traditional gardening, offering a streamlined and accessible approach, even for those with limited space or experience.
The beauty of growing kale in soil bags lies in its simplicity and adaptability. You’re essentially creating a self-contained ecosystem, providing your kale plants with the perfect environment to thrive. The improved drainage minimizes the risk of root rot, while the nutrient-rich soil mix ensures they receive all the essential elements for robust growth. Plus, the portability of the bags means you can easily move your kale to chase the sun or protect them from harsh weather conditions.
But the benefits don’t stop there. Think about the reduced weeding, the minimized soil-borne diseases, and the overall convenience of having a thriving kale patch right at your doorstep. It’s a win-win situation for both you and your plants.
Why is this a must-try? Because it democratizes gardening. It empowers anyone, regardless of their experience level or living situation, to cultivate their own fresh, healthy food. It’s a sustainable and rewarding way to connect with nature and enjoy the fruits (or rather, the leaves) of your labor.
Ready to take it to the next level? Consider these variations:
* Companion Planting: Plant herbs like rosemary or thyme around the base of your kale plants to deter pests and enhance flavor.
* Succession Planting: Stagger your planting times to ensure a continuous harvest throughout the growing season.
* Vertical Gardening: Stack your soil bags to create a vertical kale garden, maximizing space and adding visual appeal.
* Different Kale Varieties: Experiment with different types of kale, such as Lacinato (dinosaur kale), Red Russian, or Curly kale, to discover your favorites.
* Organic Amendments: Incorporate organic amendments like compost tea or worm castings to further enrich the soil and boost plant growth.
Growing kale in soil bags is more than just a gardening technique; it’s an invitation to embrace a healthier, more sustainable lifestyle. It’s a chance to connect with nature, nurture your own food, and enjoy the satisfaction of harvesting fresh, delicious kale right from your own backyard (or balcony!).
We wholeheartedly encourage you to give this DIY trick a try. It’s easy, affordable, and incredibly rewarding. And most importantly, it allows you to enjoy the unparalleled taste and nutritional benefits of homegrown kale.
Don’t just take our word for it. Roll up your sleeves, grab a soil bag, and experience the joy of growing your own kale. We’re confident that you’ll be amazed by the results.
Once you’ve tried it, we’d love to hear about your experience! Share your tips, tricks, and photos with us in the comments below. Let’s build a community of kale-growing enthusiasts and inspire others to embrace this simple yet powerful gardening method. Happy gardening!
Frequently Asked Questions (FAQ)
What type of soil is best for growing kale in soil bags?
The ideal soil mix for growing kale in soil bags is a well-draining, nutrient-rich blend. A good starting point is a mix of equal parts potting soil, compost, and perlite or vermiculite. The potting soil provides a base for the plants to grow, the compost adds essential nutrients and improves soil structure, and the perlite or vermiculite enhances drainage and aeration. You can also add slow-release organic fertilizer to provide a steady supply of nutrients throughout the growing season. Avoid using garden soil directly in soil bags, as it can be too heavy and compact, leading to poor drainage and root problems.
How often should I water my kale plants in soil bags?
Watering frequency depends on several factors, including the weather, the size of the soil bag, and the growth stage of the kale plants. Generally, you should water your kale plants when the top inch of soil feels dry to the touch. During hot, dry weather, you may need to water daily, while during cooler, wetter periods, you can water less frequently. Be sure to water thoroughly, allowing the water to drain out of the bottom of the bag. Avoid overwatering, as this can lead to root rot. A good rule of thumb is to check the soil moisture regularly and adjust your watering schedule accordingly. Using a moisture meter can also be helpful.
How much sunlight do kale plants need when grown in soil bags?
Kale thrives in full sun, which means at least 6 hours of direct sunlight per day. However, it can also tolerate partial shade, especially in hotter climates. If you’re growing kale in soil bags in a location that receives less than 6 hours of sunlight, try to position the bags where they will receive the most morning sun, as this is generally less intense than afternoon sun. If your kale plants are not getting enough sunlight, they may become leggy and produce fewer leaves. In this case, you may need to move the soil bags to a sunnier location or supplement with artificial lighting.
What are some common pests and diseases that affect kale, and how can I prevent them?
Kale is susceptible to several common pests and diseases, including aphids, cabbage worms, flea beetles, and fungal diseases like powdery mildew. To prevent these problems, start by choosing disease-resistant kale varieties and providing your plants with optimal growing conditions. Regularly inspect your plants for signs of pests or diseases, and take action promptly if you notice any problems. You can control aphids and cabbage worms by handpicking them off the plants or spraying them with insecticidal soap or neem oil. Flea beetles can be deterred by covering your kale plants with row covers. To prevent fungal diseases, ensure good air circulation around your plants and avoid overwatering. You can also apply a fungicide if necessary.
How do I harvest kale leaves from plants grown in soil bags?
You can begin harvesting kale leaves when they are about 6-8 inches long. To harvest, simply cut or snap off the outer leaves, leaving the inner leaves to continue growing. Avoid removing more than one-third of the leaves at a time, as this can stress the plant. You can harvest kale leaves continuously throughout the growing season, as long as you provide your plants with adequate water and nutrients. After harvesting, wash the leaves thoroughly and store them in the refrigerator for up to a week.
Can I grow kale in soil bags during the winter?
Yes, you can grow kale in soil bags during the winter, especially in milder climates. Kale is a cold-hardy vegetable that can tolerate temperatures as low as 20°F. To protect your kale plants from frost and freezing temperatures, you can cover them with a frost blanket or move the soil bags to a sheltered location, such as a greenhouse or garage. You may also need to reduce your watering frequency during the winter months, as the soil will dry out more slowly. With proper care, you can enjoy fresh kale from your soil bags throughout the winter.
How long will kale plants last when grown in soil bags?
Kale is a biennial plant, which means it typically lives for two years. However, it is often grown as an annual, especially in warmer climates. When grown in soil bags, kale plants can last for several months, or even a year or more, depending on the variety, growing conditions, and harvesting practices. To prolong the life of your kale plants, provide them with adequate water, nutrients, and sunlight, and protect them from pests and diseases. You can also prune your kale plants regularly to encourage new growth and prevent them from becoming leggy.
Can I reuse the soil in the bags after harvesting kale?
Yes, you can reuse the soil in the bags after harvesting kale, but it’s important to replenish the nutrients and improve the soil structure before planting again. After harvesting, remove any remaining plant debris and weeds from the soil bag. Then, amend the soil with compost, aged manure, or other organic matter to add nutrients and improve drainage. You can also add a slow-release organic fertilizer to provide a steady supply of nutrients for the next crop. If you suspect that the soil may be contaminated with pests or diseases, you can sterilize it by baking it in the oven or solarizing it in the sun.

Leave a Comment