
Sweet Potato Tower DIY: Ready to ditch the digging and embrace a bountiful harvest in a small space? I’m so excited to share this incredible DIY project that will revolutionize your sweet potato growing game! Forget sprawling vines taking over your garden; we’re going vertical! This isn’t just about saving space; it’s about creating a stunning, productive feature in your backyard or even on your patio.
The concept of vertical gardening has roots stretching back centuries, from the Hanging Gardens of Babylon to the more recent (and practical!) kitchen gardens of medieval Europe. People have always sought innovative ways to maximize food production, especially in limited areas. And let’s be honest, who *doesn’t* love a good DIY project that combines practicality with a touch of creativity?
Why do you need this sweet potato tower DIY in your life? Well, traditional sweet potato growing can be a bit of a land hog. The vines spread far and wide, making harvesting a bit of a treasure hunt. This tower method solves that problem beautifully! It allows you to grow a significant amount of sweet potatoes in a fraction of the space, making it perfect for urban gardeners, apartment dwellers with balconies, or anyone looking to maximize their yield. Plus, it’s just plain fun! Imagine the satisfaction of harvesting a tower overflowing with delicious, homegrown sweet potatoes. Let’s get started!
Süßkartoffelturm selber bauen: So erntest du eine riesige Ernte auf kleinem Raum!
Hallo liebe Gartenfreunde! Habt ihr auch das Problem, dass euer Garten nicht so riesig ist, ihr aber trotzdem eine ordentliche Ernte einfahren wollt? Dann habe ich heute genau das Richtige für euch: einen Süßkartoffelturm! Diese vertikale Anbaumethode ist nicht nur platzsparend, sondern auch super effektiv und sieht obendrein noch richtig cool aus. Ich zeige euch, wie ihr euren eigenen Süßkartoffelturm ganz einfach selber bauen könnt. Los geht’s!
Was du für deinen Süßkartoffelturm brauchst:
* Tontöpfe in verschiedenen Größen: Ich empfehle euch, mindestens drei Töpfe zu verwenden. Der größte Topf sollte einen Durchmesser von etwa 40-50 cm haben, die anderen Töpfe entsprechend kleiner.
* Gute Pflanzerde: Süßkartoffeln lieben lockere, nährstoffreiche Erde.
* Süßkartoffel-Setzlinge: Die bekommt ihr im Frühjahr in fast jeder Gärtnerei oder online. Achtet darauf, gesunde, kräftige Setzlinge auszuwählen.
* Drainagematerial: Blähton, Kies oder Tonscherben eignen sich hervorragend, um Staunässe zu vermeiden.
* Gießkanne oder Schlauch: Zum Bewässern eurer Süßkartoffeln.
* Optional: Kompost oder organischer Dünger, um die Nährstoffversorgung zu optimieren.
* Handschuhe: Zum Schutz eurer Hände.
* Schaufel oder Kelle: Zum Befüllen der Töpfe mit Erde.
* Messer oder Schere: Zum eventuellen Kürzen der Wurzeln der Setzlinge.
Schritt-für-Schritt-Anleitung: So baust du deinen Süßkartoffelturm
1. Vorbereitung der Töpfe:
* Beginnt mit dem größten Topf. Legt eine Schicht Drainagematerial (Blähton, Kies oder Tonscherben) auf den Boden des Topfes. Das verhindert Staunässe und sorgt für eine gute Belüftung der Wurzeln.
* Füllt den Topf nun mit Pflanzerde. Lasst dabei etwa 5-10 cm Platz bis zum Rand.
2. Einsetzen der Süßkartoffel-Setzlinge im untersten Topf:
* Nehmt eure Süßkartoffel-Setzlinge und lockert vorsichtig die Wurzeln auf. Wenn die Wurzeln sehr lang sind, könnt ihr sie etwas kürzen.
* Pflanzt die Setzlinge nun in den größten Topf. Achtet darauf, dass die Setzlinge ausreichend Platz haben. Ich empfehle, etwa 3-4 Setzlinge in den größten Topf zu pflanzen.
* Gießt die Setzlinge nach dem Einpflanzen gründlich an.
3. Vorbereitung des zweiten Topfes:
* Nehmt den nächstkleineren Topf und legt auch hier eine Schicht Drainagematerial auf den Boden.
* Füllt den Topf mit Pflanzerde, lasst aber wieder etwas Platz bis zum Rand.
4. Positionierung des zweiten Topfes:
* Stellt den zweiten Topf mittig auf den ersten Topf. Achtet darauf, dass der zweite Topf stabil steht.
* Füllt den Zwischenraum zwischen den beiden Töpfen mit Erde auf. So entsteht eine Art “Hügel” um den zweiten Topf.
5. Einsetzen der Süßkartoffel-Setzlinge im zweiten Topf:
* Pflanzt nun auch in den zweiten Topf Süßkartoffel-Setzlinge. Hier reichen 2-3 Setzlinge aus.
* Gießt die Setzlinge auch hier wieder gründlich an.
6. Wiederholung der Schritte für die restlichen Töpfe:
* Wiederholt die Schritte 3-5 für alle weiteren Töpfe, bis ihr euren Süßkartoffelturm fertiggestellt habt.
* Je kleiner die Töpfe werden, desto weniger Setzlinge solltet ihr einpflanzen. Im obersten Topf reicht oft schon ein einziger Setzling aus.
7. Abschließende Bewässerung:
* Gießt euren fertigen Süßkartoffelturm noch einmal gründlich an. Achtet darauf, dass die Erde gut durchfeuchtet ist.
Pflege deines Süßkartoffelturms: So sorgst du für eine reiche Ernte
* Bewässerung: Süßkartoffeln brauchen regelmäßig Wasser, besonders während der Wachstumsphase. Achtet darauf, dass die Erde immer leicht feucht ist, aber nicht nass. An heißen Tagen müsst ihr möglicherweise täglich gießen.
* Düngung: Süßkartoffeln sind Starkzehrer und benötigen ausreichend Nährstoffe. Düngt eure Pflanzen regelmäßig mit Kompost oder einem organischen Dünger. Ich dünge meine Süßkartoffeln alle 2-3 Wochen.
* Sonnenlicht: Süßkartoffeln lieben die Sonne! Stellt euren Süßkartoffelturm an einen sonnigen Standort, an dem die Pflanzen mindestens 6 Stunden Sonne pro Tag bekommen.
* Schutz vor Schädlingen: Achtet auf Schädlinge wie Blattläuse oder Schnecken. Bei Bedarf könnt ihr biologische Schädlingsbekämpfungsmittel einsetzen.
* Rankhilfe: Süßkartoffeln bilden lange Ranken. Ihr könnt ihnen eine
Hallo liebe Gartenfreunde! Habt ihr auch das Problem, dass euer Garten nicht so riesig ist, ihr aber trotzdem eine ordentliche Ernte einfahren wollt? Dann habe ich heute genau das Richtige für euch: einen Süßkartoffelturm! Diese vertikale Anbaumethode ist nicht nur platzsparend, sondern auch super effektiv und sieht obendrein noch richtig cool aus. Ich zeige euch, wie ihr euren eigenen Süßkartoffelturm ganz einfach selber bauen könnt. Los geht’s!
Was du für deinen Süßkartoffelturm brauchst:
* Tontöpfe in verschiedenen Größen: Ich empfehle euch, mindestens drei Töpfe zu verwenden. Der größte Topf sollte einen Durchmesser von etwa 40-50 cm haben, die anderen Töpfe entsprechend kleiner.
* Gute Pflanzerde: Süßkartoffeln lieben lockere, nährstoffreiche Erde.
* Süßkartoffel-Setzlinge: Die bekommt ihr im Frühjahr in fast jeder Gärtnerei oder online. Achtet darauf, gesunde, kräftige Setzlinge auszuwählen.
* Drainagematerial: Blähton, Kies oder Tonscherben eignen sich hervorragend, um Staunässe zu vermeiden.
* Gießkanne oder Schlauch: Zum Bewässern eurer Süßkartoffeln.
* Optional: Kompost oder organischer Dünger, um die Nährstoffversorgung zu optimieren.
* Handschuhe: Zum Schutz eurer Hände.
* Schaufel oder Kelle: Zum Befüllen der Töpfe mit Erde.
* Messer oder Schere: Zum eventuellen Kürzen der Wurzeln der Setzlinge.
Schritt-für-Schritt-Anleitung: So baust du deinen Süßkartoffelturm
1. Vorbereitung der Töpfe:
* Beginnt mit dem größten Topf. Legt eine Schicht Drainagematerial (Blähton, Kies oder Tonscherben) auf den Boden des Topfes. Das verhindert Staunässe und sorgt für eine gute Belüftung der Wurzeln.
* Füllt den Topf nun mit Pflanzerde. Lasst dabei etwa 5-10 cm Platz bis zum Rand.
2. Einsetzen der Süßkartoffel-Setzlinge im untersten Topf:
* Nehmt eure Süßkartoffel-Setzlinge und lockert vorsichtig die Wurzeln auf. Wenn die Wurzeln sehr lang sind, könnt ihr sie etwas kürzen.
* Pflanzt die Setzlinge nun in den größten Topf. Achtet darauf, dass die Setzlinge ausreichend Platz haben. Ich empfehle, etwa 3-4 Setzlinge in den größten Topf zu pflanzen.
* Gießt die Setzlinge nach dem Einpflanzen gründlich an.
3. Vorbereitung des zweiten Topfes:
* Nehmt den nächstkleineren Topf und legt auch hier eine Schicht Drainagematerial auf den Boden.
* Füllt den Topf mit Pflanzerde, lasst aber wieder etwas Platz bis zum Rand.
4. Positionierung des zweiten Topfes:
* Stellt den zweiten Topf mittig auf den ersten Topf. Achtet darauf, dass der zweite Topf stabil steht.
* Füllt den Zwischenraum zwischen den beiden Töpfen mit Erde auf. So entsteht eine Art “Hügel” um den zweiten Topf.
5. Einsetzen der Süßkartoffel-Setzlinge im zweiten Topf:
* Pflanzt nun auch in den zweiten Topf Süßkartoffel-Setzlinge. Hier reichen 2-3 Setzlinge aus.
* Gießt die Setzlinge auch hier wieder gründlich an.
6. Wiederholung der Schritte für die restlichen Töpfe:
* Wiederholt die Schritte 3-5 für alle weiteren Töpfe, bis ihr euren Süßkartoffelturm fertiggestellt habt.
* Je kleiner die Töpfe werden, desto weniger Setzlinge solltet ihr einpflanzen. Im obersten Topf reicht oft schon ein einziger Setzling aus.
7. Abschließende Bewässerung:
* Gießt euren fertigen Süßkartoffelturm noch einmal gründlich an. Achtet darauf, dass die Erde gut durchfeuchtet ist.
Pflege deines Süßkartoffelturms: So sorgst du für eine reiche Ernte
* Bewässerung: Süßkartoffeln brauchen regelmäßig Wasser, besonders während der Wachstumsphase. Achtet darauf, dass die Erde immer leicht feucht ist, aber nicht nass. An heißen Tagen müsst ihr möglicherweise täglich gießen.
* Düngung: Süßkartoffeln sind Starkzehrer und benötigen ausreichend Nährstoffe. Düngt eure Pflanzen regelmäßig mit Kompost oder einem organischen Dünger. Ich dünge meine Süßkartoffeln alle 2-3 Wochen.
* Sonnenlicht: Süßkartoffeln lieben die Sonne! Stellt euren Süßkartoffelturm an einen sonnigen Standort, an dem die Pflanzen mindestens 6 Stunden Sonne pro Tag bekommen.
* Schutz vor Schädlingen: Achtet auf Schädlinge wie Blattläuse oder Schnecken. Bei Bedarf könnt ihr biologische Schädlingsbekämpfungsmittel einsetzen.
* Rankhilfe: Süßkartoffeln bilden lange Ranken. Ihr könnt ihnen eine Rankhilfe anbieten, damit sie nicht am Boden liegen. Das erleichtert auch die Ernte.
Erntezeit: Wann sind die Süßkartoffeln reif?
Die Erntezeit für Süßkartoffeln ist in der Regel im Herbst, kurz vor dem ersten Frost. Ihr erkennt, dass die Süßkartoffeln reif sind, wenn die Blätter der Pflanzen gelb werden und absterben.
So erntest du deine Süßkartoffeln aus dem Turm:
1. Vorbereitung: Stellt sicher, dass ihr einen trockenen Tag für die Ernte wählt.
2. Abbau des Turms: Beginnt mit dem obersten Topf und nehmt ihn vorsichtig ab.
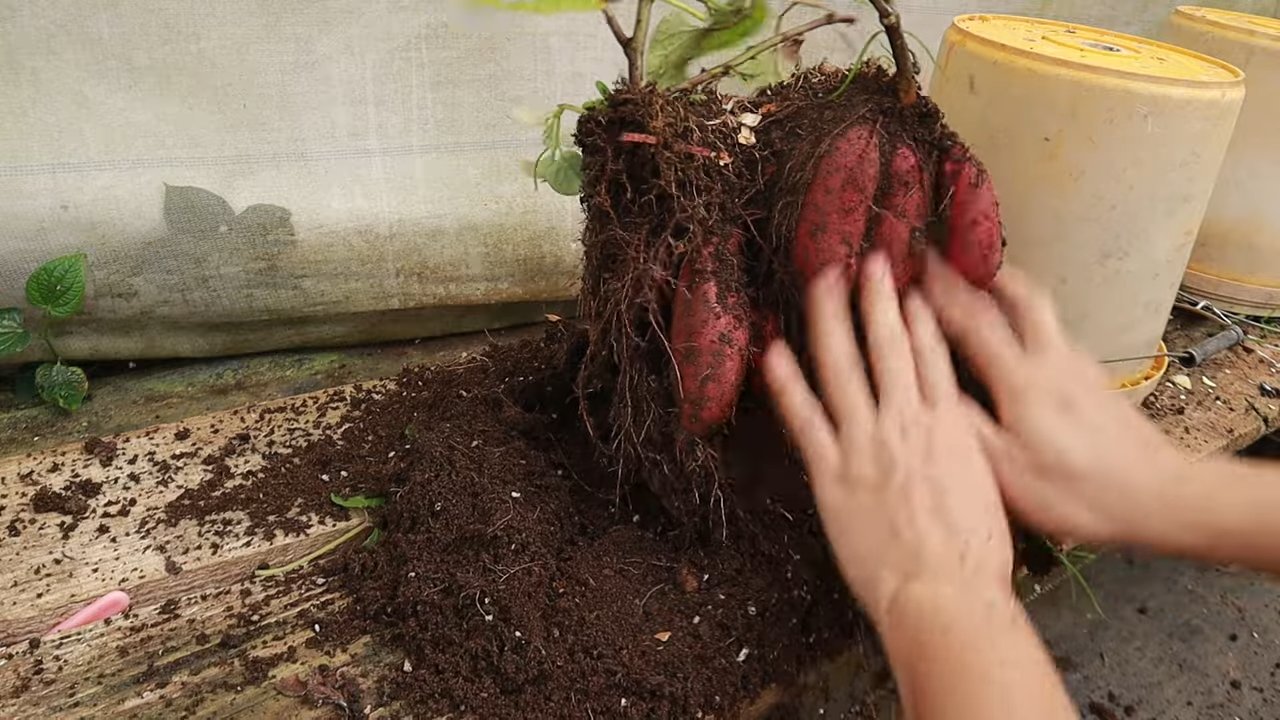
3. Ernte der Süßkartoffeln: Grabt die Süßkartoffeln vorsichtig aus der Erde. Achtet darauf, die Knollen nicht zu beschädigen.
4. Wiederholung: Wiederholt die Schritte 2 und 3 für alle weiteren Töpfe.
5. Reinigung: Entfernt die Erde von den Süßkartoffeln.
6. Trocknung: Lasst die Süßkartoffeln einige Tage an einem trockenen, luftigen Ort trocknen. Dadurch werden sie haltbarer.
Tipps und Tricks für den perfekten Süßkartoffelturm
* Sortenwahl: Es gibt viele verschiedene Süßkartoffelsorten. Informiert euch, welche Sorten sich am besten für den Anbau im Topf eignen.
* Drainage: Eine gute Drainage ist das A und O für einen erfolgreichen Süßkartoffelturm. Achtet darauf, dass das Wasser gut ablaufen kann, um Staunässe zu vermeiden.
* Erde: Verwendet eine hochwertige Pflanzerde, die reich an Nährstoffen ist. Ihr könnt die Erde auch mit Kompost oder organischem Dünger anreichern.
* Standort: Wählt einen sonnigen Standort für euren Süßkartoffelturm. Süßkartoffeln brauchen viel Sonne, um gut zu wachsen.
* Bewässerung: Gießt eure Süßkartoffeln regelmäßig, besonders während der Wachstumsphase. Achtet darauf, dass die Erde immer leicht feucht ist.
* Düngung: Düngt eure Süßkartoffeln regelmäßig mit Kompost oder einem organischen Dünger.
* Schädlinge: Achtet auf Schädlinge wie Blattläuse oder Schnecken. Bei Bedarf könnt ihr biologische Schädlingsbekämpfungsmittel einsetzen.
* Rankhilfe: Bietet euren Süßkartoffeln eine Rankhilfe an, damit sie nicht am Boden liegen.
* Erntezeitpunkt: Erntet eure Süßkartoffeln, wenn die Blätter der Pflanzen gelb werden und absterben.
* Lagerung: Lagert eure Süßkartoffeln an einem kühlen, trockenen und dunklen Ort.
Ich hoffe, diese Anleitung hilft euch dabei, euren eigenen Süßkartoffelturm

Conclusion
So, there you have it! Creating your own sweet potato tower isn’t just a fun weekend project; it’s a game-changer for your garden and your plate. We’ve walked you through the steps, highlighting the benefits of vertical gardening and the sheer abundance of sweet potatoes you can harvest from a relatively small space. But why is this DIY trick a must-try?
First and foremost, it’s about maximizing space. If you’re dealing with a limited garden area, a balcony, or even just a sunny patio, a sweet potato tower allows you to grow a substantial crop without sacrificing precious ground. Think of it as a vertical sweet potato farm, efficiently utilizing every inch of available sunlight and soil.
Second, it’s about healthier plants and easier harvesting. The tower design promotes better air circulation around the plants, reducing the risk of fungal diseases. And when harvest time rolls around, you won’t be digging endlessly through the soil. The sweet potatoes are concentrated within the tower, making the process significantly easier and less back-breaking.
Third, it’s about the sheer satisfaction of growing your own food. There’s something incredibly rewarding about nurturing a plant from a slip to a bountiful harvest. Knowing that you created this thriving ecosystem, providing your family with fresh, homegrown sweet potatoes, is an experience that store-bought produce simply can’t replicate.
But the beauty of this project lies in its adaptability. Feel free to experiment with different materials for your tower. While we’ve suggested using hardware cloth and burlap, you could also repurpose old tires (thoroughly cleaned, of course!), plastic containers, or even woven willow branches for a more rustic look. Consider adding companion plants like marigolds or nasturtiums around the base of the tower to deter pests and attract beneficial insects. You can also tailor the soil mix to your specific climate and sweet potato variety. Some varieties thrive in sandier soil, while others prefer a richer, more loamy mix. Don’t be afraid to adjust the recipe to suit your needs.
And speaking of variations, why not try growing other vining vegetables in a similar tower structure? Cucumbers, squash, or even certain types of beans could thrive in a vertical environment. The possibilities are endless!
We wholeheartedly encourage you to give this sweet potato tower DIY a try. It’s a rewarding project that will transform your gardening experience and provide you with a delicious and nutritious harvest. Don’t be intimidated by the process; it’s simpler than it looks, and the results are well worth the effort.
Once you’ve built your tower and harvested your first crop of sweet potatoes, we want to hear about it! Share your experiences, photos, and tips in the comments below. Let’s create a community of sweet potato tower enthusiasts and learn from each other’s successes (and even the occasional mishap!). Your insights could inspire others to embark on their own vertical gardening adventures. So, get your hands dirty, embrace the challenge, and enjoy the sweet rewards of your labor. Happy gardening!
Frequently Asked Questions (FAQ)
What kind of sweet potato slips should I use?
The best type of sweet potato slip depends on your climate and personal preference. Beauregard is a popular and reliable variety that produces large, orange-fleshed sweet potatoes. Centennial is another good choice, known for its sweet flavor and early maturity. For a more unique option, consider trying Japanese sweet potatoes, which have a purple skin and white flesh. Research which varieties are best suited for your growing zone and choose slips from a reputable source. Ensure the slips are healthy and free from disease before planting.
How often should I water my sweet potato tower?
Watering frequency depends on several factors, including the weather, the type of soil you’re using, and the size of your tower. In general, you should water your sweet potato tower whenever the top inch of soil feels dry to the touch. During hot, dry weather, you may need to water daily, or even twice a day. Be sure to water deeply, allowing the water to penetrate the entire tower. Avoid overwatering, as this can lead to root rot. A good way to check if your tower needs watering is to stick your finger into the soil near the base of the plants. If it feels dry, it’s time to water.
What kind of fertilizer should I use for my sweet potato tower?
Sweet potatoes are heavy feeders, so it’s important to provide them with adequate nutrients. A balanced fertilizer with an NPK ratio of 10-10-10 or 14-14-14 is a good starting point. You can also use organic fertilizers such as compost tea, fish emulsion, or bone meal. Apply fertilizer according to the package directions, typically every 4-6 weeks. Avoid over-fertilizing, as this can lead to excessive vine growth at the expense of tuber development. Consider doing a soil test to determine the specific nutrient needs of your soil.
How do I protect my sweet potato tower from pests and diseases?
Prevention is key when it comes to pests and diseases. Start by using healthy, disease-free slips. Ensure good air circulation around the tower by spacing the plants appropriately. Regularly inspect your plants for signs of pests or diseases. Common pests that affect sweet potatoes include aphids, flea beetles, and sweet potato weevils. You can control these pests with insecticidal soap, neem oil, or by hand-picking them off the plants. Diseases such as fungal leaf spots and root rot can be prevented by avoiding overwatering and ensuring good drainage. If you notice any signs of disease, remove the affected leaves or plants immediately.
When is the best time to harvest my sweet potatoes?
Sweet potatoes are typically ready to harvest about 90-120 days after planting. The best time to harvest is just before the first frost. The leaves will start to turn yellow and the vines will begin to die back. To harvest, carefully dig around the base of the tower and gently lift the sweet potatoes out of the soil. Avoid damaging the tubers during harvest. Cure the sweet potatoes by placing them in a warm, humid place (80-85°F and 85-90% humidity) for 7-10 days. This will help to heal any wounds and improve their flavor and storage life.
Can I reuse the soil from my sweet potato tower?
Yes, you can reuse the soil from your sweet potato tower, but it’s important to amend it before replanting. Sweet potatoes are heavy feeders, so the soil will likely be depleted of nutrients after a growing season. Add compost, aged manure, or other organic matter to replenish the nutrients. You may also want to consider sterilizing the soil to kill any pests or diseases that may be present. This can be done by baking the soil in the oven or by solarizing it in the sun.
How tall should my sweet potato tower be?
The ideal height for your sweet potato tower depends on your personal preference and the space you have available. A tower that is 4-5 feet tall is a good starting point. This will provide ample space for the sweet potato vines to grow and produce a good yield. However, you can make your tower taller or shorter depending on your needs. Just be sure that the tower is sturdy enough to support the weight of the soil and plants.
What if my sweet potato vines are not producing tubers?
There are several reasons why your sweet potato vines may not be producing tubers. One common reason is that the soil is too rich in nitrogen. Nitrogen promotes vine growth, but it can inhibit tuber development. To remedy this, reduce the amount of nitrogen fertilizer you’re using and add some phosphorus and potassium to the soil. Another reason could be that the plants are not getting enough sunlight. Sweet potatoes need at least 6 hours of sunlight per day to produce tubers. Make sure your tower is located in a sunny spot. Finally, it could simply be that the plants are not mature enough. Sweet potatoes typically take 90-120 days to mature, so be patient and give them time to develop.
Can I grow other vegetables in my sweet potato tower?
While the tower is designed for sweet potatoes, you can certainly incorporate other companion plants. Marigolds and nasturtiums are excellent choices for deterring pests. Herbs like basil or oregano can also be planted around the base of the tower. Avoid planting vegetables that will compete with the sweet potatoes for nutrients or sunlight. The primary focus should remain on the sweet potatoes to maximize their yield.
How do I store my harvested sweet potatoes?
Proper storage is crucial for extending the shelf life of your sweet potatoes. After curing, store them in a cool, dark, and well-ventilated place with a temperature between 55-60°F and a humidity level of 85-90%. A root cellar is ideal, but a cool basement or garage can also work. Avoid storing sweet potatoes in the refrigerator, as this can cause them to develop a hard core and lose their flavor. Properly stored sweet potatoes can last for several months.


Leave a Comment