
Grow Kale in Containers: Unlock the secrets to a thriving, leafy green bounty, even without a sprawling garden! Have you ever dreamed of snipping fresh, vitamin-packed kale right outside your kitchen door? I know I have! It’s easier than you think, and this DIY guide will show you exactly how to make it happen. Forget those wilted, overpriced bunches at the grocery store.
Kale, a nutritional powerhouse, has a rich history dating back to ancient Greece and Rome, where it was a staple food. Over centuries, it has become a symbol of healthy eating and sustainable living. But let’s be honest, not everyone has the space for a traditional garden. That’s where container gardening comes to the rescue!
Why should you learn to grow kale in containers? Because it’s a game-changer! Imagine having fresh, organic kale readily available for smoothies, salads, or even crispy kale chips. Plus, container gardening is perfect for small spaces like balconies, patios, or even sunny windowsills. This DIY trick is a must-have for anyone looking to boost their health, save money, and add a touch of green to their lives. I’m excited to share my best tips and tricks to help you succeed!
Grow Your Own Kale: A Beginner’s Guide to Container Gardening
Hey there, fellow gardening enthusiasts! I’m so excited to share my experience with growing kale in containers. It’s surprisingly easy, even if you don’t have a huge backyard. Fresh, homegrown kale is incredibly rewarding, and you’ll be amazed at how much you can harvest from just a few pots. Let’s dive in!
Choosing the Right Kale Variety
Before we get our hands dirty, let’s talk kale varieties. There are tons of options, each with its own unique flavor and texture. Here are a few of my favorites for container gardening:
* Dwarf Blue Curled Vates: This is a compact variety that’s perfect for smaller containers. It has a classic kale flavor and beautiful, frilly leaves.
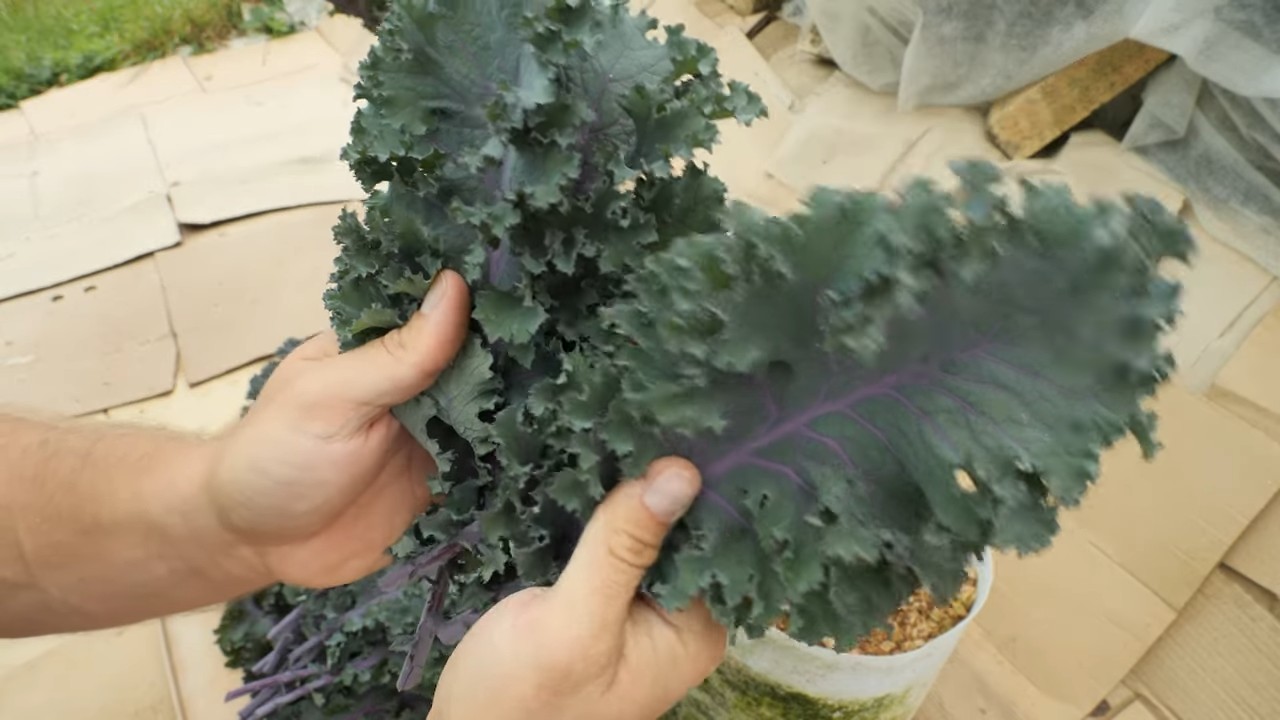
* Red Russian: If you’re looking for something a little different, Red Russian kale is a great choice. It has flat, oak-shaped leaves with a mild, slightly sweet flavor. The stems are a gorgeous reddish-purple, adding a pop of color to your garden.
* Lacinato (Dinosaur) Kale: Also known as Dinosaur kale or Tuscan kale, Lacinato has long, dark green, bumpy leaves. It has a slightly more robust flavor than other varieties and holds up well in cooking.
* Redbor Kale: This variety is grown as much for its ornamental value as it is for its taste. The deeply fringed leaves are a vibrant purple-red, making it a stunning addition to any container garden.
Gathering Your Supplies
Okay, now that we’ve picked our kale, let’s gather everything we need. Here’s a checklist:
* Containers: Choose containers that are at least 12 inches in diameter and 12 inches deep. This will give your kale plants enough room to grow. Make sure the containers have drainage holes!
* Potting Mix: Don’t use garden soil in your containers! It’s too heavy and doesn’t drain well. Instead, use a high-quality potting mix specifically designed for containers.
* Kale Seeds or Seedlings: You can start kale from seed or buy seedlings from your local garden center. I’ve done both, and both work well.
* Watering Can or Hose: You’ll need a way to water your kale plants regularly.
* Fertilizer: Kale is a heavy feeder, so you’ll need to fertilize it regularly. I like to use a balanced, organic fertilizer.
* Optional:
* Gardening gloves (to keep your hands clean)
* Trowel (for planting)
* Mulch (to help retain moisture and suppress weeds)
Planting Your Kale
Alright, let’s get planting!
Starting from Seed
1. Sow the Seeds: Fill your containers with potting mix, leaving about an inch of space at the top. Moisten the soil. Sow the kale seeds about 1/4 inch deep and 1 inch apart.
2. Cover and Water: Gently cover the seeds with potting mix and water them thoroughly.
3. Keep Moist: Keep the soil consistently moist until the seeds germinate, which usually takes about 5-10 days. You can cover the container with plastic wrap to help retain moisture, but be sure to remove it once the seedlings emerge.
4. Thin Seedlings: Once the seedlings have a few true leaves, thin them out so that they are about 6-8 inches apart. This will give them enough room to grow.
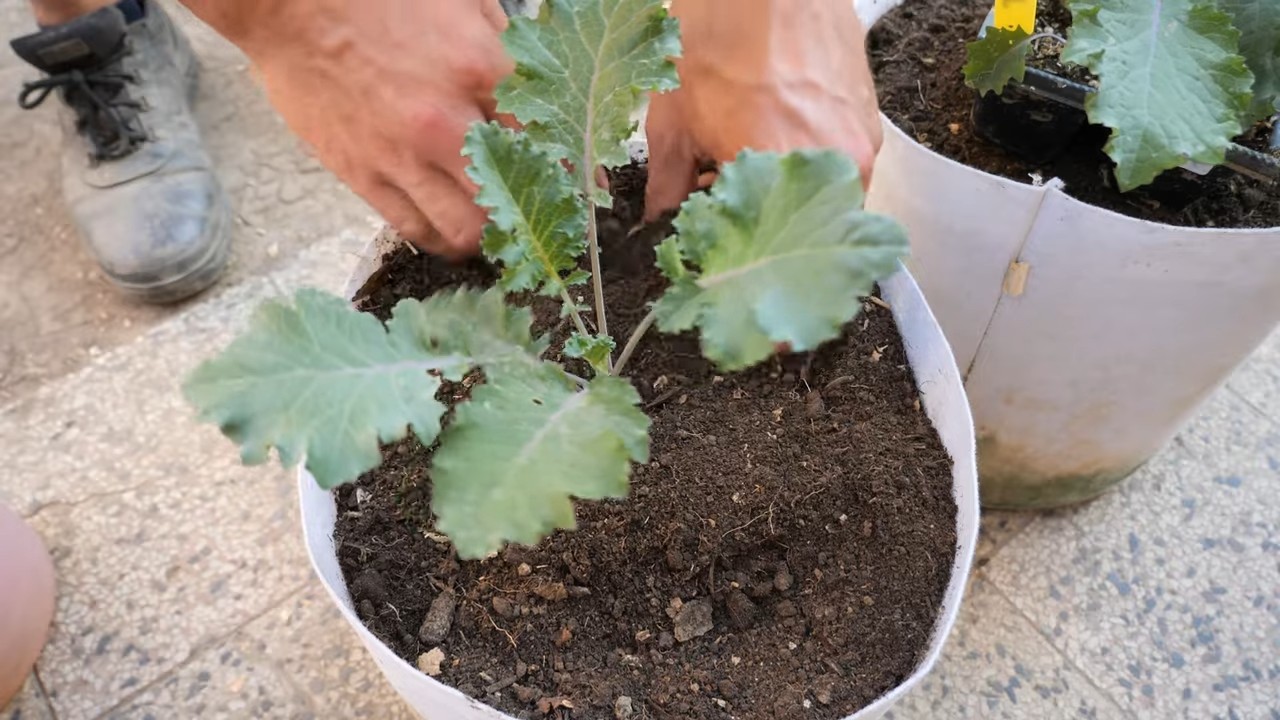
Planting Seedlings
1. Prepare the Container: Fill your container with potting mix, leaving about an inch of space at the top.
2. Dig a Hole: Dig a hole in the potting mix that is large enough to accommodate the seedling’s root ball.
3. Remove Seedling: Gently remove the seedling from its container. If the roots are pot-bound (tightly circling the root ball), gently loosen them before planting.
4. Plant the Seedling: Place the seedling in the hole and backfill with potting mix. Gently firm the soil around the base of the plant.
5. Water Thoroughly: Water the seedling thoroughly after planting.
Caring for Your Kale
Now that your kale is planted, it’s time to take care of it. Here’s what you need to do:
1. Watering: Kale needs consistent moisture, especially when it’s actively growing. Water your kale plants deeply whenever the top inch of soil feels dry to the touch. Avoid overwatering, as this can lead to root rot.
2. Fertilizing: As I mentioned earlier, kale is a heavy feeder. Fertilize your plants every 2-3 weeks with a balanced, organic fertilizer. Follow the instructions on the fertilizer package. You can also use compost tea as a natural fertilizer.
3. Sunlight: Kale needs at least 6 hours of sunlight per day. Place your containers in a sunny location. If you live in a hot climate, provide some afternoon shade to prevent the leaves from scorching.
4. Pest Control: Kale can be susceptible to pests like aphids, cabbage worms, and flea beetles. Inspect your plants regularly for signs of pests. If you find any, you can try spraying them with insecticidal soap or neem oil. You can also handpick the pests off the plants.
5. Weed Control: Keep your containers free of weeds. Weeds compete with your kale plants for nutrients and water. You can hand-pull weeds or use a hoe to remove them. Mulching around your kale plants can also help suppress weeds.
Harvesting Your Kale
The best part! You can start harvesting kale leaves once they are about 4-6 inches long.
1. Harvest Outer Leaves: Harvest the outer leaves first, leaving the inner leaves to continue growing. This is called “cut and come again” harvesting.
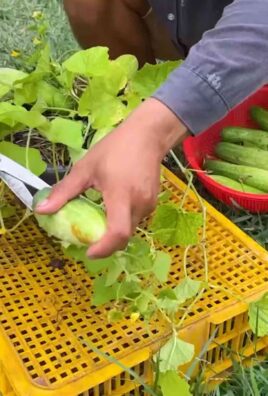
2. Use Scissors or a Knife: Use scissors or a knife to cut the leaves off the plant. Cut the leaves close to the stem.
3. Harvest Regularly: Harvest your kale regularly to encourage new growth.
4. Wash and Enjoy: Wash the kale leaves thoroughly before eating. You can eat them raw in salads, sauté them, add them to soups and stews, or even bake them into kale chips.
Troubleshooting
Even with the best care, you might encounter some problems while growing kale. Here are a few common issues and how to fix them:
* Yellowing Leaves: Yellowing leaves can be a sign of overwatering, underwatering, or nutrient deficiency. Check the soil moisture and adjust your watering accordingly. Fertilize your plants to provide them with the nutrients they need.
* Holes in Leaves: Holes in leaves are usually caused by pests like cabbage worms or flea beetles. Inspect your plants for pests and treat them accordingly.
* Leggy Growth: Leggy growth (long, spindly stems) is usually caused by insufficient sunlight. Move your containers to a sunnier location.
* Bolting: Bolting (when the plant starts to flower) can occur when the weather gets too hot. Once kale bolts, the leaves become bitter. To prevent bolting, try to provide some afternoon shade during hot weather. You can also choose bolt-resistant varieties of kale.
Extending the Growing Season
Kale is a cool-season crop, so it grows best in the spring and fall. However, you can extend the growing season by using a few simple techniques:
* Start Seeds Indoors: Start your kale seeds indoors 6-8 weeks before the last frost in the spring or 6-8 weeks before the first frost in the fall. This will give you a head start on the growing season.
* Use Row Covers: Row covers are lightweight fabric covers that you can place over your plants to protect them from frost and pests.
* Move Containers Indoors: If you live in a cold climate, you can move your containers indoors during the winter. Place them in a sunny location and water them regularly.
Enjoy Your Homegrown Kale!
Growing kale in containers is a fun and rewarding experience. With a little bit of care, you can enjoy fresh, homegrown kale all season long. So, get out there and start planting! I promise, you won’t regret it. Happy gardening!
Conclusion
So, there you have it! Growing kale in containers is not only achievable, but it’s also a remarkably rewarding experience. We’ve walked through the essential steps, from selecting the right container and soil to nurturing your kale plants and harvesting those vibrant, nutrient-packed leaves. But why should you bother with this DIY project?
Firstly, growing your own kale offers unparalleled freshness. Imagine stepping out onto your balcony or patio and snipping off a handful of kale leaves just moments before adding them to your smoothie, salad, or stir-fry. The flavor is simply unmatched by store-bought kale, which often suffers from wilting and nutrient loss during transportation and storage.
Secondly, container gardening provides incredible flexibility. Whether you live in an apartment with limited outdoor space or have a sprawling garden, you can easily grow kale in containers. This method allows you to control the growing environment, protecting your plants from harsh weather conditions and pests. Plus, you can move your containers around to maximize sunlight exposure.
Thirdly, and perhaps most importantly, growing your own kale is empowering. It connects you to the food you eat and gives you a sense of accomplishment. There’s nothing quite like watching a tiny seed sprout and transform into a thriving plant that provides you with delicious and nutritious food.
But the fun doesn’t stop there! Feel free to experiment with different varieties of kale. Curly kale, dinosaur kale (lacinato), and red Russian kale all offer unique flavors and textures. You can also try companion planting by adding herbs like rosemary or thyme to your kale containers. These herbs not only enhance the flavor of your kale but also help to deter pests.
Consider adding a trellis or support structure for taller kale varieties to encourage upward growth and maximize space. You can also experiment with different container sizes and materials to find what works best for your growing conditions. Don’t be afraid to get creative and personalize your kale-growing experience!
We wholeheartedly encourage you to give this DIY trick a try. It’s a simple, affordable, and incredibly satisfying way to enjoy fresh, healthy kale. And once you’ve harvested your first batch of homegrown kale, we’d love to hear about your experience! Share your photos, tips, and stories with us in the comments below. Let’s build a community of container kale growers and inspire others to embrace the joys of homegrown food. Remember, even a small container of kale can make a big difference in your health and well-being. So, grab your seeds, soil, and containers, and get ready to embark on a delicious and rewarding gardening adventure! Let’s all enjoy the benefits of fresh, homegrown kale.
Frequently Asked Questions (FAQ)
What is the best type of container for growing kale?
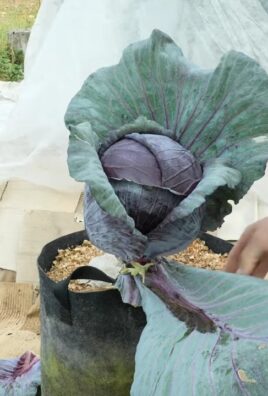
The ideal container for growing kale should be at least 12 inches deep and 12 inches in diameter. This provides ample space for the roots to develop. You can use plastic pots, terracotta pots, or even repurposed containers like buckets or tubs. Ensure the container has drainage holes to prevent waterlogging, which can lead to root rot. Fabric pots are also a great option as they allow for excellent drainage and aeration.
What kind of soil should I use for growing kale in containers?
Kale thrives in well-draining, nutrient-rich soil. A good potting mix specifically formulated for vegetables is an excellent choice. You can also create your own mix by combining equal parts of compost, peat moss (or coconut coir), and perlite or vermiculite. Compost provides essential nutrients, peat moss (or coconut coir) helps retain moisture, and perlite or vermiculite improves drainage. Avoid using garden soil in containers, as it can become compacted and hinder root growth.
How much sunlight does kale need when grown in containers?
Kale needs at least 6 hours of direct sunlight per day to thrive. Choose a location that receives plenty of sunlight, such as a south-facing balcony or patio. If you live in a particularly hot climate, provide some afternoon shade to prevent the leaves from scorching. If you don’t have access to enough natural sunlight, you can supplement with grow lights.
How often should I water my container kale plants?
Water your kale plants regularly, especially during hot and dry weather. The soil should be consistently moist but not waterlogged. Check the soil moisture by sticking your finger about an inch deep into the soil. If it feels dry, it’s time to water. Water deeply, allowing the water to drain out of the drainage holes. Avoid overhead watering, as this can promote fungal diseases.
What are some common pests and diseases that affect kale, and how can I prevent them?
Common pests that affect kale include aphids, cabbage worms, and flea beetles. You can prevent these pests by inspecting your plants regularly and removing any pests you find by hand. You can also use insecticidal soap or neem oil to control infestations. Row covers can also be used to protect your plants from pests. Common diseases that affect kale include powdery mildew and black rot. Prevent these diseases by providing good air circulation, avoiding overhead watering, and removing any infected leaves promptly.
How often should I fertilize my container kale plants?
Kale is a heavy feeder and benefits from regular fertilization. Fertilize your plants every 2-3 weeks with a balanced liquid fertilizer or compost tea. You can also add slow-release fertilizer granules to the soil at planting time. Avoid over-fertilizing, as this can lead to excessive leaf growth and reduced flavor.
When can I harvest my container kale?
You can start harvesting kale leaves when they are about 4-6 inches long. Harvest the outer leaves first, leaving the inner leaves to continue growing. You can harvest kale continuously throughout the growing season. The flavor of kale is often improved by a light frost.
Can I grow kale in containers indoors?
Yes, you can grow kale in containers indoors, but you’ll need to provide adequate light. Place your kale plants near a sunny window or use grow lights to supplement natural light. You’ll also need to ensure good air circulation and maintain a consistent temperature.
What are some good companion plants for kale in containers?
Good companion plants for kale include herbs like rosemary, thyme, and sage, which can help deter pests. Marigolds are also beneficial, as they attract beneficial insects that prey on pests. Avoid planting kale near members of the brassica family, such as broccoli, cabbage, and cauliflower, as they can attract the same pests and diseases.
How do I overwinter kale in containers?
Kale is a hardy plant that can tolerate cold temperatures. In mild climates, you can simply leave your kale plants in their containers outdoors. In colder climates, you can move your containers to a sheltered location, such as a garage or shed. You can also cover your plants with a layer of mulch to protect them from frost. Water your plants sparingly during the winter months.
Leave a Comment