
Backyard garden harvest time is the most rewarding part of gardening, isn’t it? After all the planning, planting, and nurturing, finally gathering the fruits (and vegetables!) of your labor is incredibly satisfying. But what if I told you there are simple DIY tricks to maximize your backyard garden harvest and extend the season, ensuring a bounty that lasts even longer?
For centuries, humans have cultivated gardens, relying on their harvests for sustenance and connection to nature. From the hanging gardens of Babylon to the victory gardens of World War II, growing your own food has always been a source of pride and resilience. Today, with rising food costs and a growing desire for sustainable living, the appeal of a thriving backyard garden is stronger than ever.
Let’s face it, sometimes our gardens don’t quite live up to our expectations. Pests, unpredictable weather, and simple mistakes can lead to disappointing yields. That’s where these DIY tricks come in! I’m going to share some easy-to-implement hacks that will help you overcome common gardening challenges, boost your harvest, and enjoy fresh, homegrown produce for months to come. Get ready to unlock the full potential of your backyard and experience the joy of an abundant harvest!
DIY Backyard Garden Harvest: From Seed to Supper!
Hey there, fellow garden enthusiasts! I’m so excited to share my tried-and-true methods for maximizing your backyard garden harvest. It’s incredibly rewarding to nurture plants from tiny seeds to delicious, homegrown meals. This guide will walk you through the entire process, from planning your harvest to preserving your bounty. Let’s get started!
Planning Your Harvest: Timing is Everything
Before you even sow a single seed, thinking about your harvest is crucial. It’s not just about *when* you harvest, but *how much* and *what* you’ll do with it all.
* Succession Planting: This is my secret weapon for a continuous harvest. Instead of planting all your lettuce seeds at once, stagger them every 2-3 weeks. This way, you’ll have a steady supply of fresh lettuce instead of a massive glut all at once. The same principle applies to radishes, beans, and other quick-growing crops.
* Know Your Frost Dates: This is non-negotiable! Understanding your region’s average first and last frost dates is essential for planning planting and harvest times. A quick online search for “[Your City/Region] frost dates” will give you the information you need.
* Seed Packet Information: Pay close attention to the “days to maturity” listed on your seed packets. This tells you approximately how long it will take for the plant to be ready for harvest after planting. Keep a garden journal or use a planting calendar to track these dates.
* Consider Preserving Methods: Are you planning to can, freeze, dry, or ferment your harvest? Knowing this in advance will help you determine how much of each crop to plant. For example, if you want to make a lot of tomato sauce, you’ll need to plant a significant number of tomato plants.
* Plan for Pollination: If you’re growing fruits and vegetables that require pollination (like tomatoes, peppers, squash, and cucumbers), ensure you have enough pollinators in your garden. Plant flowers that attract bees and other beneficial insects.
Harvesting Techniques: Getting it Right
Harvesting at the right time and using the correct techniques is vital for maximizing flavor and extending the shelf life of your produce.
* Harvesting Leafy Greens:
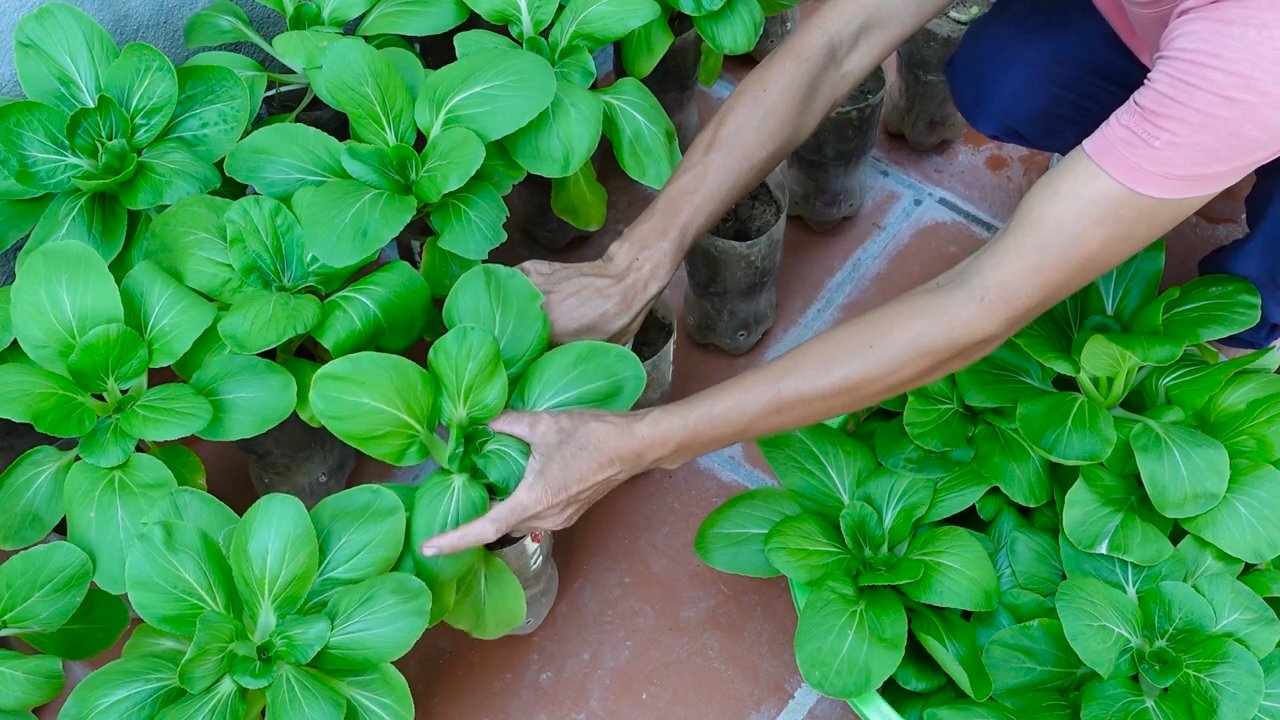
* Cut-and-Come-Again Method: For lettuce, spinach, and other leafy greens, use the cut-and-come-again method. Instead of pulling up the entire plant, harvest the outer leaves as needed, leaving the inner leaves to continue growing. This allows for multiple harvests from a single planting.
* Harvesting Time: Harvest leafy greens in the morning, after the dew has dried but before the sun gets too hot. This is when they are at their crispest and most flavorful.
* Proper Tools: Use sharp scissors or a knife to cut the leaves cleanly. Avoid tearing them, as this can damage the plant and make it more susceptible to disease.
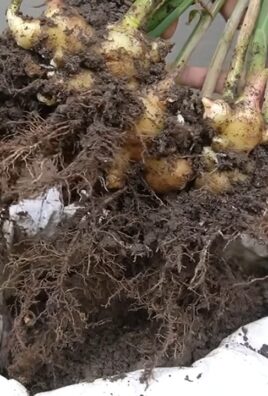
* Harvesting Root Vegetables:
* Timing is Key: Check your seed packet for the “days to maturity” and start checking the size of your root vegetables around that time. Gently brush away some soil to see how they are developing.
* Loosening the Soil: Before pulling up root vegetables, loosen the soil around them with a garden fork or trowel. This will make it easier to pull them up without breaking them.
* Gentle Pulling: Grasp the base of the plant near the soil line and gently pull upwards. If the vegetable is resistant, loosen the soil further.
* Curing Onions and Garlic: After harvesting onions and garlic, cure them in a dry, well-ventilated place for 2-3 weeks. This allows the outer layers to dry and toughen, which helps to prevent spoilage.
* Harvesting Fruiting Vegetables:
* Tomatoes: Harvest tomatoes when they are fully colored and slightly soft to the touch. They should easily detach from the vine.
* Peppers: Harvest peppers when they have reached their mature color and size. Use pruning shears or a knife to cut them from the plant, leaving a small stem attached.
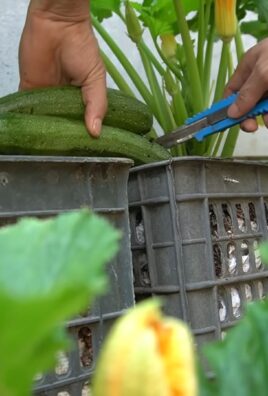
* Cucumbers: Harvest cucumbers when they are firm and have reached the desired size. Overripe cucumbers can become bitter and seedy.
* Zucchini and Summer Squash: Harvest zucchini and summer squash when they are young and tender. Overripe squash can become tough and watery.
* Beans and Peas: Harvest beans and peas when the pods are plump and the seeds are fully developed.
* Harvesting Herbs:
* Regular Harvesting: Regular harvesting encourages herbs to produce more leaves.
* Harvesting Time: Harvest herbs in the morning, after the dew has dried but before the sun gets too hot. This is when they are at their most flavorful.
* Proper Tools: Use sharp scissors or a knife to cut the stems cleanly.
* Drying Herbs: To dry herbs, hang them upside down in a cool, dry, well-ventilated place. You can also dry them in a dehydrator or oven.
Step-by-Step Harvesting Guide: Let’s Get Our Hands Dirty!
Okay, let’s break down the harvesting process with some specific examples.
1. Harvesting Lettuce (Cut-and-Come-Again):
* Step 1: Choose the outer leaves that are large and mature.
* Step 2: Using sharp scissors or a knife, cut the leaves about an inch above the soil line.
* Step 3: Avoid cutting the central bud, as this will allow the plant to continue growing.
* Step 4: Gently wash the harvested leaves and store them in the refrigerator.
2. Harvesting Radishes:
* Step 1: Check your seed packet for the “days to maturity.”
* Step 2: Gently loosen the soil around the radish with a garden fork or trowel.
* Step 3: Grasp the base of the plant near the soil line and gently pull upwards.
* Step 4: Wash the radishes and trim off the tops and roots.
* Step 5: Store the radishes in the refrigerator in a plastic bag or container.
3. Harvesting Tomatoes:
* Step 1: Look for tomatoes that are fully colored and slightly soft to the touch.
* Step 2: Gently twist the tomato until it detaches from the vine.
* Step 3: If the tomato is difficult to remove, use pruning shears or a knife to cut it from the vine, leaving a small stem attached.
* Step 4: Store the tomatoes at room temperature, away from direct sunlight.
4. Harvesting Basil:
* Step 1: Look for basil stems that have multiple leaves.
* Step 2: Using sharp scissors or a knife, cut the stem just above a leaf node (where two leaves grow from the stem).
* Step 3: This will encourage the plant to branch out and produce more leaves.
* Step 4: Use the basil fresh or dry it for later use.
Preserving Your Harvest: Extending the Goodness
Now that you’ve harvested your bounty, let’s talk about preserving it! This is where you can really get creative and enjoy the fruits (and vegetables!) of your labor all year round.
* Canning:
* Water Bath Canning: This method is suitable for high-acid foods like tomatoes, fruits, and pickles. You’ll need a large pot with a rack, canning jars, lids, and rings.
* Pressure Canning: This method is required for low-acid foods like beans, corn, and meat. You’ll need a pressure canner, canning jars, lids, and rings.
* Following Recipes: Always follow tested and approved canning recipes to ensure food safety. The National Center for Home Food Preservation (NCHFP) is a great resource.
* Freezing:
* Blanching: Blanching vegetables before freezing helps to preserve their color, flavor, and texture. Blanching involves briefly boiling or steaming the vegetables and then immediately plunging them into ice water to stop the cooking process.
* Proper Packaging: Use freezer-safe bags or containers to prevent freezer burn. Remove as much air as possible from the packaging.
* Labeling: Label each package with the date and contents.
* Drying:
* Sun Drying: This method is suitable for fruits, vegetables, and herbs in hot, dry climates.
* Dehydrator Drying: A food dehydrator provides consistent heat and airflow for efficient drying.
*
Conclusion
So, there you have it! Transforming your backyard garden harvest into delectable, long-lasting treats is not only achievable but also incredibly rewarding. We’ve explored a simple yet effective DIY trick that allows you to savor the fruits (and vegetables!) of your labor long after the growing season ends. This isn’t just about preserving food; it’s about preserving memories, flavors, and the connection to your garden.
Why is this DIY trick a must-try? Because it empowers you to take control of your food supply, reduce waste, and enjoy the unparalleled taste of homegrown goodness year-round. Imagine the satisfaction of pulling out a jar of sun-ripened tomatoes in the dead of winter, or adding a vibrant burst of basil pesto to a summer pasta dish made from your own garden’s bounty. This is more than just a recipe; it’s a lifestyle.
But the beauty of this DIY approach lies in its adaptability. Feel free to experiment with different herbs and spices to create unique flavor profiles. For example, try adding a pinch of red pepper flakes to your tomato sauce for a spicy kick, or infusing your olive oil with rosemary and garlic for a fragrant dipping oil. You can also explore different preservation methods, such as drying herbs or pickling vegetables, to further diversify your pantry.
Consider these variations to elevate your backyard garden harvest experience:
* Infused Oils: Beyond rosemary and garlic, experiment with chili peppers, lemon zest, or other herbs to create custom infused oils perfect for drizzling over salads, pasta, or grilled meats.
* Homemade Vinegars: Turn excess herbs and fruits into flavorful vinegars. Simply steep your chosen ingredients in vinegar for a few weeks, then strain and enjoy.
* Fruit Leathers: Puree excess fruits and dehydrate them into chewy, healthy snacks.
* Herb Butters: Blend fresh herbs with softened butter for a delicious spread on bread, vegetables, or grilled meats.
* Spice Blends: Dry and grind your own herbs and spices to create custom spice blends for seasoning meats, vegetables, or soups.
Don’t be afraid to get creative and tailor this DIY trick to your own preferences and the specific produce you’re harvesting from your backyard garden. The possibilities are endless!
We wholeheartedly encourage you to give this DIY trick a try. It’s a fun, educational, and ultimately delicious way to connect with your garden and enjoy the fruits (and vegetables!) of your labor all year long. And most importantly, we want to hear about your experiences! Share your photos, tips, and variations in the comments below. Let’s build a community of backyard gardeners who are passionate about preserving and enjoying their homegrown bounty. What are you waiting for? Get out there and start preserving your backyard garden harvest today!
Frequently Asked Questions (FAQ)
What if I don’t have a backyard garden? Can I still use this DIY trick?
Absolutely! While this article focuses on using produce from a backyard garden harvest, the principles of preserving and transforming fresh ingredients apply to store-bought or farmers market finds as well. You can easily adapt the techniques to preserve seasonal fruits and vegetables that you purchase from local sources. Just be sure to choose high-quality, fresh ingredients for the best results.
How long will my preserved goods last?
The shelf life of your preserved goods will depend on the specific method you use and how carefully you follow the instructions. Properly canned goods can last for up to a year or more in a cool, dark place. Dried herbs and spices can last for several months. Infused oils and vinegars should be used within a few weeks or months. Always check for signs of spoilage before consuming any preserved goods. If you notice any mold, discoloration, or unusual odors, discard the item immediately.
What are the best vegetables to preserve from my backyard garden harvest?
Many vegetables are well-suited for preservation. Tomatoes, cucumbers, peppers, beans, and corn are popular choices for canning, pickling, or freezing. Herbs like basil, oregano, and thyme can be dried or frozen for later use. Root vegetables like carrots and potatoes can be stored in a cool, dark place for several months. The best vegetables to preserve will depend on your personal preferences and the specific growing conditions in your garden.
Is it safe to can food at home?
Yes, canning food at home can be safe, but it’s crucial to follow proper canning procedures to prevent spoilage and foodborne illness. Always use tested recipes from reputable sources, such as the USDA Complete Guide to Home Canning. Ensure that you are using the correct canning method (water bath canning for high-acid foods like fruits and pickles, and pressure canning for low-acid foods like vegetables and meats). Properly sterilize your jars and lids, and follow the recommended processing times. If you are new to canning, consider taking a canning class or consulting with an experienced canner.
What equipment do I need to get started with preserving my backyard garden harvest?
The equipment you’ll need will depend on the specific preservation method you choose. For canning, you’ll need canning jars, lids, and bands, a canning pot with a rack, a jar lifter, and a lid wand. For drying herbs, you’ll need a dehydrator or a well-ventilated space. For freezing, you’ll need freezer-safe bags or containers. You may also need other equipment, such as a food processor, blender, or mandoline, depending on the recipe.
Can I freeze my backyard garden harvest instead of canning or drying?
Yes, freezing is a great way to preserve many fruits and vegetables. To freeze vegetables, blanch them first to stop enzyme activity that can cause spoilage. Blanching involves briefly boiling or steaming the vegetables, then plunging them into ice water to stop the cooking process. After blanching, drain the vegetables thoroughly and pack them into freezer-safe bags or containers. Fruits can be frozen whole, sliced, or pureed. Spread them out on a baking sheet to freeze individually before transferring them to a freezer bag to prevent them from clumping together.
How do I know if my preserved food has gone bad?
Always inspect your preserved food before consuming it. Look for signs of spoilage, such as mold, discoloration, unusual odors, or bulging lids. If you are canning, a broken seal on the jar is a clear indication that the food has spoiled. If you are unsure about the safety of a preserved food item, it’s always best to err on the side of caution and discard it.
What are some creative ways to use my preserved backyard garden harvest?
The possibilities are endless! Use canned tomatoes to make sauces, soups, and stews. Add dried herbs to your favorite recipes. Use pickled vegetables as a condiment or side dish. Make jams and jellies from your preserved fruits. Infuse oils and vinegars with herbs and spices for flavorful dressings and marinades. Get creative and experiment with different ways to incorporate your preserved garden bounty into your meals.
Where can I find more recipes and resources for preserving my backyard garden harvest?
There are many excellent resources available for learning more about preserving food. The USDA Complete Guide to Home Canning is a comprehensive guide to safe canning practices. Many websites and blogs offer recipes and tips for preserving fruits, vegetables, and herbs. Local extension offices and community centers often offer canning classes and workshops. You can also find inspiration and ideas from other gardeners and food preservation enthusiasts online.

Leave a Comment