
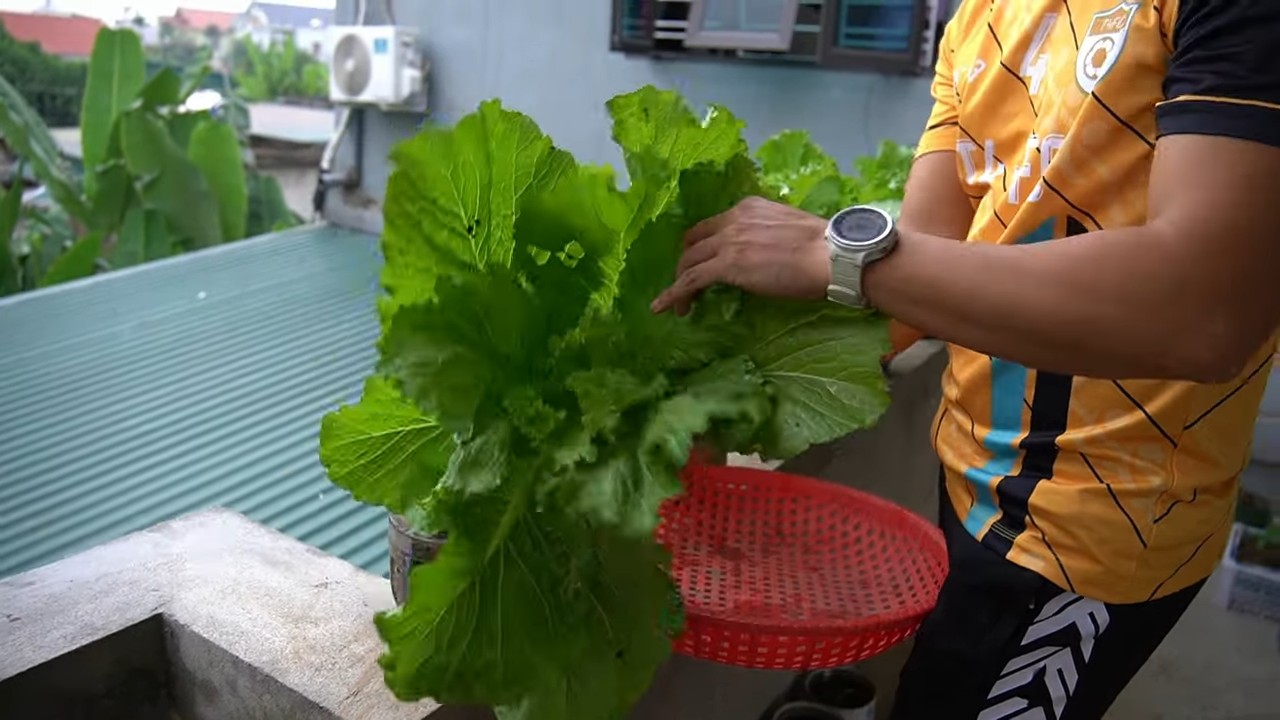
Bottle Gardening Mustard Greens: Imagine harvesting fresh, peppery mustard greens right from your windowsill, even if you don’t have a sprawling backyard! Sounds amazing, right? Well, it’s totally achievable with this super simple DIY project. For centuries, humans have cultivated food in creative ways, adapting to limited spaces and resources. From ancient rooftop gardens in Babylon to modern-day urban farms, the desire to grow our own food is deeply ingrained in our history.
But let’s be honest, not everyone has the time, space, or budget for a traditional garden. That’s where bottle gardening mustard greens comes in! This DIY trick is perfect for apartment dwellers, busy bees, or anyone looking for a fun and sustainable way to add fresh greens to their diet. I’m going to show you how to transform ordinary plastic bottles into mini-gardens, allowing you to enjoy the vibrant flavor and nutritional benefits of mustard greens without the hassle of traditional gardening. Plus, it’s a fantastic way to recycle and reduce waste! So, grab your bottles, some soil, and let’s get growing!
Senfgrün im Flaschengarten: Dein DIY-Leitfaden für frische Blätter
Hey Gärtnerfreunde! Habt ihr Lust auf knackig-frische Senfgrünblätter direkt aus eurer Küche? Und das Ganze auch noch super platzsparend und nachhaltig? Dann seid ihr hier genau richtig! Ich zeige euch, wie ihr ganz einfach einen Flaschengarten für Senfgrün anlegen könnt. Das ist nicht nur ein tolles DIY-Projekt, sondern auch eine super Möglichkeit, um auch in der kalten Jahreszeit frisches Grün zu ernten. Los geht’s!
Was du brauchst: Deine Materialliste
Bevor wir loslegen, hier eine Liste mit allen Dingen, die du für deinen Flaschengarten benötigst:
* Eine Plastikflasche: Am besten eine große PET-Flasche (1,5 oder 2 Liter) mit glatten Seiten. Denk dran, sie vorher gründlich auszuwaschen!
* Ein scharfes Messer oder eine Schere: Zum Zerteilen der Flasche. Sei vorsichtig!
* Erde: Am besten Anzuchterde oder eine Mischung aus Blumenerde und Kompost.
* Senfgrünsamen: Die gibt’s im Gartencenter oder online. Achte auf Bio-Qualität, wenn du Wert darauf legst.
* Wasser: Zum Befeuchten der Erde und zum Gießen.
* Optional: Kleine Steine oder Kies für eine Drainageschicht.
* Optional: Sprühflasche für die Bewässerung.
* Optional: Etikett und Stift zum Beschriften.
Schritt-für-Schritt-Anleitung: So baust du deinen Flaschengarten
Jetzt geht’s ans Eingemachte! Folge diesen Schritten, um deinen eigenen Senfgrün-Flaschengarten zu bauen:
1. Flasche vorbereiten: Zuerst musst du die Plastikflasche vorbereiten. Schneide sie mit dem Messer oder der Schere etwa ein Drittel vom Flaschenhals ab. Du hast jetzt zwei Teile: den oberen Teil mit dem Flaschenhals und den unteren Teil. Der untere Teil wird dein Pflanzgefäß.
2. Drainage (optional): Wenn du möchtest, kannst du eine Drainageschicht anlegen. Gib dazu eine Schicht kleine Steine oder Kies in den unteren Teil der Flasche. Das verhindert Staunässe und sorgt dafür, dass die Wurzeln nicht faulen.
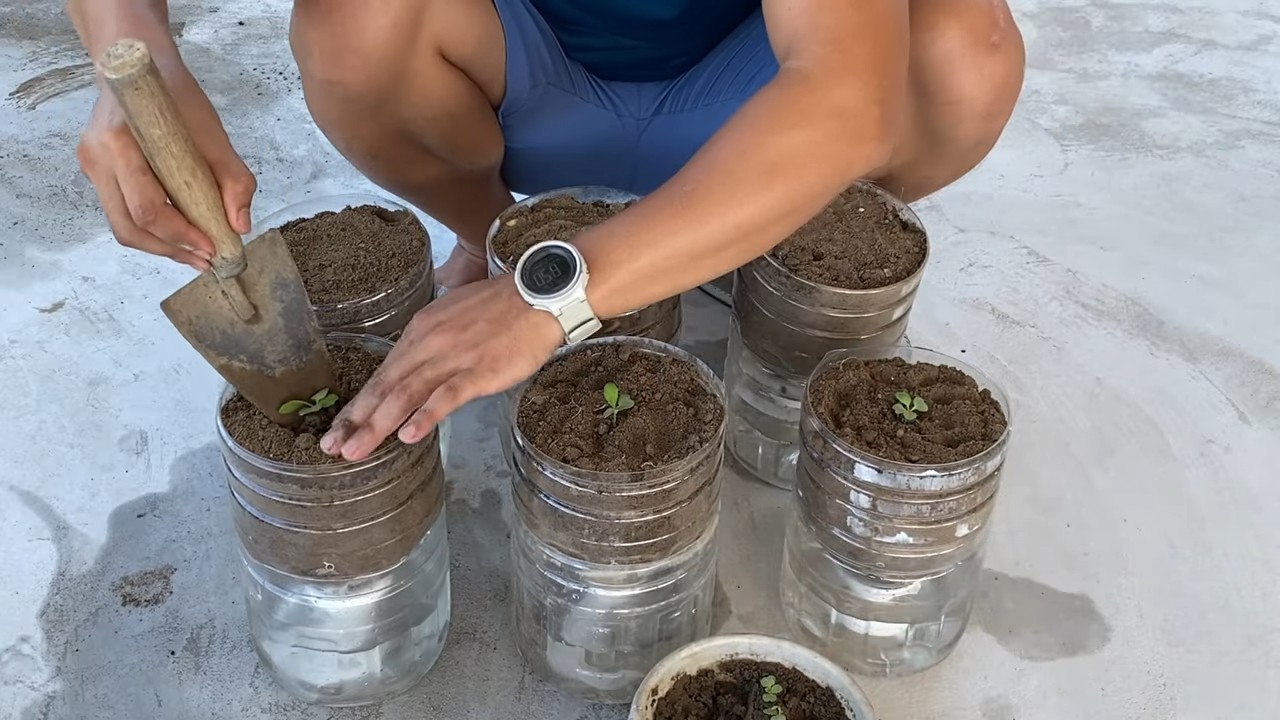
3. Erde einfüllen: Fülle den unteren Teil der Flasche mit Erde. Lass etwa 2-3 cm Platz bis zum Rand. Drücke die Erde leicht an.
4. Samen aussäen: Verteile die Senfgrünsamen gleichmäßig auf der Erde. Achte darauf, dass sie nicht zu dicht liegen, damit die Pflänzchen genug Platz zum Wachsen haben.
5. Samen bedecken: Bedecke die Samen mit einer dünnen Schicht Erde (ca. 0,5 cm).
6. Gießen: Befeuchte die Erde vorsichtig mit Wasser. Am besten verwendest du eine Sprühflasche, damit die Samen nicht weggeschwemmt werden. Die Erde sollte feucht, aber nicht nass sein.
7. Mini-Gewächshaus bauen: Setze den oberen Teil der Flasche (mit dem Flaschenhals nach unten) wie einen Deckel auf den unteren Teil. So entsteht ein Mini-Gewächshaus, das für ein feuchtwarmes Klima sorgt, in dem die Samen optimal keimen können.
8. Standort wählen: Stelle deinen Flaschengarten an einen hellen, aber nicht direkt sonnigen Ort. Ein Fensterbrett ist ideal.
9. Gießen und Lüften: Kontrolliere regelmäßig die Feuchtigkeit der Erde. Wenn sie sich trocken anfühlt, gieße vorsichtig nach. Um Schimmelbildung zu vermeiden, solltest du den Flaschengarten regelmäßig lüften. Nimm dazu den oberen Teil der Flasche für ein paar Stunden ab.
10. Geduld haben: Nach ein paar Tagen sollten die ersten Keimlinge zu sehen sein. Senfgrün wächst relativ schnell.
Pflege und Ernte: So bleibt dein Senfgrün fit
Dein Senfgrün braucht nicht viel Pflege, aber ein paar Dinge solltest du beachten:
* Gießen: Achte darauf, dass die Erde immer leicht feucht ist. Vermeide Staunässe.
* Lüften: Lüfte den Flaschengarten regelmäßig, um Schimmelbildung zu vermeiden.
* Düngen: Senfgrün braucht in der Regel keine zusätzliche Düngung, da es relativ schnell wächst. Wenn du möchtest, kannst du aber ab und zu etwas organischen Flüssigdünger ins Gießwasser geben.
* Ernten: Du kannst dein Senfgrün ernten, sobald die Blätter eine Größe von etwa 5-7 cm erreicht haben. Schneide die Blätter einfach mit einer Schere ab. Die Pflanze wird weiterwachsen und neue Blätter bilden.
Häufige Probleme und Lösungen: Was tun, wenn…?
Auch beim Flaschengarten können mal Probleme auftreten. Hier sind ein paar häufige Probleme und wie du sie lösen kannst:
* Schimmelbildung: Wenn sich Schimmel auf der Erde oder den Blättern bildet, ist die Luftfeuchtigkeit zu hoch. Lüfte den Flaschengarten öfter und gieße weniger. Du kannst auch die befallenen Stellen mit einem Tuch abwischen.
* Gelbe Blätter: Gelbe Blätter können ein Zeichen für zu viel oder zu wenig Wasser sein. Kontrolliere die Feuchtigkeit der Erde und passe die Bewässerung entsprechend an.
* Langsames Wachstum: Wenn dein Senfgrün nur langsam wächst, kann das an zu wenig Licht liegen. Stelle den Flaschengarten an einen helleren Ort.
Senfgrün in der Küche: Vielseitig und lecker
Senfgrün ist nicht nur einfach anzubauen, sondern auch super vielseitig in der Küche. Die Blätter haben einen leicht scharfen, senfartigen Geschmack. Du kannst sie roh in Salaten verwenden, als Topping für Suppen und Sandwiches oder kurz in der Pfanne anbraten. Auch in Smoothies macht sich Senfgrün gut. Probiere es einfach aus!
Warum Senfgrün im Flaschengarten eine tolle Idee ist: Die Vorteile
* Platzsparend: Ideal für kleine Wohnungen oder Balkone.
* Nachhaltig: Du verwendest eine Plastikflasche wieder und sparst Verpackungsmüll.
* Frisches Grün das ganze Jahr: Auch im Winter kannst du frische Blätter ernten.
* Einfach anzubauen: Senfgrün ist anspruchslos und wächst schnell.
* Gesund: Senfgrün ist reich an Vitaminen und Mineralstoffen.
* Dekorativ: Ein Flaschengarten ist ein echter Hingucker.
Noch ein paar Tipps und Tricks: Für den perfekten Flaschengarten
* Verschiedene Sorten: Es gibt verschiedene Sorten von Senfgrün mit unterschiedlichen Geschmacksrichtungen und Blattfarben. Probiere verschiedene Sorten aus, um deinen Favoriten zu finden.
* Regelmäßig ernten: Durch regelmäßiges Ernten förderst du das Wachstum der Pflanze.
* Saubere Flasche: Achte darauf, dass die Flasche sauber ist, bevor du sie bepflanzt. So vermeidest du Schimmelbildung.
* Kreativ werden: Du kannst deinen Flaschengarten auch dekorieren. Bemal die Flasche oder klebe kleine Figuren hinein.
Ich hoffe, diese Anleitung hat dir geholfen, deinen eigenen Senfgrün-Flaschengarten anzulegen. Viel Spaß beim Gärtnern und guten Appetit! Lass mich wissen, wie es bei dir geklappt hat!
Conclusion
So, there you have it! Transforming a simple plastic bottle into a thriving mini-garden for mustard greens is not just a fun project; it’s a sustainable, space-saving, and incredibly rewarding way to enjoy fresh, peppery greens right at your fingertips. We’ve walked you through the process, highlighting the ease and accessibility of this DIY trick. But why is this method a must-try?
Firstly, it’s incredibly eco-friendly. Reusing plastic bottles reduces waste and gives them a new lease on life. Instead of ending up in a landfill, these bottles become vessels for nurturing life. Secondly, it’s perfect for urban dwellers or anyone with limited garden space. A few bottles can be placed on a balcony, windowsill, or even a sunny countertop, bringing a touch of nature indoors. Thirdly, it’s a fantastic way to control the growing environment. You can easily monitor the soil moisture, temperature, and sunlight exposure, ensuring optimal conditions for your mustard greens.
Beyond the basic method, there’s plenty of room for experimentation. Consider using different types of bottles – larger bottles for bigger harvests, or colored bottles to add a decorative touch. You can also explore different growing mediums. While we recommended a standard potting mix, you could try coco coir, vermiculite, or even a combination of these. For added nutrients, consider incorporating compost tea or diluted liquid fertilizer into your watering routine.
Another exciting variation is to create a vertical garden by stacking multiple bottle planters. This maximizes space and creates a visually stunning display. Simply cut openings in the sides of the bottles and arrange them in a staggered pattern, ensuring each bottle receives adequate sunlight. You can even paint the bottles to match your décor or create a vibrant, eye-catching design.
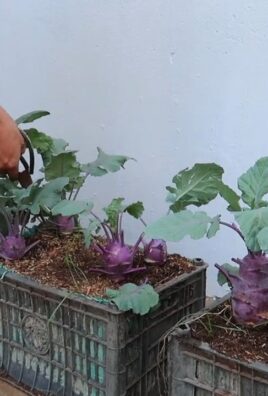
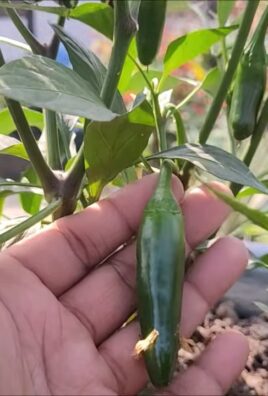
Don’t limit yourself to just mustard greens! This bottle gardening technique can be adapted for other leafy greens like spinach, lettuce, and arugula, as well as herbs like basil, parsley, and cilantro. The possibilities are endless!
The key takeaway is that this DIY bottle gardening method offers a simple, sustainable, and satisfying way to grow your own fresh produce. It’s a project that’s accessible to everyone, regardless of their gardening experience or available space.
We wholeheartedly encourage you to give this DIY trick a try. It’s a fantastic way to connect with nature, reduce your environmental impact, and enjoy the delicious flavor of homegrown mustard greens. Once you’ve set up your bottle garden and started harvesting your greens, we’d love to hear about your experience! Share your photos, tips, and variations in the comments below. Let’s create a community of bottle gardeners and inspire others to embrace this sustainable and rewarding practice. Happy gardening!
Frequently Asked Questions (FAQ)
What kind of plastic bottles are best for bottle gardening mustard greens?
Ideally, you should use food-grade plastic bottles, such as those that previously contained water, juice, or soda. These are generally made from PET (polyethylene terephthalate) or HDPE (high-density polyethylene), which are considered relatively safe for growing food. Avoid using bottles that contained harsh chemicals or cleaning products, as these may contaminate the soil and affect the growth of your mustard greens. Thoroughly wash and rinse the bottles before using them for planting. Also, consider the size of the bottle. Larger bottles will provide more space for the roots to grow and can support a larger harvest.
How often should I water my bottle garden mustard greens?
The frequency of watering depends on several factors, including the size of the bottle, the type of soil, the temperature, and the amount of sunlight the plants receive. Generally, you should water your mustard greens when the top inch of soil feels dry to the touch. Avoid overwatering, as this can lead to root rot. A good rule of thumb is to water deeply but infrequently, allowing the soil to dry out slightly between waterings. Check the drainage holes to ensure that excess water is draining properly. During hot weather, you may need to water more frequently.
What kind of soil is best for growing mustard greens in bottles?
A well-draining potting mix is ideal for growing mustard greens in bottles. Avoid using garden soil, as it can be too heavy and compact, which can hinder root growth and drainage. A good potting mix will contain a blend of peat moss, perlite, and vermiculite, which provides good aeration and drainage while retaining moisture. You can also add compost to the potting mix to provide additional nutrients. Alternatively, you can create your own potting mix by combining equal parts of peat moss, perlite, and compost.
So, there you have it! Transforming a simple plastic bottle into a thriving mini-garden for mustard greens is not just a fun project; it’s a sustainable, space-saving, and incredibly rewarding way to enjoy fresh, peppery greens right at your fingertips. We’ve walked you through the process, highlighting the ease and accessibility of this DIY trick. But why is this method a must-try?
Firstly, it’s incredibly eco-friendly. Reusing plastic bottles reduces waste and gives them a new lease on life. Instead of ending up in a landfill, these bottles become vessels for nurturing life. Secondly, it’s perfect for urban dwellers or anyone with limited garden space. A few bottles can be placed on a balcony, windowsill, or even a sunny countertop, bringing a touch of nature indoors. Thirdly, it’s a fantastic way to control the growing environment. You can easily monitor the soil moisture, temperature, and sunlight exposure, ensuring optimal conditions for your mustard greens.
Beyond the basic method, there’s plenty of room for experimentation. Consider using different types of bottles – larger bottles for bigger harvests, or colored bottles to add a decorative touch. You can also explore different growing mediums. While we recommended a standard potting mix, you could try coco coir, vermiculite, or even a combination of these. For added nutrients, consider incorporating compost tea or diluted liquid fertilizer into your watering routine.
Another exciting variation is to create a vertical garden by stacking multiple bottle planters. This maximizes space and creates a visually stunning display. Simply cut openings in the sides of the bottles and arrange them in a staggered pattern, ensuring each bottle receives adequate sunlight. You can even paint the bottles to match your décor or create a vibrant, eye-catching design.
Don’t limit yourself to just mustard greens! This bottle gardening technique can be adapted for other leafy greens like spinach, lettuce, and arugula, as well as herbs like basil, parsley, and cilantro. The possibilities are endless!
The key takeaway is that this DIY bottle gardening method offers a simple, sustainable, and satisfying way to grow your own fresh produce. It’s a project that’s accessible to everyone, regardless of their gardening experience or available space.
We wholeheartedly encourage you to give this DIY trick a try. It’s a fantastic way to connect with nature, reduce your environmental impact, and enjoy the delicious flavor of homegrown mustard greens. Once you’ve set up your bottle garden and started harvesting your greens, we’d love to hear about your experience! Share your photos, tips, and variations in the comments below. Let’s create a community of bottle gardeners and inspire others to embrace this sustainable and rewarding practice. Happy gardening!
Frequently Asked Questions (FAQ)
What kind of plastic bottles are best for bottle gardening mustard greens?
Ideally, you should use food-grade plastic bottles, such as those that previously contained water, juice, or soda. These are generally made from PET (polyethylene terephthalate) or HDPE (high-density polyethylene), which are considered relatively safe for growing food. Avoid using bottles that contained harsh chemicals or cleaning products, as these may contaminate the soil and affect the growth of your mustard greens. Thoroughly wash and rinse the bottles before using them for planting. Also, consider the size of the bottle. Larger bottles will provide more space for the roots to grow and can support a larger harvest.
How often should I water my bottle garden mustard greens?
The frequency of watering depends on several factors, including the size of the bottle, the type of soil, the temperature, and the amount of sunlight the plants receive. Generally, you should water your mustard greens when the top inch of soil feels dry to the touch. Avoid overwatering, as this can lead to root rot. A good rule of thumb is to water deeply but infrequently, allowing the soil to dry out slightly between waterings. Check the drainage holes to ensure that excess water is draining properly. During hot weather, you may need to water more frequently.
What kind of soil is best for growing mustard greens in bottles?
A well-draining potting mix is ideal for growing mustard greens in bottles. Avoid using garden soil, as it can be too heavy and compact, which can hinder root growth and drainage. A good potting mix will contain a blend of peat moss, perlite, and vermiculite, which provides good aeration and drainage while retaining moisture. You can also add compost to the potting mix to provide additional nutrients. Alternatively, you can create your own potting mix by combining equal parts of peat moss, perlite, and compost.
How much sunlight do mustard greens need when grown in bottles?
Mustard greens thrive in full sun, which means they need at least 6 hours of direct sunlight per day. However, they can also tolerate partial shade, especially during the hottest part of the day. If you’re growing your mustard greens indoors, place them near a sunny window or use a grow light to supplement the natural light. Rotate the bottles regularly to ensure that all sides of the plants receive adequate sunlight. Insufficient sunlight can lead to leggy growth and reduced yields.
How long does it take for mustard greens to grow in bottles?
Mustard greens are relatively fast-growing and can be harvested in as little as 3-4 weeks after planting. The exact time will depend on the variety of mustard greens, the growing conditions, and the size of the plants you want to harvest. You can start harvesting the outer leaves when they are about 4-6 inches long. This will encourage the plant to continue producing new leaves. Alternatively, you can harvest the entire plant at once.
Can I grow other vegetables or herbs in bottles using the same method?
Yes, the bottle gardening method can be adapted for growing a variety of other vegetables and herbs. Leafy greens like spinach, lettuce, and arugula are particularly well-suited for this method. Herbs like basil, parsley, cilantro, and mint also thrive in bottle gardens. When choosing what to grow, consider the size of the bottle and the space requirements of the plant. Smaller plants are generally better suited for bottle gardening. Also, ensure that the plants receive adequate sunlight and water.
How do I prevent pests and diseases in my bottle garden mustard greens?
Prevention is key when it comes to pests and diseases in bottle gardens. Start by using a clean potting mix and ensuring that the bottles are well-drained. Regularly inspect your plants for signs of pests or diseases. Common pests that may affect mustard greens include aphids, flea beetles, and cabbage worms. You can control these pests by handpicking them off the plants, using insecticidal soap, or introducing beneficial insects like ladybugs. Diseases like powdery mildew and downy mildew can be prevented by ensuring good air circulation and avoiding overwatering. If you notice any signs of disease, remove the affected leaves immediately.
What are some variations I can try with my bottle garden?
There are many creative variations you can try with your bottle garden. Consider painting the bottles to add a decorative touch. You can also create a vertical garden by stacking multiple bottle planters. Another variation is to use different types of bottles, such as wine bottles or glass jars. You can also experiment with different growing mediums, such as coco coir or vermiculite. For added nutrients, consider incorporating compost tea or diluted liquid fertilizer into your watering routine. The possibilities are endless!
Is bottle gardening mustard greens a sustainable practice?
Yes, bottle gardening mustard greens is a highly sustainable practice. It reduces waste by reusing plastic bottles, minimizes the need for transportation of produce, and allows you to grow your own food locally. By using organic gardening practices, you can further enhance the sustainability of your bottle garden. This includes using compost, avoiding synthetic fertilizers and pesticides, and conserving water. Bottle gardening is a great way to reduce your environmental impact and contribute to a more sustainable food system.
What do I do with the bottles after I’m done growing mustard greens?
Once you’ve finished harvesting your mustard greens, you can reuse the bottles for another planting cycle. Simply remove the old soil, wash the bottles thoroughly, and refill them with fresh potting mix. Alternatively, you can recycle the bottles if they are no longer needed. If the bottles are damaged or broken, dispose of them properly according to your local recycling guidelines. You can also repurpose the bottles for other uses, such as storage containers or craft projects.
Leave a Comment