
Celery container gardening tips are your secret weapon to fresh, crunchy stalks right outside your door! Forget those limp, sad-looking bunches at the grocery store. Imagine snipping off exactly what you need for your soup, salad, or that perfect peanut butter snack, all grown with your own two hands.
Growing celery might seem intimidating, but trust me, it’s totally achievable, even without a sprawling garden. Celery has been cultivated for centuries, with evidence suggesting its use dating back to ancient Greece and Rome, initially for medicinal purposes. Now, it’s a culinary staple, and you can easily bring that history to your own patio or balcony.
Why bother with celery container gardening tips? Well, for starters, you control the growing environment, ensuring your celery gets the perfect amount of sunlight, water, and nutrients. Plus, it’s incredibly rewarding to nurture a plant from seed (or transplant) to harvest. In this article, I’m going to share my favorite DIY tricks and hacks that will have you enjoying homegrown celery in no time. We’ll cover everything from choosing the right container and soil to troubleshooting common problems. Let’s get growing!
Growing Celery in Containers: A Beginner’s Guide
Hey there, fellow gardening enthusiasts! Ever thought about growing your own celery? It might seem intimidating, but trust me, with a little know-how, you can absolutely cultivate crisp, delicious celery right in your own backyard (or even on your balcony!) using containers. I’m going to walk you through everything you need to know, from choosing the right container to harvesting your homegrown stalks. Let’s get started!
Choosing the Right Container and Soil
First things first, let’s talk about the essentials: the container and the soil. These are crucial for a happy and productive celery plant.
* Container Size: Celery needs room to grow. I recommend a container that’s at least 12 inches deep and 12 inches in diameter. A larger container is even better, as it will hold more moisture and give the roots plenty of space to spread out. Think about using a large pot, a half-barrel planter, or even a sturdy plastic storage container with drainage holes drilled in the bottom.
* Drainage: This is non-negotiable! Celery loves moisture, but it hates sitting in soggy soil. Make sure your container has plenty of drainage holes to allow excess water to escape.
* Soil: Celery thrives in rich, well-draining soil that’s high in organic matter. I like to use a mix of equal parts potting mix, compost, and perlite or vermiculite. The potting mix provides a good base, the compost adds nutrients and improves drainage, and the perlite or vermiculite helps with aeration. Avoid using garden soil, as it can be too heavy and compact in containers.
Planting Your Celery
Now that you’ve got your container and soil sorted, it’s time to plant your celery! You have two options here: starting from seed or transplanting seedlings. I personally prefer transplanting seedlings because it’s faster and easier, but I’ll cover both methods.
Starting from Seed (The Patient Gardener’s Route)
This method requires a bit more patience, as celery seeds can be slow to germinate.
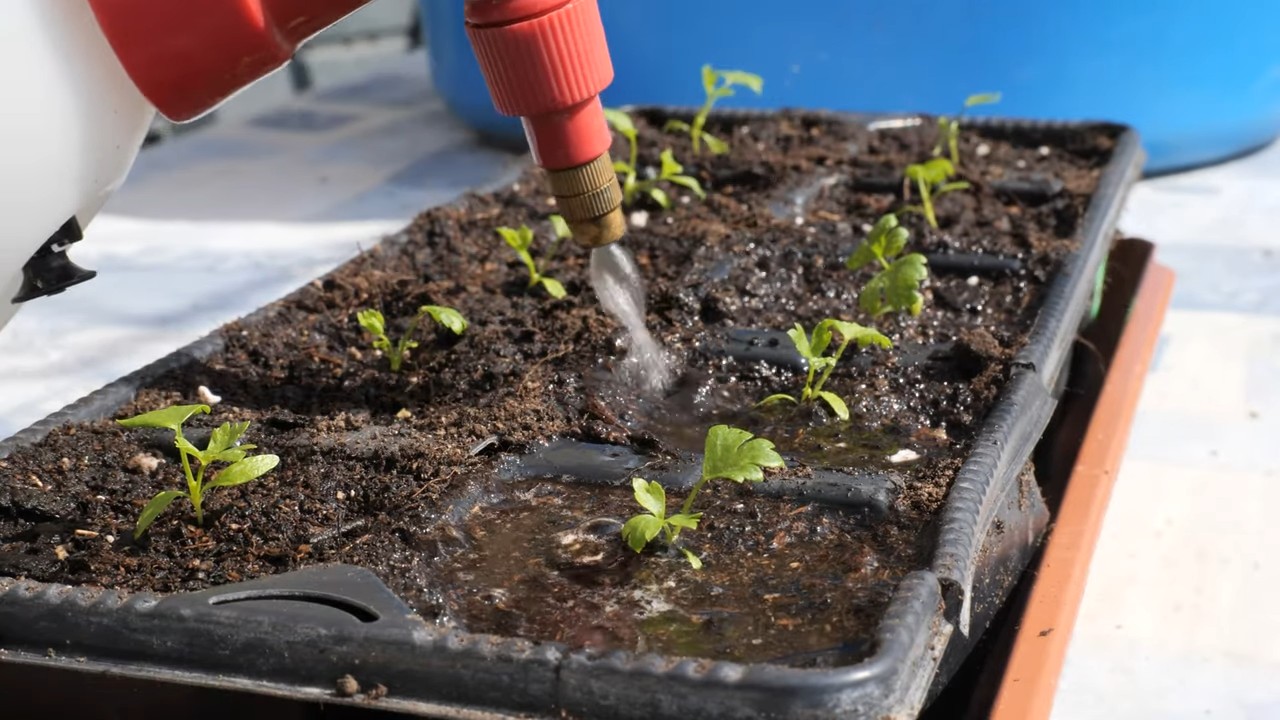
1. Sow Seeds Indoors: Start your seeds indoors about 10-12 weeks before the last expected frost. Use a seed-starting tray or small pots filled with seed-starting mix.
2. Sprinkle Seeds: Celery seeds are tiny, so just sprinkle them lightly on the surface of the soil. Don’t bury them too deep, as they need light to germinate.
3. Water Gently: Mist the soil gently with water to avoid disturbing the seeds.
4. Provide Light and Warmth: Cover the tray or pots with a clear plastic dome or plastic wrap to create a humid environment. Place them in a warm location (around 70-75°F) with bright, indirect light. A heat mat can be helpful.
5. Germination: Be patient! Celery seeds can take 2-3 weeks to germinate. Keep the soil consistently moist but not soggy.
6. Thin Seedlings: Once the seedlings have a few true leaves, thin them out, leaving the strongest seedlings spaced about 2 inches apart.
7. Harden Off: Before transplanting your seedlings outdoors, you’ll need to harden them off. This means gradually exposing them to outdoor conditions over a period of 7-10 days. Start by placing them in a sheltered spot for a few hours each day, gradually increasing the amount of time they spend outdoors.
Transplanting Seedlings (The Easier Option)
This is my preferred method because it’s quicker and less demanding. You can purchase celery seedlings from your local garden center or nursery.
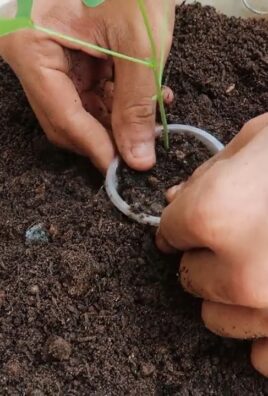
1. Prepare the Container: Fill your container with the soil mixture you prepared earlier, leaving about an inch of space at the top.
2. Dig Holes: Dig holes in the soil that are slightly larger than the root balls of your seedlings. Space the holes about 6-8 inches apart.
3. Carefully Remove Seedlings: Gently remove the seedlings from their containers, being careful not to damage the roots.
4. Plant Seedlings: Place the seedlings in the holes and gently backfill with soil. Make sure the top of the root ball is level with the soil surface.
5. Water Thoroughly: Water the seedlings thoroughly after planting to help them settle in.
Caring for Your Celery Plants
Once your celery plants are in their containers, it’s time to provide them with the care they need to thrive.
* Watering: Celery needs consistent moisture to grow well. Water your plants regularly, especially during hot, dry weather. Aim to keep the soil consistently moist but not soggy. Check the soil moisture by sticking your finger into the soil. If the top inch feels dry, it’s time to water.
* Fertilizing: Celery is a heavy feeder, so it needs regular fertilization. I recommend using a balanced liquid fertilizer (like a 10-10-10) every 2-3 weeks. Follow the instructions on the fertilizer label. You can also side-dress your plants with compost or aged manure every few weeks.
* Sunlight: Celery prefers full sun (6-8 hours of direct sunlight per day), but it can tolerate partial shade, especially in hot climates. If you live in a very hot area, provide some afternoon shade to prevent the plants from scorching.
* Weeding: Keep your container free of weeds, as they can compete with your celery plants for nutrients and water. Hand-pull any weeds that appear.
* Blanching (Optional): Blanching is the process of excluding light from the celery stalks to make them more tender and less bitter. This is optional, but it can improve the flavor of your celery. You can blanch your celery by wrapping the stalks with newspaper, cardboard, or even old socks about 2-3 weeks before harvest. Leave the tops of the stalks exposed to sunlight.
Dealing with Pests and Diseases
Celery is generally a pretty hardy plant, but it can be susceptible to a few pests and diseases. Here’s what to watch out for:
* Pests: Common celery pests include aphids, celery leaf tiers, and spider mites. You can control these pests by hand-picking them off the plants, spraying them with insecticidal soap, or using neem oil.
* Diseases: Celery can be affected by diseases such as early blight, late blight, and pink rot. To prevent these diseases, make sure your plants have good air circulation, avoid overhead watering, and remove any infected leaves promptly. You can also use a fungicide if necessary.
Harvesting Your Celery
The moment you’ve been waiting for! Celery is typically ready to harvest about 80-100 days after transplanting.
1. Check for Maturity: The stalks should be at least 8 inches long and feel firm to the touch.
2. Harvesting Options: You can harvest the entire plant at once, or you can harvest individual stalks as needed.
3. Harvesting the Whole Plant: To harvest the entire plant, use a sharp knife to cut the stalks at the base of the plant, just below the soil surface.
4. Harvesting Individual Stalks: To harvest individual stalks, simply snap them off the plant at the base.
5. Storage: After harvesting, store your celery in the refrigerator. Wrap the stalks in a damp paper towel and place them in a plastic bag. Celery will typically last for 1-2 weeks in the refrigerator.
Troubleshooting
Even with the best care, you might encounter a few challenges along the way. Here are some common problems and how to fix them:
* Yellowing Leaves: This could be a sign of overwatering, underwatering, nutrient deficiency, or disease. Check the soil moisture and adjust your watering accordingly. Fertilize your plants with a balanced fertilizer. Inspect the plants for signs of disease and treat accordingly.
* Stunted Growth: This could be caused by poor soil, lack of sunlight, or pests. Make sure your plants are growing in rich, well-draining soil. Provide them with plenty of sunlight. Check for pests and treat accordingly.
* Bitter Taste: This could be due to lack of water, excessive heat, or not blanching the stalks. Make sure your plants are getting enough water, especially during hot weather. Consider blanching the stalks to improve the flavor.
Enjoying Your Homegrown Celery
Congratulations! You’ve successfully grown your own celery in containers. Now it’s time to enjoy the fruits (or rather, vegetables) of your labor. Here are a few ideas:
* Snack on it: Celery sticks are a healthy and refreshing snack.
* Add it to salads: Celery adds a crisp, crunchy texture to salads.
* Use it in soups and stews: Celery is a staple ingredient in many soups and stews.
* Make celery juice: Celery juice is a popular health
Conclusion
So, there you have it! Growing your own celery in containers isn’t just a fun gardening project; it’s a gateway to fresher, more flavorful meals and a deeper connection with the food you eat. We’ve walked through the entire process, from selecting the right container and soil to nurturing your celery plants and harvesting your crisp, homegrown stalks.
Why is this DIY trick a must-try? Because store-bought celery simply can’t compare to the vibrant taste and satisfying crunch of celery you’ve grown yourself. Plus, you have complete control over the growing process, ensuring your celery is free from harmful pesticides and chemicals. Imagine the satisfaction of snipping off a few stalks for your next soup, salad, or snack, knowing you cultivated them with your own two hands.
But the benefits extend beyond just taste and health. Container gardening is incredibly accessible, even if you only have a small balcony or patio. It’s also a fantastic way to reduce food waste. How many times have you bought a bunch of celery, only to use a few stalks and watch the rest wilt away in the refrigerator? With container gardening, you can harvest only what you need, when you need it.
Don’t be afraid to experiment with different varieties of celery. ‘Utah Tall’ is a classic choice, but you might also try ‘Golden Self-Blanching’ for a milder flavor or ‘Redventure’ for a beautiful, colorful addition to your garden. You can also try companion planting. Celery thrives alongside onions, garlic, and tomatoes, creating a mutually beneficial ecosystem in your container garden. Consider adding some marigolds to deter pests naturally.
And speaking of pests, remember to keep a watchful eye on your plants. Regularly inspect the leaves for signs of aphids, slugs, or other common garden pests. A simple solution of soapy water can often do the trick, but you can also explore organic pest control options if needed.
Ultimately, the success of your celery container garden depends on your dedication and attention to detail. But trust us, the rewards are well worth the effort. The crisp, refreshing taste of homegrown celery is a culinary delight, and the satisfaction of nurturing your own plants is an experience you won’t soon forget.
We wholeheartedly encourage you to give this DIY trick a try. Start small, be patient, and don’t be afraid to learn from your mistakes. Gardening is a journey, and every plant you grow is a valuable lesson.
Once you’ve harvested your first batch of homegrown celery, we’d love to hear about your experience! Share your tips, tricks, and photos with us in the comments below. Let’s create a community of celery-loving gardeners and inspire others to embrace the joys of growing their own food. Let us know if you found these **celery container gardening** tips helpful. Happy gardening!
FAQ
What is the best size container for growing celery?
A container that is at least 8-12 inches deep and 12 inches in diameter is ideal for growing celery. Celery needs room for its roots to develop properly. A larger container will also retain moisture better, which is crucial for celery growth. If you’re planning to grow multiple celery plants in one container, opt for a larger size to provide adequate spacing. Remember, overcrowding can lead to stunted growth and increased susceptibility to diseases.
What type of soil is best for celery in containers?
Celery thrives in rich, well-draining soil that is high in organic matter. A good potting mix specifically formulated for vegetables is a great starting point. You can also amend your potting mix with compost, aged manure, or other organic materials to improve its fertility and drainage. Celery prefers a slightly acidic to neutral soil pH, ideally between 6.0 and 6.8. You can test your soil pH using a simple soil testing kit available at most garden centers.
How often should I water my container celery?
Celery is a thirsty plant and requires consistent moisture to thrive. Water your celery plants deeply and regularly, especially during hot, dry weather. Aim to keep the soil consistently moist but not waterlogged. Check the soil moisture level daily by sticking your finger about an inch into the soil. If the soil feels dry to the touch, it’s time to water. Avoid overhead watering, as this can increase the risk of fungal diseases. Instead, water at the base of the plant, directing the water towards the roots.
How much sunlight does celery need in a container?
Celery prefers full sun, meaning at least 6-8 hours of direct sunlight per day. However, in hotter climates, celery can benefit from some afternoon shade to prevent the leaves from scorching. If you’re growing celery indoors, place it near a sunny window or supplement with grow lights. Insufficient sunlight can lead to leggy growth and reduced yields.
How do I fertilize my container celery?
Celery is a heavy feeder and requires regular fertilization to support its growth. Start fertilizing your celery plants about 2-3 weeks after transplanting them into their containers. Use a balanced liquid fertilizer, such as a 10-10-10 or 20-20-20, diluted to half strength. Fertilize every 2-3 weeks throughout the growing season. You can also supplement with organic fertilizers, such as compost tea or fish emulsion. Avoid over-fertilizing, as this can lead to excessive foliage growth at the expense of stalk development.
How long does it take for celery to grow in a container?
Celery typically takes 100-130 days to mature from seed to harvest. However, if you start with transplants, you can shorten the growing time by several weeks. The exact time will depend on the variety of celery, the growing conditions, and your local climate. Be patient and monitor your plants closely. You’ll know your celery is ready to harvest when the stalks are at least 6-8 inches long and have a firm, crisp texture.
How do I harvest celery from a container?
You can harvest celery stalks individually as needed or harvest the entire plant at once. To harvest individual stalks, simply cut them off at the base of the plant using a sharp knife or pruning shears. To harvest the entire plant, cut it off at the soil level. After harvesting, remove any yellowing or damaged leaves. Celery is best used fresh, but it can also be stored in the refrigerator for up to a week.
What are some common pests and diseases that affect container celery?
Celery can be susceptible to several pests and diseases, including aphids, slugs, celery leaf tiers, and fungal diseases like early blight and late blight. Regularly inspect your plants for signs of pests or diseases. If you spot any problems, take action immediately. For aphids, try spraying the plants with a strong stream of water or using insecticidal soap. For slugs, use slug bait or handpick them off the plants. To prevent fungal diseases, ensure good air circulation around your plants and avoid overhead watering. You can also use a fungicide if necessary.
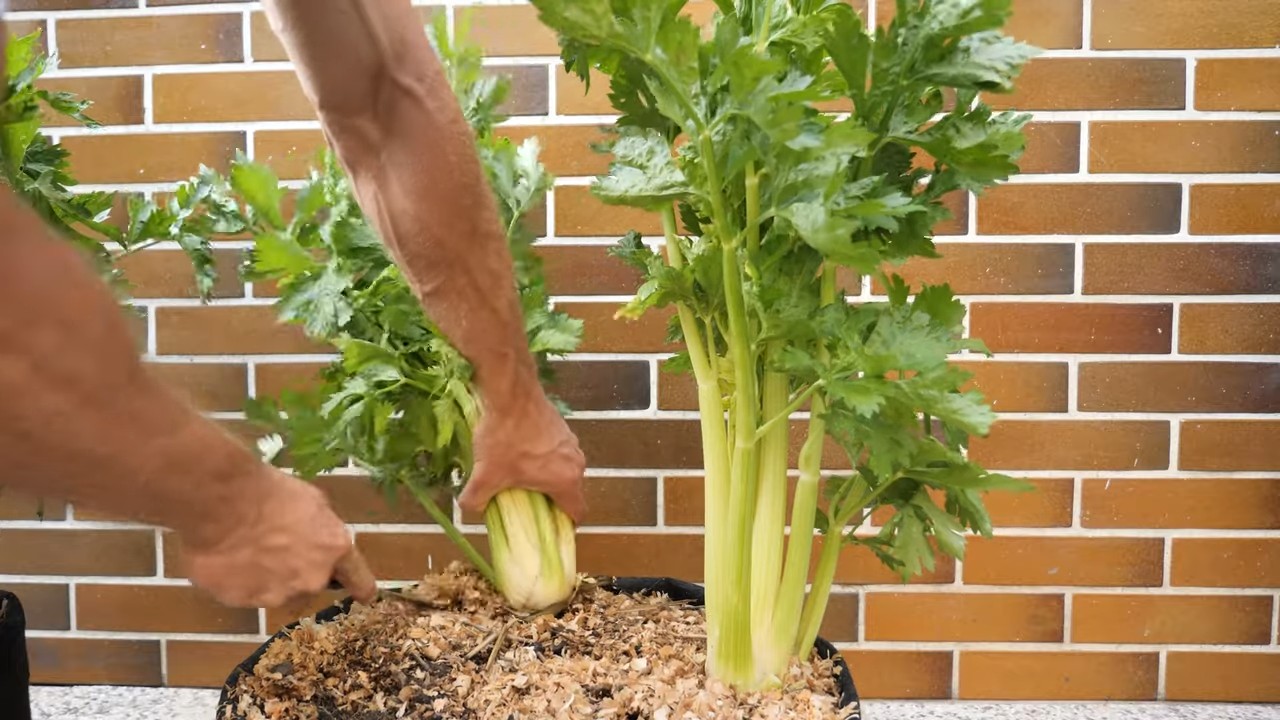
Can I grow celery from the base of a store-bought stalk?
Yes, you can! This is a fun and easy way to propagate celery. Simply cut off the base of a store-bought celery stalk, leaving about 2 inches of the base intact. Place the base in a shallow dish of water, ensuring that the cut end is submerged. Place the dish in a sunny location and change the water every day. After a few days, you should start to see new roots and leaves emerging from the base. Once the roots are well-developed, you can transplant the celery base into a container filled with potting mix.
Is blanching necessary for container-grown celery?
Blanching is the process of excluding light from the celery stalks to make them more tender and less bitter. While blanching is not strictly necessary for container-grown celery, it can improve the flavor and texture of the stalks. To blanch celery, you can wrap the stalks with newspaper, cardboard, or cloth about 2-3 weeks before harvest. Be sure to leave the tops of the leaves exposed to sunlight. Alternatively, you can mound soil around the base of the plants to blanch the stalks.

Leave a Comment