
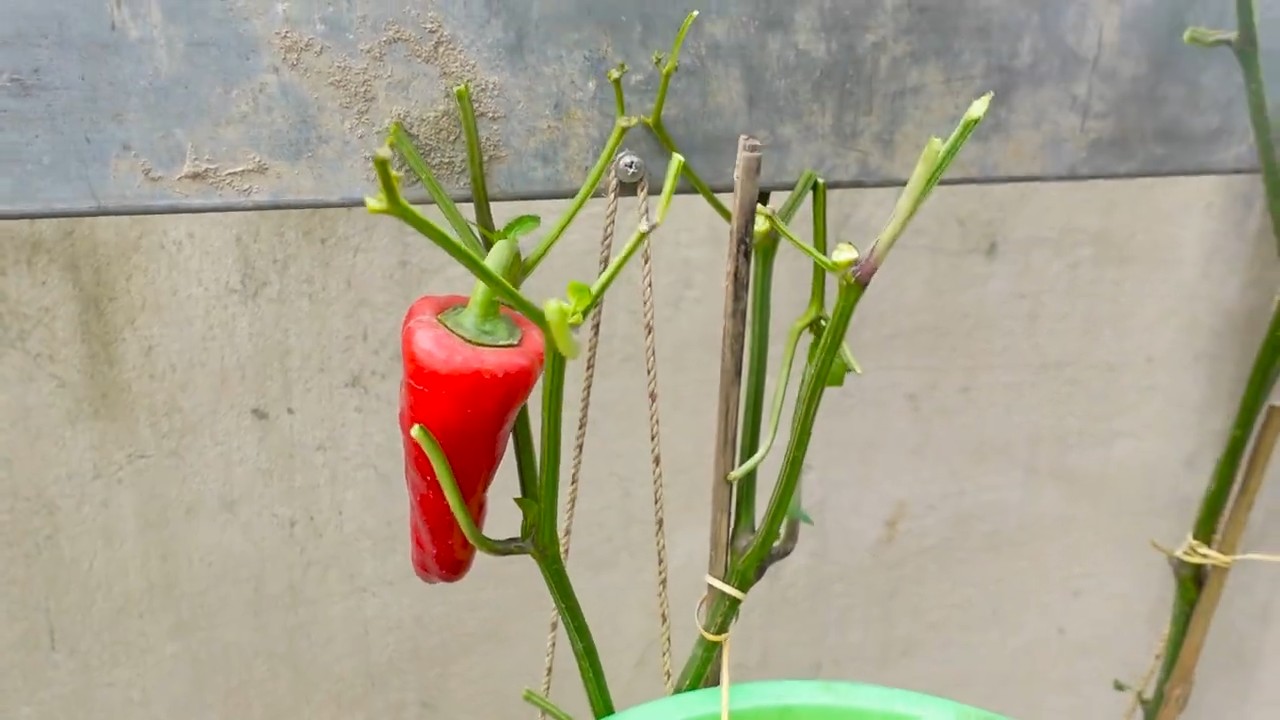
Chili growing garden upgrade – that’s what we’re diving into today, and trust me, your taste buds will thank you! Have you ever dreamt of fiery flavors dancing on your tongue, all thanks to chilies you’ve nurtured yourself? Well, get ready to turn that dream into a delicious reality. For centuries, chilies have been more than just a spice; they’ve been a symbol of warmth, passion, and even prosperity in many cultures. From the ancient Aztecs who used them in rituals to the vibrant markets of Asia where they’re a daily staple, chilies have a rich and fascinating history.
But let’s be honest, sometimes growing these fiery gems can feel a little…challenging. That’s where this DIY article comes in! We’re not just talking about planting seeds and hoping for the best. We’re talking about clever hacks, simple upgrades, and insider secrets that will transform your chili growing experience. Whether you’re battling pests, struggling with soil, or just looking to maximize your yield, I’ve got you covered. This chili growing garden upgrade guide is packed with practical tips and tricks that anyone can use, regardless of their gardening experience. So, grab your gloves, and let’s get ready to spice things up!
Chili-Garten-Upgrade: Mehr Ertrag, weniger Stress!
Hey Chili-Liebhaber! Ich bin total begeistert, euch heute von meinem neuesten Projekt zu erzählen: Einem umfassenden Upgrade meines Chili-Gartens! Ich habe in den letzten Jahren so viel über den Anbau von Chilis gelernt, und dieses Jahr wollte ich wirklich alles auf ein neues Level heben. Das Ziel? Mehr Chilis, weniger Arbeit und ein Garten, der einfach nur Spaß macht!
Hier ist, wie ich vorgegangen bin, und wie auch ihr euren Chili-Garten auf Vordermann bringen könnt. Keine Sorge, es ist einfacher als es klingt!
Bodenverbesserung: Die Basis für gesunde Pflanzen
Ein guter Boden ist das A und O für gesunde Chili-Pflanzen. Chilis sind Starkzehrer, das heißt, sie brauchen viele Nährstoffe. Deshalb habe ich mich entschieden, den Boden gründlich zu verbessern.
Was ihr braucht:
* Kompost (am besten selbstgemacht!)
* Hornspäne
* Gesteinsmehl
* Gartenkalk (optional, je nach Boden-pH-Wert)
* Spaten oder Grabegabel
* Gartenschere (zum Entfernen von Wurzeln)
Schritt-für-Schritt-Anleitung:
1. Boden vorbereiten: Zuerst habe ich den Bereich, in dem meine Chilis wachsen sollen, von Unkraut und Steinen befreit. Mit einer Gartenschere habe ich auch alle alten Wurzeln entfernt, die noch im Boden waren.
2. Boden lockern: Mit einem Spaten oder einer Grabegabel habe ich den Boden tiefgründig gelockert. Das ist wichtig, damit die Wurzeln der Chili-Pflanzen später gut eindringen können.
3. Kompost einarbeiten: Jetzt kommt der Kompost ins Spiel! Ich habe eine dicke Schicht Kompost (ca. 5-10 cm) auf den Boden aufgetragen und ihn dann mit dem Spaten oder der Grabegabel gut eingearbeitet. Kompost ist ein echter Alleskönner: Er verbessert die Bodenstruktur, speichert Wasser und liefert wichtige Nährstoffe.
4. Hornspäne und Gesteinsmehl hinzufügen: Hornspäne sind ein natürlicher Langzeitdünger, der Stickstoff liefert. Gesteinsmehl enthält wichtige Mineralien und Spurenelemente. Ich habe beides großzügig auf den Boden gestreut und ebenfalls eingearbeitet.
5. Gartenkalk verwenden (optional): Wenn euer Boden zu sauer ist (das könnt ihr mit einem Bodentest herausfinden), könnt ihr Gartenkalk hinzufügen, um den pH-Wert zu erhöhen. Chilis bevorzugen einen leicht sauren bis neutralen Boden (pH-Wert zwischen 6,0 und 7,0).
6. Alles gut vermischen: Zum Schluss habe ich alles noch einmal gründlich vermischt, damit die Nährstoffe gleichmäßig verteilt sind.
Bewässerungssystem: Nie wieder trockene Chilis!
Eines meiner größten Probleme in der Vergangenheit war, dass ich oft vergessen habe, meine Chilis regelmäßig zu gießen. Deshalb habe ich mich dieses Jahr für ein automatisches Bewässerungssystem entschieden. Das spart nicht nur Zeit, sondern sorgt auch dafür, dass die Pflanzen immer optimal mit Wasser versorgt sind.
Was ihr braucht:
* Tropfschläuche oder Micro-Drip-System
* Zeitschaltuhr
* Wasserhahnanschluss
* Druckminderer (optional, je nach Wasserdruck)
* Schere oder Messer
* Erdanker (zum Fixieren der Schläuche)
Schritt-für-Schritt-Anleitung:
1. System planen: Zuerst habe ich mir überlegt, wie ich das Bewässerungssystem am besten anordnen kann. Ich habe darauf geachtet, dass jede Chili-Pflanze ausreichend Wasser bekommt.
2. Tropfschläuche verlegen: Ich habe die Tropfschläuche entlang der Chili-Pflanzen verlegt. Dabei habe ich darauf geachtet, dass die Tropfer in der Nähe der Pflanzenwurzeln liegen.
3. Schläuche fixieren: Mit Erdankern habe ich die Schläuche am Boden fixiert, damit sie nicht verrutschen.
4. Zeitschaltuhr anschließen: Die Zeitschaltuhr habe ich an den Wasserhahn angeschlossen. Ich habe sie so programmiert, dass die Chilis jeden Tag für eine bestimmte Zeit bewässert werden. Die genaue Bewässerungsdauer hängt von der Wetterlage und dem Wasserbedarf der Pflanzen ab.
5. Druckminderer installieren (optional): Wenn der Wasserdruck in eurer Leitung sehr hoch ist, solltet ihr einen Druckminderer installieren, um die Tropfschläuche vor Beschädigungen zu schützen.
6. System testen: Bevor ich das System in Betrieb genommen habe, habe ich es gründlich getestet, um sicherzustellen, dass alle Tropfer funktionieren und die Pflanzen ausreichend Wasser bekommen.
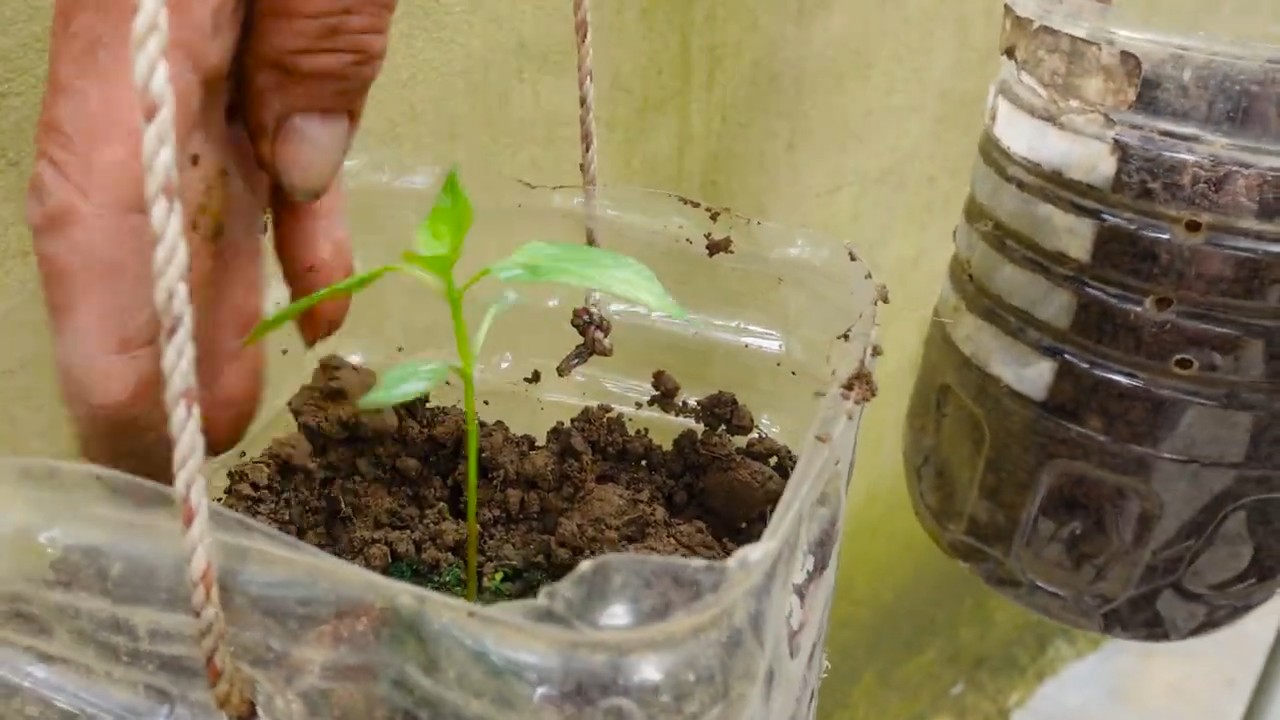
Pflanzgefäße optimieren: Mehr Platz für die Wurzeln
Ich habe festgestellt, dass meine Chili-Pflanzen in der Vergangenheit oft unter Platzmangel gelitten haben. Deshalb habe ich mich dieses Jahr für größere Pflanzgefäße entschieden. Das gibt den Wurzeln mehr Raum zum Wachsen und sorgt für eine bessere Nährstoffaufnahme.
Was ihr braucht:
* Größere Pflanzgefäße (mindestens 10 Liter Volumen pro Pflanze)
* Hochwertige Pflanzerde
* Drainagematerial (z.B. Blähton oder Kies)
* Gartenschere (zum Umtopfen)
Schritt-für-Schritt-Anleitung:
1. Pflanzgefäße vorbereiten: Ich habe die neuen Pflanzgefäße mit einer Schicht Drainagematerial am Boden versehen. Das verhindert Staunässe.
2. Pflanzerde einfüllen: Dann habe ich die Pflanzgefäße mit hochwertiger Pflanzerde gefüllt. Ich habe darauf geachtet, dass die Erde locker und luftig ist.
3. Chili-Pflanzen umtopfen: Ich habe die Chili-Pflanzen vorsichtig aus ihren alten Töpfen genommen und in die neuen Pflanzgefäße gesetzt. Dabei habe ich darauf geachtet, dass die Wurzeln nicht beschädigt werden.
4. Pflanzerde auffüllen: Ich habe die Pflanzgefäße mit Pflanzerde aufgefüllt und die Erde leicht angedrückt.
5. Angießen: Zum Schluss habe ich die Chili-Pflanzen gründlich angegossen.
Schutz vor Schädlingen: Natürliche Methoden
Ich bin kein Fan von chemischen Schädlingsbekämpfungsmitteln. Deshalb setze ich lieber auf natürliche Methoden, um meine Chili-Pflanzen vor Schädlingen zu schützen.
Was ihr braucht:
* Neemöl
* Schmierseife
* Wasser
* Sprühflasche
* Gelbtafeln
* Nützlinge (z.B. Marienkäferlarven)
Schritt-für-Schritt-Anleitung:
1. Neemöl-Spray herstellen: Ich habe eine Lösung aus Neemöl, Schmierseife und Wasser hergestellt. Neemöl ist ein natürliches Insektizid, das gegen viele Schädlinge wirkt. Schmierseife hilft dabei, das Neemöl im Wasser zu emulgieren.
2. Pflanzen besprühen: Ich habe die Chili-Pflanzen regelmäßig mit dem Neemöl-Spray besprüht. Dabei habe ich darauf geachtet, dass ich auch die Blattunterseiten erreiche, da sich dort oft Schädlinge verstecken.
3. Gelbtafeln aufhängen: Gelbtafeln sind mit einem Lockstoff versehen, der Schädlinge anzieht. Die Schädlinge bleiben dann auf der klebrigen Oberfläche der Tafeln kleben.
4. Nützlinge einsetzen: Ich habe Marienkäferlarven in meinem Chili-Garten ausgesetzt. Marienkäferlarven sind natürliche Feinde von Blattläusen und anderen Schädlingen.
5. Regelmäßige Kontrolle: Ich habe meine Chili-Pflanzen regelmäßig auf Schädlinge kontrolliert. Wenn ich Schädlinge entdeckt habe, habe ich sofort Maßnahmen ergriffen, um sie zu bekämpfen.
Beschattung: Schutz vor zu viel Sonne
Gerade in den heißen Sommermonaten können Chili-Pflanzen unter zu viel Sonne leiden. Deshalb habe ich für eine Beschattung gesorgt.
Was ihr braucht:
* Sonnensegel oder Schattiernetz
* Befestigungsmaterial (z.B
Conclusion
So, there you have it! Transforming your chili growing garden with this simple yet incredibly effective DIY upgrade is more than just a fun project; it’s an investment in a healthier, more productive, and ultimately, more rewarding chili pepper harvest. We’ve walked you through the steps, highlighting the benefits at each stage, and hopefully, inspired you to take the plunge.
Why is this DIY trick a must-try? Because it addresses several key challenges that chili growers often face. It improves drainage, preventing root rot and ensuring your plants get the oxygen they need. It enhances nutrient retention, meaning less fertilizer waste and more readily available food for your chili plants. It promotes better aeration, leading to stronger root systems and healthier overall growth. And perhaps most importantly, it’s a cost-effective and sustainable way to boost your chili growing efforts, using materials you might already have on hand or can easily source.
But don’t stop there! This DIY upgrade is just the starting point. Feel free to experiment with variations to suit your specific needs and preferences. For example, if you live in a particularly hot climate, consider adding a layer of reflective material to the outside of your container to help regulate soil temperature. Or, if you’re growing in a smaller space, you could adapt the design to create a vertical growing system. You could even incorporate companion planting directly into your upgraded container, adding herbs like basil or marigolds to deter pests and attract beneficial insects.
Another variation to consider is the type of material you use for the drainage layer. While gravel is a common choice, you could also use recycled materials like broken terracotta pots or even plastic bottle caps. The key is to choose something that won’t decompose quickly and will provide adequate drainage.
And speaking of materials, remember to choose a container that’s appropriate for the size of your chili plants. Smaller varieties can thrive in smaller containers, while larger varieties will need more space to spread their roots. Also, consider the color of your container. Darker colors will absorb more heat, which can be beneficial in cooler climates but detrimental in hotter climates.
Ultimately, the best way to discover what works best for you is to experiment and observe. Pay attention to how your chili plants respond to the changes you make, and adjust your approach accordingly.
We are confident that this DIY chili growing garden upgrade will make a significant difference in your chili growing journey. It’s a simple, effective, and rewarding way to improve the health and productivity of your plants. So, grab your tools, gather your materials, and get ready to transform your chili growing garden!
We encourage you to try this DIY trick and share your experience with us. We’d love to see photos of your upgraded gardens and hear about the results you’re achieving. Share your tips, tricks, and variations in the comments below. Let’s build a community of chili growers who are passionate about creating thriving gardens and sharing their knowledge with others. Happy growing!
Frequently Asked Questions (FAQ)
What exactly is this “DIY upgrade” supposed to do for my chili plants?
This DIY upgrade focuses on improving the growing environment for your chili plants, primarily by enhancing drainage, aeration, and nutrient retention within the container. Standard pots often lack optimal drainage, leading to waterlogged soil and root rot. This upgrade creates a layered system that allows excess water to drain away freely, while also providing better airflow to the roots. The improved nutrient retention means that the fertilizer you use is more effectively absorbed by the plants, leading to healthier growth and a more abundant harvest. Think of it as giving your chili plants a luxury apartment instead of a cramped studio!
What materials do I absolutely need for this DIY chili growing garden upgrade?
The essential materials are:
* A suitable container (plastic pot, terracotta pot, or even a repurposed bucket).
* A drainage layer material (gravel, pebbles, broken terracotta, or even plastic bottle caps).
* A barrier layer (landscape fabric, burlap, or even an old t-shirt).
* High-quality potting mix specifically formulated for vegetables or chili peppers.
Optional but recommended materials include:
* Perlite or vermiculite to improve drainage and aeration in the potting mix.
* Organic fertilizer or compost to provide essential nutrients.
* Mulch to help retain moisture and suppress weeds.
How do I know if my chili plants need this upgrade?
Look for these signs that your chili plants might benefit from this DIY upgrade:
* Yellowing leaves, especially lower leaves.
* Stunted growth.
* Wilting even when the soil is moist.
* Signs of root rot (soft, brown, or mushy roots).
* Poor drainage in the existing container.
* Frequent overwatering or underwatering issues.
If you notice any of these symptoms, it’s a good indication that your chili plants would thrive with improved drainage and aeration.
Can I use any type of soil for this upgrade?
No, you should not use just any type of soil. Garden soil is generally too dense and doesn’t drain well in containers. It can also harbor pests and diseases. Always use a high-quality potting mix specifically formulated for vegetables or chili peppers. These mixes are designed to provide excellent drainage, aeration, and nutrient retention. You can also amend the potting mix with perlite or vermiculite to further improve drainage and aeration.
How often should I water my chili plants after implementing this upgrade?
The watering frequency will depend on several factors, including the climate, the size of the container, and the type of chili pepper you’re growing. However, the improved drainage provided by this upgrade will help prevent overwatering. A good rule of thumb is to water when the top inch of soil feels dry to the touch. Water deeply until water drains out of the bottom of the container. Avoid watering shallowly and frequently, as this can lead to shallow root growth.
What if I don’t have access to all the recommended materials? Can I still do this?
Absolutely! The key is to be resourceful and adapt the design to what you have available. For example, if you don’t have landscape fabric, you can use an old t-shirt or burlap sack as a barrier layer. If you don’t have gravel, you can use broken terracotta pots or even plastic bottle caps for the drainage layer. The most important thing is to ensure that the drainage layer is effective and that the potting mix is well-draining.
Will this upgrade protect my chili plants from pests and diseases?
While this upgrade primarily focuses on improving drainage, aeration, and nutrient retention, it can indirectly help protect your chili plants from pests and diseases. Healthy plants are more resistant to pests and diseases. The improved drainage helps prevent root rot, which is a common cause of plant death. You can also incorporate companion planting into your upgraded container to deter pests and attract beneficial insects.
How long will this DIY upgrade last?
The lifespan of this upgrade will depend on the materials you use. However, with proper care, it should last for at least one growing season, and potentially several. Choose durable materials that won’t decompose quickly. Regularly inspect the container and drainage layer for any signs of damage or deterioration. If necessary, you can easily replace the potting mix and drainage layer to extend the lifespan of the upgrade.
Can I use this upgrade for other plants besides chili peppers?
Yes, absolutely! This DIY upgrade can be beneficial for a wide variety of plants that require well-draining soil, including tomatoes, peppers, herbs, and even some flowers. Just be sure to choose a container that’s appropriate for the size of the plant and adjust the potting mix accordingly.
I’m a complete beginner gardener. Is this DIY project too difficult for me?
Not at all! This DIY project is designed to be simple and accessible for gardeners of all skill levels. The steps are straightforward and require minimal tools and expertise. Don’t be afraid to give it a try! And remember, there are plenty of resources available online and in your local community to help you along the way. The most important thing is to have fun and learn from your experiences.

Leave a Comment