
Chili pepper growing guide: Ready to turn up the heat in your garden and your kitchen? I’m so excited to share my favorite tips and tricks for cultivating vibrant, flavorful chili peppers right in your own backyard! For centuries, chili peppers have been more than just a spice; they’ve been a vital part of cultures around the globe, adding zest to dishes and even playing a role in traditional medicine. From the ancient Aztecs to modern-day foodies, the love for chili peppers is a timeless tradition.
But let’s be honest, sometimes growing these fiery fruits can feel a little intimidating. Maybe you’ve tried before and ended up with lackluster results, or perhaps you’re a complete beginner unsure where to even start. That’s where this DIY guide comes in! I’m going to break down the entire process, from selecting the perfect seeds to harvesting a bumper crop, with easy-to-follow instructions and insider secrets.
Why do you need this chili pepper growing guide? Because fresh, homegrown chili peppers are simply unmatched in flavor and quality. Plus, there’s nothing quite like the satisfaction of nurturing a plant from seed to table. Imagine adding a dash of your own cayenne to your favorite chili recipe or creating a signature hot sauce with your unique blend of peppers. Get ready to unleash your inner gardener and spice up your life!
Growing Fiery Friends: Your Ultimate Guide to DIY Chili Pepper Cultivation
Hey there, fellow spice enthusiasts! Ever dreamt of having a garden bursting with vibrant chili peppers, ready to add a kick to your culinary creations? Well, you’ve come to the right place! I’m going to walk you through everything you need to know to successfully grow your own chili peppers, from seed to sizzling harvest. Get ready to unleash your inner gardener and spice up your life!
Choosing Your Chili Pepper Variety
Before we dive into the nitty-gritty, let’s talk about choosing the right chili pepper for you. The world of chili peppers is vast and diverse, ranging from mild and sweet to scorching hot. Consider your heat tolerance and culinary preferences when making your selection. Here are a few popular options to get you started:
* **Bell Peppers:** (Capsicum annuum) – These are the mildest of the bunch, perfect for stuffing, salads, and adding a touch of sweetness to dishes.
* **Jalapeños:** (Capsicum annuum) – A classic choice with a moderate heat level, great for salsas, pickling, and adding a kick to nachos.
* **Serranos:** (Capsicum annuum) – Hotter than jalapeños, serranos are ideal for those who like a bit more spice in their life.
* **Cayenne Peppers:** (Capsicum annuum) – These slender peppers pack a punch and are often dried and ground into chili powder.
* **Habaneros:** (Capsicum chinense) – Proceed with caution! Habaneros are seriously hot and should be used sparingly.
* **Ghost Peppers (Bhut Jolokia):** (Capsicum chinense) – One of the hottest peppers in the world. Only for the brave!
* **Scotch Bonnets:** (Capsicum chinense) – Similar in heat to habaneros, with a slightly sweeter, fruitier flavor.
Once you’ve chosen your variety, you can either purchase seeds or start with seedlings from a local nursery. I personally love the satisfaction of starting from seed, but seedlings can give you a head start.
Starting Your Chili Peppers from Seed
Starting chili peppers from seed requires a bit of patience, as they can take a while to germinate. But trust me, it’s worth the effort!
Materials You’ll Need:
* Chili pepper seeds
* Seed starting trays or small pots
* Seed starting mix (a light, well-draining mix)
* Spray bottle
* Heat mat (optional, but recommended)
* Grow light (optional, but recommended)
* Clear plastic dome or plastic wrap
Step-by-Step Instructions:
1. **Prepare Your Seed Starting Trays:** Fill your seed starting trays or pots with seed starting mix. Gently tap the trays to settle the mix.
2. **Sow the Seeds:** Make a small indentation (about 1/4 inch deep) in the center of each cell or pot. Place 2-3 seeds in each indentation. This increases the chances of at least one seed germinating.
3. **Cover the Seeds:** Gently cover the seeds with seed starting mix.
4. **Water Thoroughly:** Use a spray bottle to thoroughly moisten the soil. Avoid overwatering, as this can lead to damping off (a fungal disease that can kill seedlings).
5. **Provide Warmth:** Chili pepper seeds germinate best in warm temperatures (around 80-85°F). Place your seed starting trays on a heat mat to provide consistent warmth.
6. **Maintain Humidity:** Cover the seed starting trays with a clear plastic dome or plastic wrap to create a humid environment. This helps the seeds germinate.
7. **Provide Light:** Once the seeds germinate (usually within 7-21 days), remove the plastic dome or plastic wrap and place the seedlings under a grow light. If you don’t have a grow light, place them in a sunny window, but be sure to rotate them regularly to prevent them from becoming leggy.
8. **Thin the Seedlings:** Once the seedlings have their first true leaves (the second set of leaves that appear after the cotyledons), thin them out by snipping off the weaker seedlings at the soil line. Leave only the strongest seedling in each cell or pot.
9. **Water Regularly:** Keep the soil consistently moist, but not soggy. Water when the top inch of soil feels dry to the touch.
10. **Fertilize Lightly:** Once the seedlings have their second set of true leaves, start fertilizing them with a diluted liquid fertilizer (half strength) every 2 weeks.
Transplanting Your Chili Pepper Seedlings
Once your chili pepper seedlings have grown to about 6-8 inches tall and the weather has warmed up (nighttime temperatures consistently above 50°F), it’s time to transplant them into larger pots or directly into your garden.
Materials You’ll Need:
* Larger pots (if transplanting into pots) or a prepared garden bed
* Potting mix or garden soil
* Trowel
* Watering can
* Fertilizer (optional)
Step-by-Step Instructions:
1. **Harden Off the Seedlings:** Before transplanting, you need to harden off the seedlings to acclimate them to outdoor conditions. Gradually expose them to sunlight and wind for increasing periods of time over the course of a week. Start with an hour or two of exposure and gradually increase the time each day.
2. **Prepare the Planting Location:** If you’re transplanting into pots, choose pots that are at least 5 gallons in size. Fill the pots with a well-draining potting mix. If you’re transplanting into your garden, choose a location that receives at least 6-8 hours of sunlight per day. Amend the soil with compost or other organic matter to improve drainage and fertility.
3. **Dig a Hole:** Dig a hole that is slightly larger than the root ball of the seedling.
4. **Carefully Remove the Seedling:** Gently remove the seedling from its pot or cell. Be careful not to damage the roots.
5. **Place the Seedling in the Hole:** Place the seedling in the hole and backfill with soil. Gently firm the soil around the base of the plant.
6. **Water Thoroughly:** Water the seedling thoroughly after transplanting.
7. **Fertilize (Optional):** You can fertilize the seedling with a balanced fertilizer after transplanting. Follow the instructions on the fertilizer package.
Caring for Your Chili Pepper Plants
Once your chili pepper plants are established, it’s important to provide them with proper care to ensure a bountiful harvest.
Key Care Tips:
* **Sunlight:** Chili peppers need at least 6-8 hours of sunlight per day.
* **Watering:** Water regularly, especially during hot, dry weather. Avoid overwatering, as this can lead to root rot. Water deeply and less frequently, rather than shallowly and often.
* **Fertilizing:** Fertilize every 2-3 weeks with a balanced fertilizer. You can also use a fertilizer specifically formulated for peppers and tomatoes.
* **Pruning:** Pruning is not essential, but it can help to improve air circulation and encourage bushier growth. Remove any suckers (small shoots that grow from the base of the plant) to direct energy to fruit production.
* **Support:** As the plants grow and produce fruit, they may need support to prevent them from falling over. Use stakes or cages to support the plants.
* **Pest and Disease Control:** Keep an eye out for pests and diseases. Common pests include aphids, spider mites, and whiteflies. Common diseases include blossom end rot and fungal infections. Treat any problems promptly with appropriate insecticides or fungicides. I prefer using natural and organic solutions whenever possible. Neem oil is a great all-purpose option.
* **Mulching:** Apply a layer of mulch around the base of the plants to help retain moisture, suppress weeds, and regulate soil temperature.
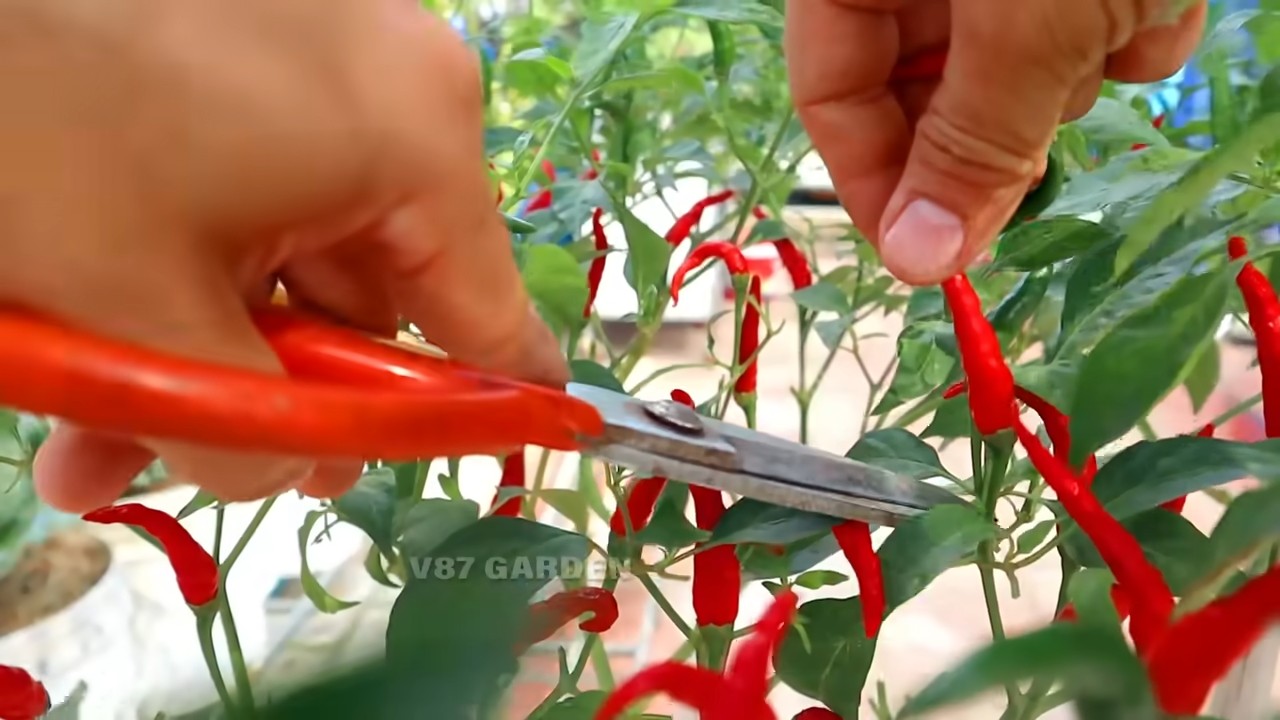
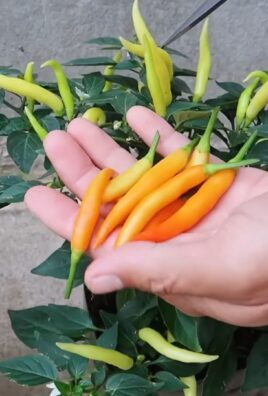
Harvesting Your Chili Peppers
The time it takes for chili peppers to mature depends on the variety. Generally, it takes about 60-90 days from transplanting to harvest.
Harvesting Tips:
* **Color:** The color of the chili pepper will indicate its ripeness. Most chili peppers will turn from green to red, yellow, or orange when ripe.
* **Firmness:** Ripe chili peppers should be firm to the touch.
* **Stem:** Gently twist or cut the chili pepper from the plant, leaving a small piece of stem attached.
* **Taste Test:** If you’re unsure whether a chili pepper is ripe, you can do a taste test. Cut off a small piece and taste it. If it has the desired flavor and heat level, it’s ready to harvest.
Storing Your Chili Peppers
Once you’ve harvested your chili peppers, you can store them in a variety of ways.
Storage Methods:
* **Fresh:** Fresh chili peppers can be stored in the refrigerator for up to a week.
* **Dried:** Dried chili peppers can be stored in an airtight container in a

Conclusion
So, there you have it! Mastering the art of growing your own chili peppers is not only achievable but incredibly rewarding. From the vibrant colors adorning your garden to the fiery flavors enhancing your culinary creations, the benefits are undeniable. This DIY chili pepper growing guide has equipped you with the knowledge to nurture these spicy gems from seed to harvest.
Why is this a must-try? Because store-bought chili peppers simply can’t compare to the freshness and intensity of homegrown varieties. You control the entire process, ensuring organic practices and selecting the exact level of heat you desire. Plus, there’s an unparalleled satisfaction in harvesting something you’ve cultivated with your own hands. Imagine the pride you’ll feel serving a dish seasoned with chili peppers you grew yourself!
Beyond the basics, consider exploring different varieties. Experiment with milder options like poblano or Anaheim peppers for a subtle warmth, or venture into the realm of extreme heat with habaneros or ghost peppers for the truly adventurous. You can also try different growing methods, such as hydroponics or container gardening, to adapt to your space and preferences.
Don’t be afraid to get creative with your chili pepper harvest. Beyond adding them to your favorite recipes, you can dry them for long-term storage, pickle them for a tangy treat, or even create your own chili oil or hot sauce. The possibilities are endless!
We wholeheartedly encourage you to embark on this exciting journey of growing your own chili peppers. It’s a fulfilling and flavorful experience that will transform your garden and your kitchen. So, grab your seeds, prepare your soil, and get ready to unleash the fiery potential of homegrown chili peppers!
Most importantly, we want to hear about your experiences! Share your successes, your challenges, and your favorite chili pepper recipes in the comments below. Let’s build a community of chili pepper enthusiasts and learn from each other’s journeys. Happy growing!
Frequently Asked Questions (FAQ)
Q: What is the best time of year to start growing chili peppers?
A: The ideal time to start growing chili peppers depends on your climate. In general, chili peppers thrive in warm weather and require a long growing season. If you live in a region with mild winters, you can start seeds indoors 6-8 weeks before the last expected frost. If you live in a colder climate, you may need to start seeds even earlier. Starting seeds indoors gives your chili peppers a head start and allows them to mature before the weather turns cold. Once the danger of frost has passed and the soil has warmed up, you can transplant the seedlings outdoors.
Q: What type of soil is best for growing chili peppers?
A: Chili peppers prefer well-draining soil that is rich in organic matter. A slightly acidic to neutral pH (around 6.0 to 7.0) is ideal. You can improve the soil by adding compost, aged manure, or other organic amendments. Avoid heavy clay soils, as they can retain too much water and lead to root rot. If you have clay soil, consider amending it with sand and organic matter to improve drainage. You can also grow chili peppers in raised beds or containers filled with a well-draining potting mix.
Q: How much sunlight do chili peppers need?
A: Chili peppers require at least 6-8 hours of direct sunlight per day to thrive. Choose a location in your garden that receives plenty of sunlight throughout the day. If you are growing chili peppers indoors, place them near a sunny window or use grow lights to provide adequate light. Insufficient sunlight can result in leggy plants with poor fruit production.
Q: How often should I water my chili peppers?
A: Water chili peppers regularly, especially during hot and dry weather. The soil should be kept consistently moist but not waterlogged. Water deeply at the base of the plant, avoiding wetting the foliage, which can increase the risk of fungal diseases. Check the soil moisture regularly by sticking your finger into the soil. If the top inch of soil feels dry, it’s time to water. Reduce watering frequency during cooler weather.
Q: What are some common pests and diseases that affect chili peppers?
A: Chili peppers can be susceptible to various pests and diseases, including aphids, spider mites, whiteflies, blossom-end rot, and fungal diseases. Regularly inspect your plants for signs of pests or diseases. Treat infestations promptly with insecticidal soap, neem oil, or other appropriate treatments. Prevent blossom-end rot by ensuring consistent watering and providing adequate calcium to the soil. Improve air circulation around your plants to reduce the risk of fungal diseases.
Q: How do I know when my chili peppers are ripe?
A: The color of ripe chili peppers varies depending on the variety. Most chili peppers will turn from green to red, yellow, orange, or brown when they are ripe. The peppers should also feel firm and slightly waxy to the touch. You can harvest chili peppers at any stage of ripeness, but the flavor and heat will intensify as they mature. Use pruning shears or scissors to cut the peppers from the plant, leaving a small stem attached.
Q: Can I grow chili peppers in containers?
A: Yes, chili peppers can be successfully grown in containers. Choose a container that is at least 12 inches in diameter and has drainage holes. Use a well-draining potting mix and provide adequate sunlight and water. Container-grown chili peppers may require more frequent watering and fertilization than those grown in the ground.
Q: How do I fertilize my chili peppers?
A: Chili peppers benefit from regular fertilization, especially during the growing season. Use a balanced fertilizer with equal amounts of nitrogen, phosphorus, and potassium. You can also use a fertilizer specifically formulated for tomatoes or peppers. Follow the instructions on the fertilizer label for application rates. Avoid over-fertilizing, as this can lead to excessive foliage growth and reduced fruit production.
Q: How can I increase the heat of my chili peppers?
A: Several factors can influence the heat of chili peppers, including genetics, growing conditions, and stress. To increase the heat of your chili peppers, ensure they receive plenty of sunlight and water. You can also stress the plants slightly by withholding water for short periods, which can encourage them to produce more capsaicin, the compound that gives chili peppers their heat. However, avoid stressing the plants too much, as this can negatively impact their overall health and productivity.
Q: How do I store my chili peppers?
A: There are several ways to store chili peppers. You can dry them by stringing them together and hanging them in a well-ventilated area. You can also dehydrate them using a food dehydrator or oven. Dried chili peppers can be stored in airtight containers for several months. Alternatively, you can pickle chili peppers in vinegar or brine. Pickled chili peppers can be stored in the refrigerator for several weeks. You can also freeze chili peppers whole or chopped. Frozen chili peppers can be stored in freezer bags for several months.
Leave a Comment