
Clean frying pan baking soda – sounds simple, right? But trust me, this little combo is about to become your new best friend in the kitchen! I know, I know, cleaning a burnt or greasy frying pan is probably right up there with doing taxes on your list of favorite activities. But what if I told you there’s a ridiculously easy, almost magical way to restore your pans to their former glory, using ingredients you probably already have in your pantry?
Baking soda, or sodium bicarbonate, has been a household staple for centuries. Its uses stretch far beyond baking; our grandmothers knew its cleaning power, using it for everything from scrubbing sinks to deodorizing refrigerators. Think of it as a time-tested, eco-friendly solution passed down through generations. And when paired with the right technique, it’s a powerhouse for tackling even the most stubborn grime.
Let’s face it, we’ve all been there: distracted by a phone call, a chat with a friend, or simply forgetting about the food simmering on the stove. The result? A blackened, seemingly unsalvageable frying pan. Instead of resigning yourself to endless scrubbing or, worse, tossing the pan altogether, I’m going to show you a simple DIY trick using clean frying pan baking soda that will save you time, money, and a whole lot of elbow grease. This method is not only effective but also avoids harsh chemicals, making it a safer option for your family and the environment. So, grab your baking soda, and let’s get started on breathing new life into your beloved frying pans!
DIY: Revive Your Scorched Frying Pan with Baking Soda Magic!
Okay, let’s face it, we’ve all been there. You’re cooking up a storm, get distracted for a minute, and BAM! Your frying pan is now sporting a lovely layer of burnt-on gunk that seems impossible to remove. Don’t despair! Before you toss that pan in the trash, I’m going to show you a super easy and effective way to bring it back to life using the power of baking soda. This method is gentle, non-toxic, and works wonders on most types of frying pans (though always test a small, inconspicuous area first, especially on delicate surfaces like non-stick).
What You’ll Need:
* Your victim – the scorched frying pan!
* Baking soda (the star of the show!)
* Water
* Dish soap (optional, but helpful)
* A non-abrasive sponge or scrub brush (avoid steel wool on non-stick!)
* A spatula or scraper (plastic or wooden is best)
* A little bit of patience (it’s worth it, I promise!)
The Baking Soda Soak: Loosening the Grime
This first step is all about letting the baking soda work its magic to loosen that stubborn burnt-on food.
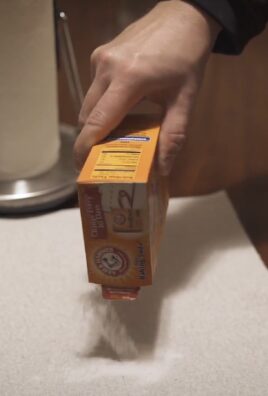
1. Coat the Bottom: Generously sprinkle baking soda all over the burnt areas of the frying pan. You want a nice, thick layer covering everything. Don’t be shy!
2. Add Water: Pour enough water into the pan to completely cover the baking soda and the burnt areas. The water should be hot, but not boiling. Hot tap water usually works just fine.
3. Simmer Time: Place the frying pan on the stovetop over medium heat. Bring the water to a simmer (small bubbles, not a rolling boil). Let it simmer for about 15-30 minutes. You’ll likely see the water start to turn brown as the baking soda begins to lift the burnt food particles. Keep an eye on it and add more water if it starts to evaporate too quickly.
4. Cool Down: Turn off the heat and let the pan cool down completely. This is important! You don’t want to burn yourself, and letting it cool allows the baking soda solution to continue working its magic. I usually let it sit for at least an hour, or even overnight for really stubborn messes.
Scrub-a-Dub-Dub: Removing the Loose Debris
Now that the baking soda has had a chance to loosen the burnt-on food, it’s time to get scrubbing!
1. Drain the Water: Carefully pour out the baking soda solution. You might be surprised at how much gunk comes out with it!
2. Scrape Away: Use a plastic or wooden spatula or scraper to gently scrape away any loose debris. You should find that a lot of the burnt food comes off quite easily at this point. Don’t force it! If it’s still stuck, move on to the next step.
3. Baking Soda Paste Power: Make a paste of baking soda and a little bit of water. The consistency should be like a thick cream.
4. Scrubbing Time: Apply the baking soda paste to the remaining burnt areas and gently scrub with a non-abrasive sponge or scrub brush. Use circular motions and apply a little pressure. Remember, patience is key! Avoid using steel wool or abrasive cleaners, especially on non-stick surfaces, as they can scratch the pan.
5. Rinse and Repeat: Rinse the pan thoroughly with warm water. If there are still stubborn spots, repeat steps 3 and 4.
Dealing with Stubborn Spots: The Baking Soda Boil
Sometimes, even after soaking and scrubbing, there are still a few stubborn spots that just won’t budge. Don’t worry, I have a trick for that too!
1. Baking Soda Bath: Fill the frying pan with water again, enough to cover the stubborn spots. Add a generous amount of baking soda – about 2-3 tablespoons should do the trick.
2. Boil It Away: Bring the water to a boil over medium-high heat. Let it boil for about 10-15 minutes. Keep an eye on it and add more water if needed.
3. Cool and Scrub: Turn off the heat and let the pan cool down slightly. Then, use your non-abrasive sponge or scrub brush to scrub the remaining spots. They should come off much easier now.
4. Final Rinse: Rinse the pan thoroughly with warm water.
The Finishing Touches: Making it Sparkle
Now that your frying pan is free of burnt-on food, let’s give it a final cleaning to make it sparkle!
1. Dish Soap Wash: Wash the frying pan with dish soap and warm water, just like you normally would. This will remove any remaining baking soda residue and grease.
2. Rinse Thoroughly: Rinse the pan thoroughly with warm water to remove all traces of soap.
3. Dry Completely: Dry the frying pan completely with a clean towel. This will prevent rust from forming, especially on cast iron pans.
Extra Tips and Tricks:
* Prevention is Key: The best way to avoid burnt-on food is to prevent it in the first place! Keep a close eye on your cooking, use the correct heat settings, and don’t leave food unattended.
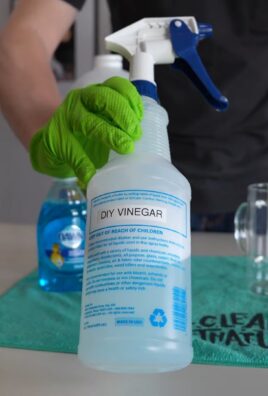
* Vinegar Power: For extra cleaning power, you can add a cup of white vinegar to the water when simmering or boiling with baking soda. The vinegar helps to break down grease and grime.
* Lemon Juice Boost: A squeeze of lemon juice can also help to brighten and deodorize your frying pan. After cleaning, rub the cut side of a lemon over the surface of the pan and rinse.
* Cast Iron Care: If you’re cleaning a cast iron frying pan, be sure to re-season it after cleaning to protect it from rust.
* Non-Stick Caution: Be extra gentle when cleaning non-stick frying pans. Avoid using abrasive cleaners or scrub brushes, as they can damage the non-stick coating.
* Test First: Before using any cleaning method on a delicate or expensive frying pan, test it on a small, inconspicuous area first to make sure it doesn’t damage the surface.
* Baking Soda Alternatives: While baking soda is my go-to for cleaning burnt frying pans, you can also try using a mixture of salt and water, or a commercial oven cleaner (but be sure to follow the manufacturer’s instructions carefully).
* Don’t Give Up: Some burnt-on messes are more stubborn than others. If the first attempt doesn’t completely remove the burnt food, don’t give up! Repeat the process or try a different method.
* Regular Cleaning: Clean your frying pan regularly, even if it doesn’t look dirty. This will prevent food from building up and becoming difficult to remove.
* Proper Storage: Store your frying pans properly to prevent scratches and damage. Use pan protectors or hang them on a rack.
Why This Works: The Science Behind the Sparkle
Baking soda, also known as sodium bicarbonate, is a mild alkali. When mixed with water and heated, it creates a slightly alkaline solution that helps to break down grease and loosen burnt-on food particles. The simmering or boiling action helps to further lift the debris from the surface of the pan. The gentle abrasive nature of baking soda also helps to scrub away stubborn spots without scratching the pan.
So there you have it! A simple, effective, and eco-friendly way to revive your scorched frying pan using the power of baking soda. I hope this helps you save your favorite pan and avoid the frustration of dealing with burnt-on food. Happy cooking!

Conclusion
So, there you have it! This simple yet incredibly effective DIY trick using baking soda to clean your frying pan is a game-changer. We’ve all been there, staring down at a frying pan caked with stubborn grease and burnt-on food, wondering if it’s even worth the effort to clean. Store-bought cleaners can be harsh, expensive, and often don’t deliver on their promises. But with this method, you’re harnessing the natural cleaning power of baking soda, a readily available and eco-friendly ingredient, to restore your frying pan to its former glory.
Why is this a must-try? Because it saves you time, money, and frustration. Forget endless scrubbing and soaking. This method is quick, efficient, and gentle on your frying pan’s surface. It’s also a fantastic way to avoid harsh chemicals, making it a safer option for you and your family. Plus, the satisfaction of seeing that grime lift away with minimal effort is truly rewarding.
But the beauty of this DIY trick lies in its adaptability. Feel free to experiment with variations to suit your specific needs. For instance, if you’re dealing with particularly stubborn stains, you can add a squeeze of lemon juice to the baking soda paste for an extra boost of cleaning power. The acidity of the lemon juice will help to break down the grime even further. Alternatively, for cast iron pans, be sure to re-season the pan after cleaning to maintain its protective coating. You can do this by lightly coating the pan with oil and baking it in the oven at a low temperature.
Another variation involves using a slightly abrasive sponge or scrub brush for tougher spots. However, be cautious not to scratch the surface of your frying pan, especially if it has a non-stick coating. Always test the sponge or brush on a small, inconspicuous area first to ensure it doesn’t cause any damage.
We’re confident that this baking soda cleaning method will become your go-to solution for keeping your frying pans sparkling clean. It’s a simple, effective, and eco-friendly way to tackle even the most challenging messes.
Now, it’s your turn! We encourage you to try this DIY trick and see the amazing results for yourself. Don’t just take our word for it – experience the cleaning power of baking soda firsthand. And most importantly, we want to hear about your experience! Share your before-and-after photos, tips, and variations in the comments below. Let’s build a community of clean frying pan enthusiasts and help each other discover even more ways to make this trick even better. Your feedback is invaluable, and we can’t wait to see your sparkling clean frying pans! Let us know if this baking soda method worked for you.
Frequently Asked Questions (FAQs)
Q: What kind of frying pans can I clean with this baking soda method?
A: This method is generally safe for most types of frying pans, including stainless steel, non-stick, and even cast iron (with the caveat of re-seasoning cast iron afterwards). However, it’s always a good idea to test the method on a small, inconspicuous area first, especially if you’re unsure about the material of your pan. For delicate surfaces like ceramic, use a gentler scrubbing motion and avoid abrasive sponges.
Q: How much baking soda should I use?
A: The amount of baking soda you need will depend on the size and the level of grime on your frying pan. A good starting point is about 1/4 cup of baking soda. You can always add more if needed. The goal is to create a paste that’s thick enough to coat the affected areas of the pan.
Q: Can I use vinegar instead of water to make the baking soda paste?
A: While vinegar and baking soda can create a powerful cleaning reaction, it’s generally not recommended for this particular application. The fizzing action can be messy and may not provide the sustained cleaning power needed to lift stubborn grime. Water is a more effective and controlled option for creating the baking soda paste.
Q: How long should I let the baking soda paste sit on the frying pan?
A: The amount of time you let the baking soda paste sit will depend on the severity of the grime. For lightly soiled pans, 15-20 minutes may be sufficient. For more heavily soiled pans, you can let the paste sit for up to an hour or even overnight. Just be sure to keep the paste moist by covering the pan with a damp cloth or plastic wrap.
Q: What if the baking soda paste doesn’t remove all the grime?
A: If the baking soda paste doesn’t remove all the grime on the first try, don’t worry! You can repeat the process as needed. You can also try adding a squeeze of lemon juice to the baking soda paste for an extra boost of cleaning power. For particularly stubborn spots, you can use a slightly abrasive sponge or scrub brush, but be careful not to scratch the surface of your frying pan.
Q: How do I re-season a cast iron frying pan after cleaning it with baking soda?
A: Re-seasoning a cast iron frying pan is essential after cleaning it with baking soda to protect it from rust and maintain its non-stick properties. To re-season your pan, first, make sure it’s completely dry. Then, coat the entire pan, inside and out, with a thin layer of cooking oil (vegetable oil, canola oil, or flaxseed oil are all good options). Wipe off any excess oil with a clean cloth. Next, bake the pan in the oven at 350-400 degrees Fahrenheit for about an hour. Let the pan cool completely in the oven before using it.
Q: Is this method safe for non-stick frying pans?
A: Yes, this method is generally safe for non-stick frying pans, but it’s important to be gentle. Avoid using abrasive sponges or scrub brushes, as they can scratch the non-stick coating. Use a soft cloth or sponge and a gentle scrubbing motion. Also, avoid letting the baking soda paste sit on the pan for extended periods of time, as it can potentially damage the coating.
Q: Can I use this method to clean the outside of my frying pan?
A: Yes, you can use this method to clean the outside of your frying pan as well. Simply apply the baking soda paste to the affected areas and let it sit for a few minutes before scrubbing and rinsing. For burnt-on food or grease on the outside of the pan, you may need to repeat the process or use a slightly abrasive sponge.
Q: How often should I clean my frying pan with baking soda?
A: The frequency with which you clean your frying pan with baking soda will depend on how often you use it and how much grime accumulates. As a general rule, it’s a good idea to clean your frying pan with baking soda every few weeks or whenever you notice a buildup of grime. Regular cleaning will help to keep your frying pan in good condition and prevent food from sticking.
Leave a Comment