
Compact Chili Growing – sounds like a mission impossible, right? Well, get ready to ditch that assumption because I’m about to spill all the secrets to cultivating a fiery chili pepper paradise, even if you’re working with a tiny balcony or a sunny windowsill! Forget those sprawling gardens of yesteryear; we’re talking maximum flavor in minimum space.
Chili peppers have a rich history, dating back thousands of years to South America, where they were prized not only for their culinary kick but also for their medicinal properties. From ancient civilizations to modern-day kitchens, these vibrant fruits have added zest to cultures worldwide. But let’s face it, not everyone has the luxury of acres of land to dedicate to their chili passion.
That’s where these DIY tricks come in! In today’s world, space is a premium, and the desire for fresh, homegrown produce is stronger than ever. Imagine plucking a perfectly ripe chili straight from your own plant to spice up your dinner – talk about farm-to-table freshness! This article is your ultimate guide to mastering compact chili growing. I’ll show you how to choose the right varieties, optimize your container setup, and provide all the essential care tips to ensure a bountiful harvest, no matter how limited your space. So, let’s get our hands dirty and transform your small space into a chili haven!
DIY Compact Chili Growing: From Seed to Spice in Small Spaces
Hey there, fellow chili enthusiasts! Ever dreamed of having a constant supply of fresh, fiery chilies right at your fingertips, even if you’re living in a tiny apartment or have a postage-stamp-sized balcony? Well, dream no more! I’m going to walk you through a super fun and rewarding DIY project: growing chilies in a compact, space-saving way. We’ll cover everything from choosing the right varieties to harvesting your spicy bounty. Get ready to turn your small space into a chili paradise!
Choosing Your Chili Varieties
Before we dive into the nitty-gritty, let’s talk about chili varieties. Not all chilies are created equal, and some are definitely better suited for compact growing than others. Here’s what I recommend considering:
* Plant Size: Look for compact or dwarf varieties. These stay relatively small, making them perfect for pots and containers. Some great options include:
* Thai Chilies: These are prolific producers and stay relatively small.
* Bird’s Eye Chilies: Similar to Thai chilies, these are small and pack a punch.
* Jalapeños: While they can get a bit bigger, they’re manageable in larger pots and offer a good yield.
* Serrano Peppers: Another good option for container growing.
* ‘Patio Fire’ Chilies: Specifically bred for container growing, these are a fantastic choice.
* Heat Level: Consider your spice tolerance! Do you want a mild kick or a fiery inferno? Research the Scoville Heat Units (SHU) of different varieties to make an informed decision.
* Growing Conditions: Think about the amount of sunlight your space gets. Most chilies need at least 6-8 hours of direct sunlight per day. Choose varieties that are well-suited to your specific conditions.
* Personal Preference: Ultimately, grow what you like to eat! Experiment with different varieties to find your favorites.
Gathering Your Supplies
Okay, now that we’ve chosen our chili varieties, let’s gather our supplies. Here’s what you’ll need:
* Chili Seeds: Purchase seeds from a reputable source or, if you’re feeling adventurous, save seeds from chilies you’ve bought at the store (just be aware that the results might not be exactly the same as the parent plant).
* Seed Starting Tray or Small Pots: For starting your seeds indoors.
* Seed Starting Mix: A light, well-draining mix specifically designed for starting seeds.
* Larger Pots or Containers: Choose pots that are at least 8-12 inches in diameter for each plant. Make sure they have drainage holes!
* Potting Soil: A good quality potting mix that’s well-draining and rich in nutrients.
* Watering Can or Hose: For watering your plants.
* Fertilizer: A balanced fertilizer or one specifically formulated for peppers and tomatoes.
* Plant Labels: To keep track of your different varieties.
* Optional: Grow Lights: If you don’t have enough natural sunlight.
* Optional: Small Trellis or Stakes: To support the plants as they grow.
Starting Your Chili Seeds Indoors
Starting your chili seeds indoors gives them a head start, especially if you live in a cooler climate. Here’s how I do it:
1. Prepare Your Seed Starting Tray or Pots: Fill your seed starting tray or small pots with seed starting mix. Gently firm the soil.
2. Sow Your Seeds: Make a small indentation (about 1/4 inch deep) in the soil and place 1-2 seeds in each indentation. Cover the seeds with soil and gently water.
3. Provide Warmth and Moisture: Chili seeds need warmth to germinate. You can use a heat mat or place the tray in a warm location. Keep the soil consistently moist, but not soggy.
4. Provide Light: Once the seedlings emerge (usually within 7-14 days), provide them with plenty of light. If you don’t have enough natural sunlight, use grow lights.
5. Thin Your Seedlings: Once the seedlings have their first true leaves (the second set of leaves), thin them out, leaving only the strongest seedling in each cell or pot.
Transplanting Your Chili Seedlings
Once your seedlings have grown a few inches tall and the weather has warmed up (after the last frost), it’s time to transplant them into their larger pots.
1. Harden Off Your Seedlings: Before transplanting, you need to “harden off” your seedlings. This means gradually exposing them to outdoor conditions over a period of 7-10 days. Start by placing them outside for an hour or two each day, gradually increasing the amount of time they spend outdoors.
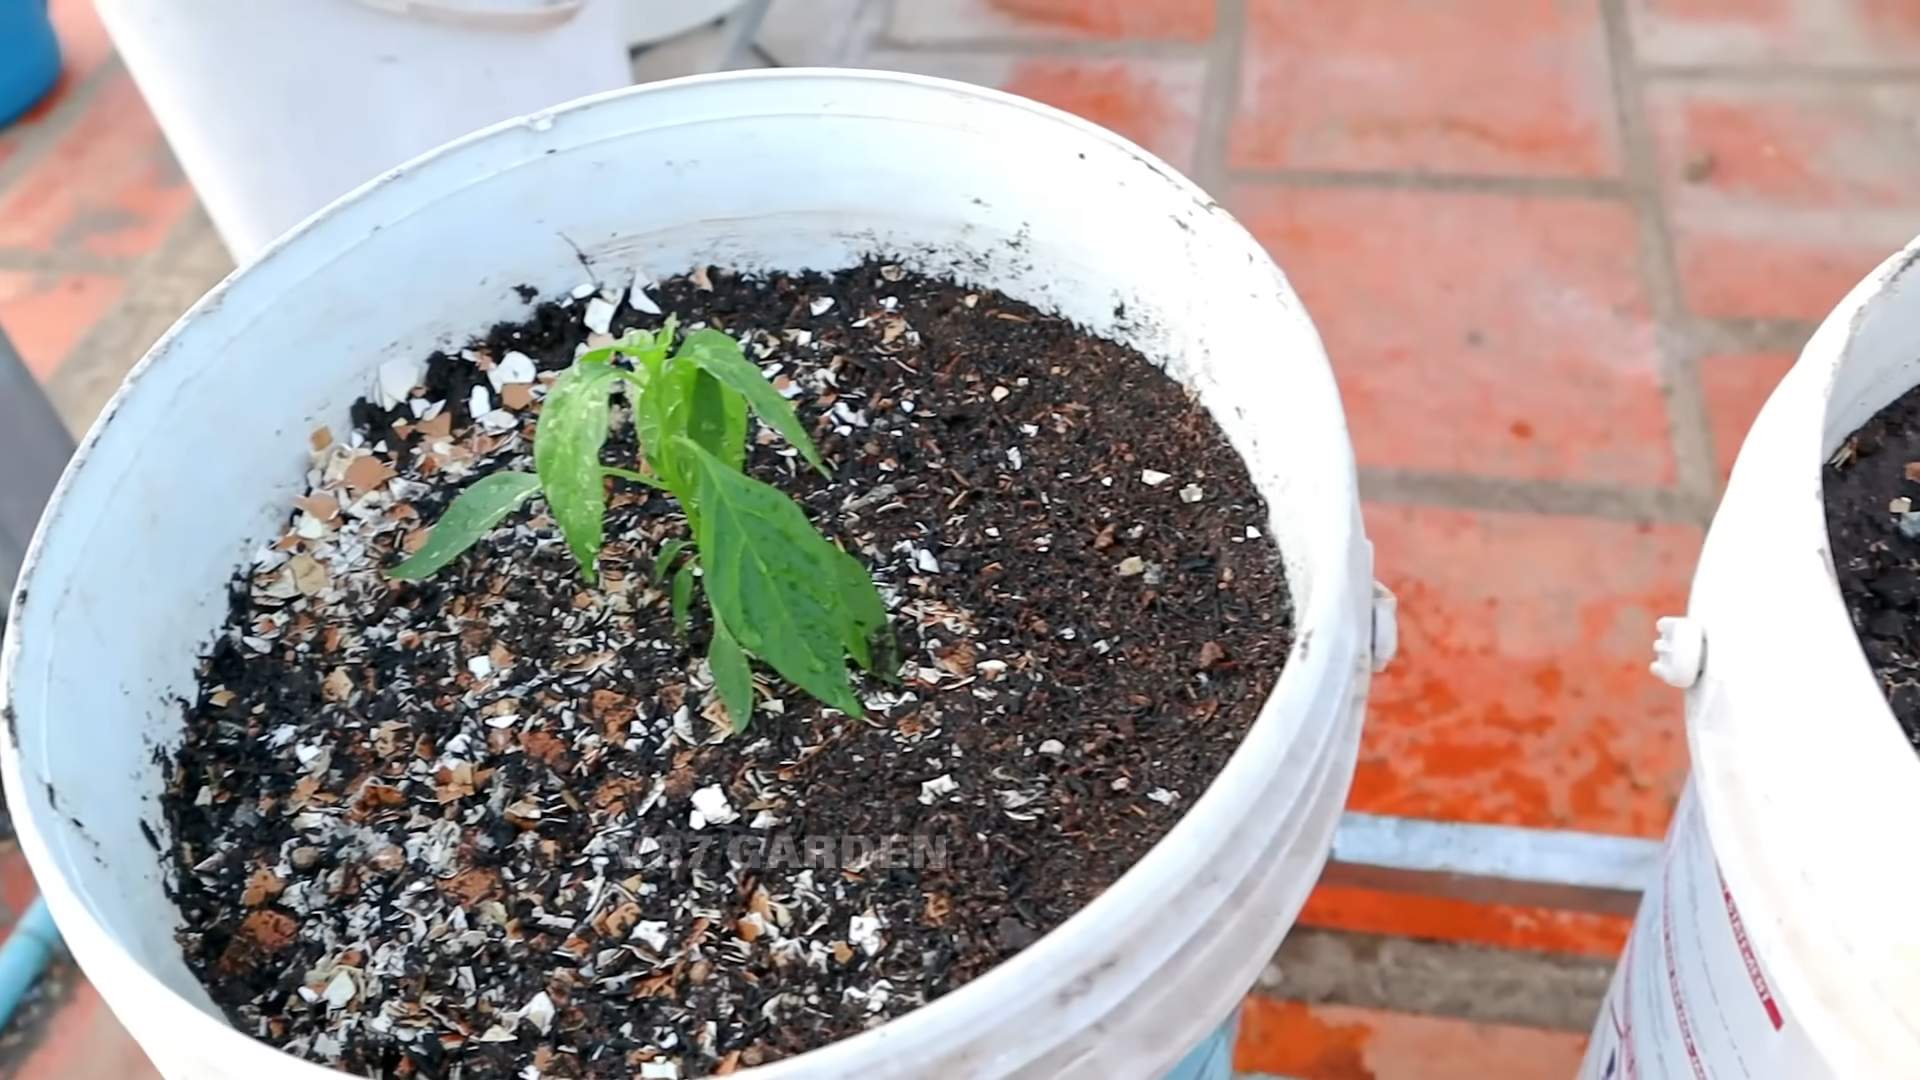
2. Prepare Your Pots: Fill your larger pots with potting soil.
3. Transplant Your Seedlings: Gently remove the seedlings from their seed starting tray or pots. Be careful not to damage the roots. Plant each seedling in its own pot, making sure the top of the root ball is level with the soil surface.
4. Water Thoroughly: Water the newly transplanted seedlings thoroughly.
Caring for Your Chili Plants
Now that your chili plants are in their permanent homes, it’s time to provide them with the care they need to thrive.
1. Sunlight: Chili plants need at least 6-8 hours of direct sunlight per day. Place your pots in a sunny location.
2. Watering: Water your plants regularly, especially during hot, dry weather. Allow the soil to dry out slightly between waterings. Avoid overwatering, as this can lead to root rot.
3. Fertilizing: Fertilize your plants every 2-3 weeks with a balanced fertilizer or one specifically formulated for peppers and tomatoes.
4. Pruning: Pruning can help to encourage bushier growth and more fruit production. Pinch off the tips of the branches to encourage side growth.
5. Support: As your plants grow, they may need support. Use small trellises or stakes to keep them from falling over.
6. Pest and Disease Control: Keep an eye out for pests and diseases. Common pests include aphids, spider mites, and whiteflies. Treat infestations promptly with insecticidal soap or neem oil. Prevent diseases by providing good air circulation and avoiding overwatering.
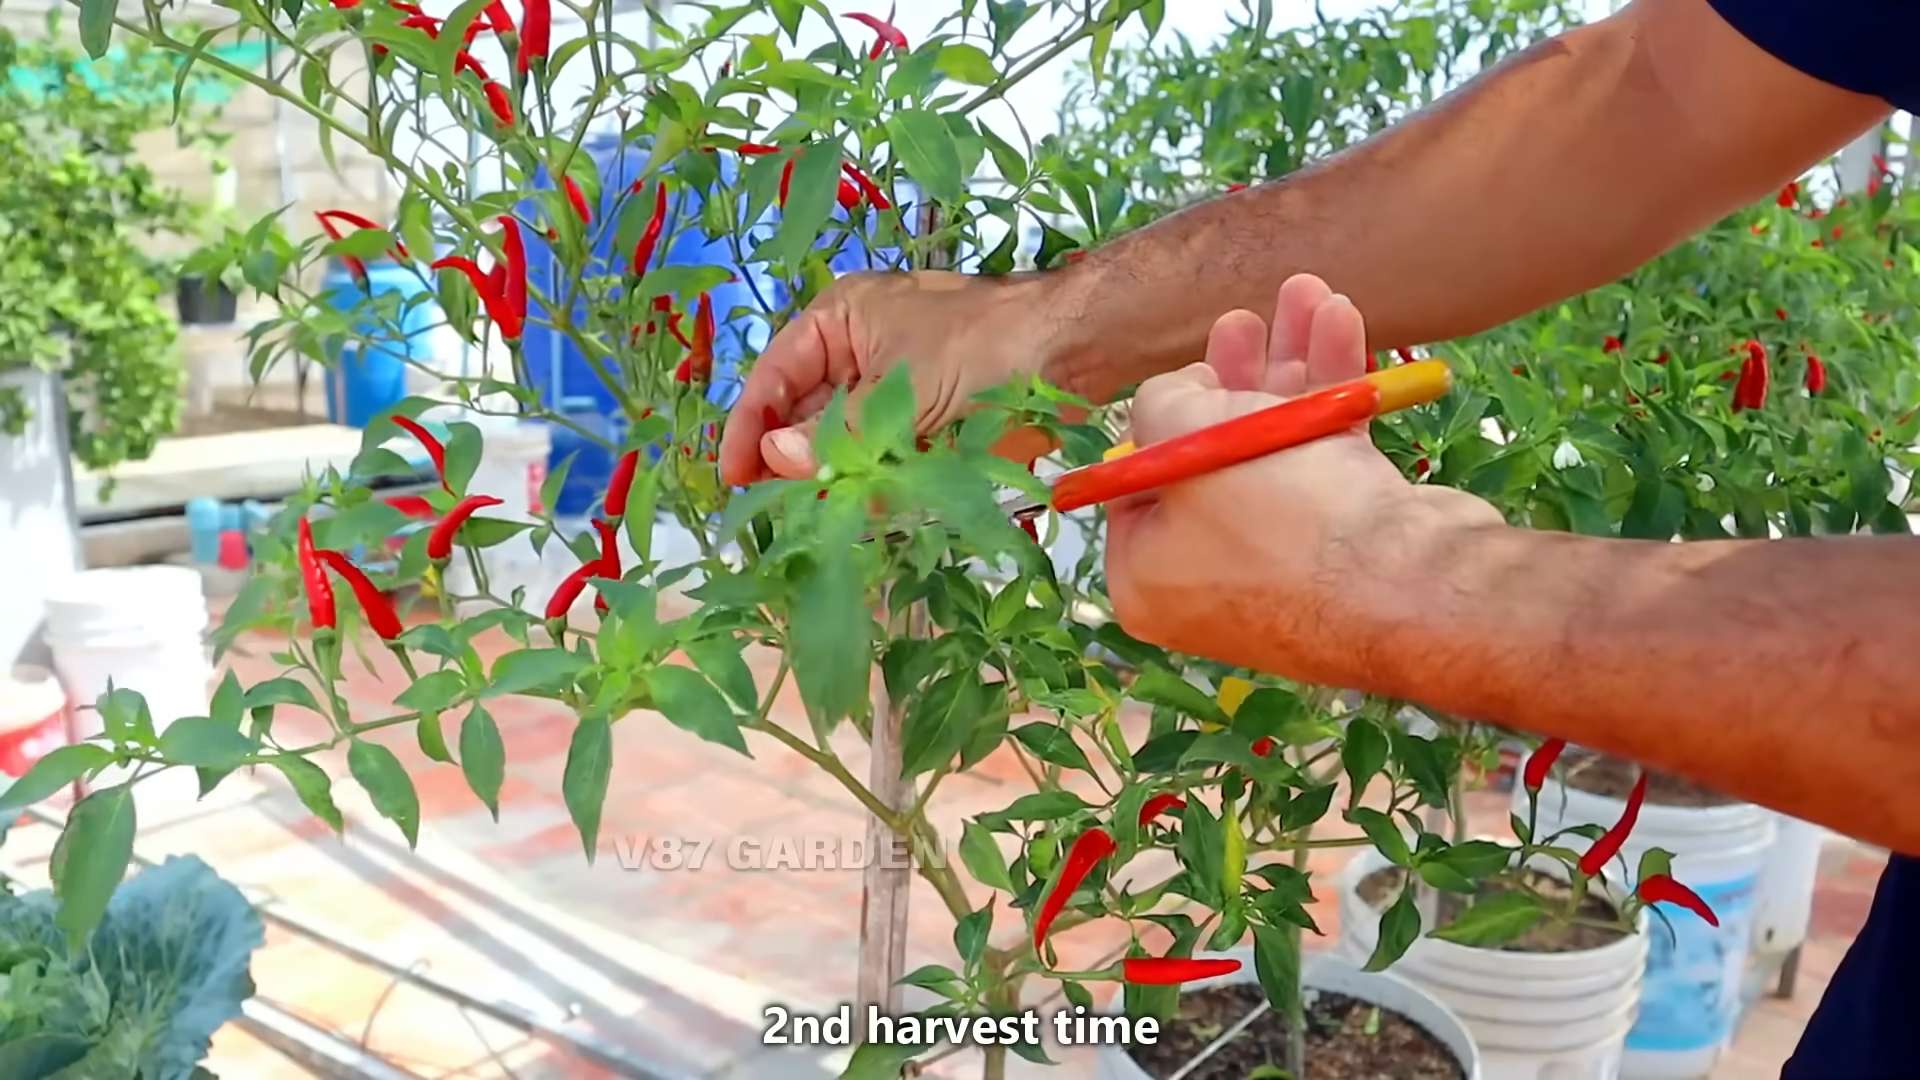
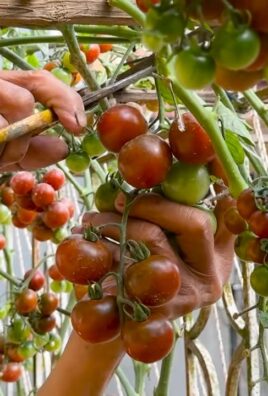
Harvesting Your Chilies
The most exciting part! Harvesting your chilies!
1. Timing: The time it takes for chilies to mature depends on the variety. Generally, they’re ready to harvest when they’ve reached their mature color and size.
2. Harvesting: Use scissors or pruning shears to cut the chilies from the plant. Be careful not to damage the plant.
3. Enjoy: Use your fresh chilies in your favorite recipes! You can also dry them, freeze them, or pickle them for later use.
Troubleshooting
Even with the best care, you might encounter some problems along the way. Here are a few common issues and how to address them:
* Yellowing Leaves: This could be a sign of overwatering, underwatering, nutrient deficiency, or pest infestation. Check the soil moisture, fertilize your plants, and inspect them for pests.
* Blossom Drop: This is when the flowers fall off the plant without producing fruit. It can be caused by temperature fluctuations, lack of pollination, or stress. Ensure consistent watering, provide adequate sunlight, and consider hand-pollinating the flowers.
* Pest Infestations: As mentioned earlier, aphids, spider mites, and whiteflies are common pests. Treat infestations promptly with insecticidal soap or neem oil.
* Lack of Fruit Production: This could be due to a lack of sunlight, insufficient pollination, or nutrient deficiency. Ensure your plants are getting enough sunlight, consider hand-pollinating the flowers, and fertilize your plants regularly.
Maximizing Your Compact Chili Garden
Here are a few extra tips to help you get the most out of your compact chili garden:
* Vertical Gardening: Use vertical gardening techniques, such as hanging baskets or wall planters, to maximize your space.
* Succession Planting: Plant new seeds every few weeks to ensure a continuous harvest throughout the growing season.
* Companion Planting: Plant basil, marigolds, or other companion plants near your chilies to help deter pests and attract pollinators.
* Recycle and Reuse: Use recycled containers and materials whenever possible to reduce waste.
* Have Fun! Growing chilies should be a fun and rewarding experience. Don’t be afraid to experiment and try new things.
Growing chilies in a compact space is totally achievable and incredibly rewarding. With a little planning, some basic supplies, and a bit of TLC, you can enjoy a constant supply of
Conclusion
So, there you have it! Growing your own compact chili plants is not only achievable, even in the smallest of spaces, but it’s also incredibly rewarding. Imagine the satisfaction of plucking fresh, fiery chilies from your own little garden, ready to spice up your next meal. This DIY trick, focusing on container gardening and strategic pruning, unlocks a world of flavor and freshness right on your windowsill, balcony, or patio.
Why is this a must-try? Because it democratizes chili growing. No sprawling garden required! It’s a fantastic way to reduce your reliance on store-bought produce, knowing exactly where your food comes from and how it was grown. Plus, it’s a fun and engaging project that connects you with nature, even in an urban environment.
But the beauty of this method lies in its adaptability. Feel free to experiment with different chili varieties. From the mild poblano to the scorching habanero, the choice is yours! Consider using different types of containers – terracotta pots, repurposed buckets, or even hanging baskets can all work beautifully. Just ensure they have adequate drainage. You can also explore companion planting. Basil, for example, is said to improve the flavor of chilies and deter pests. Marigolds are another excellent choice for pest control.
Don’t be afraid to tweak the soil mix to suit your specific chili variety. Some chilies prefer slightly acidic soil, while others thrive in more alkaline conditions. Research your chosen chili and adjust accordingly. And remember, consistent watering and regular fertilization are key to a bountiful harvest.
We’ve armed you with the knowledge and techniques to embark on your own compact chili growing adventure. Now, it’s your turn to get your hands dirty! We wholeheartedly encourage you to give this DIY trick a try. You’ll be amazed at how much flavor and satisfaction you can cultivate in a small space.
Once you’ve harvested your first batch of homegrown chilies, we’d love to hear about your experience. Share your photos, tips, and challenges in the comments below. Let’s build a community of compact chili growers and learn from each other! What varieties did you grow? What challenges did you face? What tips do you have for fellow growers? Your insights could be invaluable to someone just starting out. So, go ahead, get growing, and share your story! We can’t wait to see what you create.
Frequently Asked Questions (FAQ)
What are the best chili varieties to grow in containers?
Choosing the right chili variety is crucial for successful container gardening. Compact varieties that naturally stay smaller are ideal. Some excellent choices include:
* **Thai Chilies:** These are prolific producers and relatively compact, making them perfect for small spaces. They offer a good level of heat and are versatile in cooking.
* **Tabasco Peppers:** Famous for Tabasco sauce, these peppers are also well-suited for containers. They have a distinctive flavor and a moderate heat level.
* **Jalapeño Peppers:** A classic choice, jalapeños are relatively easy to grow and offer a mild to medium heat. Look for compact varieties specifically bred for container gardening.
* **Serrano Peppers:** Similar to jalapeños but with a bit more heat, serranos are another good option for containers.
* **Poblano Peppers:** These larger, milder chilies can also be grown in containers, but you’ll need a larger pot to accommodate their size.
* **Ornamental Peppers:** These are bred for their colorful fruits and compact size, making them a visually appealing and edible addition to your garden.
When selecting your chili variety, consider your heat preference, the size of your container, and the amount of sunlight available.
How much sunlight do chili plants need?
Chili plants are sun-loving vegetables and require at least 6-8 hours of direct sunlight per day to thrive. Insufficient sunlight can lead to leggy growth, reduced flowering, and smaller, less flavorful chilies. If you don’t have a sunny spot outdoors, consider using grow lights to supplement the natural light. Position the grow lights a few inches above the plants and adjust the height as they grow.
What type of soil is best for growing chilies in containers?
The ideal soil for container-grown chilies is a well-draining potting mix that is rich in organic matter. Avoid using garden soil, as it can become compacted in containers and hinder drainage. A good potting mix should contain a blend of peat moss, perlite, and vermiculite. You can also amend the potting mix with compost or aged manure to provide additional nutrients. The pH of the soil should be slightly acidic to neutral, around 6.0 to 7.0.
How often should I water my chili plants?
Watering frequency depends on several factors, including the size of the container, the weather conditions, and the type of potting mix. Generally, you should water your chili plants when the top inch of soil feels dry to the touch. Avoid overwatering, as this can lead to root rot. Water deeply, allowing the excess water to drain out of the bottom of the container. During hot, dry weather, you may need to water your plants more frequently.
How often should I fertilize my chili plants?
Chili plants are heavy feeders and benefit from regular fertilization. Start fertilizing your plants a few weeks after transplanting them into their containers. Use a balanced fertilizer with an NPK ratio of 10-10-10 or 14-14-14. Follow the instructions on the fertilizer package for application rates. You can also use a liquid fertilizer diluted to half strength and apply it every two weeks. Avoid over-fertilizing, as this can burn the roots of your plants.
How do I prune my chili plants to keep them compact?
Pruning is essential for maintaining a compact shape and encouraging bushier growth. Start by removing any yellowing or dead leaves. Then, pinch back the tips of the main stems to encourage branching. You can also remove any suckers that grow from the base of the plant. Regular pruning will help to keep your chili plants compact and productive.
What are some common pests and diseases that affect chili plants?
Chili plants can be susceptible to various pests and diseases, including aphids, spider mites, whiteflies, and fungal diseases. Regularly inspect your plants for signs of infestation or disease. If you spot any pests, you can try spraying them with insecticidal soap or neem oil. For fungal diseases, use a fungicide specifically labeled for use on vegetables. Good air circulation and proper watering can also help to prevent diseases.
How do I harvest my chilies?
The time to harvest your chilies depends on the variety and your personal preference. Generally, chilies are ready to harvest when they have reached their mature color and size. Use a sharp knife or scissors to cut the chilies from the plant, leaving a small stem attached. Handle the chilies with care, as some varieties can be very hot.
Can I overwinter my chili plants?
Yes, you can overwinter your chili plants indoors to enjoy them for another season. Before the first frost, prune your plants back to about 6 inches tall and transplant them into smaller pots. Bring the plants indoors and place them in a sunny location. Water sparingly and avoid fertilizing during the winter months. In the spring, gradually acclimate the plants to outdoor conditions before transplanting them back into their containers.
What can I do with my harvested chilies?
The possibilities are endless! You can use your harvested chilies fresh in salsas, sauces, and other dishes. You can also dry them, pickle them, or freeze them for later use. Experiment with different recipes and find your favorite ways to enjoy your homegrown chilies.
Leave a Comment