
Continuous Pumpkin Harvest: Imagine stepping into your garden and picking plump, vibrant pumpkins well beyond the typical autumn season. Sounds like a dream, right? Well, it doesn’t have to be! I’m here to share some amazing DIY tricks and hacks that will help you achieve a continuous pumpkin harvest, extending the joy of homegrown pumpkins for weeks, even months, longer than you thought possible.
Pumpkins have a rich history, deeply intertwined with autumn festivals and traditions around the world. From ancient indigenous cultures using them for sustenance to the modern-day carving of jack-o’-lanterns, pumpkins hold a special place in our hearts. But why limit our enjoyment to just one season?
Let’s face it, growing pumpkins can be a labor of love, and the thought of that hard work culminating in just a few weeks of harvest can be a little disheartening. That’s where these DIY tricks come in! I’ll show you simple, effective methods to encourage prolonged fruiting, protect your pumpkins from early frosts, and even techniques for storing them properly to maximize their shelf life. With a little know-how, you can enjoy the delicious flavor and festive charm of homegrown pumpkins for an extended period. So, let’s dive in and unlock the secrets to a bountiful and continuous pumpkin harvest!
How to Get a Continuous Pumpkin Harvest: My Secret DIY Trick!
Hey pumpkin lovers! Are you tired of the fleeting pumpkin season? Do you dream of having fresh pumpkins gracing your porch (or your pie!) for months on end? Well, you’re in luck! I’m going to share my super-secret (okay, maybe not *that* secret) DIY trick for extending your pumpkin harvest and enjoying those gorgeous gourds for a much longer period. This isn’t about some magical fertilizer or complicated grafting technique. It’s about smart planning, strategic planting, and a little bit of pumpkin-loving TLC.
Planning Your Pumpkin Patch for Extended Harvest
Before we even think about seeds, let’s talk strategy. The key to a continuous harvest is understanding pumpkin varieties and their maturity times.
* Choose Varieties with Different Maturity Dates: This is the golden rule! Don’t just plant one type of pumpkin. Select varieties that mature at different rates. Think early-season, mid-season, and late-season pumpkins.
* Consider Storage Potential: Some pumpkins store better than others. If you’re aiming for a long-lasting supply, prioritize varieties known for their excellent storage capabilities.
* Space is Key: Pumpkins need room to sprawl. Make sure you have enough space to accommodate multiple plants of different sizes. Overcrowding leads to disease and reduced yields.
* Soil Preparation is Crucial: Pumpkins are heavy feeders. Prepare your soil well with plenty of compost and well-rotted manure. Good drainage is also essential.
* Succession Planting: This is the secret weapon! Plant your pumpkins in stages, a few weeks apart, to stagger the harvest.
Choosing the Right Pumpkin Varieties
Okay, let’s get specific about pumpkin varieties. Here are some of my favorites, categorized by maturity time and storage potential:
* Early Season (90-100 days):
* ‘Baby Boo’: These adorable white pumpkins are perfect for decorations and mature quickly. They don’t store as long as some others, so enjoy them early!
* ‘Small Sugar’: A classic pie pumpkin that’s ready relatively early. Good for baking and carving.
* Mid-Season (100-110 days):
* ‘Jack Be Little’: Another miniature pumpkin, great for decorations and individual servings. Stores a bit better than ‘Baby Boo’.
* ‘Connecticut Field’: The quintessential jack-o’-lantern pumpkin. A good all-around choice.
* ‘Rouge Vif d’Etampes’: Also known as the Cinderella pumpkin, this beautiful French heirloom is stunning and delicious.
* Late Season (110+ days):
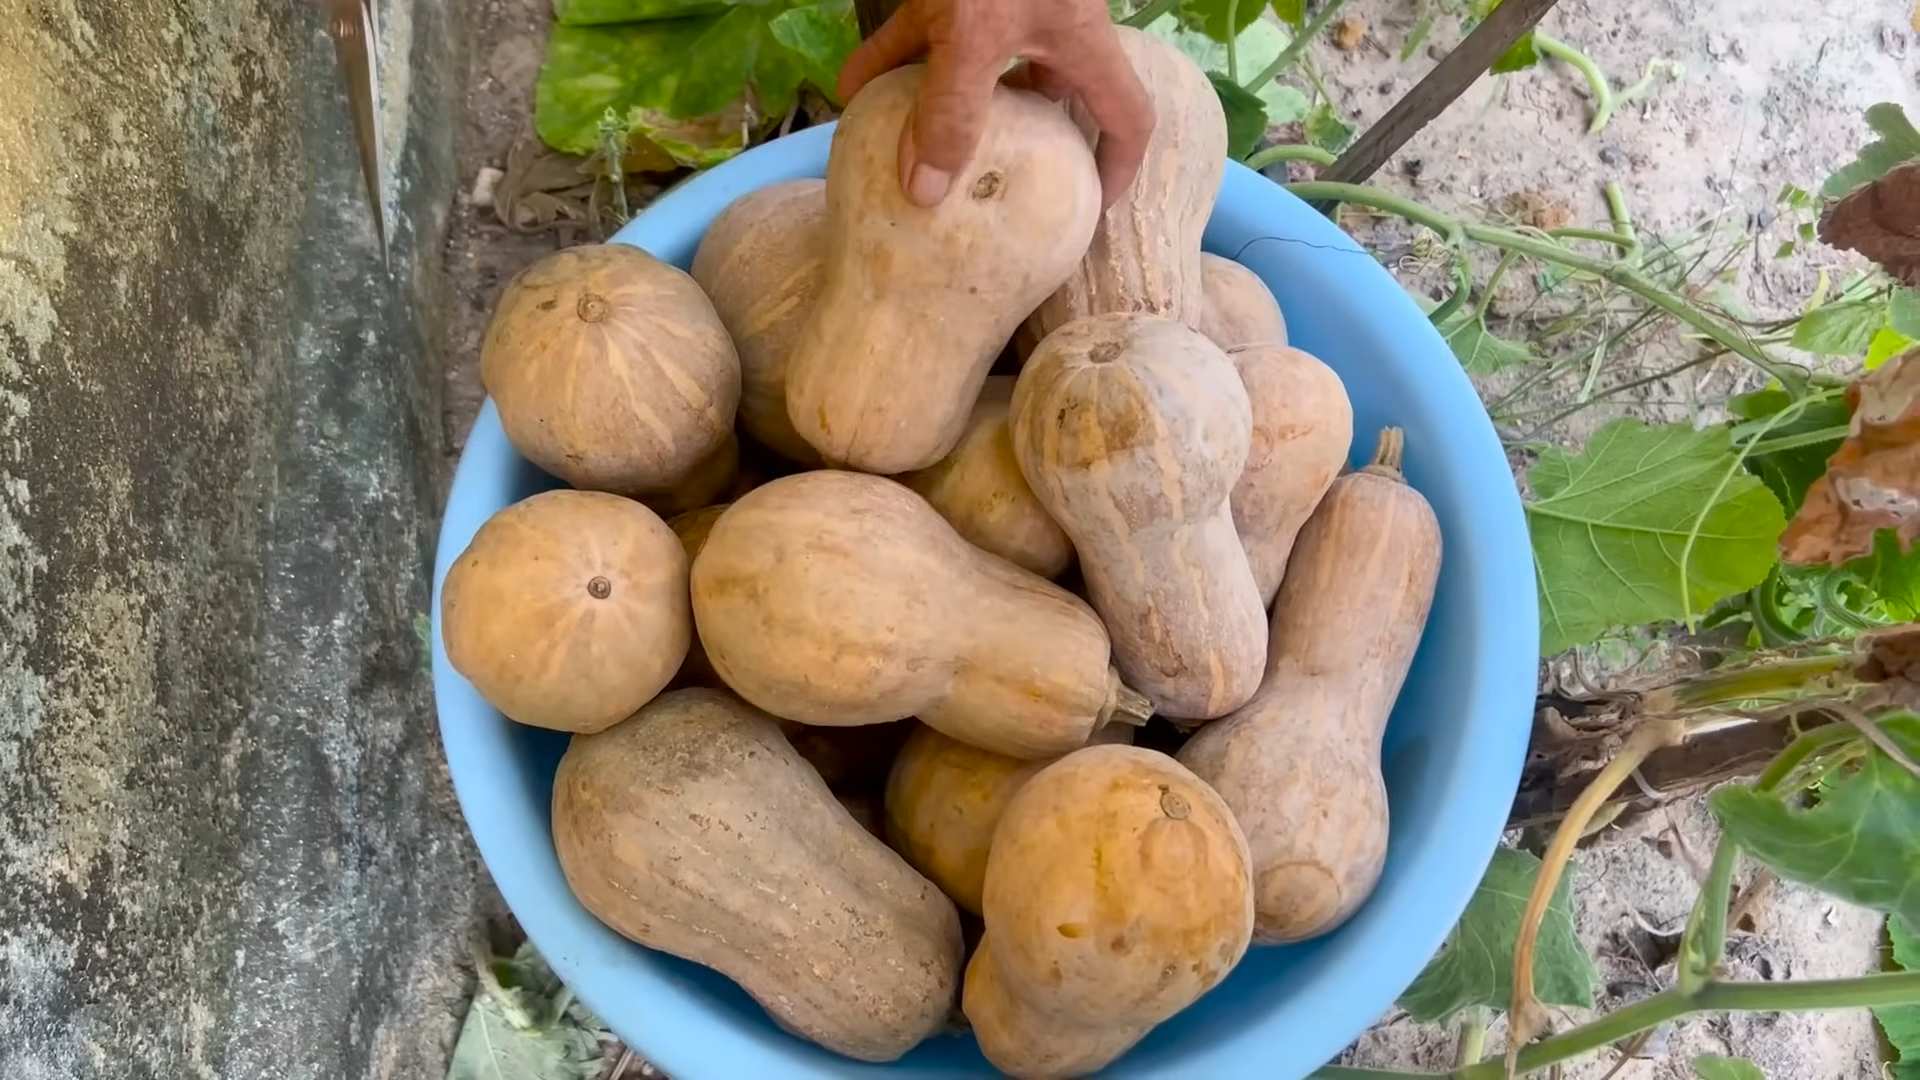
* ‘Long Island Cheese’: A flattened, tan-colored pumpkin with excellent storage potential. Great for pies and soups.
* ‘Musquee de Provence’: Another French heirloom with a unique shape and flavor. Stores exceptionally well.
* ‘Jarrahdale’: A beautiful blue-gray pumpkin from Australia. Stores for months and is delicious in both sweet and savory dishes.
Step-by-Step Planting Guide
Now for the fun part – getting those seeds in the ground!
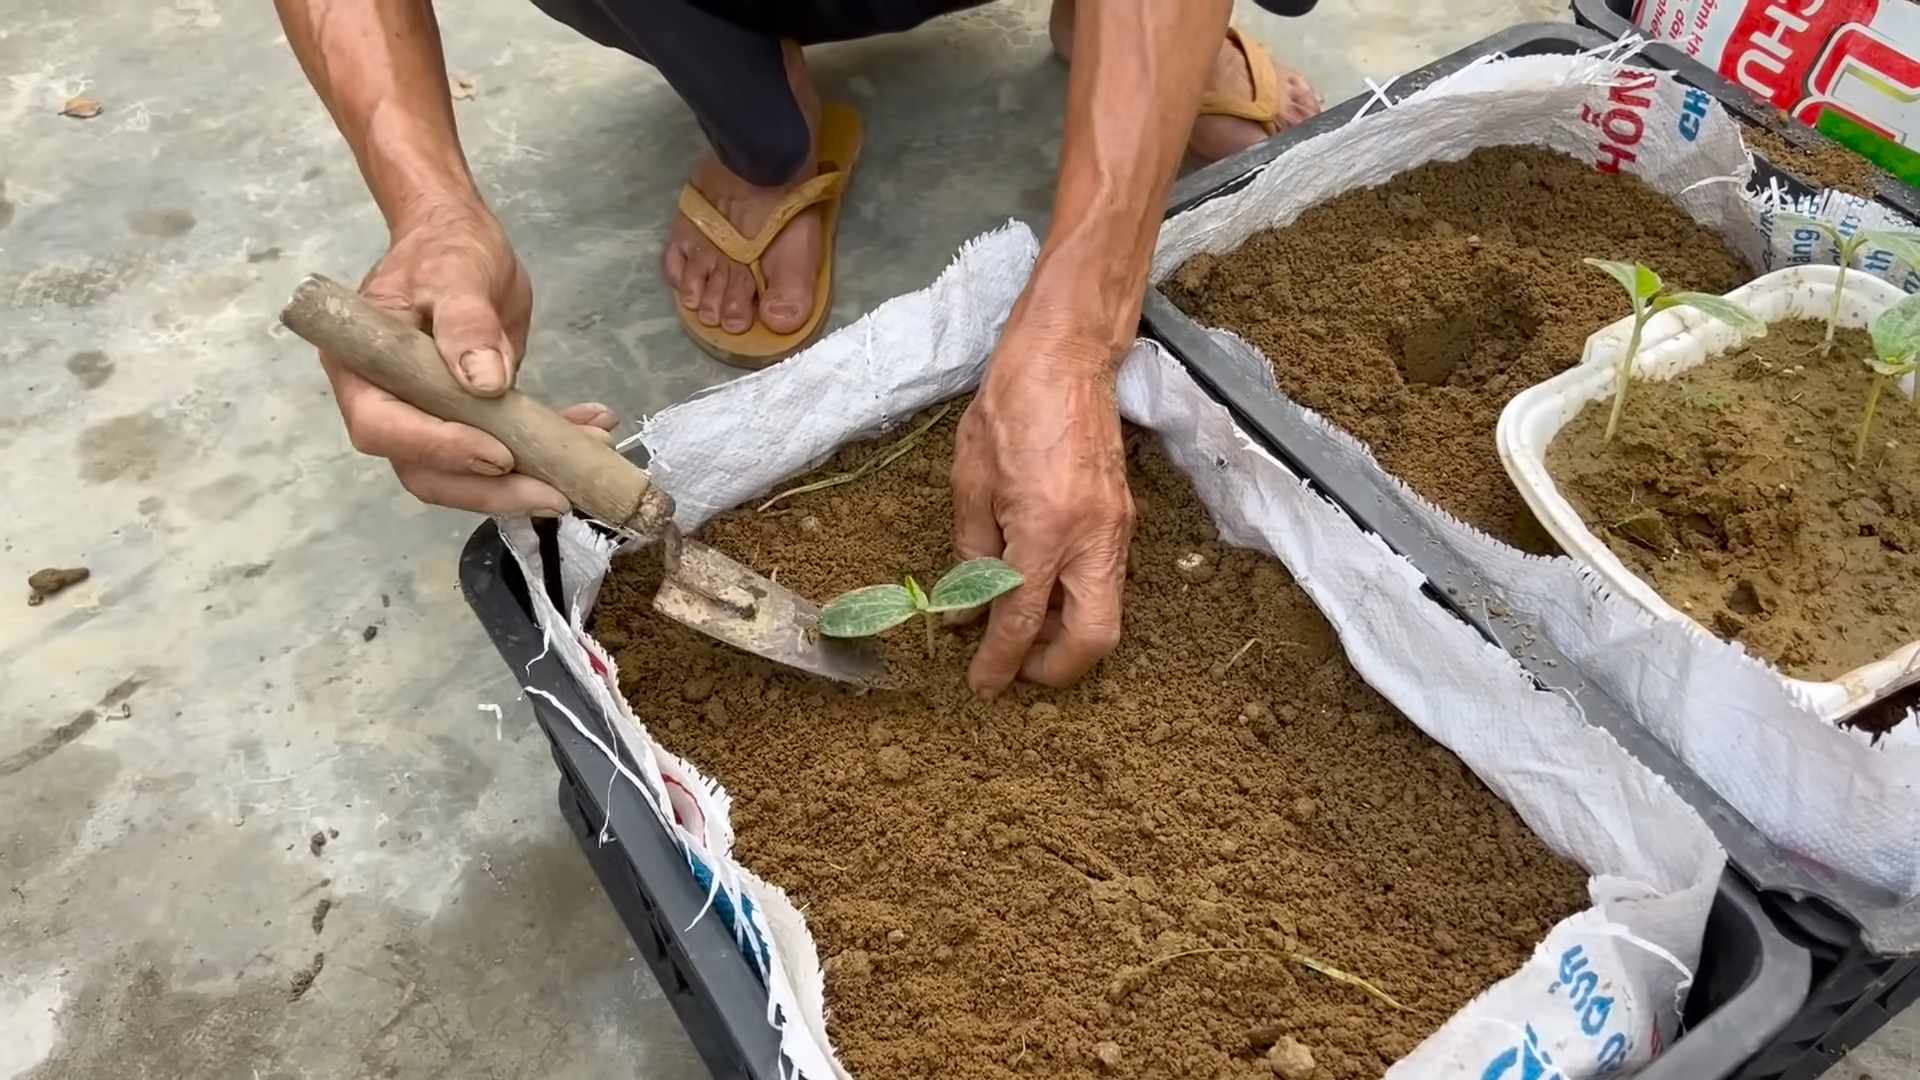
1. Start Seeds Indoors (Optional): You can start pumpkin seeds indoors about 2-3 weeks before the last expected frost. This gives them a head start, especially in cooler climates. I like to use peat pots or biodegradable containers to minimize root disturbance when transplanting.
2. Prepare the Soil: Whether you’re starting seeds indoors or direct sowing, make sure your soil is well-drained and amended with plenty of organic matter. Dig a hole about 1-2 feet wide and deep, and mix in compost and well-rotted manure.
3. Direct Sowing: Once the danger of frost has passed and the soil has warmed up, you can direct sow pumpkin seeds. Plant 2-3 seeds per hill, about 1 inch deep. Space the hills according to the variety’s needs (check the seed packet for recommendations).
4. Transplanting Seedlings: If you started seeds indoors, harden them off for a week before transplanting. Gradually expose them to outdoor conditions for increasing periods each day. Plant them in the prepared hills, spacing them according to the variety’s needs.
5. Watering: Water deeply and regularly, especially during dry spells. Pumpkins need consistent moisture to thrive. Aim for about 1 inch of water per week.
6. Fertilizing: Feed your pumpkin plants with a balanced fertilizer every few weeks. You can also side-dress them with compost or manure.
7. Pest and Disease Control: Keep an eye out for common pumpkin pests like squash bugs, squash vine borers, and cucumber beetles. Use organic pest control methods like hand-picking, row covers, or insecticidal soap. Prevent fungal diseases by providing good air circulation and avoiding overhead watering.
Succession Planting: The Key to Continuous Harvest
This is where the magic happens! To achieve a continuous harvest, you need to stagger your plantings. Here’s how I do it:
1. First Planting: Plant your early-season varieties as soon as the soil is warm enough.
2. Second Planting: About 2-3 weeks later, plant your mid-season varieties.
3. Third Planting: Another 2-3 weeks later, plant your late-season varieties.
By staggering your plantings, you’ll have pumpkins maturing at different times throughout the season. This ensures a steady supply of fresh pumpkins for your fall decorations, baking, and other culinary adventures.
Harvesting and Curing Your Pumpkins
Knowing when and how to harvest and cure your pumpkins is crucial for extending their shelf life.
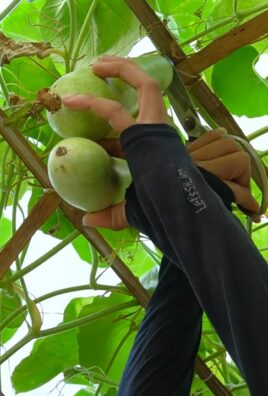
1. Harvesting: Harvest your pumpkins when they are fully mature and the rind is hard. The stem should be dry and starting to crack. Use a sharp knife or pruning shears to cut the stem, leaving about 3-4 inches attached to the pumpkin.
2. Curing: Curing helps to harden the rind and heal any minor wounds, which improves storage potential. Cure your pumpkins in a warm, dry, well-ventilated place for about 1-2 weeks. A sunny porch or greenhouse is ideal.
3. Storage: Store your cured pumpkins in a cool, dry, dark place. A basement or garage is usually a good option. Avoid storing them in areas that are prone to freezing.
Troubleshooting Common Pumpkin Problems
Even with the best planning, you might encounter some challenges along the way. Here are some common pumpkin problems and how to address them:
* Powdery Mildew: This fungal disease can cause white, powdery spots on the leaves. Improve air circulation, avoid overhead watering, and use a fungicide if necessary.
* Squash Bugs: These pests can suck the sap from pumpkin plants, causing them to wilt and die. Hand-pick them, use row covers, or spray with insecticidal soap.
* Squash Vine Borers: These pests bore into the stems of pumpkin plants, causing them to collapse. Wrap the stems with aluminum foil or netting to prevent them from laying eggs. You can also inject Bacillus thuringiensis (Bt) into the stems to kill the larvae.
* Poor Pollination: If your pumpkins aren’t setting fruit, it could be due to poor pollination. Hand-pollinate the flowers by transferring pollen from the male flowers to the female flowers.
Enjoying Your Extended Pumpkin Harvest!
With a little planning and effort, you can enjoy a continuous pumpkin harvest that lasts for months. Imagine having fresh pumpkins for Halloween, Thanksgiving, and even Christmas! Use them for decorations, baking, soups, stews, and all sorts of other culinary creations. And don’t forget to save some seeds for next year’s crop! Happy pumpkin growing!
Conclusion
So, there you have it! Mastering the art of a continuous pumpkin harvest isn’t just about extending your supply of this autumnal delight; it’s about embracing a more sustainable and rewarding gardening experience. By implementing these simple yet effective techniques, you’re not just growing pumpkins; you’re cultivating a season-long celebration of flavor, creativity, and the sheer joy of watching your garden flourish.
Why is this a must-try? Because it breaks free from the traditional, single-harvest mentality. Imagine the possibilities! Instead of a glut of pumpkins all at once, you’ll have a steady stream, perfect for everything from impromptu pumpkin pies to last-minute Halloween decorations. Think of the reduced waste – no more struggling to use up a mountain of pumpkins before they spoil. And consider the sheer satisfaction of knowing you’ve maximized your garden’s potential.
But don’t stop there! Experiment with different pumpkin varieties to discover which ones respond best to these techniques in your specific climate and soil conditions. Try succession planting with varying maturity dates to further stagger your harvest. Consider companion planting with beneficial herbs and flowers to deter pests and attract pollinators, ensuring a healthier and more productive pumpkin patch. You could even explore different pruning methods to encourage fruit development on later-season vines.
This isn’t just a recipe for a continuous harvest; it’s a recipe for gardening success. It’s about understanding the needs of your plants, adapting your approach, and reaping the rewards of your efforts. It’s about connecting with nature in a deeper, more meaningful way.
We wholeheartedly encourage you to try this DIY trick. It’s easier than you might think, and the results are truly remarkable. Don’t be afraid to experiment, to tweak the techniques to suit your own garden, and to learn from your experiences.
And most importantly, we want to hear from you! Share your successes, your challenges, and your own unique tips for achieving a continuous pumpkin harvest. Post pictures of your bountiful pumpkin patch, share your favorite pumpkin recipes, and let us know what you’ve learned along the way. Together, we can create a community of passionate gardeners who are dedicated to maximizing the potential of their gardens and enjoying the fruits (or rather, the vegetables!) of their labor. So, get out there, get your hands dirty, and start your journey towards a continuous pumpkin harvest today! Let’s make this autumn the most bountiful one yet!
Frequently Asked Questions (FAQ)
What exactly does “continuous pumpkin harvest” mean?
It means extending the pumpkin harvesting season beyond the typical single, large harvest in the fall. Instead of getting all your pumpkins at once, you aim to have a steady supply of ripe pumpkins over a longer period, often several weeks or even months. This is achieved through careful planning, planting techniques, and ongoing maintenance.
Which pumpkin varieties are best suited for a continuous harvest?
While most pumpkin varieties can benefit from the techniques described, some are naturally better suited for extended harvests. Look for varieties with varying maturity dates. For example, you could plant some early-maturing varieties alongside some late-maturing ones. Smaller, faster-growing varieties like ‘Baby Boo’ or ‘Sugar Pie’ can be harvested earlier, while larger varieties like ‘Connecticut Field’ or ‘Jack O’ Lantern’ will mature later. Also, consider disease resistance, as pumpkins that are less susceptible to common diseases will be more likely to produce a continuous harvest.
How important is soil preparation for a continuous pumpkin harvest?
Soil preparation is absolutely crucial. Pumpkins are heavy feeders and require nutrient-rich soil. Before planting, amend your soil with plenty of compost, well-rotted manure, or other organic matter. This will provide the necessary nutrients for healthy growth and fruit development. Ensure the soil is well-draining to prevent root rot, which can significantly impact your harvest. A soil test can help you determine any specific nutrient deficiencies that need to be addressed.
What are some effective methods for succession planting pumpkins?
Succession planting involves planting pumpkins in stages, rather than all at once. This ensures a staggered harvest. Start by planting your first batch of seeds or seedlings in the spring, after the last frost. Then, plant subsequent batches every 2-3 weeks. This will provide a continuous supply of pumpkins as the earlier plantings mature and are harvested. Be sure to choose varieties with different maturity dates to further extend the harvest window.
How does pruning affect a continuous pumpkin harvest?
Pruning can play a significant role in directing the plant’s energy towards fruit production. Remove any non-productive vines or suckers that are not producing flowers or fruit. This will allow the plant to focus its resources on developing the existing pumpkins. You can also prune away some of the larger leaves to improve air circulation and sunlight penetration, which can help prevent diseases and promote fruit ripening. However, avoid excessive pruning, as the leaves are essential for photosynthesis.
What are some common pests and diseases that can affect pumpkin harvests, and how can I prevent them?
Pumpkins are susceptible to various pests and diseases, including squash bugs, squash vine borers, powdery mildew, and downy mildew. Preventative measures are key. Practice crop rotation to avoid the buildup of soilborne diseases. Use row covers to protect young plants from pests. Regularly inspect your plants for signs of infestation or disease and take action promptly. Organic pest control methods, such as insecticidal soap or neem oil, can be effective. Ensure good air circulation and avoid overhead watering to minimize the risk of fungal diseases.
How do I know when a pumpkin is ripe and ready to harvest?
Several indicators can help you determine when a pumpkin is ripe. The skin should be hard and resistant to scratching. The stem should be dry and corky. The color should be deep and uniform, characteristic of the variety. You can also try tapping the pumpkin; a ripe pumpkin will sound hollow. Avoid harvesting pumpkins that are still green or have soft spots, as they will not store well.
What are the best storage conditions for harvested pumpkins?
Proper storage is essential for extending the shelf life of your harvested pumpkins. Store them in a cool, dry, and well-ventilated place. Ideal temperatures are between 50-60°F (10-15°C). Avoid storing pumpkins in direct sunlight or near sources of heat. Handle them carefully to avoid bruising or damaging the skin. With proper storage, pumpkins can last for several months.
Can I use this continuous harvest technique for other types of squash?
Yes, many of the techniques described can be applied to other types of squash, such as zucchini, butternut squash, and acorn squash. Succession planting, pruning, and proper soil preparation are all beneficial for maximizing the harvest of various squash varieties. However, be sure to research the specific needs of each type of squash to ensure optimal results.
What if I live in a colder climate with a shorter growing season? Can I still achieve a continuous pumpkin harvest?
Even in colder climates, you can still achieve a continuous pumpkin harvest with some adjustments. Start your seeds indoors several weeks before the last frost to give them a head start. Choose early-maturing varieties that are well-suited to your climate. Use row covers or other protective measures to extend the growing season. Consider using raised beds or containers, which can warm up faster in the spring. With careful planning and attention, you can enjoy a bountiful pumpkin harvest even in a shorter growing season.
Leave a Comment