
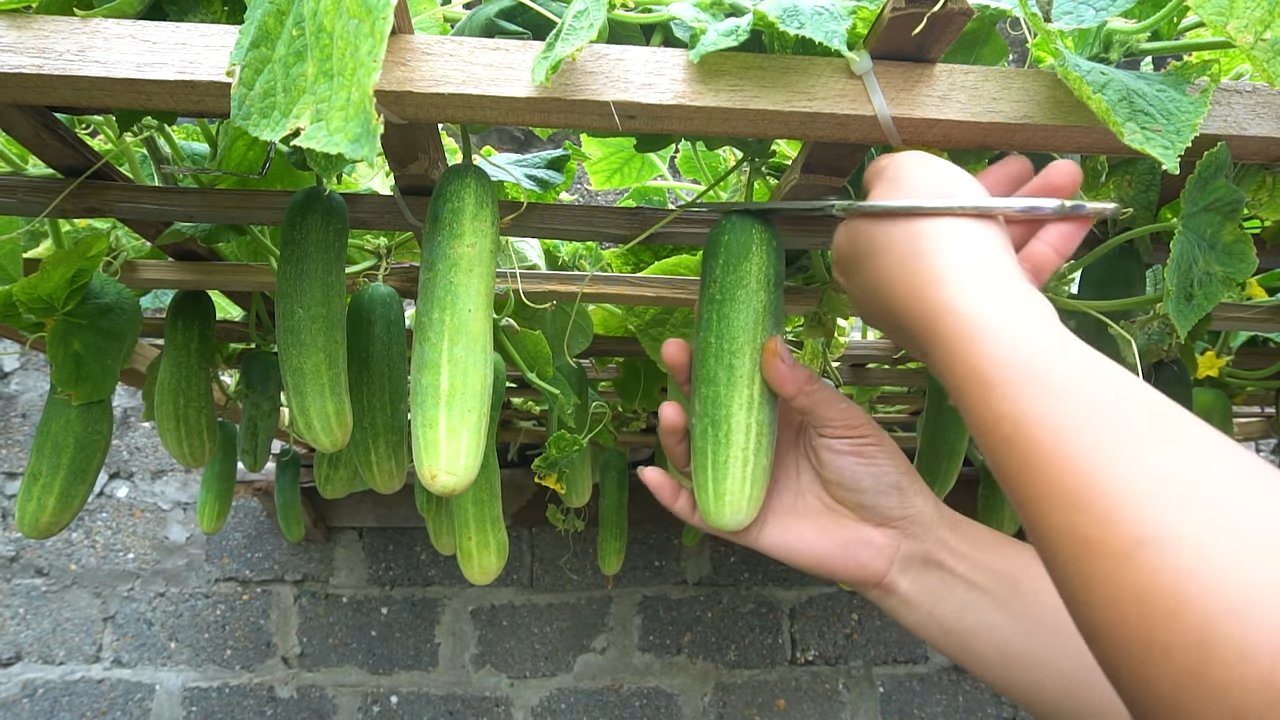
Cucumber harvest fast is the dream of every home gardener, isn’t it? Imagine baskets overflowing with crisp, juicy cucumbers, ready for salads, pickles, or a refreshing snack straight from the vine. But let’s be honest, sometimes it feels like those cucumbers are taking their sweet time! I know I’ve been there, patiently waiting, only to find a few overgrown, bitter surprises lurking beneath the leaves.
For centuries, cucumbers have been cultivated across the globe, from their origins in India to their adoption in ancient Greece and Rome. They’ve been prized not only for their refreshing taste but also for their health benefits. But regardless of the variety or where they’re grown, the key to a truly delicious cucumber is timely harvesting.
That’s why I’m so excited to share these simple yet effective DIY tricks and hacks that will help you achieve a cucumber harvest fast and abundant. We’ll dive into everything from optimizing your watering schedule to clever pruning techniques, ensuring you get the most out of your cucumber plants. No more waiting around – let’s get those cucumbers growing!
Gurkenernte beschleunigen: Mein DIY-Trick für eine reiche Ernte
Hallo liebe Gartenfreunde! Ich bin so aufgeregt, euch heute einen meiner absoluten Lieblings-DIY-Tricks zu verraten, mit dem ich meine Gurkenernte jedes Jahr aufs Neue beschleunige und vervielfache. Es ist wirklich einfacher als ihr denkt und erfordert nur ein paar Handgriffe und Materialien, die ihr wahrscheinlich schon zu Hause habt. Also, lasst uns loslegen und eure Gurken zum Wachsen bringen!
Warum dieser Trick funktioniert
Bevor wir ins Detail gehen, möchte ich kurz erklären, warum dieser Trick so effektiv ist. Gurken sind Starkzehrer, das heißt, sie benötigen viele Nährstoffe, um optimal zu wachsen und Früchte zu tragen. Dieser DIY-Trick zielt darauf ab, die Nährstoffversorgung der Pflanzen zu optimieren und gleichzeitig die Bodenbedingungen zu verbessern, was zu einem schnelleren Wachstum und einer reicheren Ernte führt. Außerdem fördert er die Bestäubung und schützt die Pflanzen vor einigen häufigen Krankheiten.
Was du brauchst: Die Materialliste
Hier ist eine Liste der Materialien, die du für diesen DIY-Trick benötigst. Keine Sorge, es sind alles Dinge, die leicht zu bekommen sind und nicht viel kosten:
* Kaffeesatz: Gesammelter Kaffeesatz (getrocknet oder frisch)
* Eierschalen: Zerkleinerte Eierschalen
* Bananenschalen: Frische oder getrocknete Bananenschalen
* Holzasche: (Optional, aber sehr empfehlenswert) Holzasche aus einem Kamin oder Grill (nur unbehandeltes Holz!)
* Kompost: Reifer Kompost
* Gießkanne: Eine Gießkanne für die Bewässerung
* Gartenschere: Eine Gartenschere zum Beschneiden
* Mulchmaterial: Stroh, Heu oder Rasenschnitt als Mulch
* Sprühflasche: Eine Sprühflasche für die Blattdüngung (optional)
* Bittersalz (Epsom Salz): Für die Magnesiumversorgung (optional)
Schritt-für-Schritt-Anleitung: So geht’s
Jetzt kommt der spannende Teil: Die eigentliche Umsetzung! Ich habe den Prozess in verschiedene Phasen unterteilt, um es euch so einfach wie möglich zu machen.
Phase 1: Bodenvorbereitung
Eine gute Bodenvorbereitung ist das A und O für eine erfolgreiche Gurkenernte.
1. Boden lockern: Lockere den Boden rund um deine Gurkenpflanzen vorsichtig auf. Achte darauf, die Wurzeln nicht zu beschädigen. Eine Grabegabel oder ein kleiner Kultivator sind hierfür ideal.
2. Kompost einarbeiten: Arbeite eine großzügige Menge reifen Komposts in den Boden ein. Kompost verbessert die Bodenstruktur, speichert Feuchtigkeit und liefert wichtige Nährstoffe. Ich verwende meistens etwa 2-3 Liter Kompost pro Pflanze.
3. Kaffeesatz hinzufügen: Verteile eine Schicht Kaffeesatz um die Pflanzen herum. Kaffeesatz ist reich an Stickstoff und wirkt leicht sauer, was Gurken lieben. Achte darauf, dass der Kaffeesatz nicht zu dick aufgetragen wird, da er sonst verklumpen kann. Eine dünne Schicht von etwa 1-2 cm ist ideal.
4. Eierschalen einarbeiten: Zerkleinere die Eierschalen so fein wie möglich und mische sie unter die oberste Bodenschicht. Eierschalen sind eine hervorragende Quelle für Kalzium, das für die Zellstruktur und das Wachstum der Gurken unerlässlich ist.
5. Holzasche verteilen (optional): Wenn du Holzasche zur Verfügung hast, verteile eine kleine Menge (etwa eine Handvoll pro Pflanze) um die Pflanzen herum. Holzasche enthält Kalium und andere wichtige Spurenelemente. Sei vorsichtig mit der Dosierung, da zu viel Holzasche den pH-Wert des Bodens erhöhen kann.
6. Gießen: Gieße den Boden nach der Einarbeitung der Nährstoffe gründlich an. Das hilft, die Nährstoffe in den Boden zu transportieren und die Pflanzenwurzeln zu erreichen.
Phase 2: Düngung während der Wachstumsphase
Während der Wachstumsphase benötigen Gurken regelmäßig Nachschub an Nährstoffen.
1. Bananenschalen-Tee: Sammle Bananenschalen und lasse sie in Wasser ziehen. Ich verwende dafür etwa 5-6 Bananenschalen auf 5 Liter Wasser. Lasse die Schalen mindestens 24 Stunden, besser noch 48 Stunden ziehen. Gieße deine Gurkenpflanzen dann mit diesem Bananenschalen-Tee. Er ist reich an Kalium, das für die Fruchtbildung unerlässlich ist.
2. Kaffeesatz-Düngung: Wiederhole die Kaffeesatz-Düngung alle 2-3 Wochen. Verteile einfach eine dünne Schicht Kaffeesatz um die Pflanzen herum und gieße sie anschließend.
3. Bittersalz-Anwendung (optional): Wenn deine Gurkenpflanzen Anzeichen von Magnesiummangel zeigen (gelbe Blätter mit grünen Adern), kannst du ihnen mit Bittersalz (Epsom Salz) helfen. Löse etwa 1 Esslöffel Bittersalz in 5 Litern Wasser auf und gieße die Pflanzen damit. Du kannst die Lösung auch in eine Sprühflasche füllen und die Blätter damit besprühen.
4. Komposttee: Komposttee ist ein weiterer hervorragender Dünger für Gurken. Lasse eine Handvoll Kompost in einem Eimer Wasser ziehen (etwa 24 Stunden) und gieße die Pflanzen dann mit dem Tee.
Phase 3: Pflege und Schutz
Neben der Düngung ist auch die richtige Pflege und der Schutz vor Krankheiten und Schädlingen wichtig.
1. Mulchen: Bringe eine Schicht Mulchmaterial (Stroh, Heu oder Rasenschnitt) um die Gurkenpflanzen herum aus. Mulch hält den Boden feucht, unterdrückt Unkraut und schützt die Früchte vor direktem Bodenkontakt.
2. Regelmäßiges Gießen: Gurken benötigen viel Wasser, besonders während der Fruchtbildung. Gieße sie regelmäßig, am besten morgens, damit die Blätter bis zum Abend abtrocknen können. Vermeide es, die Blätter direkt zu gießen, da dies Pilzkrankheiten fördern kann.
3. Beschneiden: Entferne regelmäßig Seitentriebe und gelbe Blätter, um die Luftzirkulation zu verbessern und die Energie der Pflanze auf die Fruchtbildung zu konzentrieren.
4. Bestäubung fördern: Gurken sind auf Bestäubung angewiesen, um Früchte zu bilden. Fördere die Bestäubung, indem du bienenfreundliche Pflanzen in der Nähe deiner Gurken anpflanzt. Du kannst auch selbst Hand anlegen und die Blüten mit einem Pinsel bestäuben.
5. Schutz vor Schädlingen: Kontrolliere deine Gurkenpflanzen regelmäßig auf Schädlinge wie Blattläuse oder Spinnmilben. Bei Bedarf kannst du natürliche Schädlingsbekämpfungsmittel wie Neemöl oder Schmierseifenlösung einsetzen.
Zusätzliche Tipps und Tricks
Hier sind noch ein paar zusätzliche Tipps, die dir helfen können, deine Gurkenernte zu maximieren:
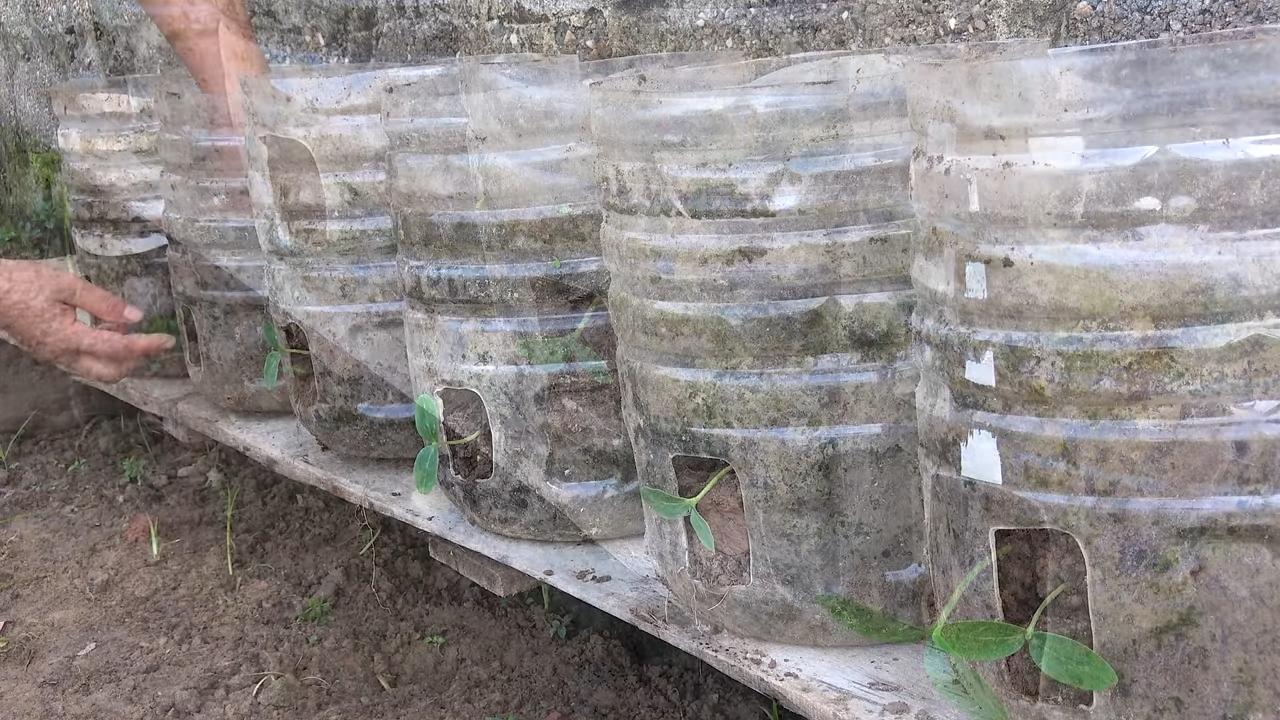
* Rankhilfe: Gurken sind Kletterpflanzen und benötigen eine Rankhilfe. Du kannst ein Rankgitter, einen Zaun oder einfach nur Stöcke verwenden, an denen die Pflanzen hochklettern können.
* Sortenwahl: Wähle Gurkensorten, die für dein Klima und deine Anbaubedingungen geeignet sind. Es gibt viele verschiedene Sorten, von Einlegegurken bis hin zu Salatgurken.
* Fruchtfolge: Baue Gurken nicht jedes Jahr am selben Standort an, um Krankheiten und Schädlingen vorzubeugen.
* Beobachtung: Beobachte deine Gurkenpflanzen regelmäßig und reagiere auf Veränderungen. Je früher du Probleme erkennst, desto besser kannst du sie beheben.
Ich hoffe, dieser DIY-Trick hilft dir dabei, deine Gurkenernte zu beschleunigen und zu vervielfachen. Viel Spaß beim Gärtnern und genieße deine selbstgezogenen Gurken!
Conclusion
So, there you have it! This simple yet incredibly effective DIY trick for a cucumber harvest fast is a game-changer for any gardener, whether you’re a seasoned pro or just starting out. We’ve walked you through the process, highlighting the benefits of increased yield, healthier plants, and a more manageable garden. But why is this method a must-try?
Firstly, it’s about efficiency. By strategically pruning and supporting your cucumber plants, you’re directing their energy towards fruit production rather than unnecessary foliage growth. This translates directly into a larger and faster harvest. Imagine the satisfaction of picking basket after basket of crisp, delicious cucumbers, knowing you’ve maximized your plant’s potential.
Secondly, it’s about plant health. Proper airflow and sunlight penetration are crucial for preventing diseases like powdery mildew, which can decimate a cucumber crop. This DIY method promotes a healthier environment for your plants, reducing the need for chemical treatments and ensuring a longer, more productive growing season.
Thirdly, it’s about space optimization. If you’re gardening in a small space, this trick is especially valuable. Training your cucumber vines vertically allows you to grow more plants in a smaller area, maximizing your yield without sacrificing valuable garden real estate.
But don’t just take our word for it! We encourage you to experiment with variations of this method to suit your specific needs and preferences. For example, if you’re growing pickling cucumbers, you might want to focus on pruning for smaller, more uniform fruits. If you’re growing slicing cucumbers, you might want to prioritize larger, more robust fruits.
Consider these variations:
* Trellis Type: Experiment with different trellis types, such as A-frames, netting, or even repurposed materials like old ladders or fencing. The key is to provide a sturdy and supportive structure for your vines to climb.
* Pruning Techniques: While we’ve outlined a basic pruning strategy, you can adjust it based on your plant’s growth habit and your desired fruit size. Some gardeners prefer to remove all suckers below the first fruit, while others leave a few for additional foliage.
* Fertilizer: Supplement your pruning efforts with a balanced fertilizer to provide your plants with the nutrients they need to thrive. Look for a fertilizer specifically formulated for vegetables, and follow the instructions on the label.
* Companion Planting: Enhance your cucumber patch by incorporating companion plants like marigolds, nasturtiums, or dill. These plants can help deter pests and attract beneficial insects, further promoting plant health.
Ultimately, the best way to discover the benefits of this DIY trick is to try it yourself. We’re confident that you’ll be amazed by the results. So, grab your pruning shears, set up your trellis, and get ready for a bountiful cucumber harvest!
We’re eager to hear about your experiences. Share your photos, tips, and variations in the comments below. Let’s create a community of cucumber-growing enthusiasts and learn from each other’s successes. Happy gardening!
FAQ
Here are some frequently asked questions about achieving a cucumber harvest fast using this DIY trick:
What type of cucumbers does this DIY trick work best for?
This method is versatile and works well for most cucumber varieties, including slicing cucumbers, pickling cucumbers, and even specialty varieties like Armenian cucumbers. However, the specific pruning techniques may need to be adjusted slightly depending on the growth habit of the variety. For example, bush varieties may require less pruning than vining varieties. Consider the mature size of the cucumber and adjust your trellis and pruning accordingly.
How often should I prune my cucumber plants?
Regular pruning is key to maximizing your cucumber harvest. Aim to prune your plants at least once a week, or even more frequently if they are growing rapidly. This will help maintain airflow, prevent disease, and direct energy towards fruit production. Check your plants regularly for new suckers and remove them promptly.
What tools do I need for pruning cucumbers?
You’ll need a pair of sharp, clean pruning shears or scissors. Make sure your tools are sanitized to prevent the spread of disease. A bucket or bag to collect the pruned foliage is also helpful. Gloves are optional but recommended to protect your hands from thorns and sap.
How high should my trellis be for cucumbers?
The ideal height of your trellis will depend on the variety of cucumbers you are growing. Vining varieties can grow quite tall, so a trellis that is at least 6 feet high is recommended. Bush varieties will require a shorter trellis, around 3-4 feet high. Make sure your trellis is sturdy enough to support the weight of the mature vines and fruits.
What if my cucumber plants are already overgrown?
If your cucumber plants are already overgrown, don’t worry! You can still implement this DIY trick. Start by carefully removing any dead or diseased foliage. Then, gradually prune back the excess growth, focusing on removing suckers and non-productive vines. Be careful not to remove too much foliage at once, as this can stress the plant. Provide support for the remaining vines and continue to prune regularly to maintain a manageable shape.
How do I know if I’m pruning too much?
It’s important to strike a balance between pruning for increased yield and leaving enough foliage for photosynthesis. If you notice that your plants are wilting or producing fewer fruits after pruning, you may be pruning too much. Observe your plants closely and adjust your pruning techniques accordingly. Remember, the goal is to direct energy towards fruit production, not to completely defoliate the plant.
Can I use this method for other vining plants?
Yes, this method can be adapted for other vining plants, such as tomatoes, squash, and melons. The specific pruning techniques may vary depending on the plant, but the principles of providing support, promoting airflow, and directing energy towards fruit production remain the same. Research the specific needs of each plant before implementing this method.
What kind of fertilizer should I use for cucumbers?
Cucumbers are heavy feeders and benefit from regular fertilization. Use a balanced fertilizer with a ratio of 10-10-10 or 14-14-14. You can also use a fertilizer specifically formulated for vegetables. Follow the instructions on the label for application rates and frequency. Organic options like compost tea or fish emulsion are also excellent choices.
How do I deal with pests and diseases on my cucumber plants?
Regularly inspect your cucumber plants for signs of pests and diseases. Common pests include aphids, cucumber beetles, and squash bugs. Common diseases include powdery mildew and downy mildew. Treat infestations and diseases promptly with appropriate organic or chemical controls. Promoting good airflow and sunlight penetration through pruning can help prevent many diseases.
What do I do with all the cucumbers I harvest?
Congratulations on your bountiful cucumber harvest! There are many ways to enjoy your fresh cucumbers. You can eat them fresh in salads, sandwiches, or as a snack. You can also pickle them, make cucumber relish, or use them in smoothies. Store your cucumbers in the refrigerator to keep them fresh for longer. Share your harvest with friends and neighbors!


Leave a Comment