
Cupcake Liner Crafts DIY: Unleash your inner artist and transform those humble paper cups into stunning creations! Have you ever looked at a stack of cupcake liners and thought, “There has to be more to life than just holding batter?” Well, you’re absolutely right! For generations, crafters have found ingenious ways to repurpose everyday items, and the cupcake liner is no exception. From adorning festive decorations to crafting whimsical flowers, the possibilities are truly endless.
I know what you’re thinking: “Why should I spend my time on cupcake liner crafts DIY?” In today’s world, where sustainability and creativity are highly valued, learning to repurpose materials is not only fun but also incredibly practical. Imagine creating unique party decorations that cost next to nothing, or crafting personalized gifts that truly stand out. Plus, it’s a fantastic way to keep kids entertained and spark their imaginations. So, grab your glue gun, gather your cupcake liners, and let’s embark on a journey of crafting magic!
Transforming Ordinary Cupcake Liners into Extraordinary Crafts
Hey there, fellow crafters! Get ready to unleash your inner artist because today, we’re diving headfirst into the wonderful world of cupcake liner crafts! You might think these little paper cups are just for baking, but trust me, they’re a treasure trove of creative possibilities. I’m going to show you how to turn those humble liners into stunning decorations, adorable critters, and so much more. So, gather your supplies, and let’s get crafting!
Materials You’ll Need
Before we get started, let’s make sure you have everything you need. This is a general list, and you might need to adjust it depending on the specific project you’re tackling.
* Cupcake liners (various colors, sizes, and patterns – the more, the merrier!)
* Scissors
* Glue (hot glue gun, glue sticks, or craft glue – choose your weapon!)
* Markers or colored pencils
* Googly eyes (because everything is cuter with googly eyes!)
* Pipe cleaners
* Pom-poms
* Yarn or string
* Construction paper or cardstock
* Ruler
* Pencil
* Optional: Glitter, sequins, beads, paint, buttons, ribbon
Crafting a Cupcake Liner Flower Bouquet
One of my favorite things to make with cupcake liners is a beautiful flower bouquet. It’s perfect for decorating your home, giving as a gift, or even using as a centerpiece for a special occasion.
Step-by-Step Instructions:
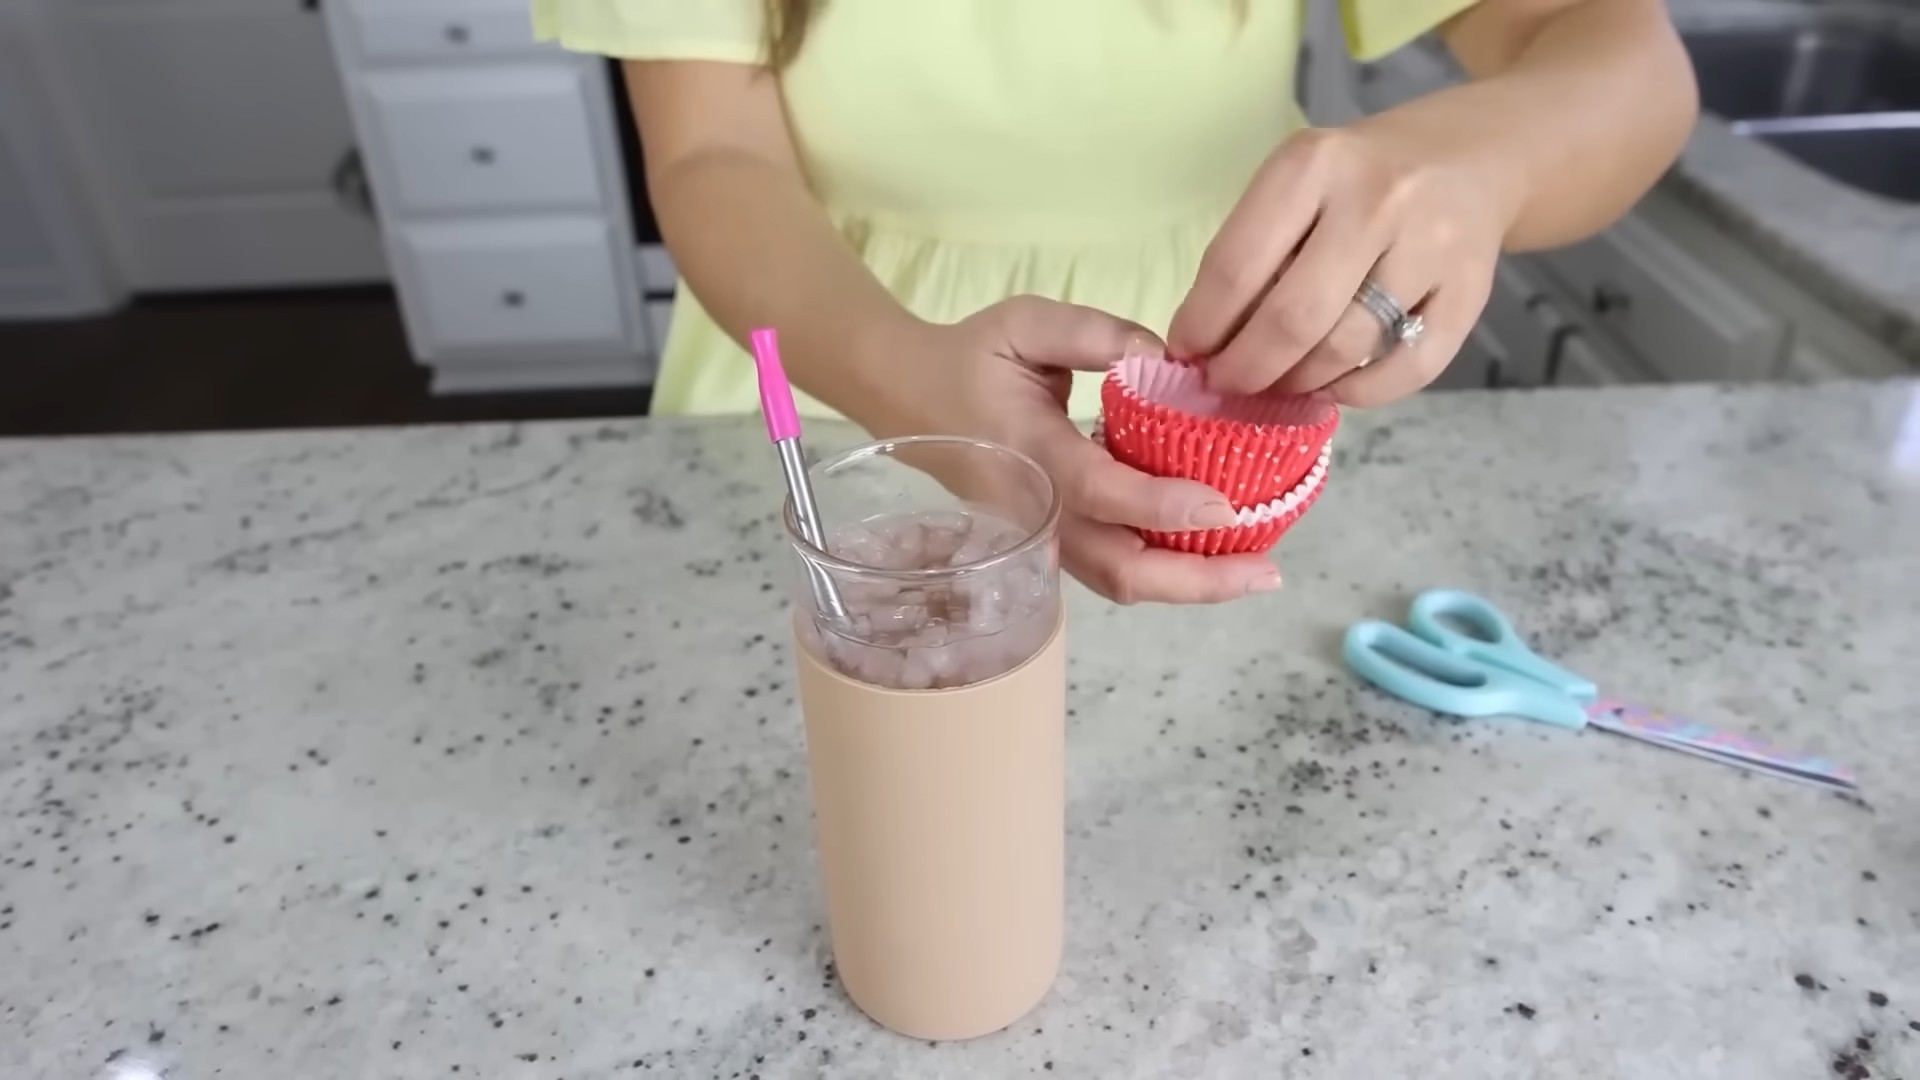
1. Prepare Your Liners: Flatten several cupcake liners. You can use different sizes and colors for a more varied look. I usually flatten about 5-7 liners per flower, depending on how full I want it to be.
2. Layer and Fold: Stack the flattened liners on top of each other. Now, fold the stack in half, then in half again. You’ll end up with a cone-like shape.
3. Cut the Petals: This is where you get to be creative! Use your scissors to cut a petal shape along the open edge of the folded liner. You can make rounded petals, pointed petals, or even jagged petals. Experiment and see what you like best! I like to cut different shapes for each flower to make them unique.
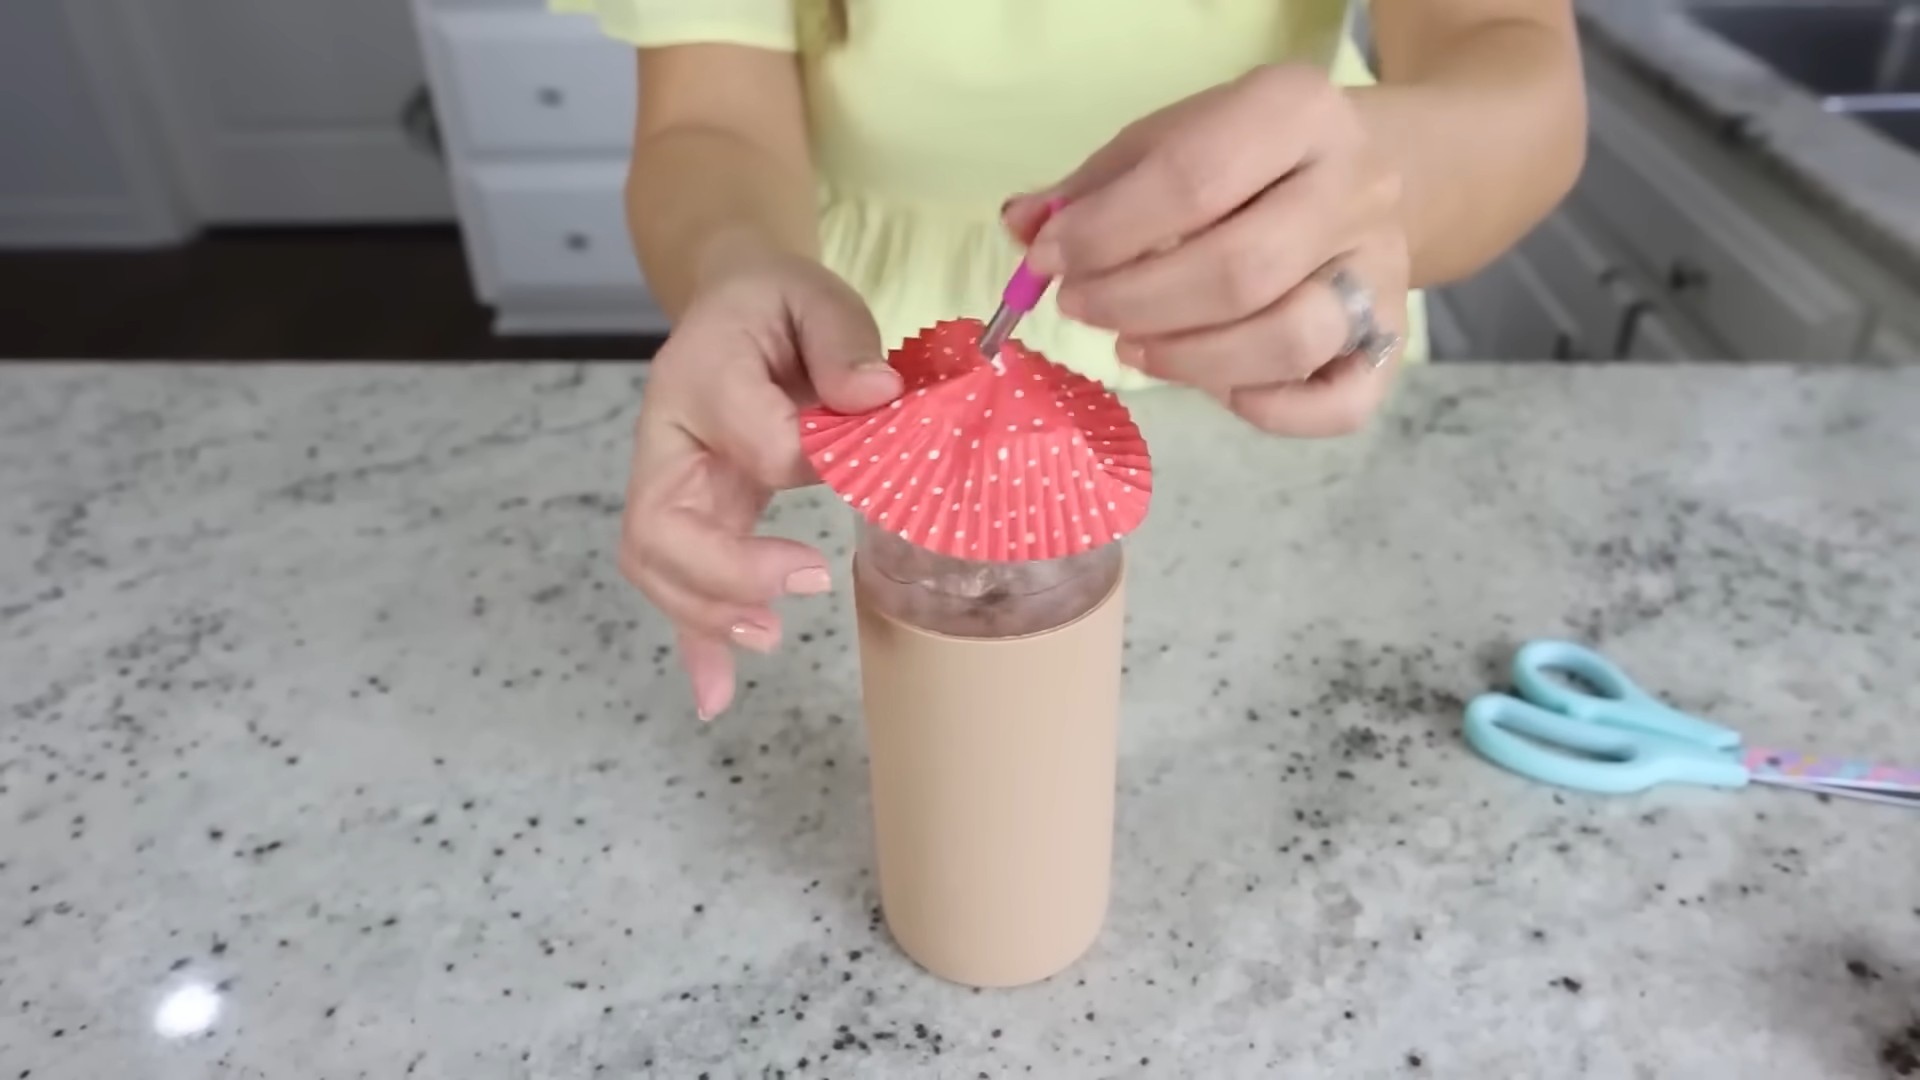
4. Unfold and Fluff: Carefully unfold the liner. You should now have a flower shape. Gently fluff the layers to give it some dimension.
5. Create the Center: You can use a pom-pom, a button, or even a small circle of construction paper for the center of your flower. Glue it in place. I often use a hot glue gun for this step because it dries quickly.
6. Make the Stem: Cut a length of pipe cleaner for the stem. You can wrap it with green floral tape if you want a more realistic look, but it’s not necessary.
7. Attach the Stem: Glue the stem to the back of the flower. Make sure it’s securely attached.
8. Repeat and Arrange: Repeat steps 1-7 to create as many flowers as you want for your bouquet. Then, arrange them in a vase or tie them together with ribbon. I love using mason jars as vases for a rustic look.
Making Adorable Cupcake Liner Animals
Cupcake liners are also fantastic for making cute little animals. These are great for kids’ crafts, party decorations, or just for adding a touch of whimsy to your day.
Creating a Cupcake Liner Butterfly
1. Prepare the Liner: Flatten a cupcake liner.
2. Fold in Half: Fold the flattened liner in half.
3. Create the Wings: Fold the folded liner in half again. Now, cut a curved shape along the open edge to create the butterfly’s wings.
4. Unfold and Decorate: Unfold the liner. You should now have a butterfly shape. Decorate the wings with markers, glitter, or sequins. I like to use bright colors and add lots of sparkle!
5. Make the Body: Cut a small piece of pipe cleaner for the butterfly’s body. Fold it in half and twist it to create the antennae.
6. Attach the Body: Glue the pipe cleaner body to the center of the butterfly wings.
7. Add Googly Eyes: Glue googly eyes to the top of the pipe cleaner body.
Crafting a Cupcake Liner Turtle
1. Prepare the Liner: Flatten a cupcake liner. This will be the turtle’s shell.
2. Color the Shell: Color the flattened liner with markers or paint. You can create a pattern or just use a solid color. I like to use green and brown for a realistic look.
3. Cut Out the Body Parts: Cut out a head, four legs, and a tail from construction paper.
4. Attach the Body Parts: Glue the head, legs, and tail to the underside of the cupcake liner shell.
5. Add Googly Eyes: Glue googly eyes to the turtle’s head.
Designing Cupcake Liner Decorations
Beyond flowers and animals, cupcake liners can be used to create all sorts of decorative elements. Let’s explore a few ideas.
Making a Cupcake Liner Garland
1. Prepare the Liners: Flatten a bunch of cupcake liners. You can use different colors and patterns for a festive look.
2. Fold and Cut: Fold each flattened liner in half, then in half again. Cut a design along the open edge. You can make triangles, scallops, or any other shape you like.
3. Unfold and String: Unfold the liners. You should now have decorative shapes. Use a needle and thread or yarn to string the shapes together to create a garland.
4. Hang and Enjoy: Hang your garland in your home, at a party, or anywhere you want to add a touch of whimsy.
Creating Cupcake Liner Christmas Ornaments
1. Prepare the Liners: Flatten several cupcake liners. Use red, green, and gold liners for a festive look.
2. Layer and Glue: Stack the flattened liners on top of each other and glue them together in the center.
3. Cut and Shape: Cut the edges of the liners to create a starburst or snowflake shape.
4. Add Glitter: Sprinkle glitter over the ornament for extra sparkle.
5. Attach a Hanger: Glue a loop of yarn or ribbon to the back of the ornament for hanging.
Tips and Tricks for Cupcake Liner Crafts
Here are a few extra tips to help you get the most out of your cupcake liner crafting adventures:
* Experiment with Different Materials: Don’t be afraid to try using different types of cupcake liners, such as foil liners or silicone liners. They can add a unique texture and look to your projects.
* Use Different Cutting Techniques: Experiment with different cutting techniques to create a variety of shapes and designs. Try using scalloped scissors or pinking shears for a different look.
* Add Embellishments: Embellishments like glitter, sequins, beads, and buttons can add extra sparkle and dimension to your crafts.
* Get the Kids Involved: Cupcake liner crafts are a great activity for kids. They’re easy, fun, and require minimal supervision.
* Don’t Be Afraid to Make Mistakes: Crafting is all about experimenting and having fun. Don’t be afraid to make mistakes. They can often lead to unexpected discoveries.
* Recycle and Reuse: Save your used cupcake liners and reuse them for crafting. It’s a great way to reduce waste and get creative.
* Hot Glue Gun Safety: If you’re using a hot glue gun, be careful not to burn yourself. Always use a glue gun mat or a piece of cardboard to protect your work surface.
* Storage: Store your cupcake liners in a dry place to prevent them from getting damaged. I like to use a plastic container or a drawer organizer.
Advanced Techniques: Adding Dimension and Texture
Want to take your cupcake liner crafts to the next level? Here are some advanced techniques to add dimension and texture:
* Curling the Edges: Use a pencil or a skewer to curl the edges of the cupcake liners. This will add dimension and create a more realistic look for flowers and other shapes.
* Embossing: Use an embossing tool to create patterns on the cupcake liners. This will add texture and visual interest.
* Layering Different Sizes: Layer different sizes of cupcake liners to create depth and dimension. For example, you can use a large liner as the base and then layer smaller liners on top to create a more intricate design.
* Using Multiple Colors: Combine different colors of cupcake liners to create a more vibrant and eye-catching design.
* Adding Watercolor Effects: Lightly dampen the cupcake liners with water and then apply watercolor paint
Conclusion
So, there you have it! Transforming simple cupcake liners into stunning decorations and practical organizers is not only incredibly easy but also surprisingly rewarding. This cupcake liner crafts DIY project is a must-try for anyone looking to add a personal touch to their home decor, create unique gifts, or simply unleash their inner artist. The versatility of these little paper cups is truly astounding, and the possibilities are limited only by your imagination.
Think beyond the basic flower shapes. Experiment with different sizes and colors of cupcake liners to create intricate patterns and textures. Try layering multiple liners to add depth and dimension to your creations. For a more rustic look, consider using parchment paper liners instead of the traditional brightly colored ones. You can even incorporate other craft supplies like glitter, beads, sequins, and paint to further embellish your designs.
For example, imagine crafting a stunning floral wall art piece using various sizes and shades of pink and red cupcake liners. Or, picture a charming mobile for a nursery, featuring delicate butterflies made from pastel-colored liners. And don’t forget the practical applications! Use decorated liners to organize your jewelry, small office supplies, or even as unique gift wrapping for small treats.
The beauty of this DIY project lies in its accessibility. It’s budget-friendly, requires minimal supplies, and can be enjoyed by crafters of all skill levels. Whether you’re a seasoned DIY enthusiast or a complete beginner, you’ll find this project to be both fun and fulfilling. Plus, it’s a fantastic way to repurpose leftover cupcake liners, reducing waste and giving them a new lease on life.
We strongly encourage you to give this cupcake liner crafts DIY a try. Gather your supplies, unleash your creativity, and see what amazing things you can create. Don’t be afraid to experiment and personalize your projects to reflect your own unique style.
And most importantly, we want to hear about your experience! Share your creations with us on social media using [Your Hashtag Here] or leave a comment below. We can’t wait to see what you come up with and inspire others to join the fun. Let’s transform the ordinary into the extraordinary, one cupcake liner at a time! This is a great way to spend time with family and friends, creating memories and beautiful crafts together. So, grab some cupcake liners and let the crafting adventure begin! Remember to have fun and let your imagination soar. The possibilities are truly endless when it comes to cupcake liner crafts DIY.
Frequently Asked Questions (FAQ)
What kind of cupcake liners work best for these crafts?
The best type of cupcake liners to use depends on the specific craft you’re planning. For most projects, standard paper cupcake liners work perfectly well. However, for projects that require more durability or a different texture, you might consider using parchment paper liners or even silicone liners. Parchment liners offer a more rustic look and are slightly more resistant to tearing, while silicone liners can be reused and are great for projects that involve heat or moisture. Also, consider the color and pattern of the liners. Solid colors are versatile, but patterned liners can add a unique touch to your creations. Experiment with different types to see what works best for your desired outcome.
How do I prevent the cupcake liners from tearing when I’m working with them?
Cupcake liners can be delicate, so it’s important to handle them with care. To prevent tearing, avoid using excessive force when folding, cutting, or shaping them. If you’re using glue, apply it sparingly to avoid saturating the paper. For more intricate designs, consider using a craft knife or scissors with a sharp blade to ensure clean cuts. If you’re working with multiple layers of liners, gently separate them before starting to avoid accidentally tearing them. Also, storing your cupcake liners in a cool, dry place will help prevent them from becoming brittle and more prone to tearing.
What kind of glue is best for cupcake liner crafts?
The best type of glue for cupcake liner crafts depends on the specific project and the materials you’re working with. For most paper-to-paper applications, a standard craft glue or glue stick will work well. However, for more complex projects or when adhering liners to other materials like cardboard or fabric, you might consider using a stronger adhesive like hot glue or a multi-purpose craft glue. Hot glue provides a strong and instant bond, but it can be messy and requires caution when handling. Multi-purpose craft glues offer a good balance of strength and flexibility and are suitable for a wide range of materials. Always test the glue on a scrap piece of liner before applying it to your project to ensure it doesn’t bleed through or damage the paper.
Can I paint or color the cupcake liners?
Yes, you can definitely paint or color cupcake liners to customize them for your crafts. Water-based paints like acrylics or watercolors work best, as they won’t damage the paper as much as solvent-based paints. You can also use markers or colored pencils to add details and patterns. If you’re using paint, apply it in thin layers to avoid saturating the paper and causing it to tear. Allow the paint to dry completely before handling the liners to prevent smudging. Experiment with different techniques like dry brushing or stippling to create interesting textures and effects. Remember to seal the painted liners with a clear sealant if you want to protect the paint and make them more durable.
Are there any safety precautions I should take when doing these crafts with children?
Yes, safety is paramount when crafting with children. Always supervise children closely when they are using scissors, glue, or other sharp or potentially hazardous tools. Use non-toxic glue and paints to avoid any health risks. If you’re using hot glue, ensure that children are not handling the glue gun themselves to prevent burns. Choose age-appropriate projects and provide clear instructions. Keep small objects like beads or sequins out of reach of young children to prevent choking hazards. Ensure that the crafting area is well-ventilated to avoid inhaling fumes from glue or paint. And most importantly, make sure the crafting experience is fun and enjoyable for everyone involved!
How can I store my finished cupcake liner crafts?
Proper storage is essential to keep your finished cupcake liner crafts looking their best. Store them in a cool, dry place away from direct sunlight to prevent fading or discoloration. If you’re storing delicate items like flowers or butterflies, consider placing them in a protective container or box to prevent them from being crushed or damaged. For larger items like wall art or mobiles, hang them in a location where they won’t be bumped or knocked over. You can also use acid-free tissue paper to wrap individual items for added protection. Regularly dust your crafts to keep them clean and prevent dust buildup. With proper care and storage, your cupcake liner creations will last for years to come.
Leave a Comment